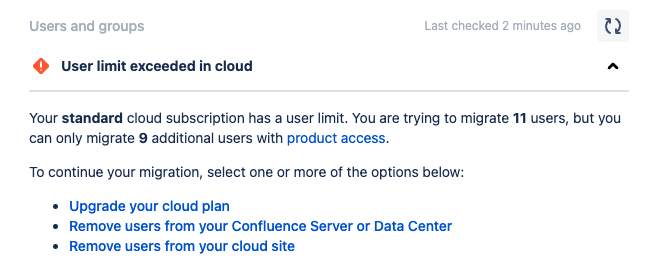
Users and groups check fails with "User limit exceeded in cloud"
Platform Notice: Data Center - This article applies to Atlassian products on the Data Center platform.
Note that this knowledge base article was created for the Data Center version of the product. Data Center knowledge base articles for non-Data Center-specific features may also work for Server versions of the product, however they have not been tested. Support for Server* products ended on February 15th 2024. If you are running a Server product, you can visit the Atlassian Server end of support announcement to review your migration options.
*Except Fisheye and Crucible
Summary
Learn how to work around the failed check "User limit exceeded in cloud" when using the migration assistants.
Overview
The Jira Cloud Migration Assistant (JCMA), and the Confluence Cloud Migration Assistant (CCMA) validate if the number of users migrating from the On-Premise instance is equal to or greater than the user licenses on the cloud instance.
When migrating more users than your cloud instance can hold, this check fails.
Solution
The following steps reduce the number of licensed users on the On-Premise instance but maintain the memberships.
Jira On-Premise
- Create a temporary group:
- Click ⚙ > User Management.
- Click on Groups.
- On the Add group section, type in the temporary group name.
- Click Add group.
- Navigate to Applications.
- Click Application access.
- Select the temporary group created from the dropdown.
- Tick the checkbox in the Default column for the temporary group.
- Untick the checkbox in the Default column for the other default access group.
- Retry the migration.
- (Optional) Revert the changes after the migration is done.
Confluence On-Premise
- Click ⚙ > General Configuration.
- Click on Global Permissions.
- Click on Edit permissions.
- Untick the can use checkbox from the current default user access group.
- Click on Save all.
- Retry the migration.
- (Optional) Revert the changes after the migration is done.
