Customer Portal
JIRA Service Desk pre-configures a Customer Portal for each service desk you set up. The Customer Portal is where you design the request forms your customers will fill out. As the service desk manager, you can map the JIRA features that are used to manage each request to the user friendly language your customers will see.

Tip: You can click the Preview the Customer Portal link at any time to see how your changes will appear for customers.
For information about the permissions needed to adminster a Customer Portal and the permissions customers need to submit requests, see How JIRA and JIRA Service Desk Work Together.
Setting up a new Customer Portal
The first step in setting up a Customer Portal is configuring the request types the service desk will support. Each request type in a service desk is based on a JIRA issue type. (See How JIRA and JIRA Service Desk Work Together for more information on how JIRA Service Desk works with JIRA.)

Note that a single JIRA issue type can be the basis for many different request types (for example, the "Purchase" issue type serves as the basis for both the "Request new hardware" and "Request new software" requests).
Grouping request types in the Customer Portal
You can group request types to make it easy for customers to find the right request type in the Customer Portal. The groups you assign to each request type allow customers to browse the high-level groups of request types, and then select the one that they think will provide the correct request type for them.
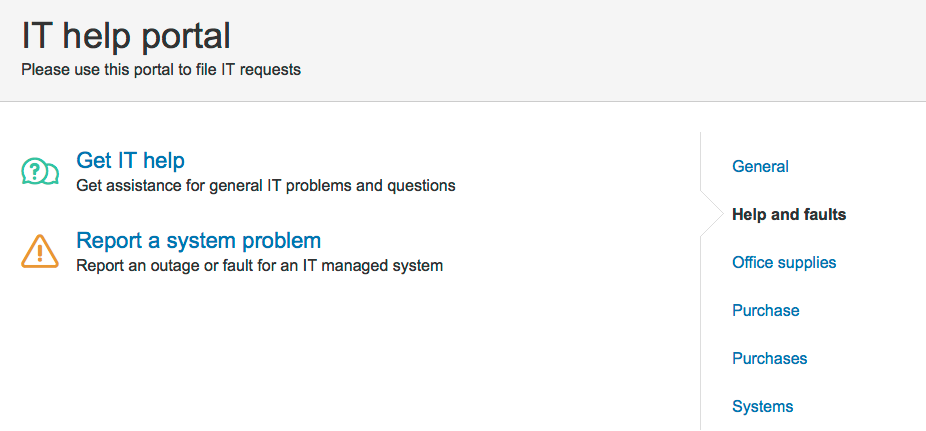
Use the Groups drop down when you design the Customer Portal to set up the group(s) the request type belongs in.
You must have more than one group for the groups to appear in the Customer Portal. Groups are unique to each service desk; if you want to use the same groups in all your service desks, the service desk admin must manually create the same groups.
Customizing the workflow statuses for a request type
JIRA Service Desk uses the workflow associated with the request's issue type for the flow of the request.

You can re-map the default workflow statuses to more customer friendly statuses that will appear for customers, and you can also map multiple statuses to a single customer status to simplify the appearance of the workflow. Use the Workflow Statuses tab on the Customer Portal designer to customize the workflow that customers will see.
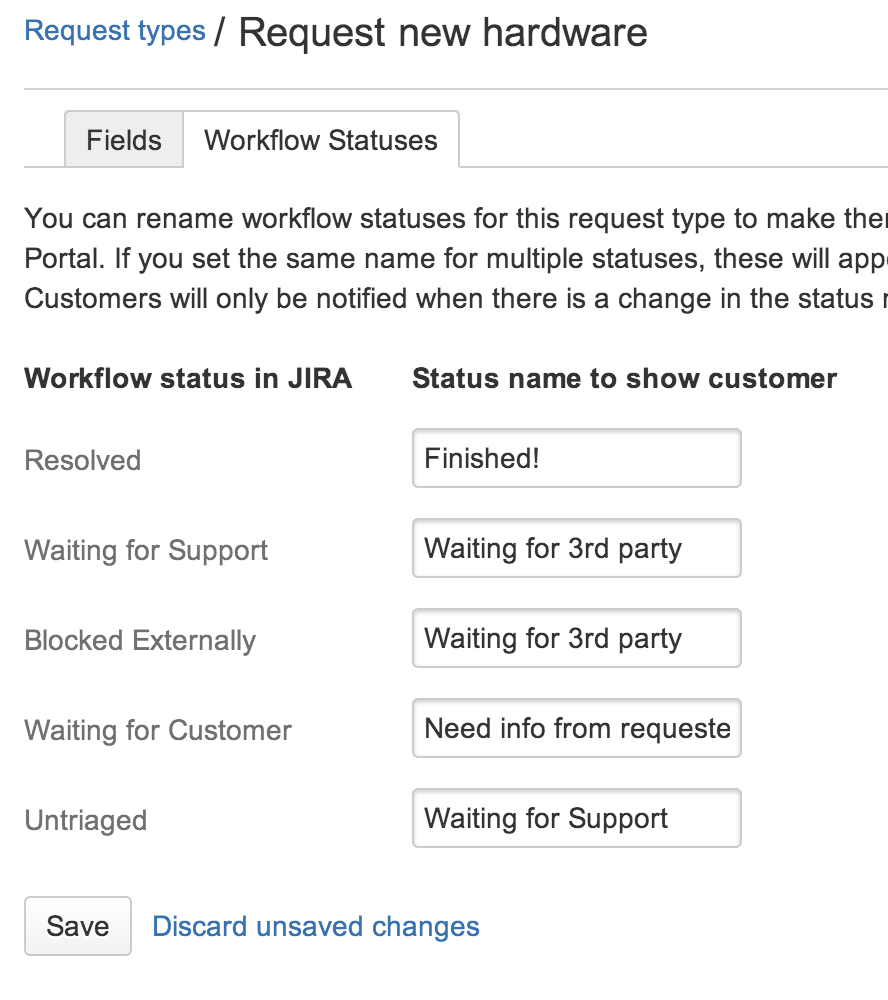
Only changes between these customer-visible 'status names' will be reflected in the Portal and its notifications (e.g. a transition between two workflow statuses can be hidden on the Portal by giving them the same 'status name'). Customers receive email notifications when they raise a request through the Customer Portal, when their request is resolved, when another user comments on their request, and when there is a change in the 'status name'.
When an issue is created through the Customer Portal, JIRA Service Desk suppresses emails that would be sent to the reporter by the project's notification scheme. In this case the issue reporter is also prevented from becoming an auto watcher on the issue to prevent duplicate notifications.
To disable email notifications completely (for all service desks), go to  > Add-ons. Then use the Service Desk link in the left panel to open your JIRA Service Desk settings.
If you need to change the workflow of a request, you must edit the workflow associated with the service desk project. You can find this workflow on the project administration section of the service desk project.
Customizing the fields on a request type
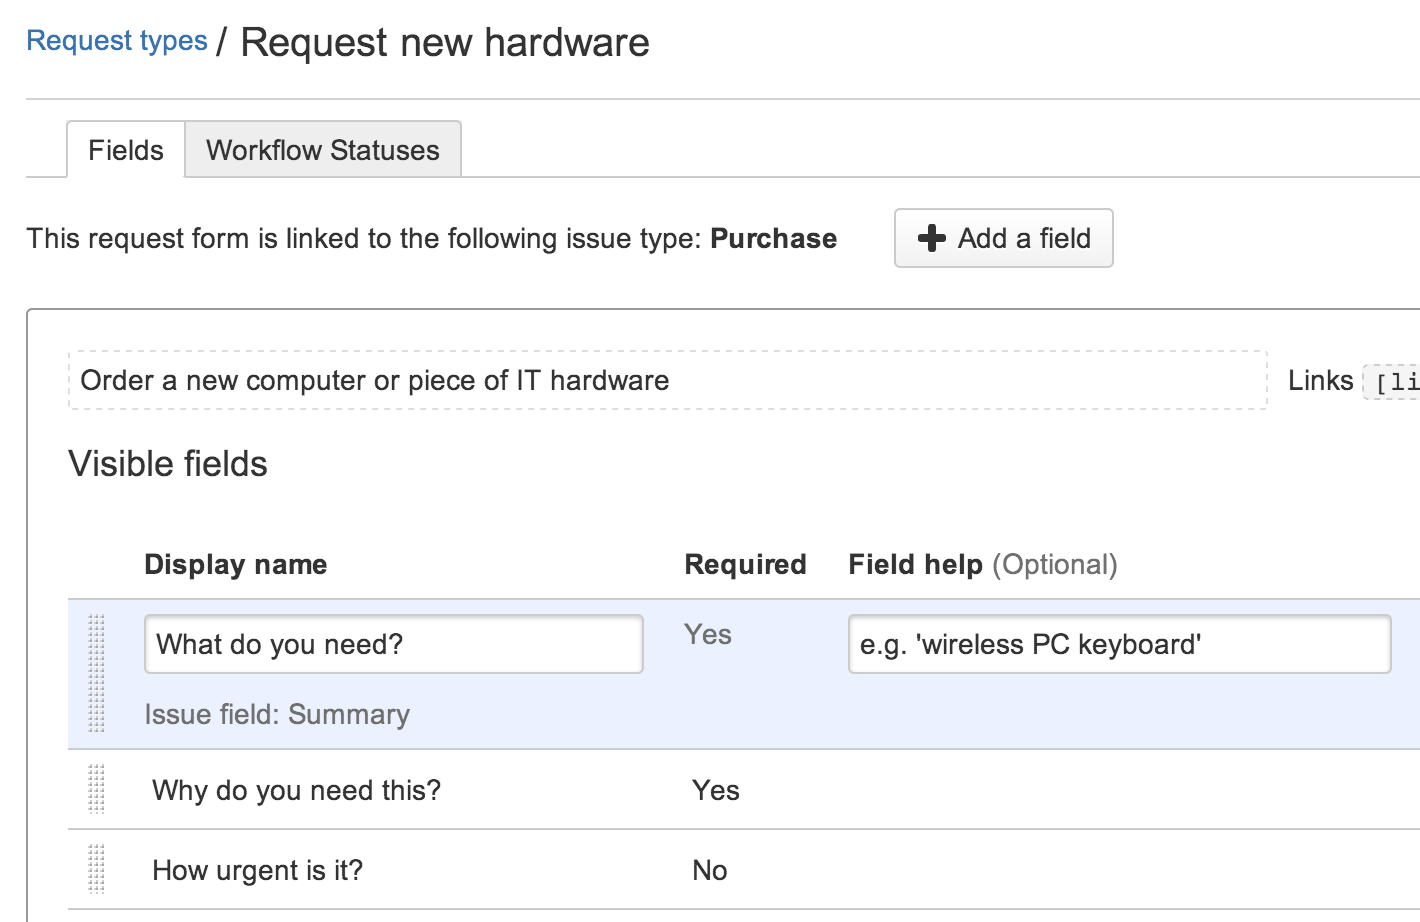
The fields and descriptions that appear in a request type are based on the field configured for the issue type (that is, the issue type the request type is based on).

You use the Fields tab on the Customer Portal to change the default JIRA field names to more customer friendly language. For example, the "Summary" field appears as "What do you need?" for customers.
You can also keep fields hidden but available on the request type so that their value can be used for other processes. For more details about how different types of fields work in JIRA Service Desk, see Hidden fields and unsupported fields.
If the issue type doesn't have the fields you need, you must add a field to the JIRA issue type that the request type is based on. If the issue type uses multiple screen schemes, the new field must be available in the create screen. See Configuring Fields and Screens.
Hidden fields and unsupported fields
Each request type in a service desk is based on a JIRA issue type. Every JIRA issue type has a set of allowed (and possibly required) fields associated with it. As you set up the request type, you can choose to include fields that are hidden on the Customer Portal but still provide a value to assist with your internal processes and reporting. For example, you might want to set the value of the "Label" field as "hardware" for the "Request new hardware" request type, and set the value as "software" for the "Request new software" request type.
Some fields used by an issue type are not supported for use in the Customer Portal; if you include these fields on a request type, they will automatically be added to the Hidden fields with preset values section and you'll be required to set a value for them.
Other fields aren't supported for use in JIRA Service Desk.
These fields can be added to the request type and given a preset value, but you cannot make them visible on the Customer Portal:
- Assignee
- Labels
- Linked issues
- Any fields that are defined by other add-ons in JIRA
These types of fields can't be added to a request type and won't appear in the in the "Add a field" dialog:
- Issue type
- Log work
- Reporter
- Security level
- Time tracking