Receiving requests by email
How your customers send requests by email
How receiving requests by email works:
- A customer emails a request to your service project email address. The request becomes an issue in your service project and is added to a queue.
- An agent comments on the issue.
- The customer receives an email notification that contains the agent's comment.
- The customer replies to the email notification and the reply displays as a comment on the issue in the service project.
Add an email account
In Jira Service Management Server, you can add one linked email account to each service desk project.
Before you begin:
With Google and Microsoft deprecating basic authentication, you need to configure an OAuth 2.0 integration if you're using one of these email providers. OAuth 2.0 can be configured once by a Jira system admin, and then used as an authentication method in your projects. For more info, see OAuth 2.0 integration.
To add a new email:
- From your service project, select Project settings > Email requests.
- Select Add an email address.
If you're using Google or Microsoft as email providers, set the authentication method to the OAuth 2.0 integration configured in your Jira instance. You should see available OAuth 2.0 integrations in the drop-down list.
When adding your email account, you need to be able to authenticate to the email service provider used in your OAuth 2.0 integration.
- Click Save and authorize. You'll be redirected to your email account.
- Once authorized, you will see a success message about the channel being enabled. Your customers should now be able to create their requests via email.
Good to know
- If your Gmail or Yahoo! account uses two-step verification, you'll need to set up an application-specific password.
- If you use more than one email address to interact with your customers, you might be able to set up forwarding rules or aliases to receive requests in the email linked to your service desk project. You will need to configure any forwarding rules or aliases in your email clients.
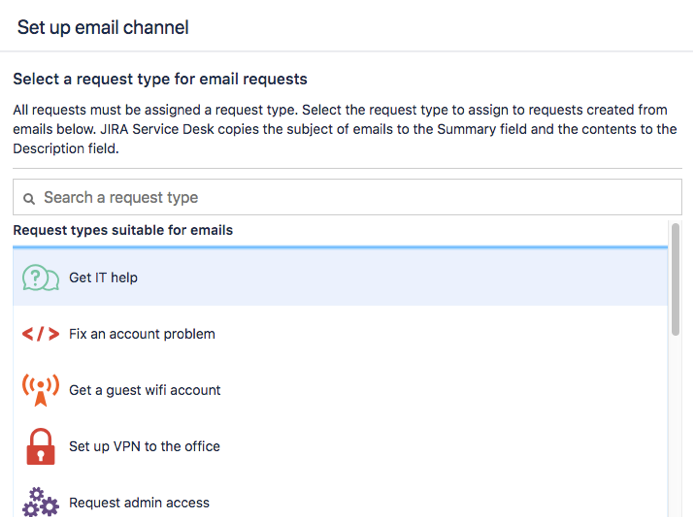
Choose a request type for email requests
To use the email channel, you need to have at least one request type in your project with visible Summary and Description fields. Associating email requests with a suitable request type ensures that the emails are successfully filtered into your service desk queues.
To choose a request type:
- From your service desk project, select Project settings > Email requests.
- Click Edit next to the email address.
- Use the dropdown to select a Request type.
- Click Done to confirm your request type.
Verify your linked email account
Once you have chosen a suitable request type, Jira Service Management sends a test email and creates a corresponding test request.
To verify your email:
- From your service desk, go to Queues.
- Verify that your linked email account works by finding the new request.
New messages sent to your linked email account appear as service desk requests in your project.
Set up permissions so customers can send email requests
Before you share your email address with your customers, check your customer permissions.
- If anyone can email your service desk, then your email address is ready to be shared. People who email your service desk automatically become customers.
- If customers have to be manually added to your project, make sure your team creates new customer accounts for them or their requests won't be processed.
Further reading
Check out Managing the email channel to learn how to:
- control what happens to email addresses that are added to the To or CC field of an email associated with a service desk request
- choose whether to allow emails from addresses which are not registered as customers of your service desk to be added as comments to the associated request
How different types of emails are processed
Jira Service Management processes different emails differently. See the option that applies to you:
Emails using POP
Jira Service Management looks for messages in your inbox that have:
- the Deleted flag set to false
- were received after your email account and service desk project were linked.
To link your email account with a service project using POP, make sure that your email inbox is empty by moving the existing messages to another folder, archiving them, or deleting them. Starting with an empty inbox ensures that you do not lose emails unintentionally, as POP emails are deleted after they are processed by Jira Service Management.
Emails using IMAP
Jira Service Management looks for messages in your inbox that have:
- the Deleted and Seen flags set to false
- were received after your email account and service desk project were linked.
If you use IMAP, emails are marked as read (not deleted) after they are processed by Jira Service Management. If you want existing messages to be pulled in by Jira Service Management, you can move them back to your inbox and mark them as unread after the connection has been established.

