4. Work on the change
When the Problem issue reaches the Waiting for change status, the new Change issue will be created automatically through Insight automation. Since this ticket requires on-site hardware changes, the support representative managing the Problem ticket might hand this ticket over to the server owner to make the changes.
Where's the change?
Again, you can see the newly created change in the issue links of your problem. Click it to see the details.
Related workflow
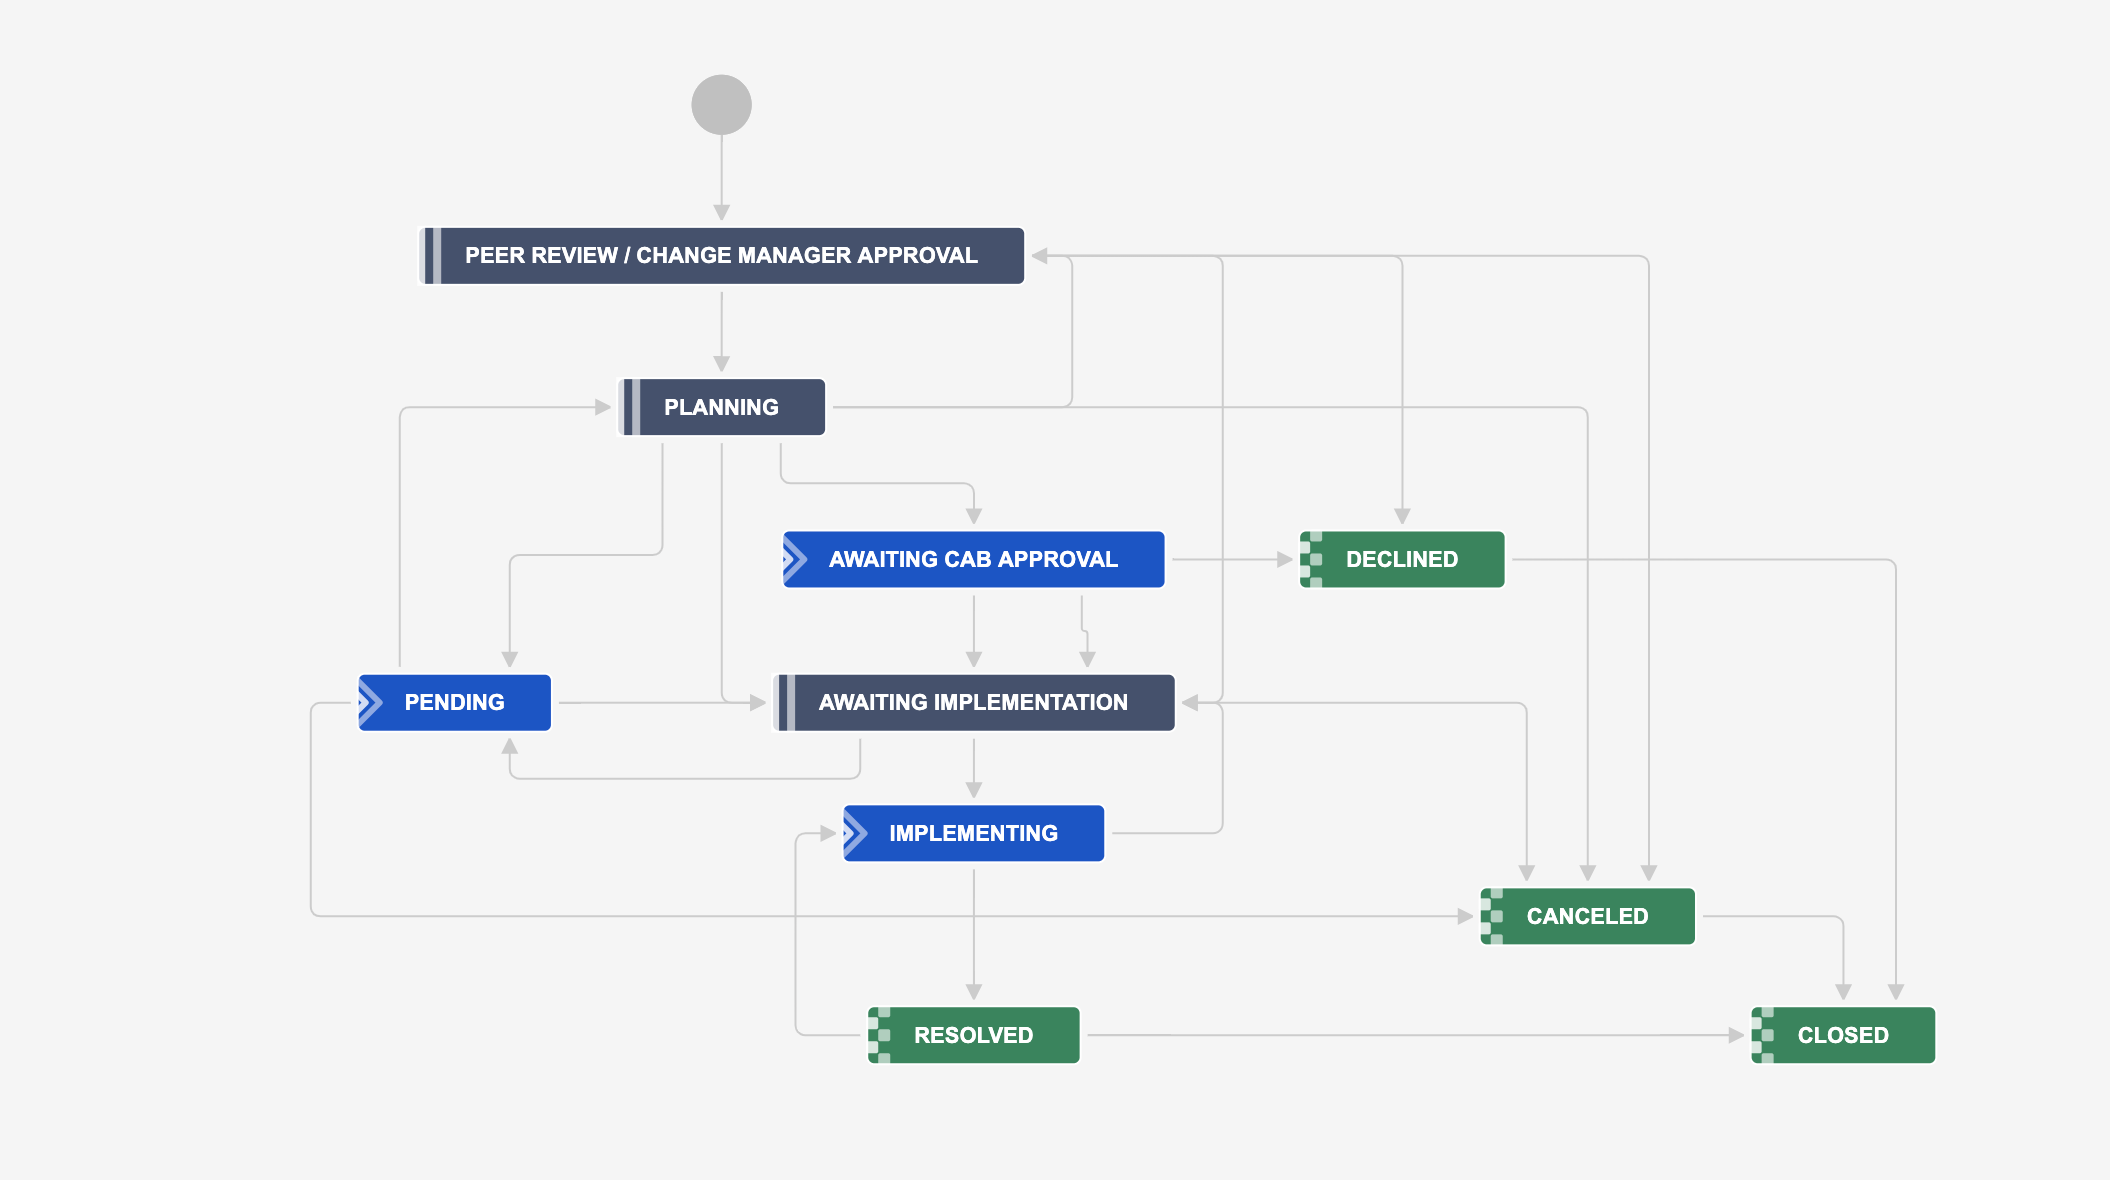
Here's the workflow for the Change issue type, just so you know how your issue will move through it. You can always view it in Project settings > Workflows.
Get the work going
Approve the change and find a replacement
- Click Approve to approve the change. Here you'll be able to select a replacement component for the malfunctioning server.
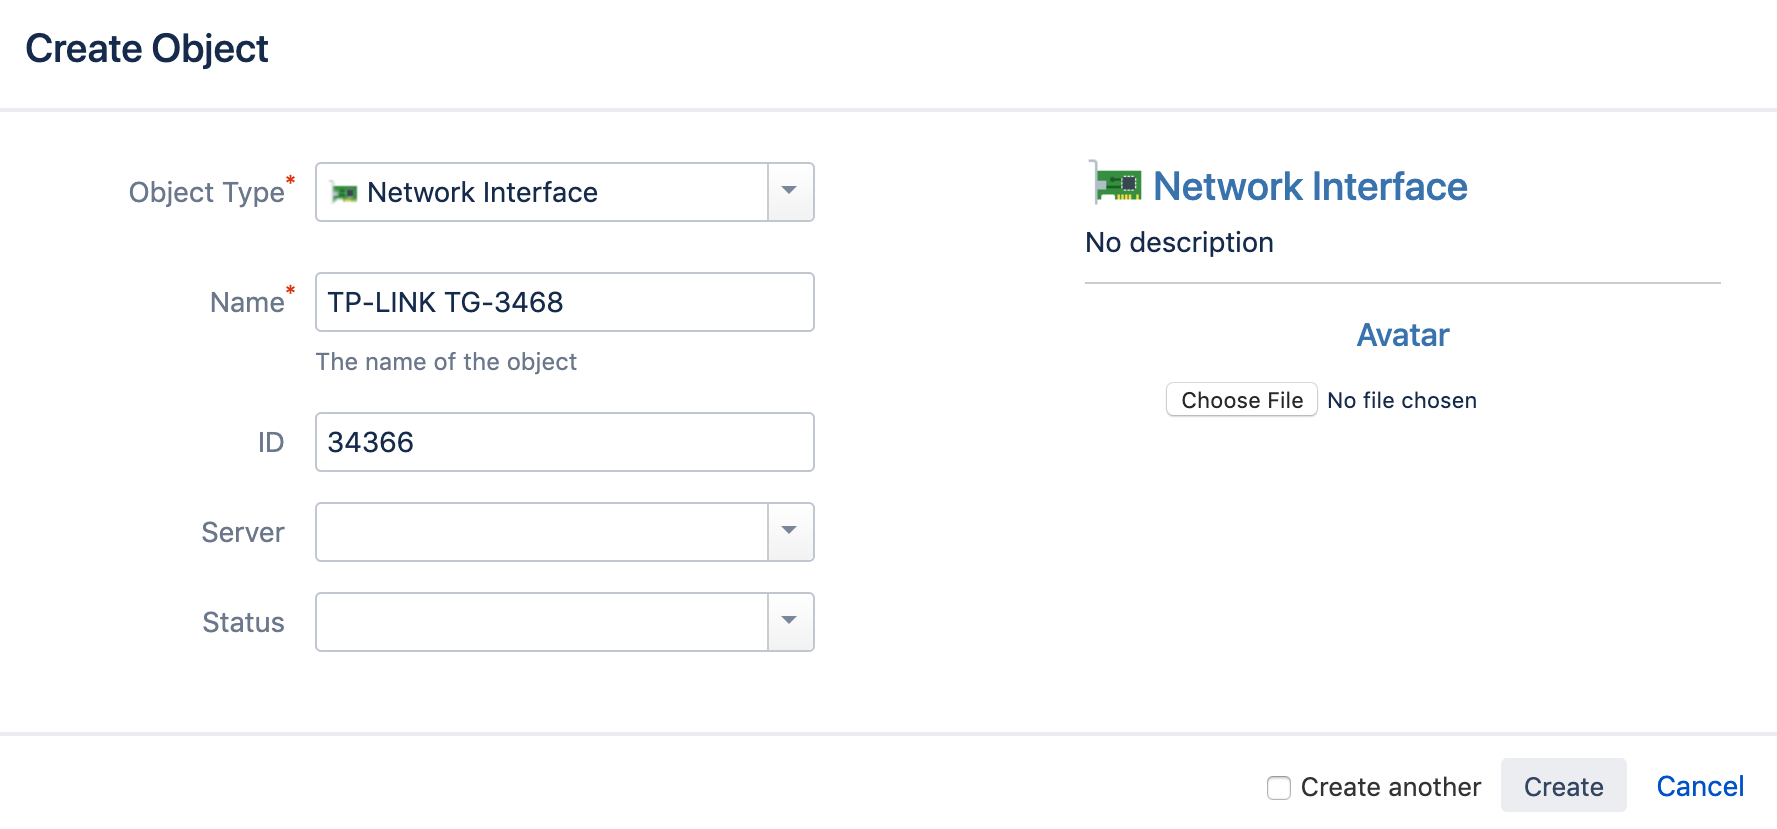
- If there are are any Available Server Components identified, they will appear in the drop-down list. But, let's say there aren't any and create a new one by clicking Create an object in the dialog.
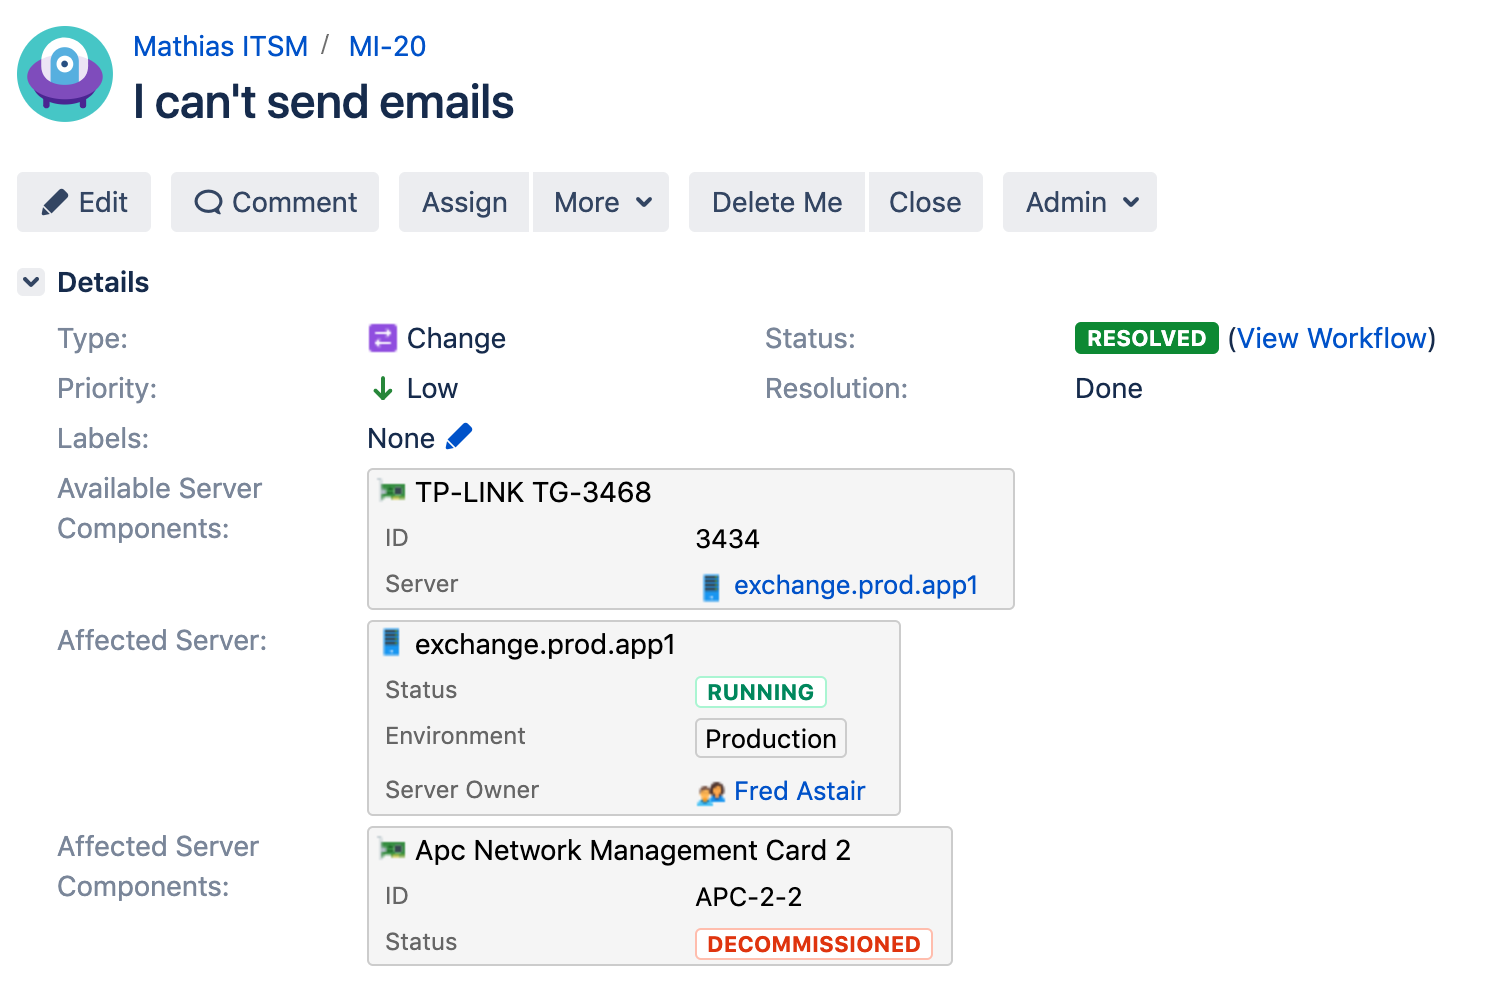
- After you've created the object, select it in Available Server Component and progress through the workflow until we reach the Implementing state.
- You'll notice when we are implementing the change, the Affected Server is automatically stopped.
Complete the change
- Click Change completed. Here's what happens when you do it:
- The change ticket is Resolved,
- The Resolution is Done
- The faulty server component is changed to Decommissioned
- The Affected Server is running again
- The server component linked to the server is updated to show the new network card
- And above all, the change request is resolved.
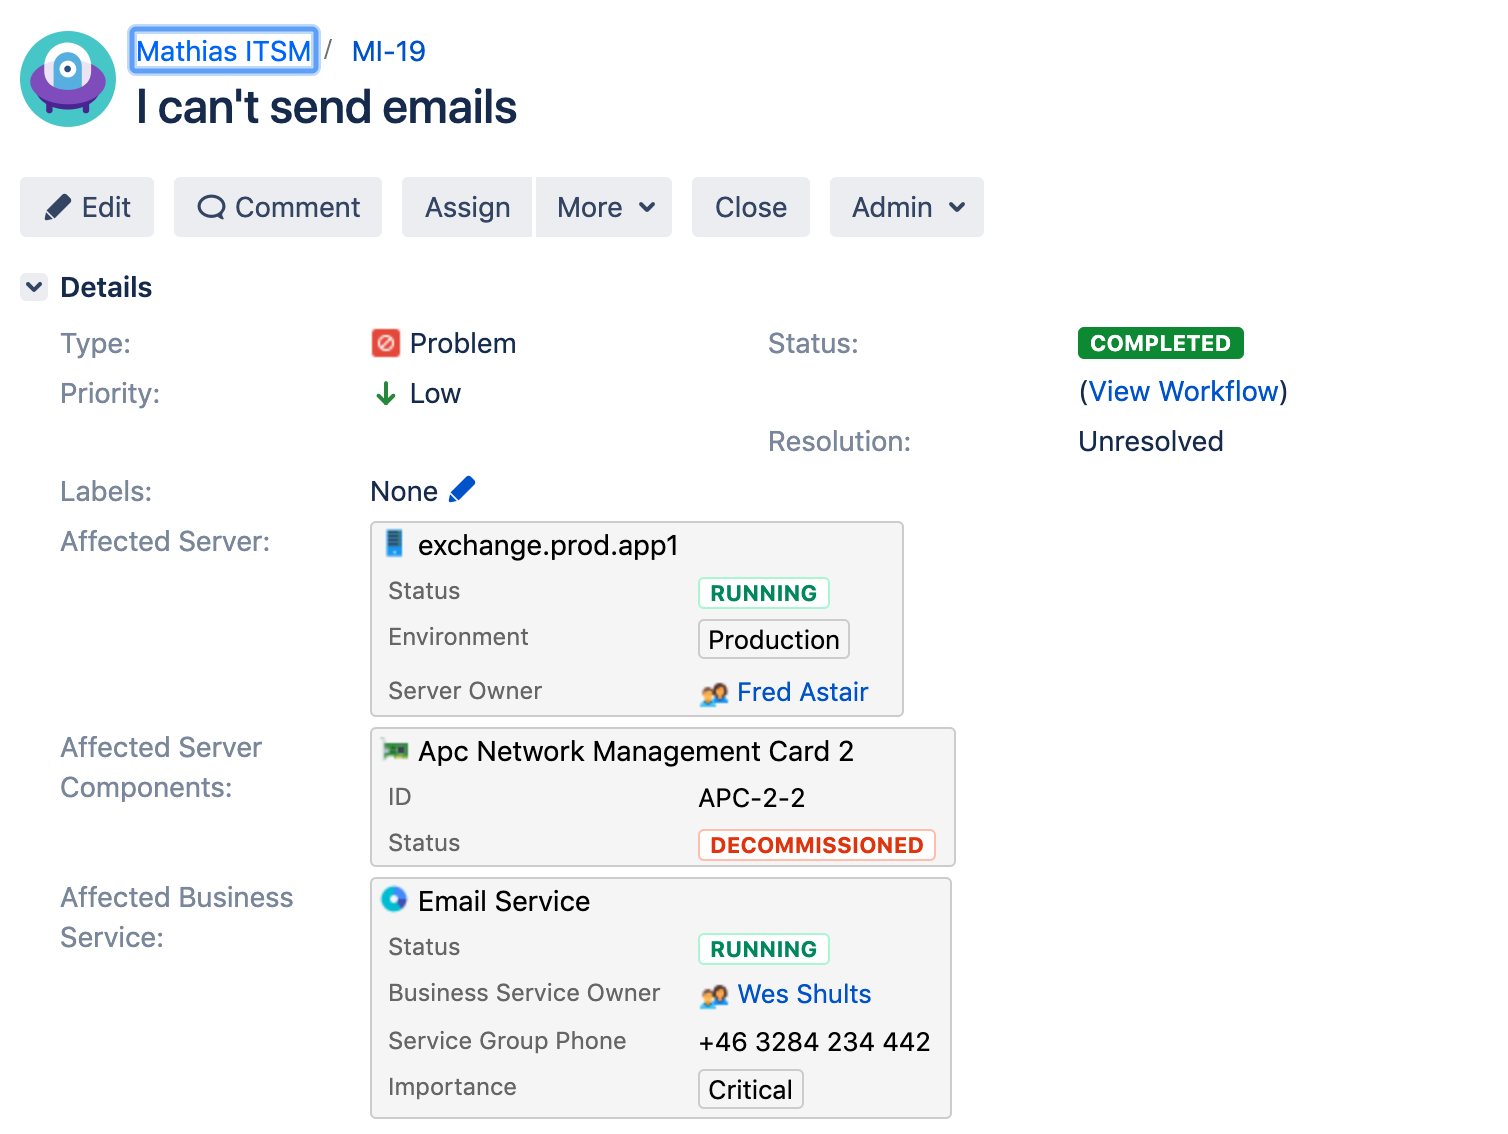
- Similarly, the problem is automatically updated and closed.
- Just like the incident that started it all.
That's it for this tutorial
The IT Service Management (ITSM) template is only an example of how you can structure your ITSM practices with Insight and Jira. Feel free to use this template, modify it, or start your own from scratch.


