Database import

On this page

Still need help?

The Atlassian Community is here for you.

Ask the community

You might want to import data from an internal or third-party system, like BMC Remedy or Service Now. This article guides you through importing data from another database. More about importing

You need to be a Jira admin to create, configure, and enable database imports.

Skip to:

Before you begin

Here are some additional details that you might need to know to import a database:

  • Predefined structure and configuration aren’t available for this import type.

  • You can add any SQL to join multiple tables and conditions to extract the necessary fields.

Supported databases

We're using a common framework (JDBC) to connect to the database. For database address location, port, and database name, go to Connecting Jira applications to a database.

To connect to the Jira database, check the dbconfig.xml in your Jira_HOME directory to find the correct configuration and URL. Below are examples of URL configurations for different database types.

Database type

Driver

URL example

Microsoft SQL Server

com.microsoft.sqlserver.jdbc.SQLServerDriver

jdbc:sqlserver://localhost:1433;databaseName=Jiradb

Oracle

oracle.jdbc.OracleDriver

jdbc:oracle:thin:@//localhost:1521/ORCL

PostgreSQL

org.postgresql.Driver

jdbc:postgresql://localhost:5433/Jiradb

MySQL

com.mysql.jdbc.Driver

jdbc:mysql://localhost:3306/Jiradb?useUnicode=true&characterEncoding=UTF8&sessionVariables=storage_engine=InnoDB

Importing data from databases

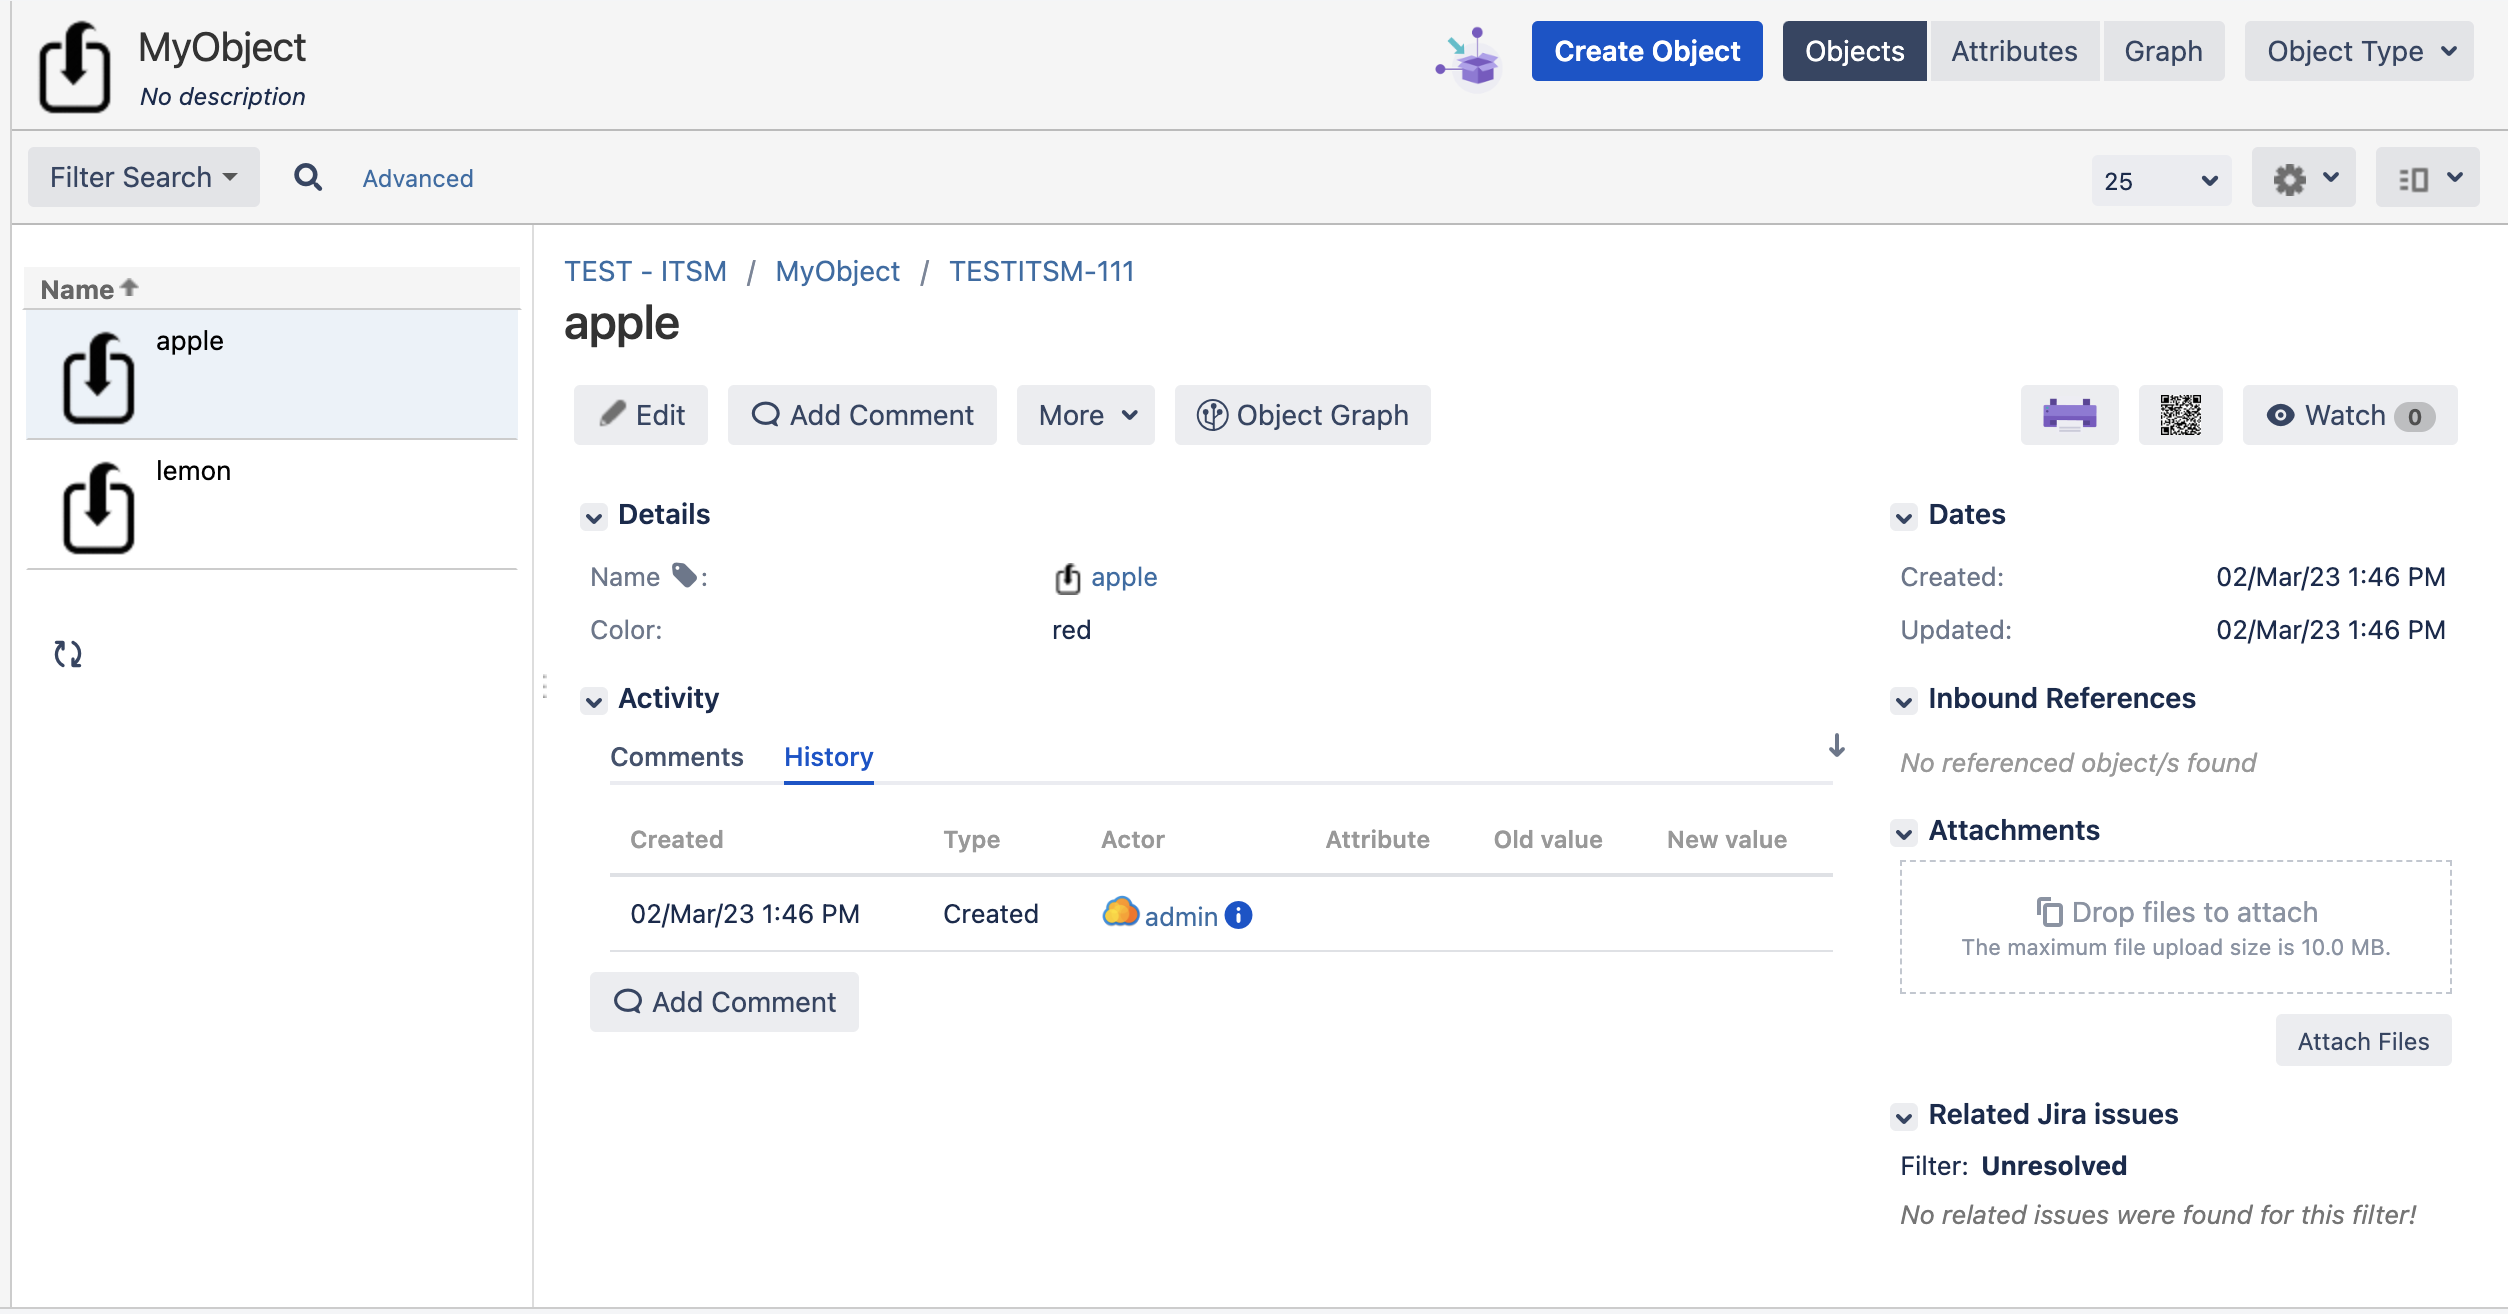
For testing purposes, you can use the following example of a database table. In this case, the attributes are the columns: name, color, and date.

#

name

color

created_on

1

apple

red

2023-03-02 13:32:22.455

2

lemon

green

2023-03-02 13:32:22.455

If the attribute “name” is selected as the Label, two objects will be created: “apple” and “lemon”. This will result in a configuration like this:

Database import example

To create an Import structure:
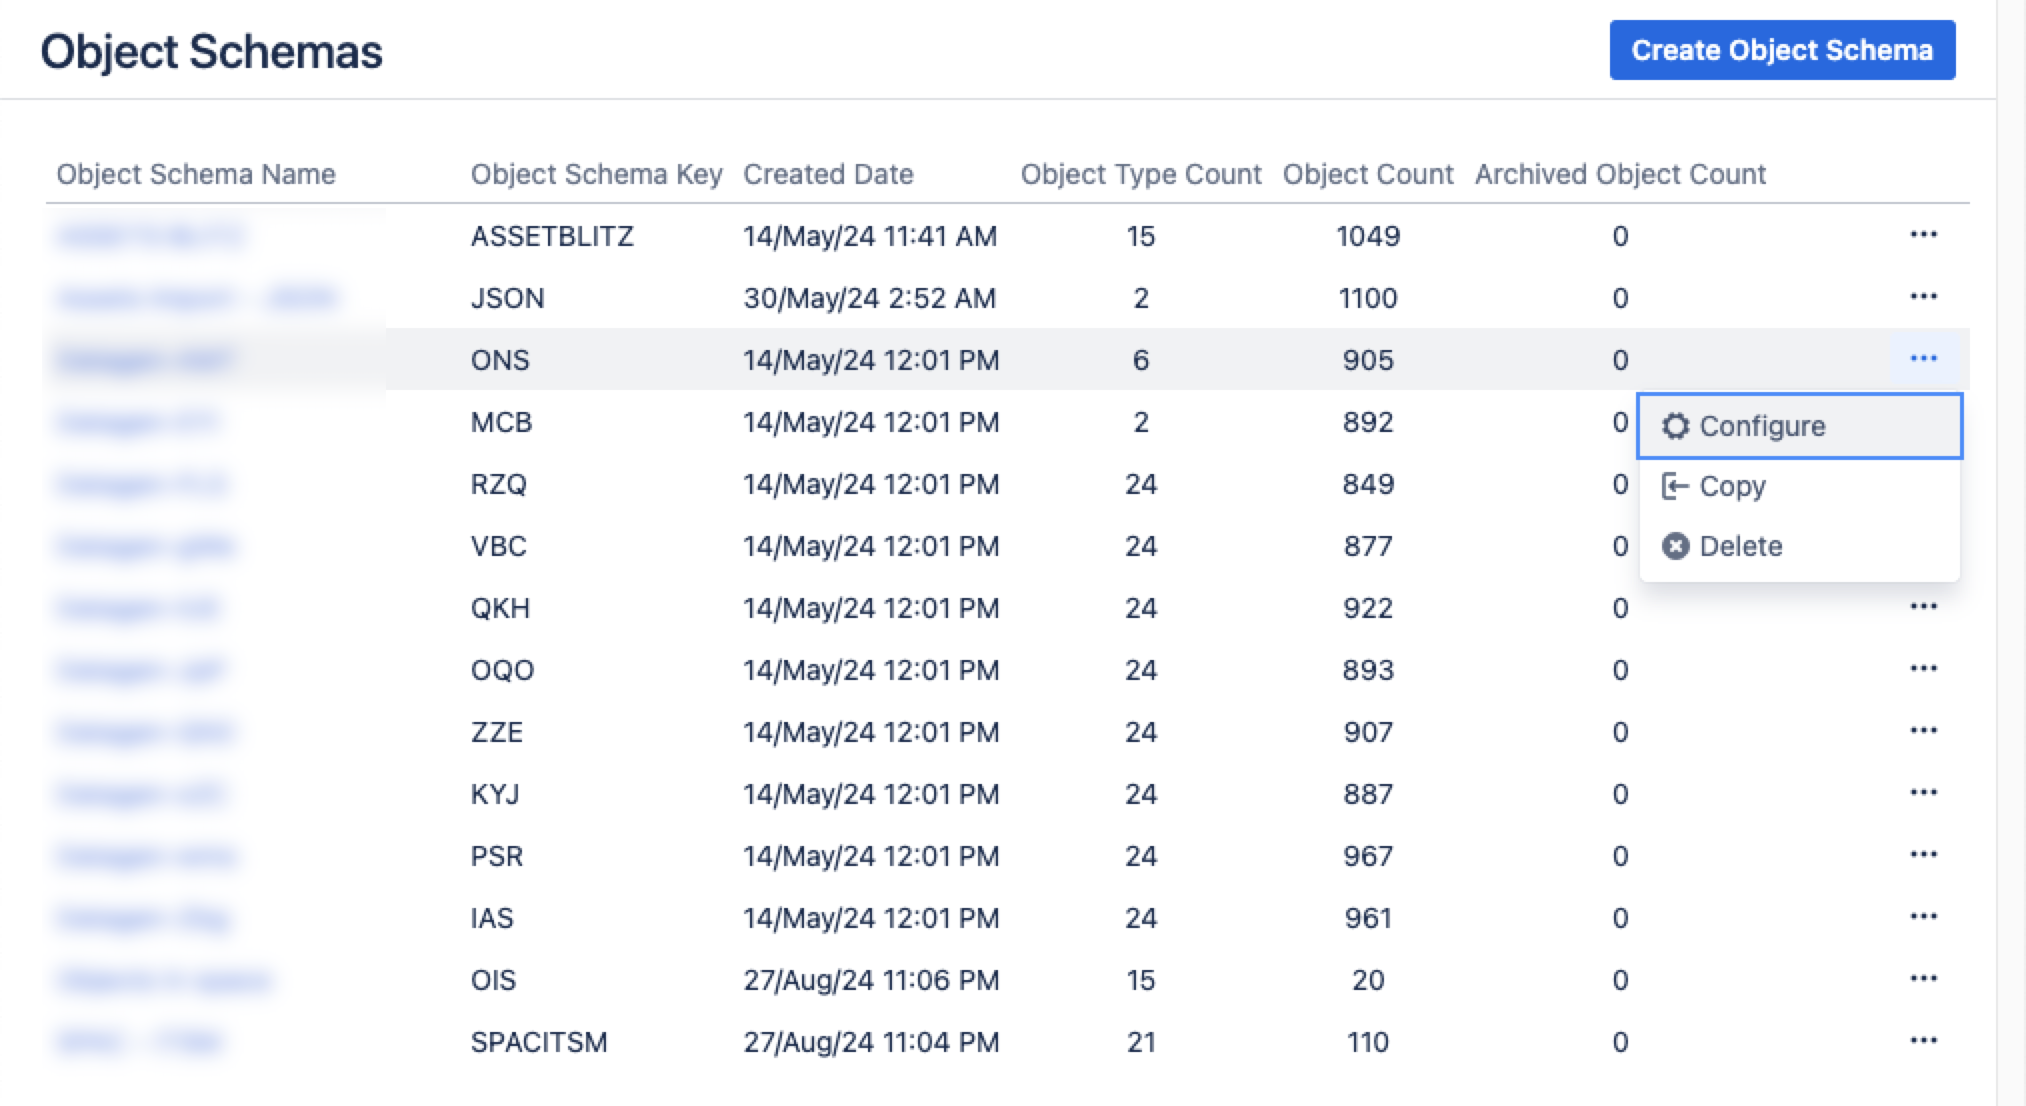
  1. From your service project, go to Assets, then Object Schemas.

  2. From the Object Schemas list, select More actions and then select Configure.
    Configure an object schema window

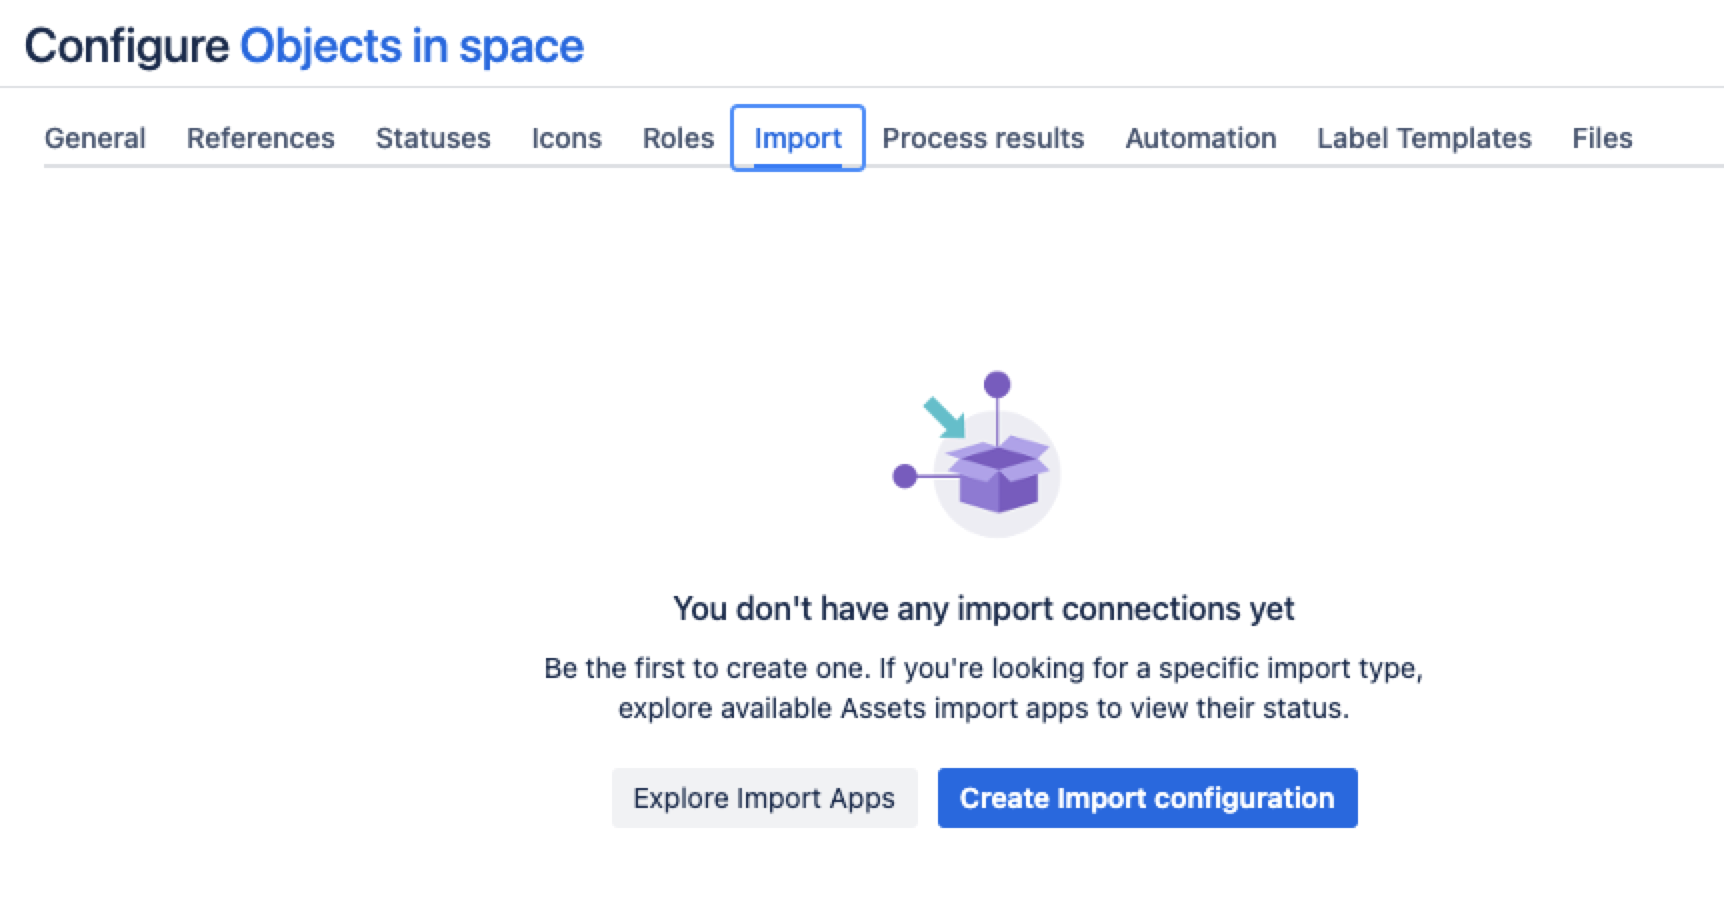
  3. In the Schema configuration view, open the Import tab.

  4. Under the Import tab:

    • If there’s no import structure, you’ll see the message “You don't have any import connections yet”. Select Create Import configuration to create a new import structure.

    • If an import structure has already been created, select Create Configuration.
      Create import configuration window

  5. Select CSV import, then select Next.

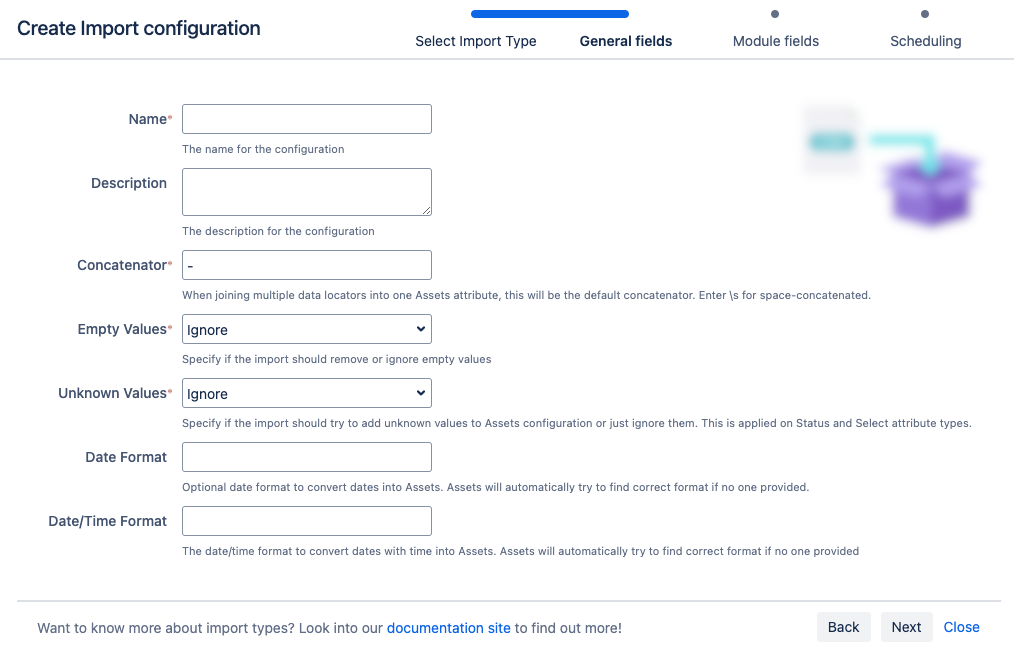
  6. Fill in the General, Module, and Scheduling import fields.
    General fields of the import configuration

General fields

Here are general fields, common for every import type:

Name

Description

NameThe name of the import.
DescriptionThe description for your convenience.
Concatenator

You can specify a default concatenator. When joining multiple data locators into one Assets attribute, this will be the default concatenator. One example could be to join two columns like "First name" and "Last name" into one attribute. So "Mathias" (first name) and "Edblom" (last name) will be concatenated as "Mathias Edblom" if using \s as concatenator.

Enter \s for space-concatenated. To include a concatenate character, place the value between double quotes (i.e "\s").

Empty Values

Defines what should happen when a Data Locator is empty:

  • Ignore - the existing value in the object will be retained and not overridden by an empty value.

  • Remove - the existing value for the object will be removed, and replaced with an empty field value.

Defines what should happen if a Data Locator is unknown. This could happen with attribute types like "Status" and "Select". 

  • Ignore - the value from CSV will be ignored and the object attribute will be left empty.

  • Add - the value passed in the CSV file will be added to the list and the object attribute will be updated with the new value.

Format for date fields in import source to convert dates into Insight. If left empty, Insight will automatically try to find correct format. 
The format should be specified according to the Java SimpleDateFormat guidelines.

Format for date/time fields in import source to convert dates into Insight. If left empty, Assets will automatically try to find correct format. 
The format should be specified according to the Java SimpleDateFormat guidelines.

Module fields

These fields are specific to an import type (module).

Setting

Description

URL

The database connection URL. If you want to connect to the Jira database, you can look into the dbconfig.xml in Jira_HOME to find the correct configuration and URL.

Driver

The driver class to use to connect to the database.

Place the JDBC driver (*.jar) to the <Jira_INSTALL>/lib folder

Don't forget to restart Jira after adding the driver to lib folder.

Username

The username used to authenticate.

Password

The password used to authenticate.

You can enter the password for your database.

If you want to query the Jira database, you can look into the dbconfig.xml found in Jira_HOME directory, to find out the correct configuration.

Scheduling fields

Scheduling fields are responsible for keeping your data in sync:

NameDescription
Synchronizing Account

The Jira user to use when synchronize data into Assets.

For LDAP and database imports, the account used for synchronization must have Jira admin permissions.

Cron ExpressionThe interval for the automatic synchronization.
Automatically SynchronizeIf the import should be scheduled for automatic synchronization.

7. Select Save Import Configuration.

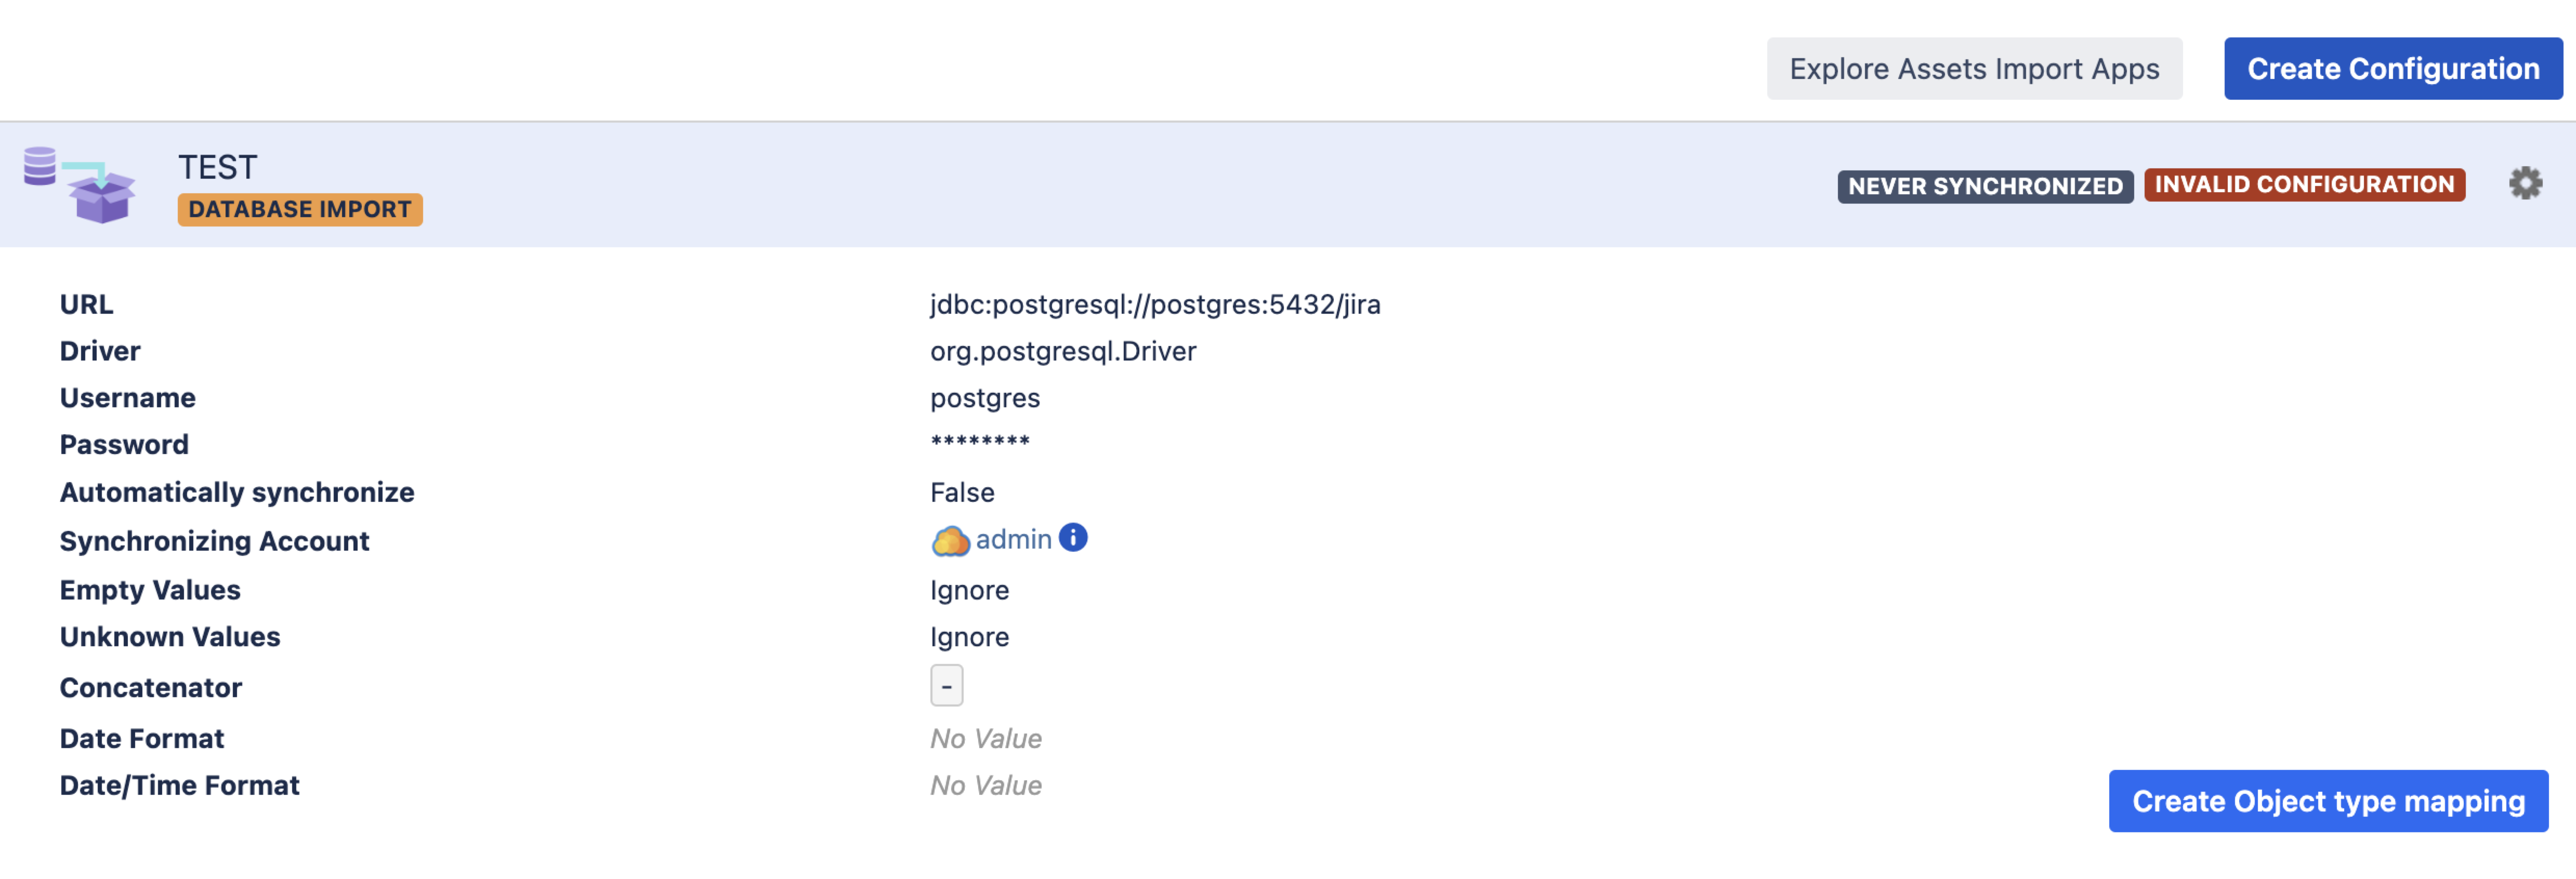
Next, you’ll need to manually create or review the object type and attribute mapping of your import configuration.

Import configuration created

You can now view your import configuration, but it's not ready yet. Because the predefined structure and configuration aren’t available for this import type, you need to manually create or review the object type and attribute mapping, and make sure there are no problems with your import configuration.

Create object type mapping button

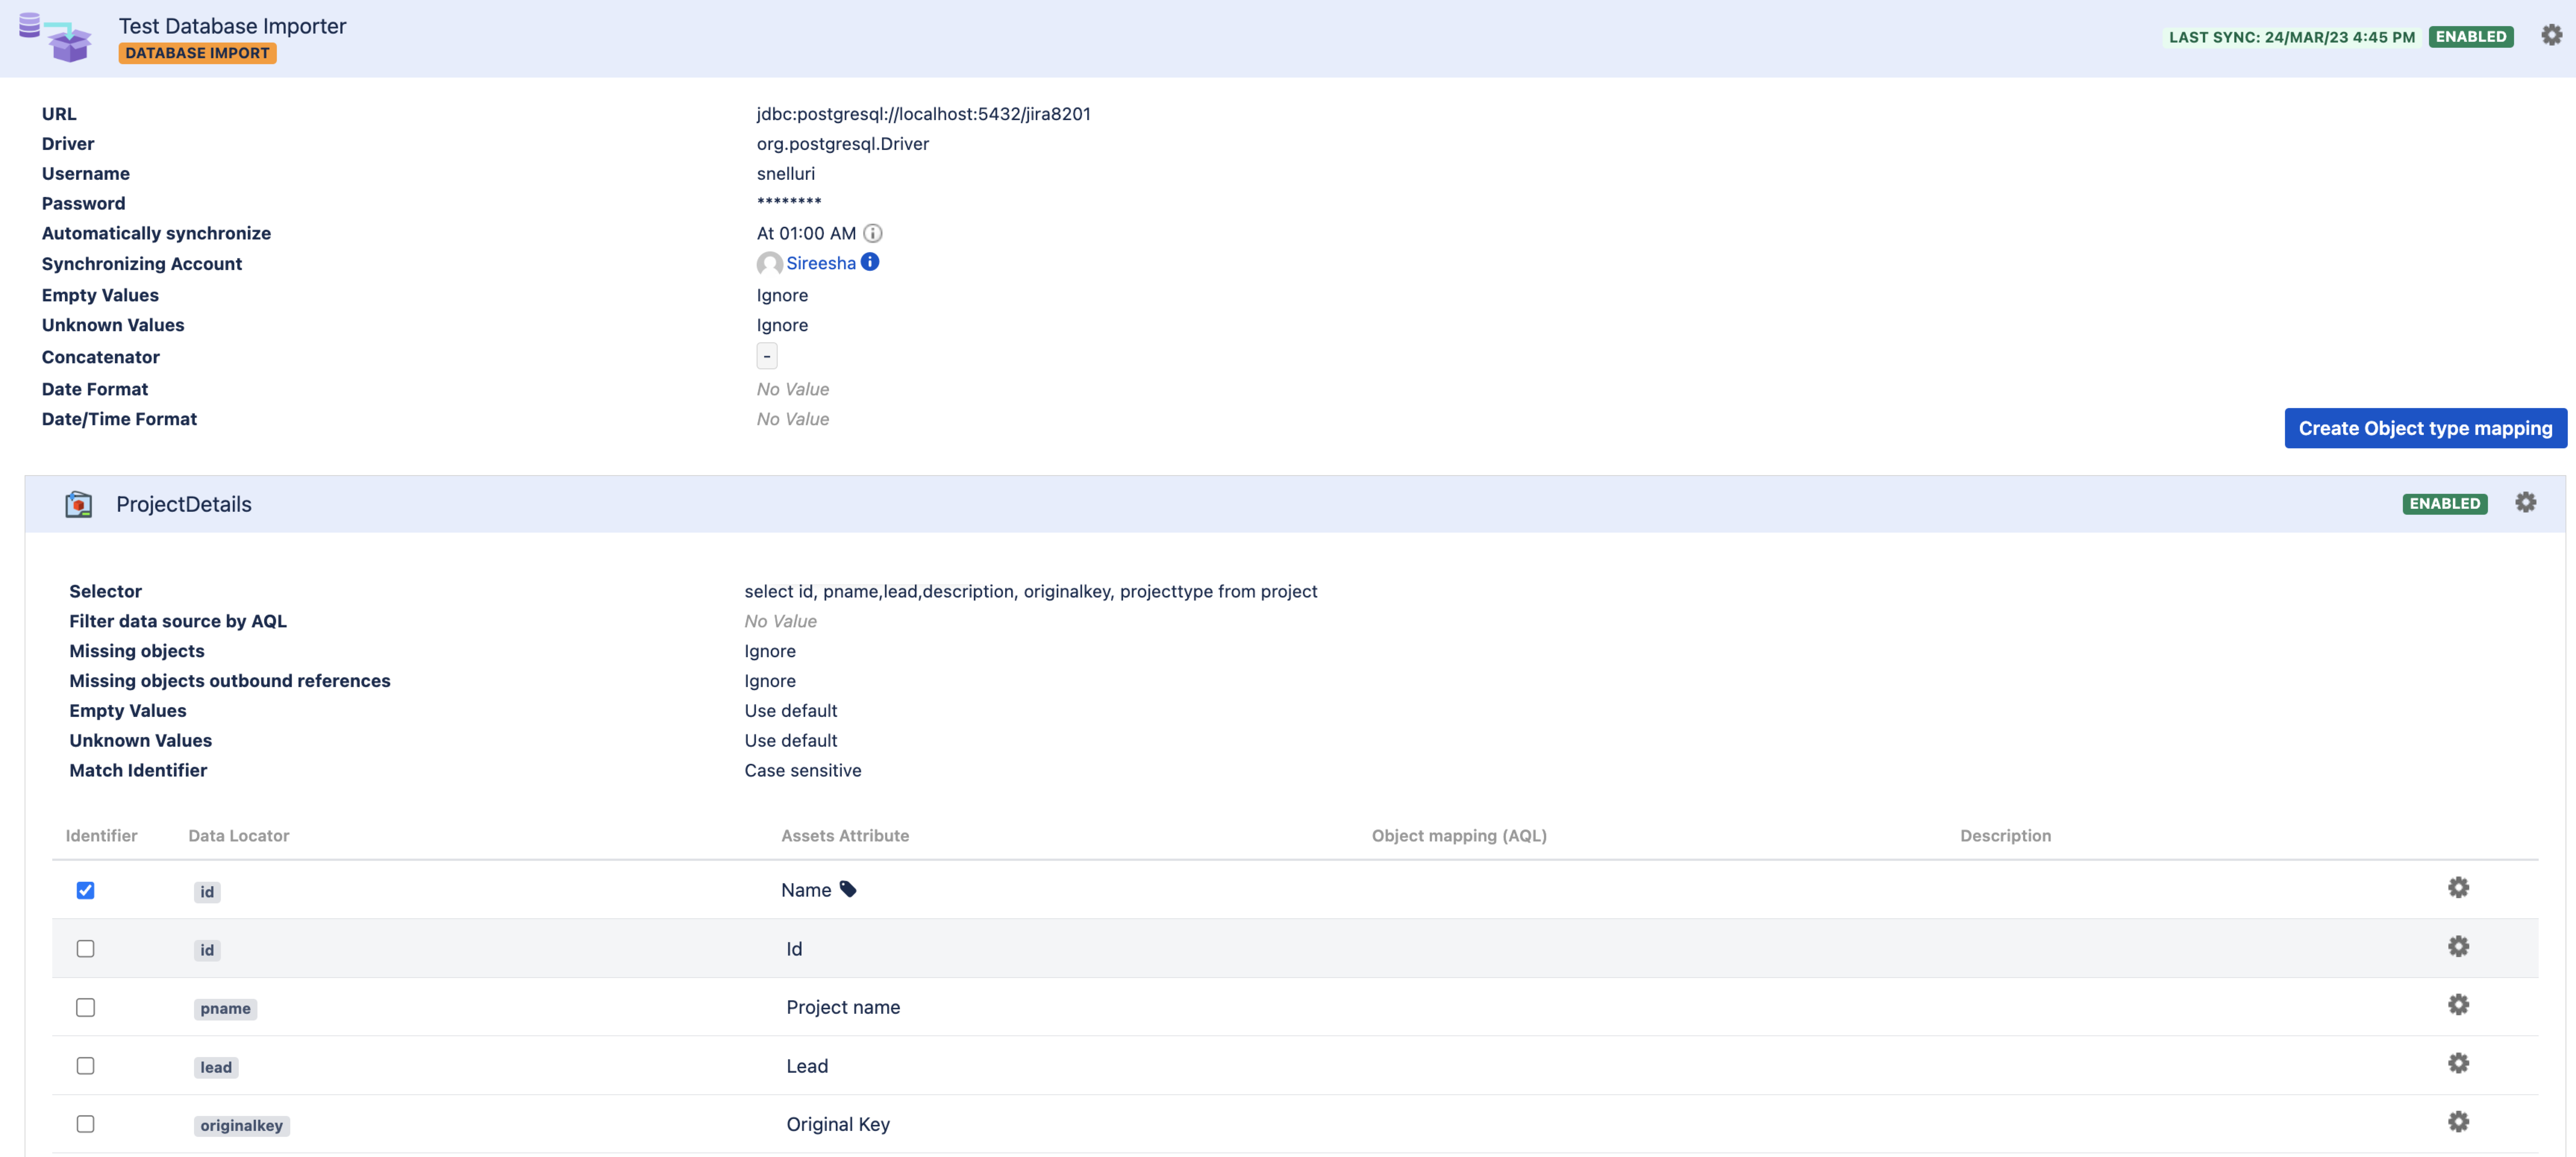
You need to select the object type you created earlier and add the database query that will return the data you want to import. After that, you can map the fields.

Make sure the identifier is set in the right database column. At least one column must be set as an identifier.

 Example of created object type mapping

When you're ready, go to 2. Create object type and attribute mapping.

Before you go

In the next step, you'll create the object type and attribute mappings. Here are some settings specific to the database import type.

Object type mapping configuration

The construction of the selector (the SQL statement) depends on the configuration of your database connection. Below are some examples that should guide you in the right direction when setting this up.

Database Type

Example

Microsoft SQL Server

select * from <database.name>.<schema-name>.Application

<schema-name> is dbo by default. An example could be:

select * from dbname.dbo.Application
Oracle

select * from <schema-name>.Application

If <schema-name> is Jiraschema, the query will be:

select * from Jiraschema.Application


PostgreSQL
select * from "Application"
MySQL
select * from Application
Last modified on Dec 30, 2024

Was this helpful?

Yes
No
Provide feedback about this article
Powered by Confluence and Scroll Viewport.