CSV import
You can import data from a CSV file. This import method useful if you're still using spreadsheets or maintain your assets in CSV files. More about importing
You need to be an Assets Manager for an object schema to create, configure, and enable imports.
Skip to:
- Before you begin
- Formatting CSV data
- Importing CSV files
- Pre-defined structure and configuration
- Import configuration created
- Object type mapping settings
- Known limitations
Before you begin
Here are some additional details that you might need to know to import a CSV file:
Make sure you have an object structure already defined. If not, check out our Assets tutorial.
The CSV file needs to have headers, as they're used to create the data locators for the imports.
To divide multiple values, for the Assets Attributes with multiple cardinality, use
||(two pipe characters).
Formatting CSV data
If there's a syntax error in your CSV data file, your import might produce unexpected results or not run. Make sure to follow the formatting rules:
You can use any of the following formats: UTF-8 (default), UTF-16, ISO-8859-1, ISO-8859-15, Windows-1250, or Windows 1252.
The CSV file must include a single-character delimiter. The default delimiter is the comma
,. You can select a custom delimiter in the Delimiter field when you create an import configuration. To include a delimiter character, use a single character input. You can also enter\tto use a tab-delimiter.If you're importing Jira users, you must identify them by their Names, Emails, or User keys.
If you're importing Jira groups, you must identify them by their Names only.
If you're importing URLs, they must begin with a protocol, such as
http,https,ftp, orfilefollowed by://to be converted into the URL attribute type. If you don’t include the protocol, the value won’t be imported. Explore attribute typesIf you're importing CSV data from a Google Sheets link, edit the URL so it works properly. Remove
/edit#gid=0from the ending of the URL and replace it with/export?format=csv.
Importing CSV files
For testing purposes, you can use the following CSV file sample. This file includes the information about employees: name, employment start and end date, role, name that Jira uses to display them, and the assigned office location.
Name,Employment start date,Employment End date,Role,Jira User,Office
John Doe,2019-06-15,2023-04-30,Project Manager,John Doe,New York
Jane Smith,2021-03-01,,Developer,Jane Smith,London
Emily Johnson,2018-09-10,2022-12-31,Designer,Emily Johnson,Sydney
Michael Brown,2020-01-20,,QA Tester,Michael Brown,San Francisco
Emma Wilson,2017-11-05,,HR Specialist,Emma Wilson,Berlin
James Davis,2022-01-01,,Data Analyst,James Davis,Tokyo
Olivia Martinez,2016-07-25,2021-08-15,Marketing Coordinator,Olivia Martinez,Toronto
Liam Garcia,2019-11-18,,Sales Executive,Liam Garcia,Singapore
Sophia Lee,2023-05-01,,Customer Success Manager,Sophia Lee,Dublin
After importing and configuring the file, you should see the imported objects (employees, in this case) and objects' values (employee data). This will result in a configuration like this for a single object:
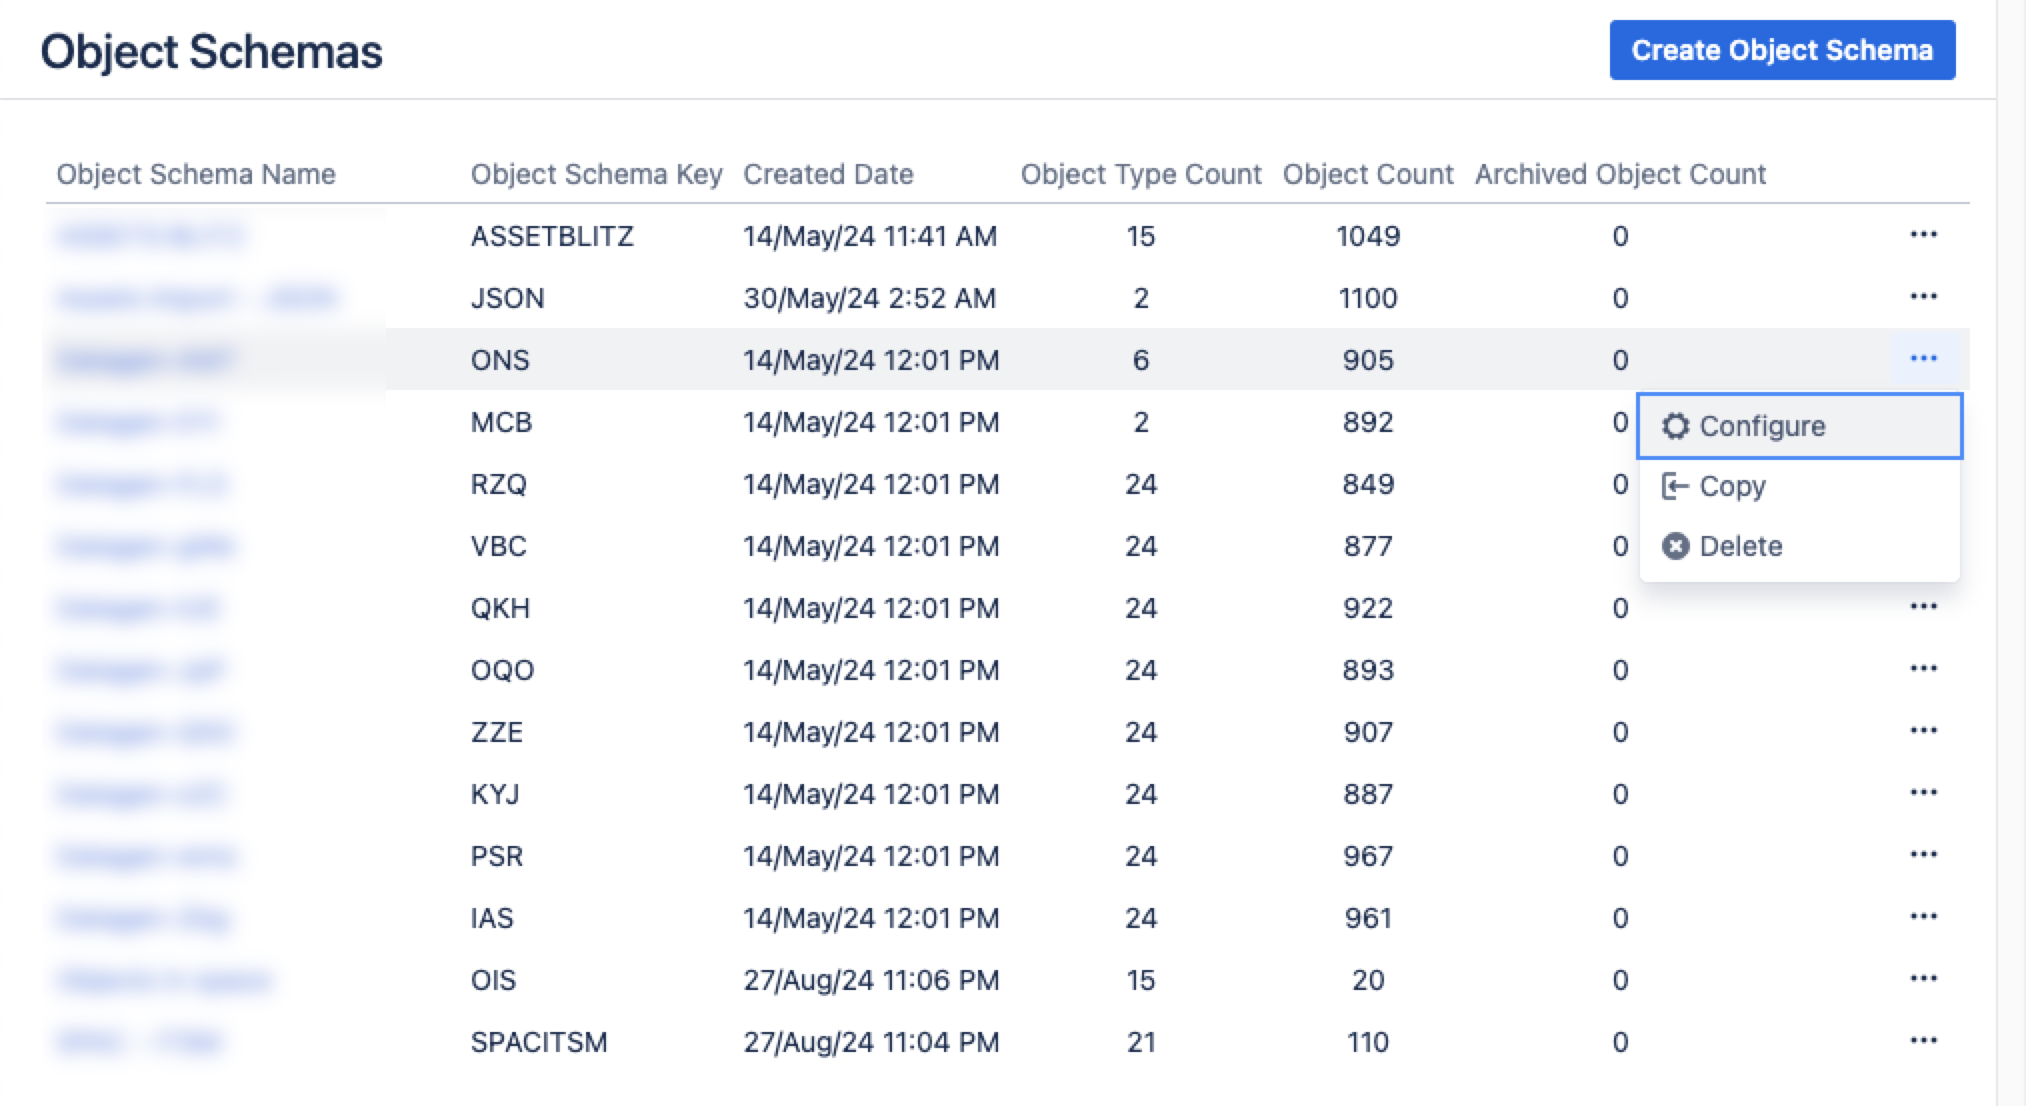
From your service project, go to Assets, then Object Schemas.
From the Object Schemas list, select More actions and then select Configure.
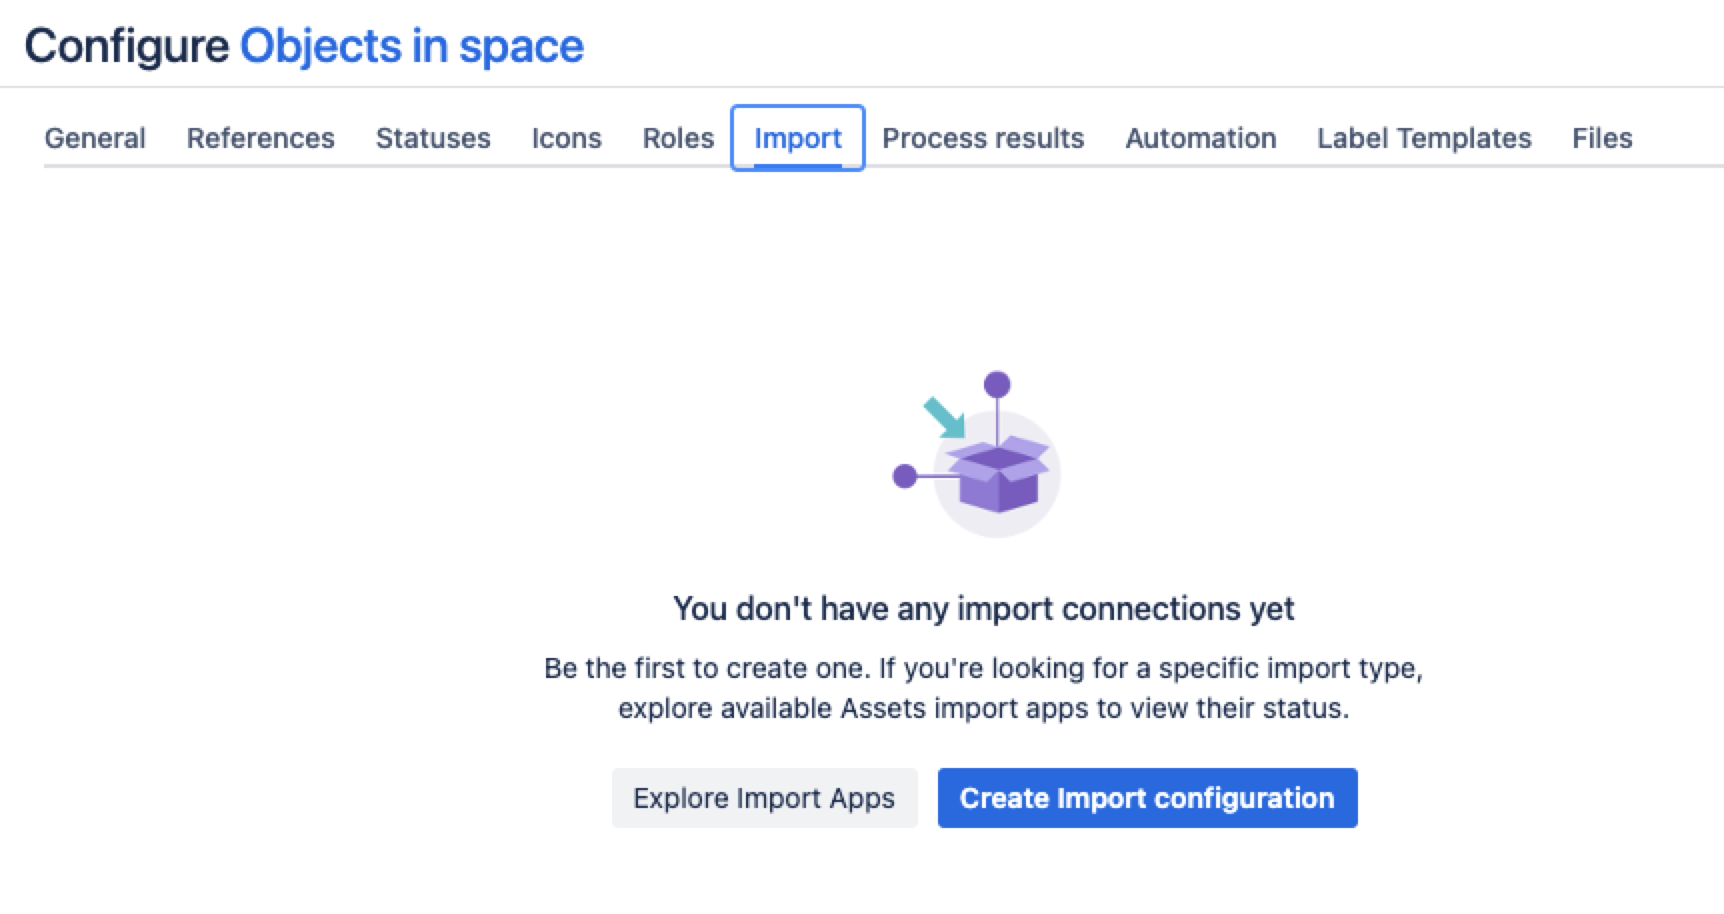
In the Schema configuration view, open the Import tab.
Under the Import tab:
If there’s no import structure, you’ll see the message “You don't have any import connections yet”. Select Create Import configuration to create a new import structure.
If an import structure has already been created, select Create Configuration.
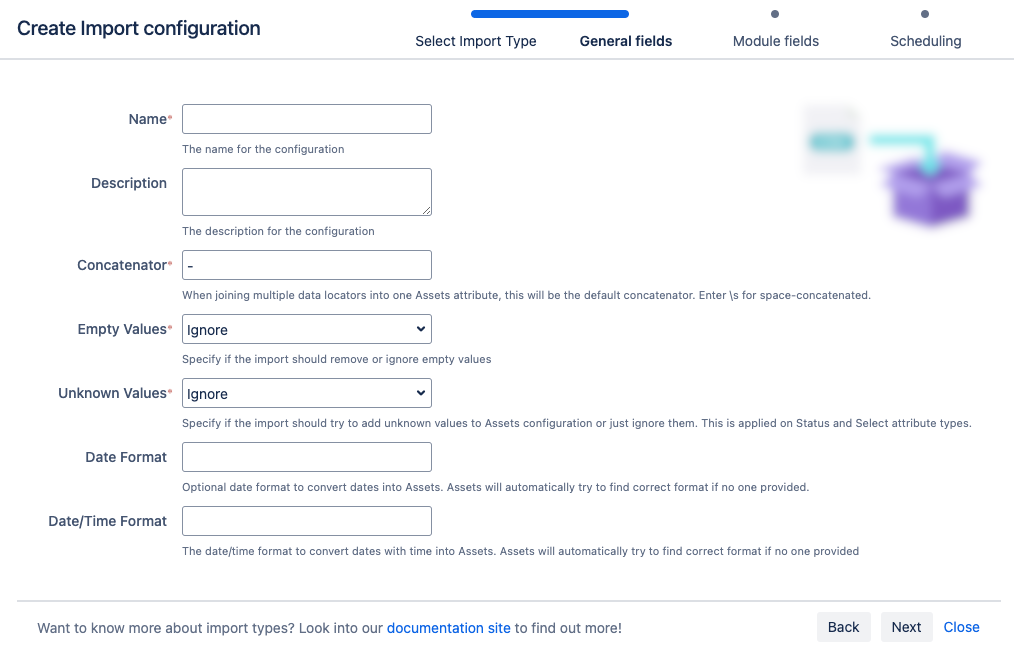
Select CSV import, then select Next.
Fill in the General, Module, and Scheduling import fields.
7. Select Save Import Configuration.
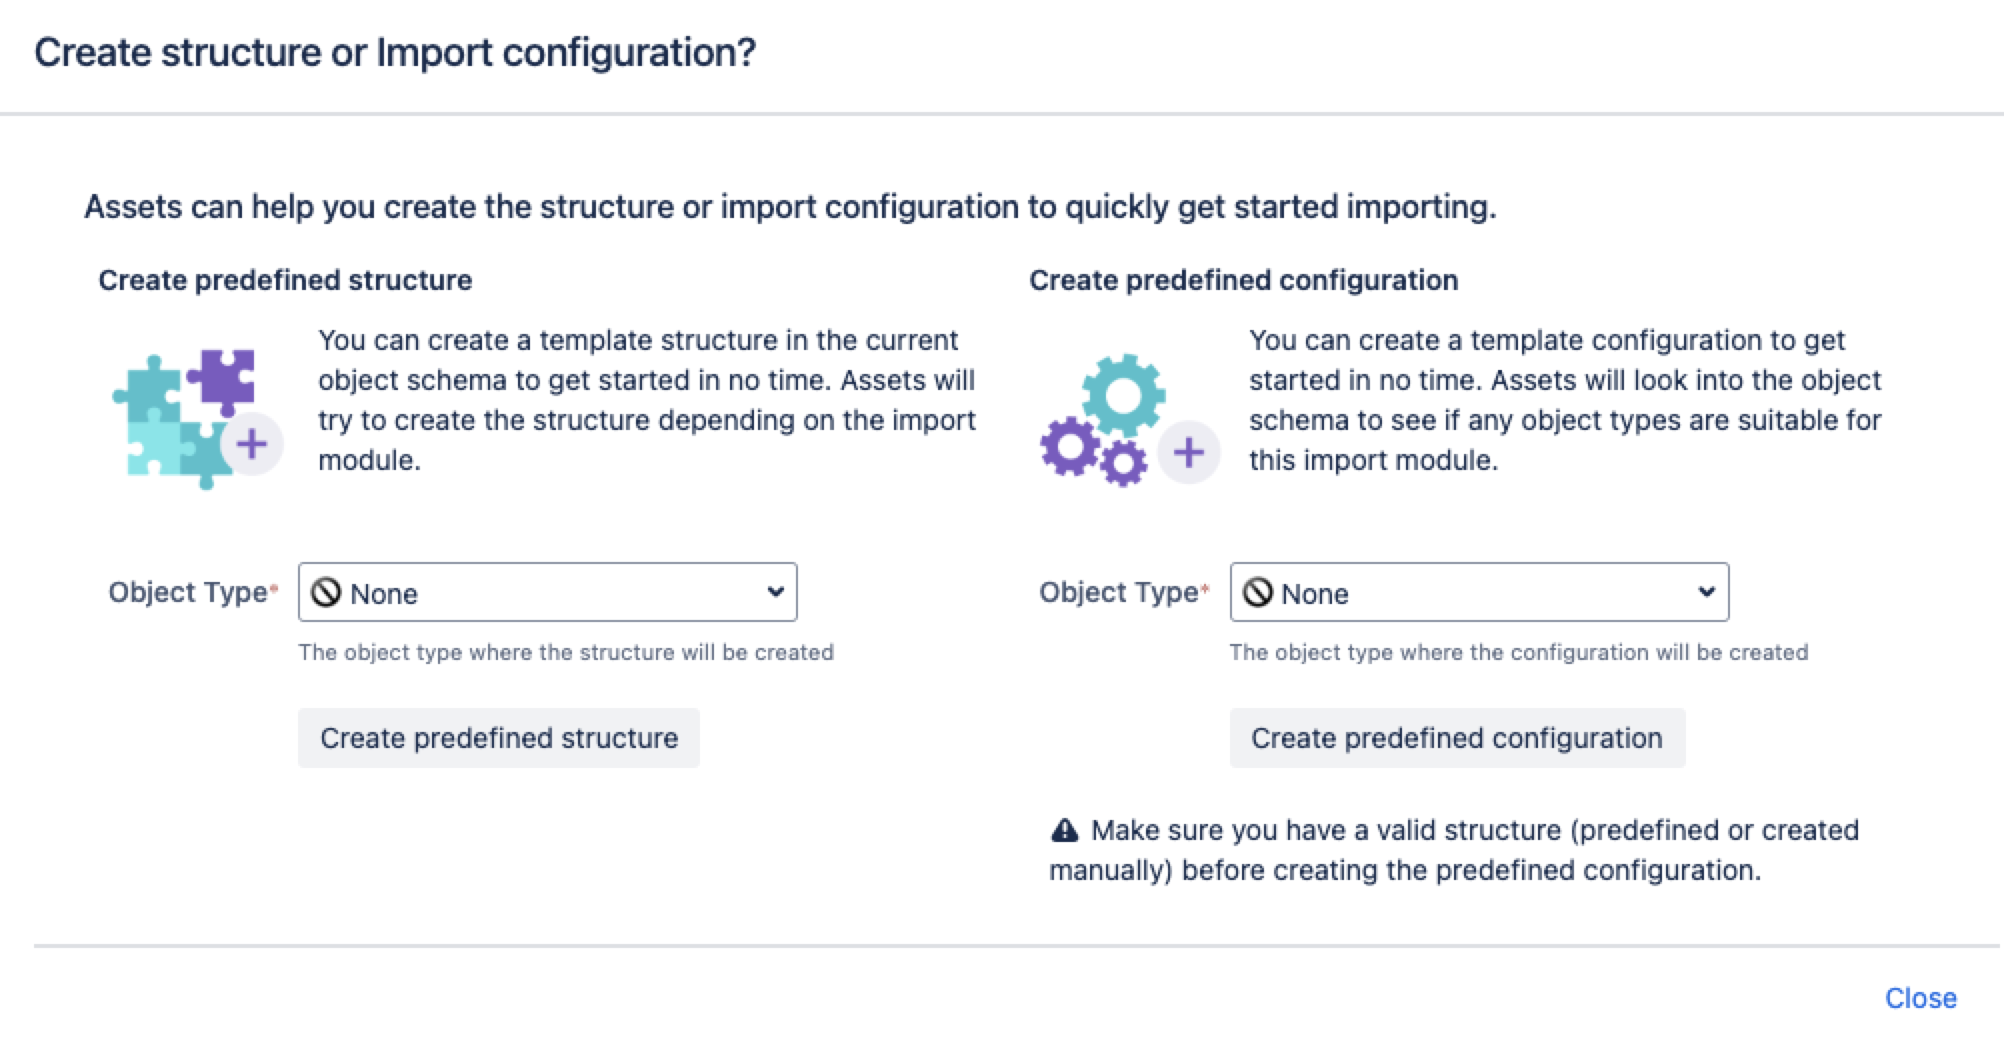
Next, can create a predefined structure and configuration for your import.
Pre-defined structure and configuration
Create predefined structure – this will create object types with attributes and relationships in the schema
Create predefined configuration – this will create type mappings in the import configuration.
After you select Create predefined configuration, Assets will create configurations and mapping from the fields in the CSV file to the attributes in the object type. As these are created based on the default rules, you might need to review the mappings and make necessary changes. For the CSV import:
Each column from the CSV file will be created as an Assets attribute of type Default Text, and configuration will be mapped accordingly.
The object type created will always be the same.
Some object type mappings are disabled by default. Make sure to select the relevant ones.
If you want to have different attribute types created by the import of the data from the CSV file, create the predefined structure and then change the attribute types.
Import configuration created
You can now view your import configuration, but it's not ready yet. You still need to create or review the object type and attribute mapping, and make sure there are no problems with your import configuration.
When you're ready, go to 2. Create object type and attribute mapping.
Before you go
Object type mapping settings
In the next step, you'll create the object mapping settings. Here are some settings specific to the CSV import type.
Name | Description |
|---|---|
| Selector | The selector for the CSV import is not used. Use AQL to filter any data from the CSV file |
| Confluence | For Confluence type attribute, the expected value is in the format of page ID instead of page title. |
Known limitations
The
textAreaattribute has a hyperlink option. However, this can't be used in the CSV import.For the
textAreaattribute, the value should be enclosed in the wrapper element, such as<div class="created-with-ak-editor content-wrapper"><p></p>. If the wrapper element isn’t present in the source, every sync will rewrite it, adding the wrapper each time and creating a new history event.


