Using service project queues
Viewing queues
You can see how many issues are in each queue, and switch between queues to work on the right issues at the right time.
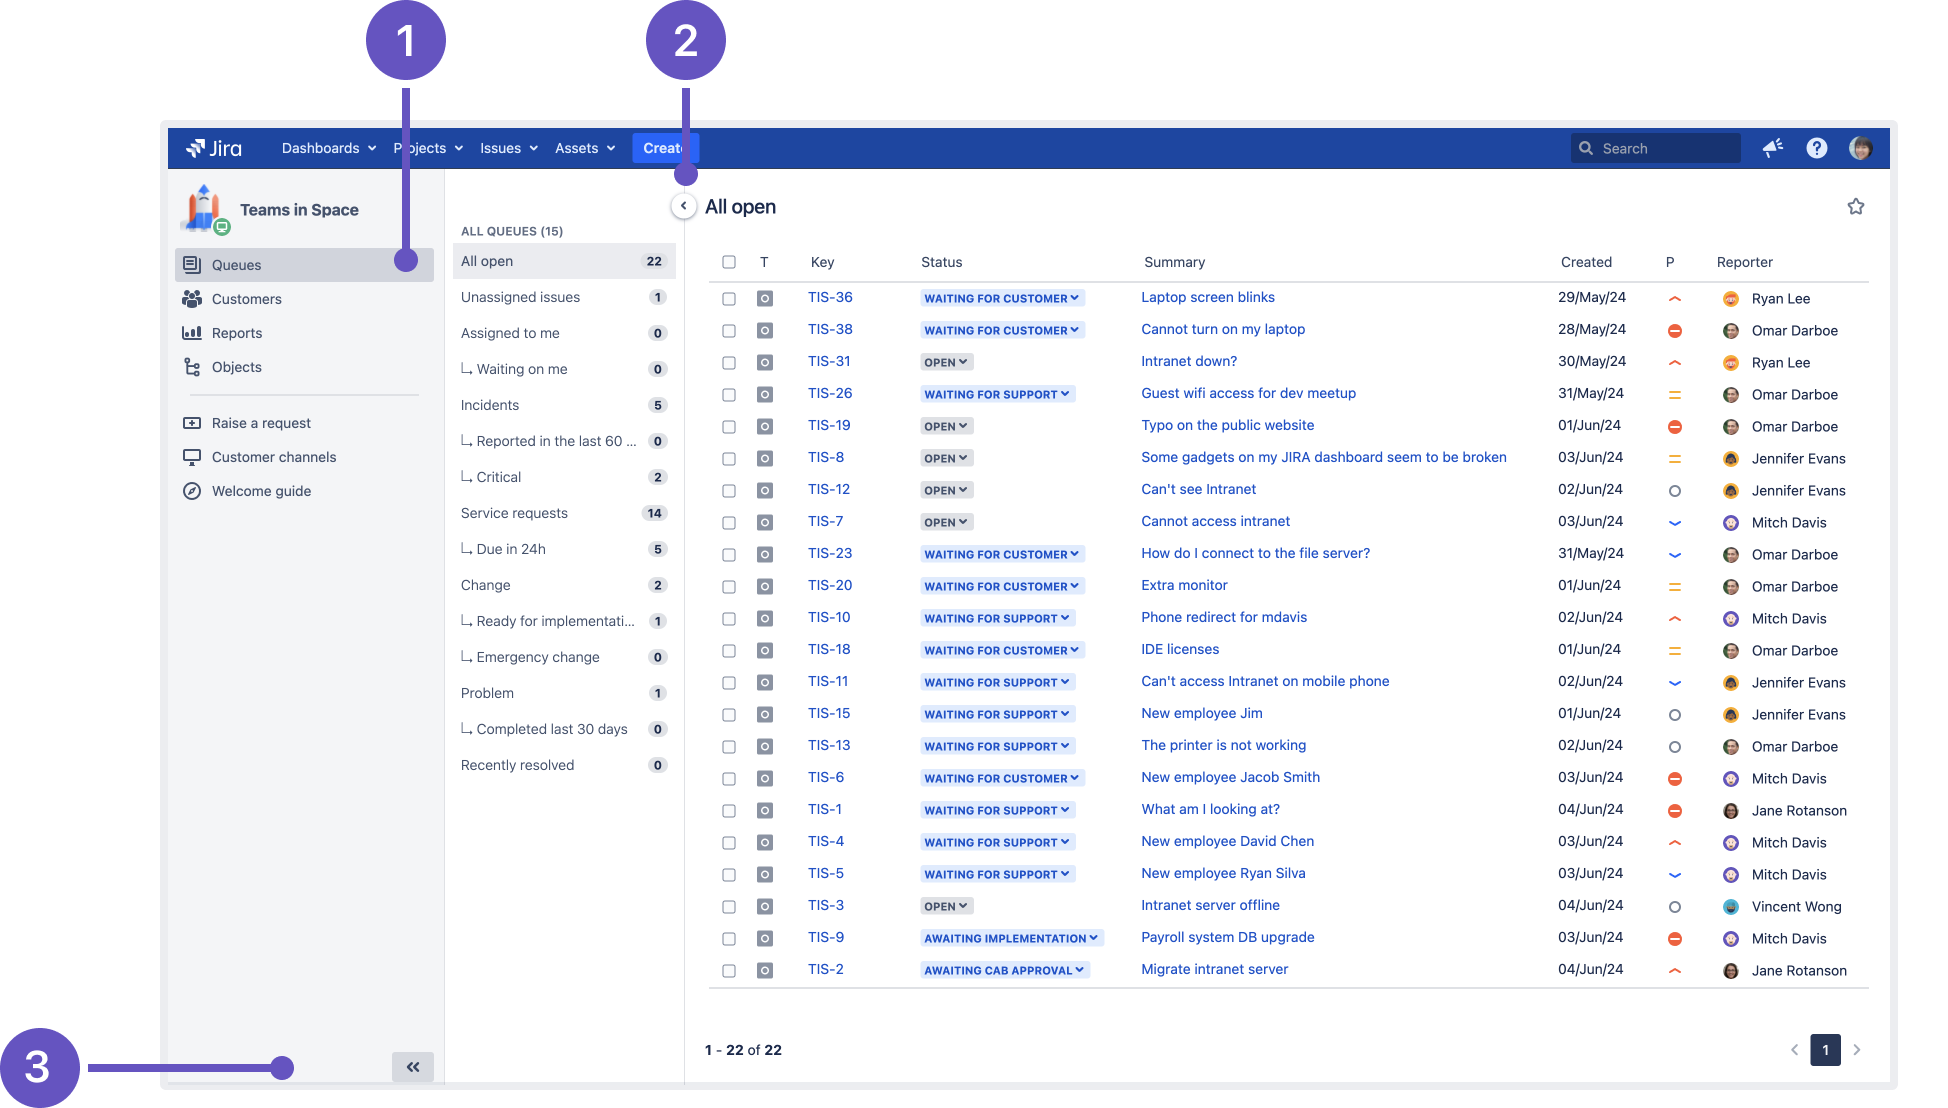
Navigate to your service project queues by selecting Queues from your project sidebar.
When you select Queues from your project sidebar for the first time, the secondary sidebar menu will open automatically. This sidebar displays all queues in your service project, as well as the number of issues in each queue. Simply select the name of the queue you wish to work from to view its issues.
To expand the view of a single queue, you can minimize your project sidebar by selecting the Collapse sidebar icon and minimize your queue sidebar by selecting the Collapse icon in the sidebar's upper right corner.
1: Queues option in the project sidebar
2: Minimize queue sidebar
3: Minimize project sidebar
Starring your favorite queues
Starring a queue helps you handpick your favorite queues and access them quickly from your service project. Starred queues appear only in your view and won’t impact the view of other agents or admins.
You can star your favorite queues in two ways:
Method 1:
- From your service project sidebar, go to Queues.
- Hover on the queue of your choice and select the star icon.
Method 2:
- From your service project sidebar, go to Queues.
- Select the queue you want to star.
- Select the star icon at the corner of the queue view.
The queue appears in the Starred section of your queues sidebar. To unstar the queue, select the star icon again.
1: Starred section in the sidebar
Sorting issues
To make it easier to find the most important issues, you can sort issues in your queues based on any of the available columns. Select a column to choose it as the primary sorting option, and then select the column again to refine the sorting. For example, you can change the sorting from oldest to newest, or switch the alphabetical order.
1: Column selected to sort issues
Some things to keep in mind:
- Sorting is a personal setting. Whatever you choose, it won't affect your teammates.
- Your settings are saved in the local storage, so they won't be available if you access your queues from a different device.
- To reset sorting, select the Reset sorting button.
Editing issues inline
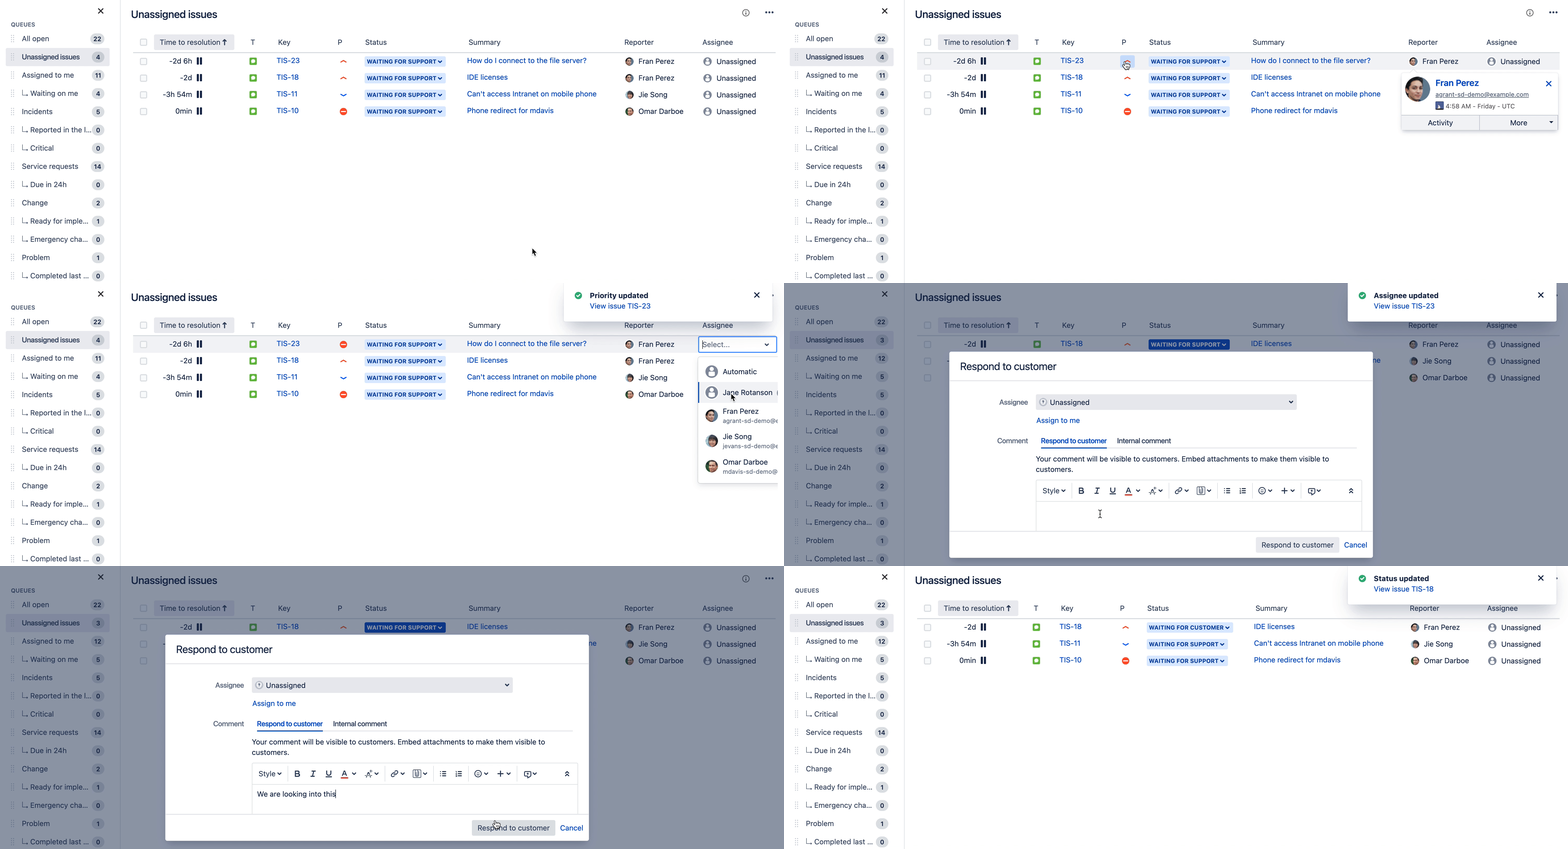
You can quickly edit issue details from the queue view instead of navigating to the issue view. Here’s the list of things you can edit from the queue view:
- Assignee
- Priority
- Status
Managing multiple issues at once
You can update multiple issues at once instead of opening and editing them one by one.
After selecting multiple issues, you’ll be able to choose one of these actions:
Assign issues to a different user
Watch / Stop watching selected issues. This requires that watching is enabled in your Jira instance.
Delete selected issues
Add an internal or external comment to your issues. Adding a comment to 50 issues at once might take some time, so watch out for this.
Link selected issues to other issues
Good to know
You can select a maximum of 50 issues at once because that’s what fits on a single page. When you switch to another page, your selections will be cleared.
Keyboard shortcuts: You can the Up and Down arrow keys to move between issues, and the Space bar to select them.


