Moving an issue
Sometimes, an issue may be incorrectly assigned to a project, and you may want to move this issue to a different project. You can easily do this using the Move issue wizard.
Before you begin
- You must have the Move issues permission for the project that has the issue that you want to move.
- You must have the Create issues permission for the project that you wish to move your issue to.
If you do not have either of this permissions, contact your Jira admin to have these added to your user profile.
- If you wish to move multiple issues between projects at the same time, see how to bulk move move issues.
- If you're using Jira Cloud, read more about updating issue details.
Moving an issue
The Move issue wizard allows you to choose any other project in your Jira instance to move your selected issue to. As there may be significant differences in the configuration of your original project and target project, the Move issue wizard allows you to change certain attributes of the issue. These include:
- Issue type: If your issue is a custom issue type that does not exist in your target project, you must select a new issue type. You can also choose to arbitrarily change the issue type. You can't move sub-tasks directly to another project, you'll need to convert them to an issue first.
- Issue status: You may have set up custom issue statuses as part of a workflow in your current project. If you have assigned a custom status to your issue, and it does not exist in your target project, you must select a new issue status for your issue. You cannot arbitrarily change the issue status, that is, the option to change the issue status will only appear if you are required to change it.
- Custom fields: If you have defined required custom fields for your issue that do not exist in your target project, you must set values for them. You will only be prompted to enter the values for required custom fields in the target project that are missing values. If the custom fields of your original project also exist in your target project, and these custom fields are not required in the target project, you may need to set values for them, to move the issue successfully. If you wish to change the existing values for other fields on your issue, you can do this after the move is complete.
To move an issue:
- Search for and navigate to the issue that you wish to move.
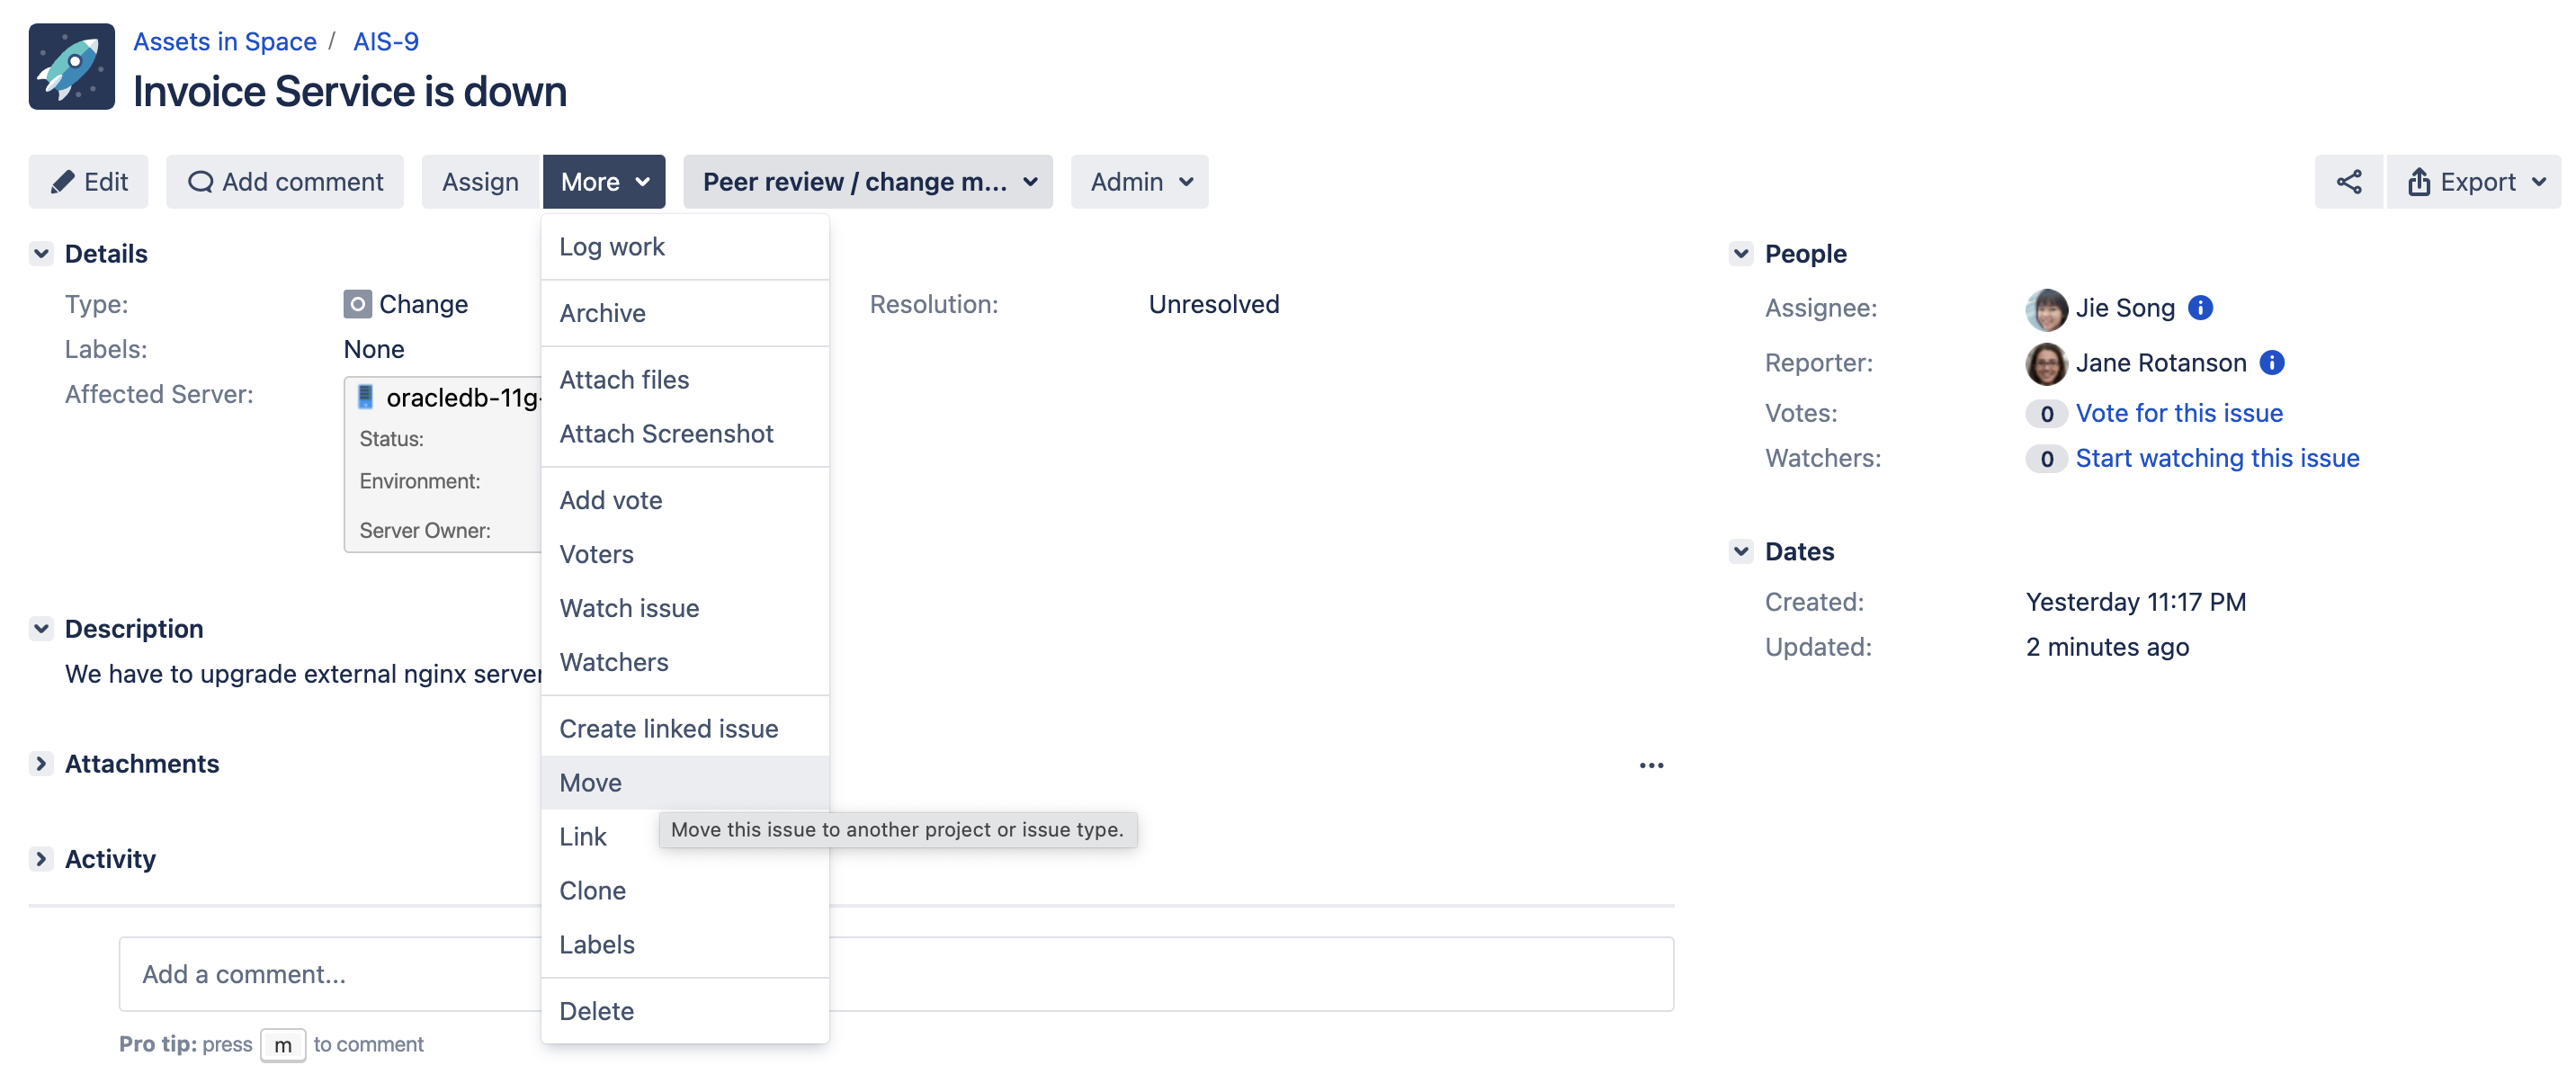
- Select More then from the list select Move.
- In the first page of the Move issue wizard that displays, complete the required steps.
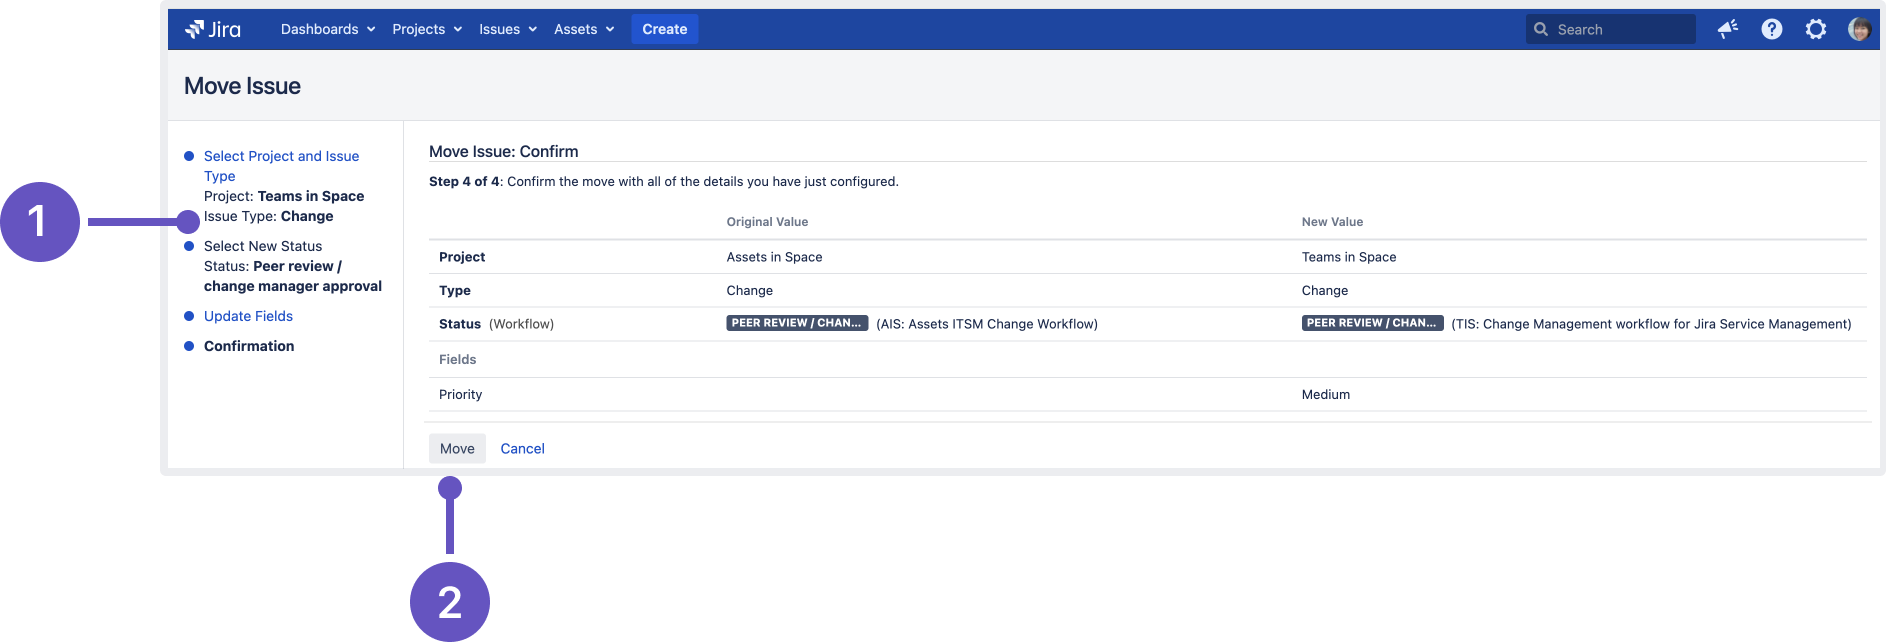
- The confirmation page displays all your changes.
To revise any of your changes, select the appropriate step in the left-hand menu to return to that page of the wizard. After you are happy with your changes, select Move to move the issue to the target project.
Your issue will be moved to the target project and displayed on screen. You can now edit the issue to make further changes, if you wish.
1: Steps in the left-hand menu
2: Confirm move
Moving related issues
- If your issue has sub-tasks, the Move issue wizard will also move the sub-tasks to the target project.
- If you're moving an epic, the Move issue wizard will not move the issues in the epic. The epic and the issues in the epic will still be linked to each other, but the issues in the epic will remain in the original project. You will need to move them separately.
- If your issue has values in the Components field, since the components field is project-tied, the target project must have the same component value already in place with the exact same name. Otherwise, the value will be lost during the move operation.
Troubleshooting
- Restricted comments appear to be removed after moving the issue. Read more about restricted comments disappear after moving an issue to a new project.

