Linking GitLab accounts
You can link your GitLab and GitLab Enterprise accounts and their repositories to Jira, and see the development information from pull requests displayed in your issues.
Supported versions
Here’s a list of supported versions:
| Jira version | GitLab | GitLab self-managed |
|---|---|---|
| 8.14+ | Current | All versions currently supported by GitLab |
Before you begin: Integrate Jira with GitLab using OAuth 2.0
Before you can add your GitLab account to the page, you need to integrate Jira with GitLab using OAuth 2.0. In this case, you'll be configuring an outgoing link where Jira acts as the OAuth 2.0 client.
You need to be a Jira System Administrator to complete this task.
In Jira
To create an outgoing link:
- In the upper-right corner of the screen, select Administration
 > Applications.
 - Under Integrations, select Application links.
Select Create link.
- Select External application > Outgoing link.
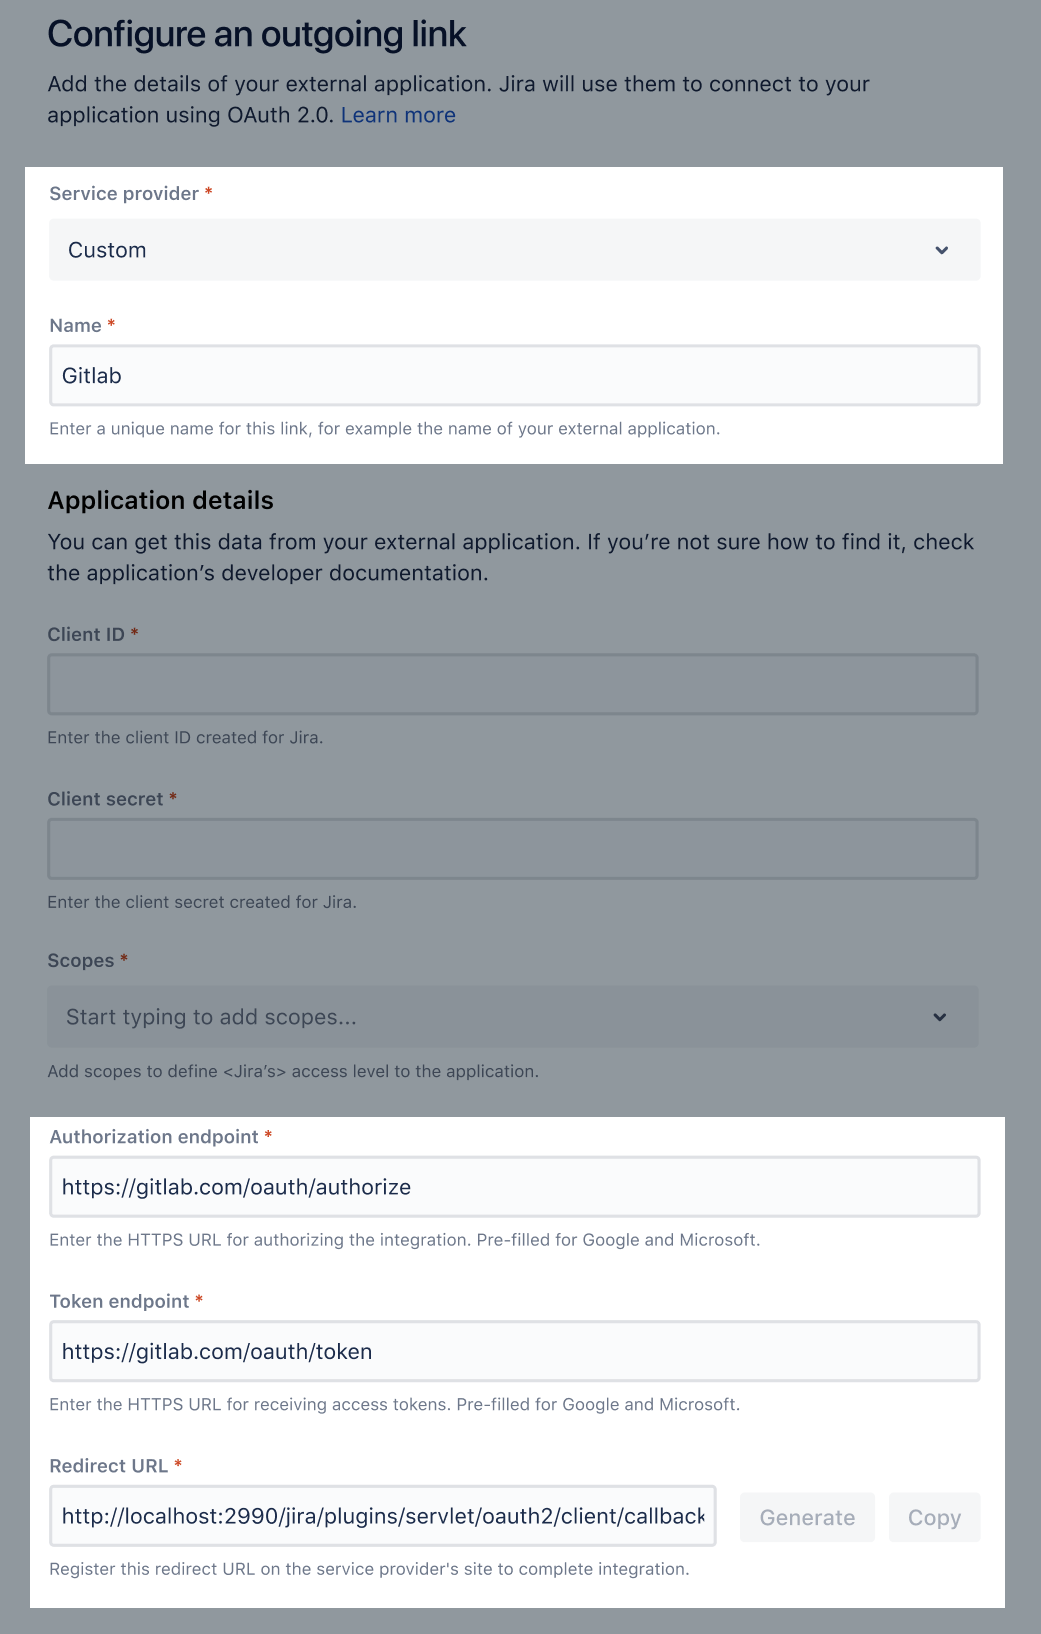
To configure the outgoing link:
- In the Grant type dropdown menu, select Authorization code.
In service provider, select Custom.
Enter your integration’s name.
Don’t worry about the Client ID and Client secret right now. You’ll get them from GitLab in the next steps.
Enter the authorization and token endpoint, as shown in the table below.
GitLab type Authorization endpoint Token endpoint GitLab.com https://gitlab.com/oauth/authorizehttps://gitlab.com/oauth/tokenGitLab self-managed <GITLAB_SELF_MANAGED_URL>/oauth/authorize<GITLAB_SELF_MANAGED_URL>/oauth/tokenCopy the Redirect URL. You’ll use it in GitLab in the next step.
In GitLab
Leave your Jira configuration open and move to GitLab to create a new application. This will give you Application ID (Client ID in Jira) and Secret (Client secret) that you’ll use in Jira.
In GitLab, go to User Settings > Applications, and add a new application. Use the following data:
Redirect URI: Enter the URL you copied from Jira.
Confidential: Keep that enabled.
Scopes: Select api. This is required for the connection to work.

- After creating the application, you should get the Application ID and Application Secret, like on the image below.

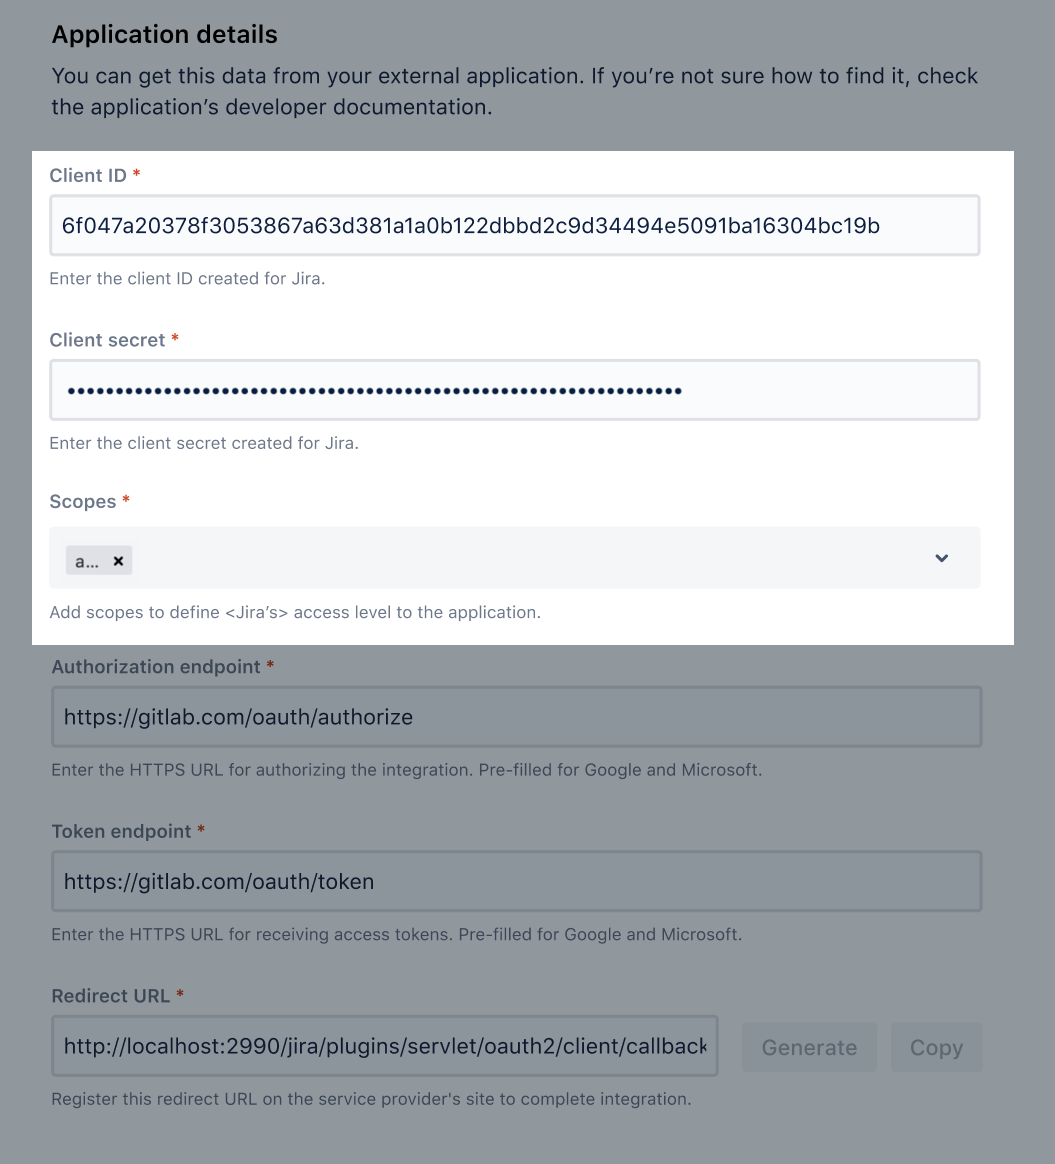
In Jira again
Go back to your configuration in Jira, and enter the missing information to complete the integration.
Enter GitLab’s Application ID as Client ID.
Enter GitLab’s Application Secret as Client secret.
In Scopes, select
api.Save the link.
- In the GitLab authorization prompt, select Authorize.
Link your GitLab account
Use the outgoing link you created earlier to link your GitLab account on the accounts page in Jira:
- In the upper-right corner of the screen, select Administration > Applications.
Under Integrations, select DVCS Accounts.
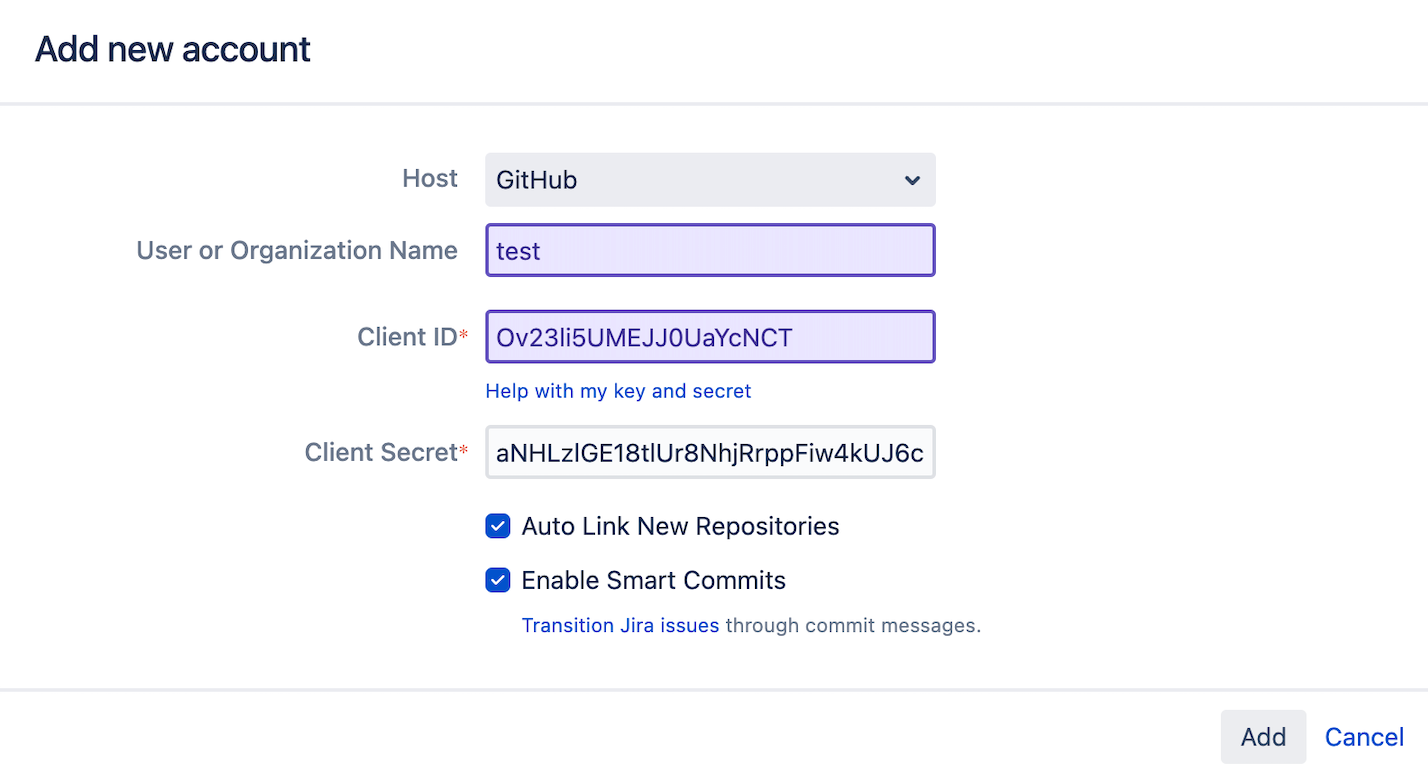
Select Link an account.
In the Host dropdown, select GitLab or GitLab Self-Managed.
For GitLab Self-Managed, enter your GitLab Host URL.
For Gitlab, the Host URL is fixed to https://gitlab.com.
In the User or Organization Name, enter the target group and optional subgroups.
In the Client Configuration, select the outgoing link you created. If you have only one integration with GitLab, it will be automatically selected.
- Select Add.
What’s next?
Here’s what happens after adding your account:
Syncing repositories: Your account appears on the page and Jira starts syncing its repositories, if you decided to link them automatically. For details, see Integrating dev tools using .
Matching issues: If your commits and pull requests include issue keys, Jira will try to find them and add the relevant information to your issues. For details, see Referencing issues in your development work.
Displaying dev info: If referenced correctly, the dev information will be added to your issues to give everyone involved more context. For details, see Viewing the dev info for an issue.
Workflow triggers: One of the benefits of integrating your development tools is adding workflow triggers that, for example, lets you change the issue status after you create a new branch. For details, see Configuring workflow triggers.