Running a test migration

Still need help?

The Atlassian Community is here for you.

Ask the community

These steps are for migrating projects between different instances of Jira Server and Data Center and require a 3rd party app Project Configurator for Jira. If you're migrating from Server to Cloud, see Jira Server to Cloud migration resources.

Before you migrate your projects to the original target instance, you can establish a staging environment, which will be a copy of your Jira, and test the migration. 

Before you begin

Create a staging environment for testing the migration.

Importing

  1. In your test instance, go to <Jira-home-directory>/import, and create a directory called projectconfigurator.
  2. Copy the exported ZIP archive to the projectconfigurator directory.
  3. Log in to Jira as an administrator, go to the add-on page, and click Import complete project.
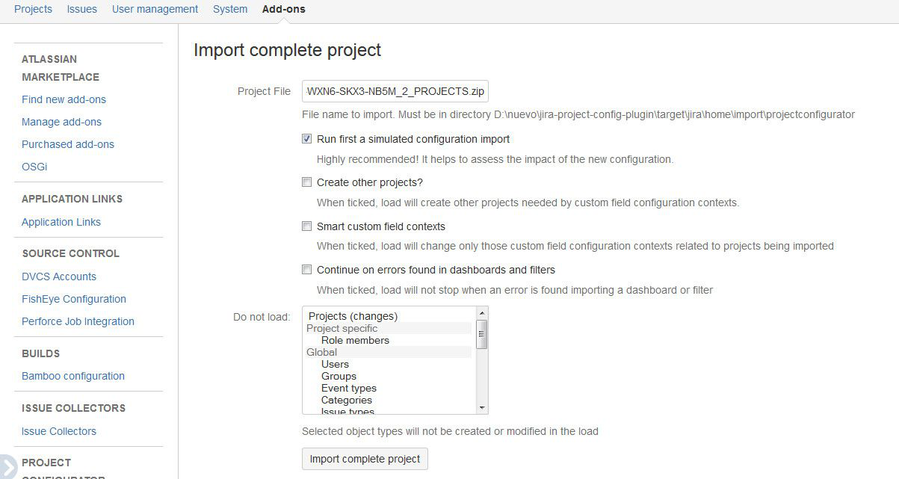
  4. In the Project File field, enter the name of the exported ZIP archive. Make sure to include the .zip extension.
  5. Select Run first a simulated configuration import
  6. Click Import complete project.

The following image shows the relevant options for importing a complete project.

Import options

The default values are sufficient for most environments. However, if you'd like to check other import options, take a look at the following definitions:

  • Run first a simulated configuration import – this option is recommended, and gives you a chance to review changes to the configuration before applying them.
  • Smart custom field contexts – enable this option if some custom fields from the source instance have the same type and name as different custom fields already existing in the target. For more information, see Smart custom field contexts.
  • Continue on errors found in dashboards and filters – often, users create and maintain filters and dashboards without any supervision or help from the administrators. If that's the case for your team, enable this option, so that the migration process skips any inconsistencies or errors in the configuration of filters and dashboards

Summary

After your projects are imported to the test instance, you'll see a summary of the import.

Next, a page will be displayed showing the configuration changes that will be applied to the test instance. The content of this page is similar to the simulated import. The difference is that here you must verify and accept the proposed changes.

Drafts for workflows and workflow schemes

In most cases, Project Configurator automatically creates and publishes the required drafts. This happens in the background, and you won't notice it unless you examine the import trace.

In some cases, however, the add-on will not be able to publish the drafts, either because your input is required to map issues to the new status, or the structure of a new workflow is not compatible with the old one. The add-on will stop, and you'll need to complete extra steps to continue. For more information, see Optional stop for publishing drafts.


Last modified on Oct 14, 2022

Was this helpful?

Yes
No
Provide feedback about this article
Powered by Confluence and Scroll Viewport.