Create and edit masked secret keys for automation rules
When creating automation rules that provide a connection to external services, like Microsoft Teams or Slack, you need to add specific notification actions that use authentication tokens or URLs of these services.
Instead of constantly copying secret tokens or URLs from the apps and pasting them as plain text into every rule where you need them, you can now create and manage secret tokens and URLs in a single place – the Secret keys panel. The values of secret keys always remain masked, so any user won’t be able to see them. If there are any available secret keys, you’ll be able to select them in notification actions for different automation rules according to your role and the scopes of the keys.
When viewing secret keys, editing them, or selecting them in notification actions, you’ll see only the names of the keys that you or other users have set.
The feature is enabled by default.
Which notification actions have been affected?
- Send Hipchat message
- Send Microsoft Teams message
- Send Stride message
- Send Twilio notification
- Send Slack notification
- Send web request
Create a secret key
To create a secret key that you’ll apply across automation rules:
- Navigate to the list of automation rules.
- In the left-side panel, select Automation rules.
- In the meatball menu, select Manage secret keys.
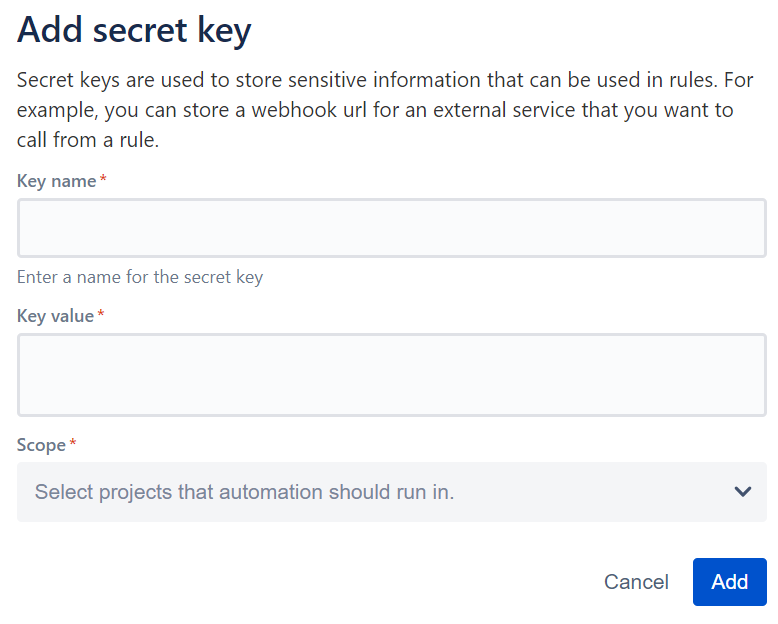
- Select New secret to create a new secret key.
- Fill in the fields:
- Key name – the name of the key. This name will display in the dropdown lists of keys that you’ll be selecting from when creating an automation rule.
- Key value – the value of the key. The value will be masked and won’t display anywhere. Check what the key value for each notification action will contain:
- Send Hipchat message – Integration URL
- Send Microsoft Teams message – Webhook URL
- Send Stride message – Access token
- Send Twilio notification – Auth token
- Send Slack notification – Webhook URL
- Send Web request – the value that is associated with a specific HTTP header, such as the Authorization header. For example, in the case where the webhook uses a bearer token as the authentication method, the key value will contain
"Bearer <TOKEN_VALUE>", where<TOKEN_VALUE>should replaced with the token.
Scope – one or multiple projects where the key will apply.
If you’re a project admin, you can select only the Single project scope for your secret key. If you’re a system admin, you can select the Single project, Multiple Projects, or All projects scope.
- Select Add.
Use a secret key in an automation rule
Check a few examples of how to use secret keys in automation rules with the notification actions.
Send web request action
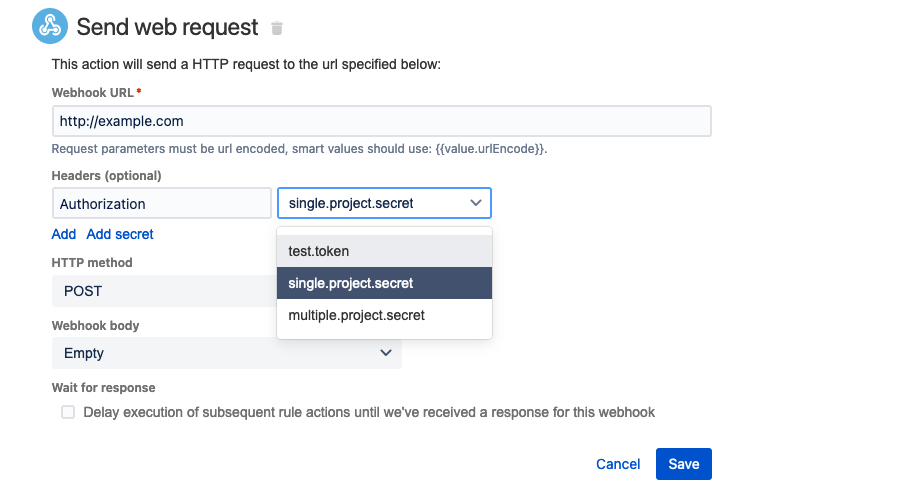
To use a secret key for the Send web request action that requires a bearer token for authentication:
- Create a new secret key. The value should contain
"Bearer <TOKEN_VALUE>"where<TOKEN_VALUE>should be replaced with the token. - Start creating an automation rule with the Send web request action and use the following settings:
- In the Webhook URL field, enter or paste the URL where a request will be sent.
- Select Add secret.
- Use Authorization as the header name.
- For the header value, select the secret key you created.
- Provide the rest of the parameters and select Save.
Send Slack notification action
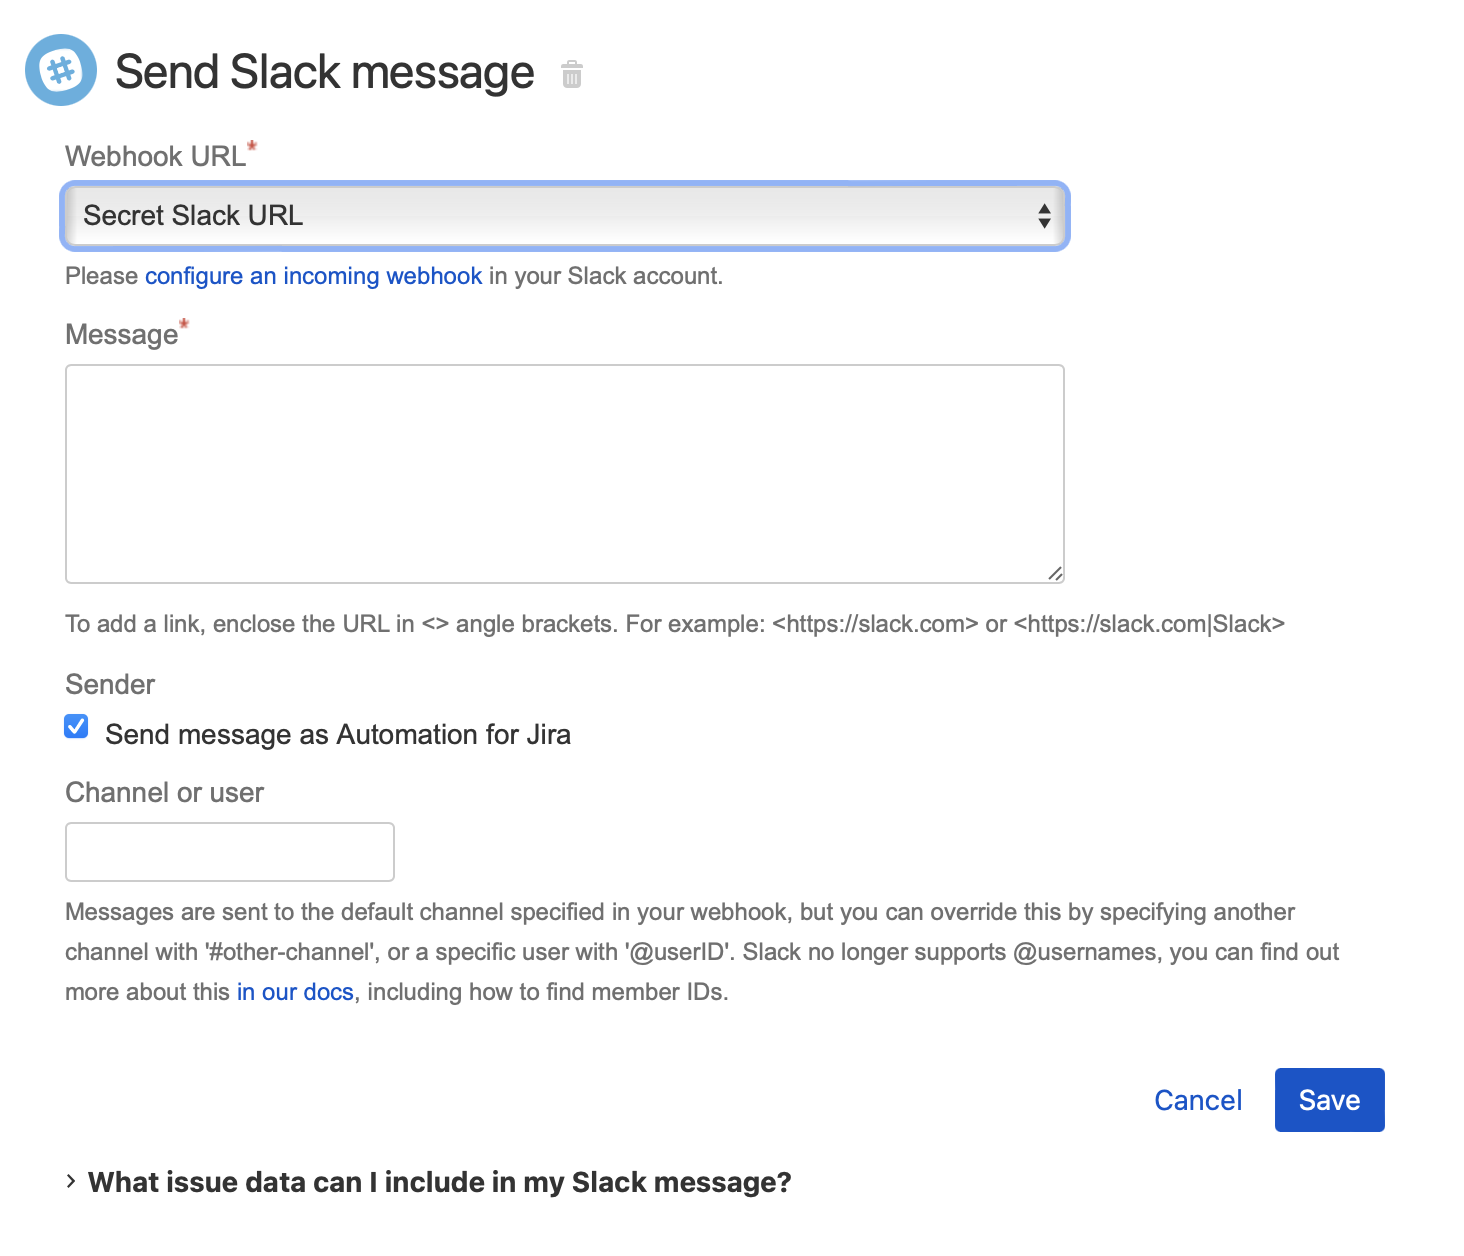
To use a secret key for the Send Slack notification action:
- Create a new secret key. The value should contain the Webhook URL.
- Start creating an automation rule with the Send Slack notification action and use following the settings:
- In the Webhook URL field, select the secret key you created.
- In the Message field, add the text of your notification.
- Provide the rest of the parameters and select Save.
Edit a secret key
To edit a secret key:
- Navigate to the list of automation rules.
- In the meatball menu, select Manage secret keys.
- In the meatball menu for the key where you want to make changes, select Edit.
Make the necessary changes.
Here are a few things you should know when editing a secret key:
- The Value field won’t display the original key value. If you want to change it, just paste the new value.
- You can’t remove a project from the scope of the key if the key is used in automation rules limited to only this project.
- Select Save.
Remove a secret key
To remove a secret key:
- Navigate to the list of automation rules.
- In the meatball menu, select Manage secret keys.
In the meatball menu for the key you want to delete, select Remove.
If the key is already used in automation rules, you can’t delete it.
- If the key isn’t used in any automation rules, you’ll be able to delete it. Confirm your action in the pop-up. Note that removed keys can’t be restored.


