Upgrading to Jira Cloud Service Management 2.0 and moving to the version 2 pricing model
Platform Notice: Cloud - This article applies to Atlassian products on the cloud platform.
Use this page if you plan to migrate to the new pricing model for Jira Service Management 2.0 in Atlassian Cloud. Licensing for Jira Service Management 2.0 allows you to have unlimited customers and instead pay for each Agent you're using.
Upgrading to version 2 pricing model for Jira Service Management Cloud (Atlassian Cloud)
All new purchases of Jira Service Management Cloud made on or after September 10, 2014 are on the new pricing model.
If you purchased Jira Service Management before September 10, 2014, your Jira Service Management has already upgraded to version 2.0 and nothing will change for you. You can continue to use Jira Service Management exactly like you do today with the same pricing. The only difference between your version of Jira Service Management and those on the new pricing model is the People tab, i.e. the way you manage your users. You will be continually upgraded and get new features.
If you want to change to the new pricing, complete the following upgrade process.
What's new for me
After you move to the new pricing, you'll see an updated People tab and get the following options for managing Service Management users.
- Jira administrators can create user accounts for agents directly on the Agents page. Project administrators can add existing agents to their Service Management. Read more...
- You can now customize the access level for the Customer Portal so that it can be as open or restricted as needed. Read more...
- Since customers do not need to be licensed any more, you have the choice to enable public signup for your Service Management and ask your customers to sign up for accounts. Read more...
Before you begin
- You must be a member of the site-admins group.
- Make sure that you've read the New pricing model for Jira Service Management 2.0 FAQ.
Stage 1: Switching to the version 2 pricing model
Make an agent list, i.e. a list of all the users that you plan to assign an agent license seat to. This typically includes both agents and service project administrators.
- Switch to the version 2 pricing model.
- Monthly subscriptions: In your Atlassian Cloud site, go to Manage applications, deactivate your current Jira Service Management subscription, and then go to Discover new applications and reactivate it. All your data will remain in tact.
- Annual subscriptions: Contact one of our advocates to request it. Unfortunately, we will not be able to pro-rata or credit any remaining service that you have already purchased. The New pricing model for Jira Service Management 2.0 FAQ page covers information on how to contact us.
Stage 2: Migrating the permissions and setting up the users for each Service Management project
Why?
With new pricing model, version 2.0 introduces the new Service Management Collaborators role. After you switch to the new pricing model, Jira Service Management checks the permission scheme against the standard permission scheme. If the permissions for the Jira Service Management roles are not the same as those in the standard permission scheme, you will see an error. There are two levels of errors: major and minor. You must fix the major ones because they impact your usage of the People tab. To learn more about the errors, see Resolve permission scheme errors in Jira Service Management Cloud.
Because the Service Management Collaborators role never existed in your previous version, you will see a list of permissions that are missing for the role in the error message and some of them are major errors. Due to these major errors, service project administrators will not be able to use certain functionalities of the People tab, but other users can continue using the Service Management, e.g. customers can still create requests and agents can work on issues assigned to them.
To restore the functionalities available on the People tab (e.g. public signup for customers), you need to migrate the permission scheme for each Service Management project to resolve the permission errors.

How?
Go to
 > User management > Groups, locate the service-desk-agents group, and add the users on the agent list you made in step 1 above to this group.
 For each Service Management project, decide who are the project's agents, administrators, customers and collaborators, and then make a list of the users for each role. You can note users down individually or the group names to which they belong.
- For each Service Management project, go to the Jira project administration page of the project and locate the Roles section. You will see the Jira Service Management roles there.
(Go to > Projects, choose the project. In the left-hand navigation, click Roles.) Add users on the lists you made in step 1 to the roles.
- Add the administrators to the Administrators role.
- Add the agents to the Service Desk Team role.
- Add the customers to the Service Management Customers role.
- Add the collaborators to the Service Management Collaborators role.
In the header, go to Service Management, and choose your Service Management project.
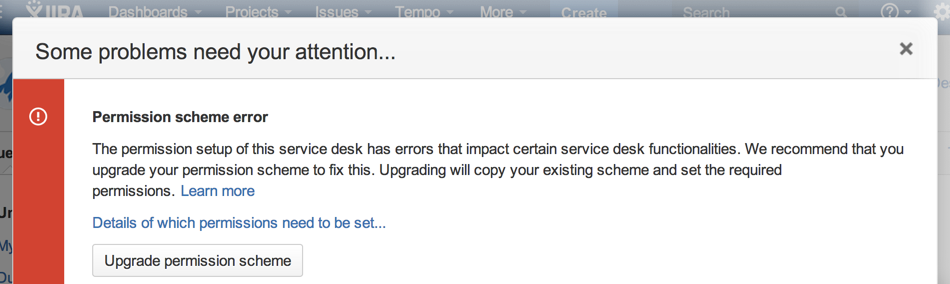
You will see an error message displayed at the top of the screen. To learn the details of permission setup differences between your current permission scheme and the standard one, you can expand the message.- At the bottom of the message, click the Upgrade permission scheme button. For information about the errors in the message and what the upgrade action does, see Resolve permission scheme errors in Jira Service Management Cloud.
- Go to the People tab, check the Agents, Customers and Collaborators sections to make sure that the users added to the roles in step 3 appear in the right section.
Note: Administrators appear on the Agents tab and have the ADMIN icon next to their usernames. - Repeat step 1 to 6 for the other service projects.
Congratulations! You've finished the upgrade process. Check out the following section for functionalities that might be useful for your Service Management.
Next
Decide whether you want your Customer Portal to be open or restricted. For details, see Set up customer permissions.
Public signup for your customers: By allowing public signup for your Service Management, your customers can easily create user accounts for themselves. If your Customer Portal is an open one, you can enable public signup. For more information, see Configuring public signup.