Clover-for-IDEA Installation Guide
Installing the plug-in from IDEA (recommended)
The easiest way to install Clover-for-IDEA is to select it from IDEA's plug-in menu.
- Launch IntelliJ IDEA.
- In IDEA 14 or newer go to the 'File > Settings > Plugins > Browse repositories' (Linux, Windows) or 'IDEA > Preferences > Plugins > Brows repositories' (OS X). In IDEA 13 or older go to the 'File > Settings > IDE Settings > Plugins > Browse repositories'.
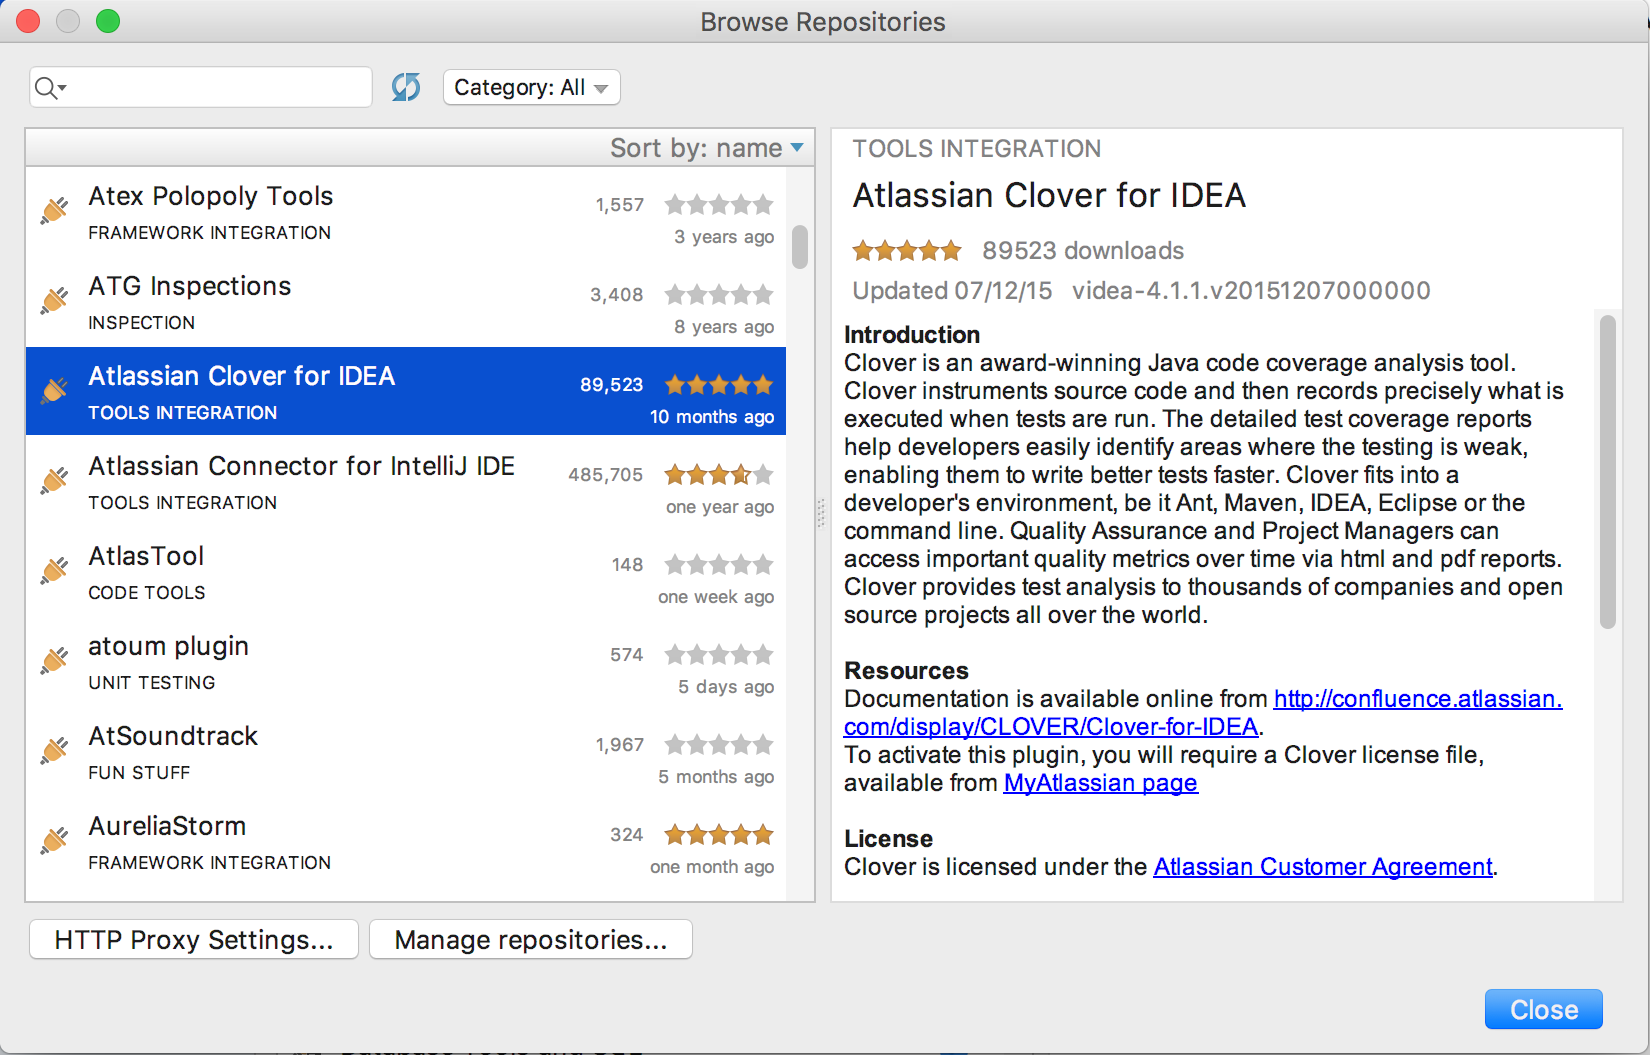
- Select 'Atlassian Clover for IDEA' and click 'Install plugin'.
- Close and re-start IDEA.
You can now begin using Clover for IDEA.
Screen shot: installing Clover from the IDEA plugin menu
Installing the plug-in manually
You can download the Clover-for-IDEA plug-in from Atlassian Downloads and install it manually as follows:
- Shut down any running instances of IDEA.
- Remove any previous versions of the the Clover-for-IDEA plug-in .jar file from the following plug-in installation locations:
- IDEA_HOME/plugins (all platforms)
- IDEA_HOME/config/plugins (all platforms excepting Mac OS X)
- USER_HOME/Library/Application/Support/IntelliJIDEA70 (Mac OS X only)
- Copy the downloaded .jar file into the relevant location for your operating system:
- IDEA_HOME/plugins (all platforms)
- IDEA_HOME/config/plugins (all platforms excepting Mac OS X)
- USER_HOME/Library/Application/Support/IntelliJIDEA70 (Mac OS X only - create the directory if it doesn't exist)
- Re-start IDEA.
Entering a license key
Clover-for-IDEA comes with a bundled 30-day evaluation key. In case you wish to extend your evaluation period or you have purchased a license, you need to enter a new license key:
- Download license (or generate new one) from http://my.atlassian.com.
- Open the Clover license dialog in IDEA.
- Open the File > Settings (Linux, Windows) or IDEA > Preferences (OS X) dialog.
- Open the Clover (global settings) > License page - you can find it in:
- the Build, Execution, Deployment group (IDEA 14 or newer and Clover 4.1.2)
- the Other settings group (IDEA 14 or newer and Clover 4.1.1 or older)
- the IDE Settings section (IDEA 13 or older)
- Click the 'Load' button and select the 'clover.license' file you just downloaded.
Screen shot: the Clover license dialog in IDEA.

Showing Clover tool bar
IDEA 13 and later hides the tool bar by default. Click "View -> Toolbar" from main menu to show Clover's buttons.

Configuring compiler settings
IntelliJ IDEA 12
JetBrains IDEA 12.0 has a new compiler feature named "external build", which is enabled by default in project settings (File > Settings > Project Settings > Compiler > "Use external build" toggle). The IDEA 12 is supported since Clover version 3.1.8, however the support for "external build" feature is available since Clover version 3.1.12 and IDEA 12.1.1. For older versions, i.e. the combination of Clover 3.1.8-3.1.12 and IDEA 12.0.0-12.1.0 please keep the "external build" feature disabled.
IntelliJ IDEA 13
In the IDEA 13.0 the "external build" feature has become default setting and thus there's no 'Use external build' toggle available.
Enabling the "external build" feature
Open the File > Settings > Project Settings > Compiler page.

Use the following state for toggles:
- Use external build - it can be either enabled (the new IDEA12 feature is used) or disabled (the "classic" IDEA build is used)
- Make project automatically - it's strongly recommended to disable this option; enabling it causes frequent compilation and faster growth of Clover database, which might affect performance
- Compile independent modules in parallel - it must be disabled; Clover does not support parallel build; follow the CLOV-1293 for future updates
Known Issues
- If you are using the Maven build tool, you should avoid using the same IntelliJ output directory as Maven does. As Maven uses the
target/classesandtarget/test-classesdirectories, avoid specifying these ones. Theclover.dblocation for IntelliJ should also be distinct from that used by Maven.
Uninstalling the Plugin
The easiest way to uninstall it is via 'File > Settings > Plugins' (Linux, Windows) or 'IDEA > Preferences > Plugins' (OS X). Just select the Clover IDEA Plugin from the list and click 'Uninstall Plugin'. The removal will take place after you restart IDEA.
To uninstall Clover-for-IDEA manually:
- Shut down any running instances of IDEA.
- Delete the 'clover-idea.jar' file from its installation directory, either IDEA_HOME/config/plugins (all platforms), IDEA_HOME/plugins (all platforms except Mac OS X) or USER_HOME/Library/Application\ Support/IntelliJIDEA70 (Mac OS X only)
- Restart IDEA.