Editing the Site Welcome Message
Give your site's landing page some personality by editing the site welcome message.
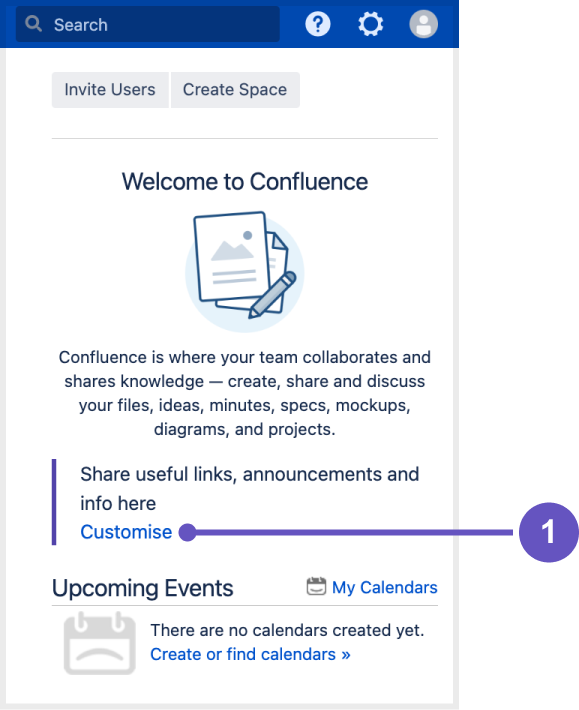
The site welcome message appears on the right hand side of the dashboard and is perfect for adding announcements, useful links, or a fun photo from your last office party or team outing.
You'll need Confluence administrator permissions to edit the site welcome message.
To edit the site welcome message:
Confluence administrators can either click the Edit link below the site welcome message on the dashboard, or:
On this page:
Related pages:
Go to Administration menu , then General Configuration > Global Templates and Blueprints.
- Scroll down to the System templates and choose Edit next to Default Welcome Message.
- Add your content and choose Save.
You can go back to the original welcome message at any time - choose Reset to Default next to the Default welcome message template.
Screenshot: Default site welcome message
- Admins can add useful information to welcome people to the site
Hints for using the template editor
The site welcome message is a template, not a page, so you'll be using the template editor to make your changes.
You can add text, links and macros, as you would in any confluence page, but the process for adding files, including images is a little different.
You can't use template variables in the site welcome message.
Allowing other people to edit the site welcome message
You can allow people who are not Confluence administrators to edit the site welcome message by using the include Include Page macro to include content from elsewhere in your site, rather than adding content directly to the template.
To include content from a page in the site welcome message:
- Create a new page in a space that is visible to all users. It's important that all users can see content in that space - if a person does not have permissions to view the space where you've created the page, they won't be able to see the page content on the dashboard.
- Add some text, images or macros, then save the page.
- Restrict who can edit the page (this is optional, but useful if you only want to allow some people to change the content).
- Edit the site welcome message template (as described above) and use the Include page macro to include the contents of your newly created page.
- Save the template.
People with permission to edit the page will now be able to make changes at any time, and their changes will be visible on the dashboard as soon as the page is saved.
