How to integrate Confluence Data Center with Azure for SAML 2.0 SSO
Platform Notice: Data Center - This article applies to Atlassian products on the Data Center platform.
Note that this knowledge base article was created for the Data Center version of the product. Data Center knowledge base articles for non-Data Center-specific features may also work for Server versions of the product, however they have not been tested. Support for Server* products ended on February 15th 2024. If you are running a Server product, you can visit the Atlassian Server end of support announcement to review your migration options.
*Except Fisheye and Crucible
Purpose
Confluence Data Center is bundled with the SSO for Atlassian Server and Data Center App – we will refer to it simply as Atlassian SSO App in the remainder of this document.
With this App, Confluence administrators can configure SSO using SAML 2.0 or OIDC with your preferred Identity Provider (IdP). Check SAML single sign-on for Atlassian Data Center applications for further details on supported IdPs and more information on the SSO App.
This document highlights the steps to integrate Confluence Data Center with Microsoft Azure for SSO using SAML 2.0.
This document is not intended to be a full reference guide, since you may need to change Azure or Confluence configuration to your organization's needs. Hence, this describes a sample configuration to have it working.
Atlassian Support can't provide assistance with configuring third-party tools like Okta. If you have questions, check the Azure documentation, Microsoft Azure Support, ask the Atlassian Community, or get help from a Solution Partner.
Summary
This is a guide to easily integrate Confluence (Service provider) with Azure (Identity provider IdP). Each requires their own specific configurations and we'll outline these below. If there are specific settings that need to in place and which are out of scope of this page, please check those with your IdP admins.
In order to use SSO for Atlassian Server and Data Center to authenticate against Microsoft's Azure AD, we need to create an Enterprise Application in the Azure management console. In this article, we'll use the pre-set Confluence SAML SSO by Microsoft from the Azure library.
For more technical details and documentation, please refer to:
You may want to enable Confluence's default login page, as a security measure, so you won't lose access to Confluence, in the event of any issue during the following steps.
For reference: Enable default login page to bypass SAML in Confluence Data Center
Environment
- Confluence 6.1+
- Microsoft Entra ID
Integration Steps
- Access your Azure Active Directory and select Enterprise applications

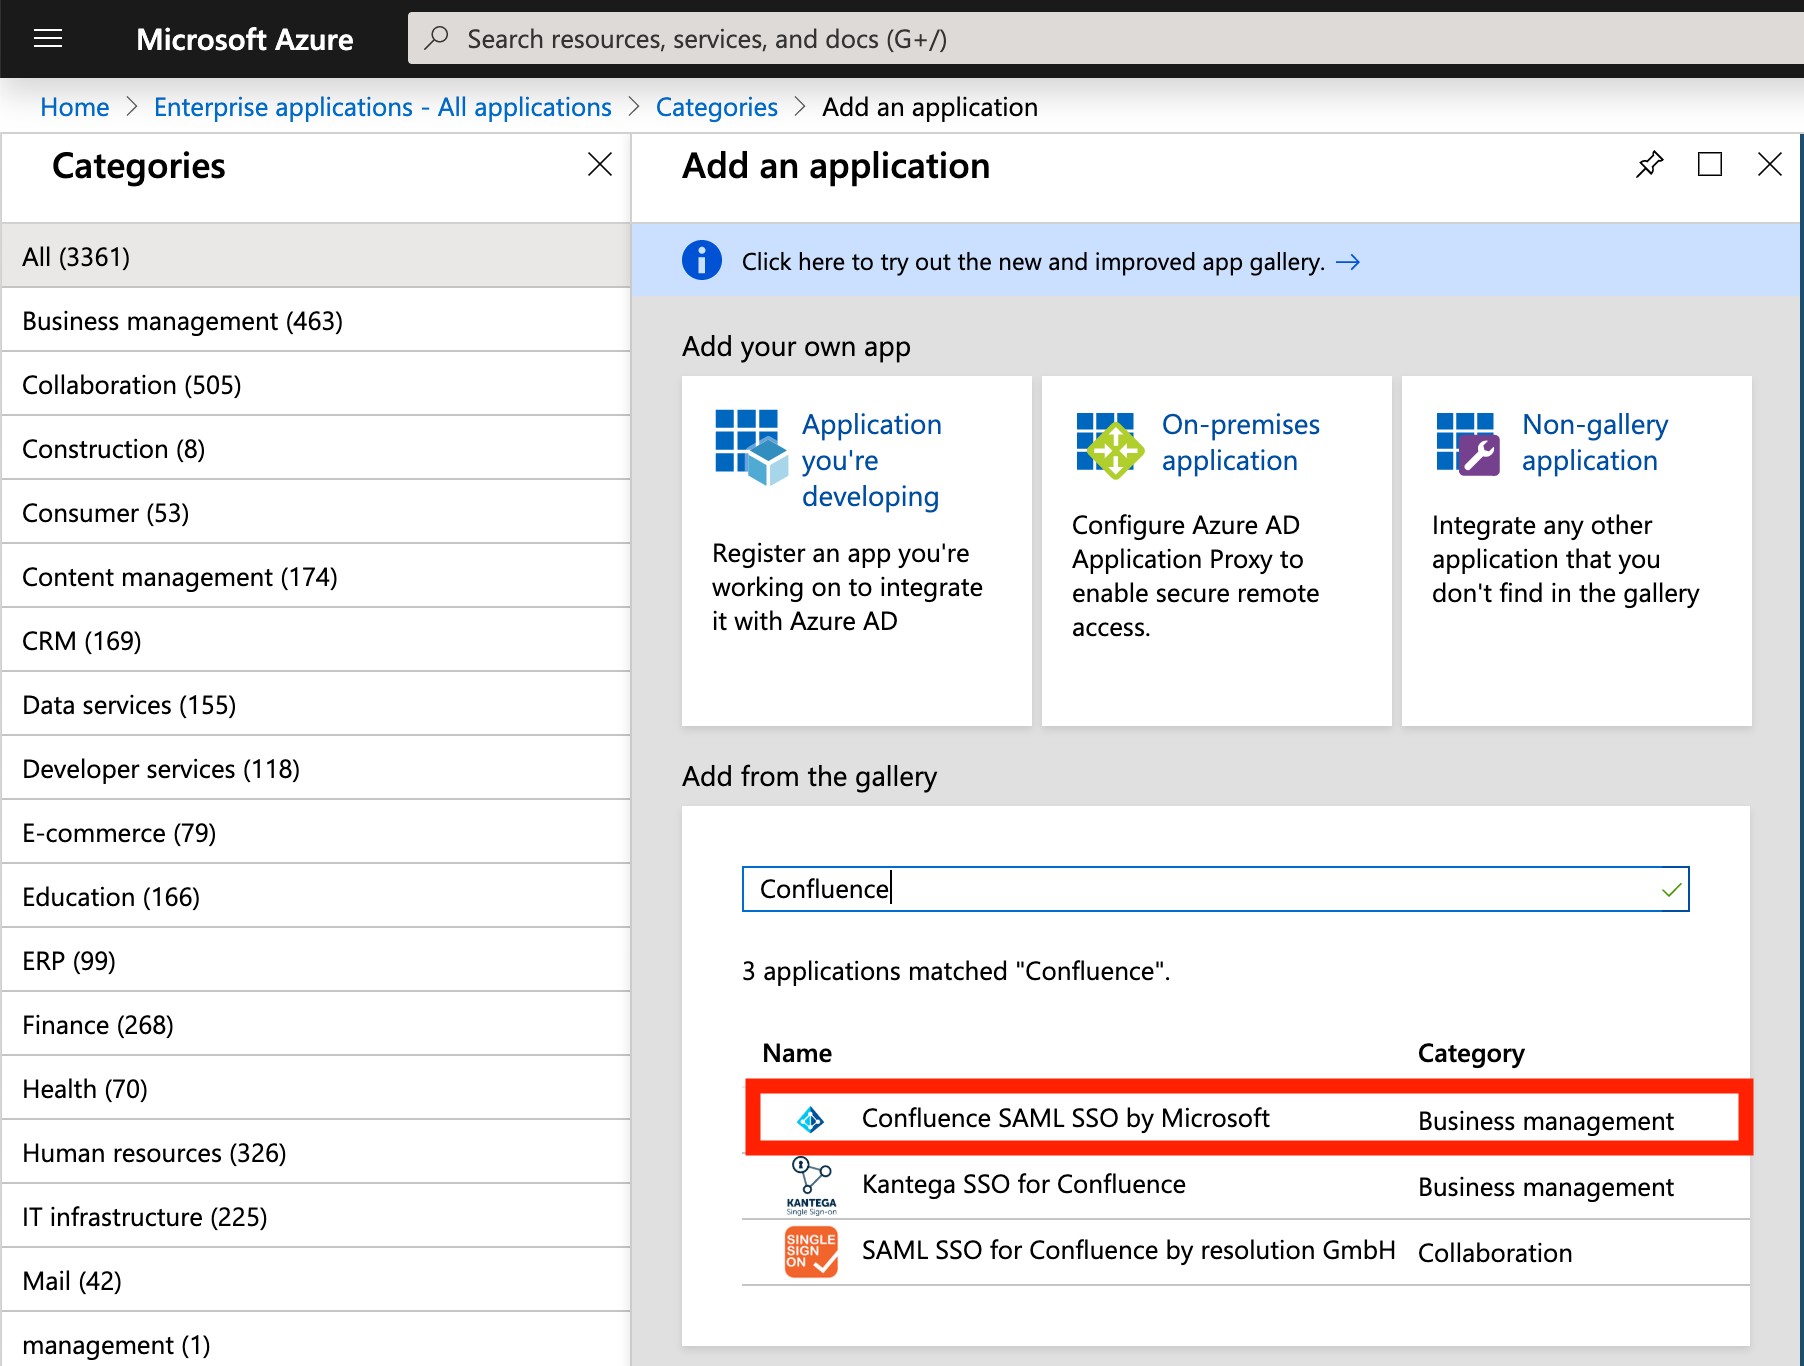
- Select New application and find "Confluence SAML SSO by Microsoft" from the gallery
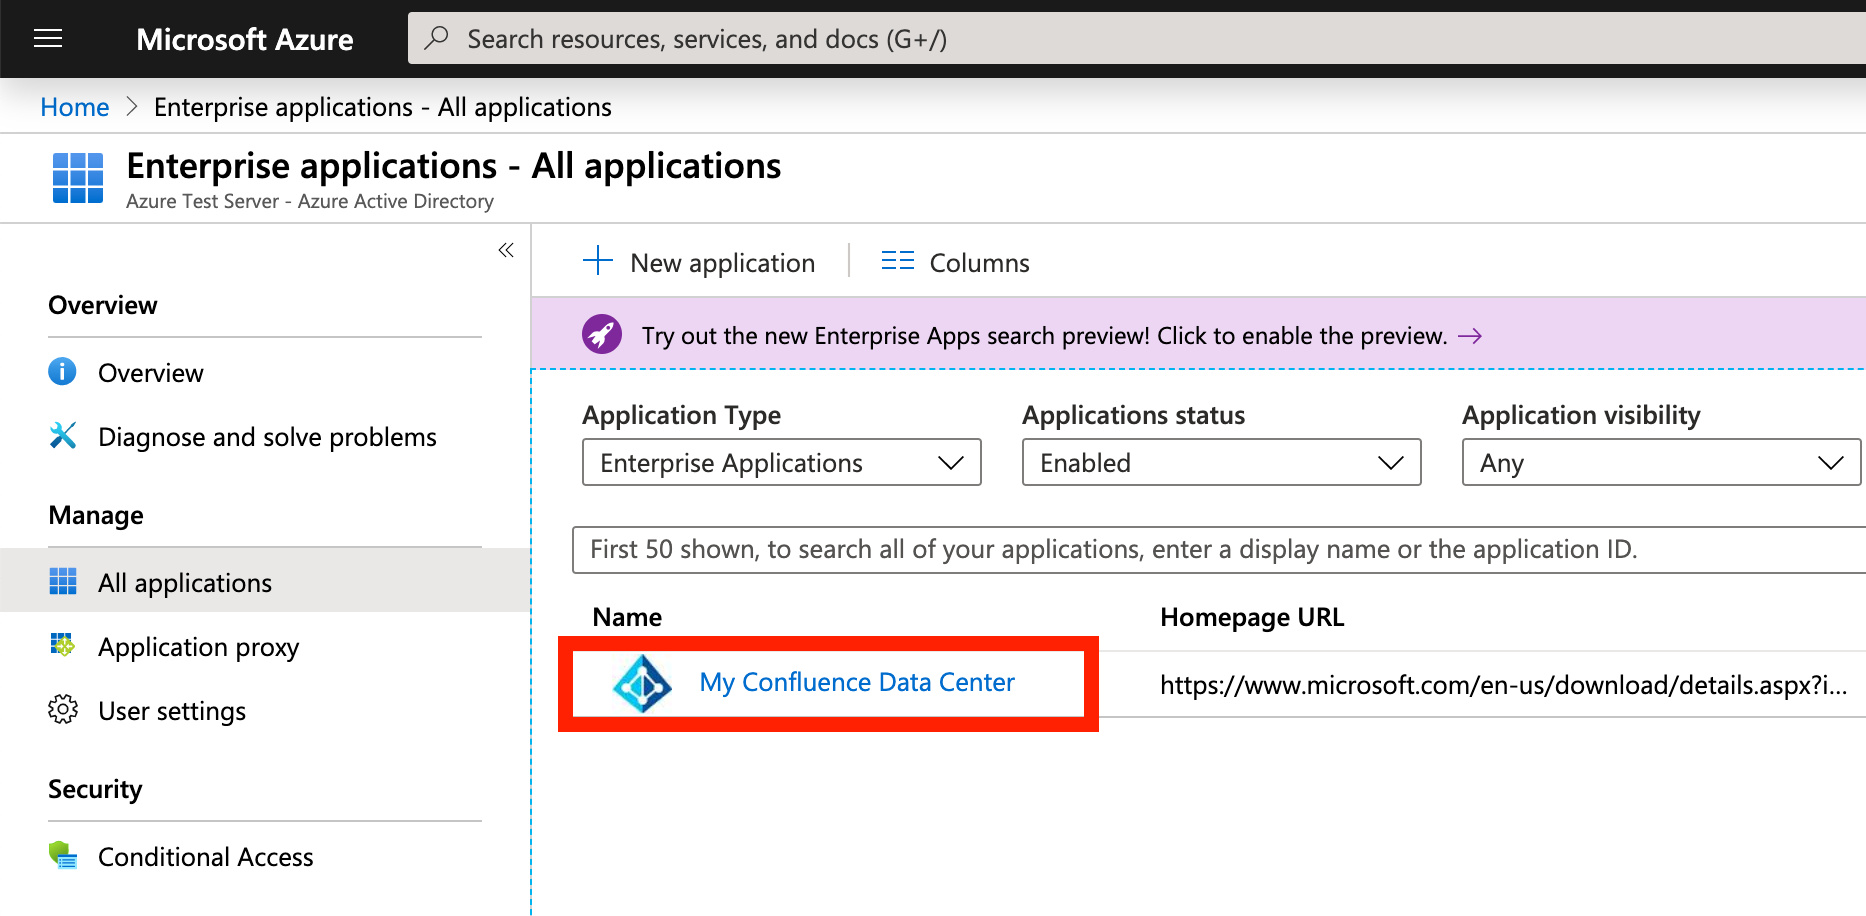
- Create a name to your application and click Add. You should see your new application like this:
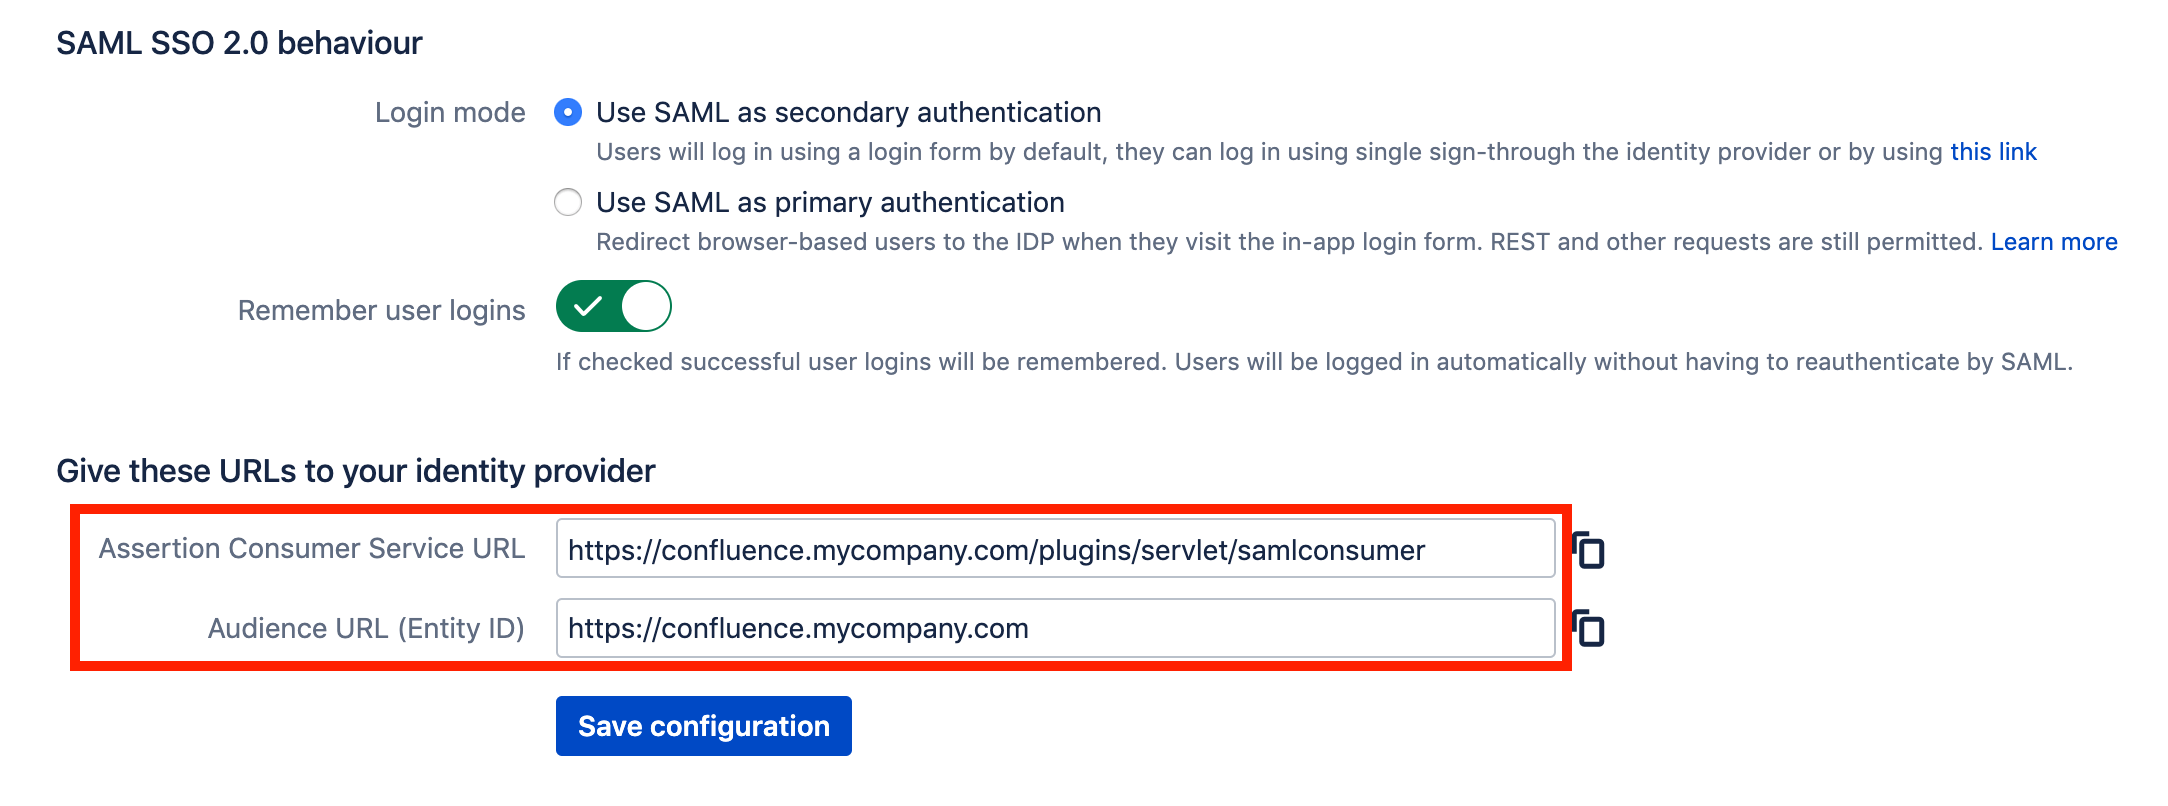
- Now we'll get some information from Confluence. Login your Confluence Data Center using an Admin account and head to General Configuration > Authentication Methods (also known as SSO 2.0 on Confluence v7.15 and earlier versions) under USERS & SECURITY.
- Scroll down until you see the following lines. Copy and save them to use in the Azure portal:
- Back in Azure, open your Enterprise Application, select 2. Set up single sign on, then choose SAML.
Click to edit the Basic SAML Configuration fields and use the information copied from Confluence.
Azure
Confluence
Identifier (Entity ID)
Audience URL (Entity ID)
Reply URL (Assertion Consumer Service URL) Assertion Consumer Service URL
Sign on URL Assertion Consumer Service URL 
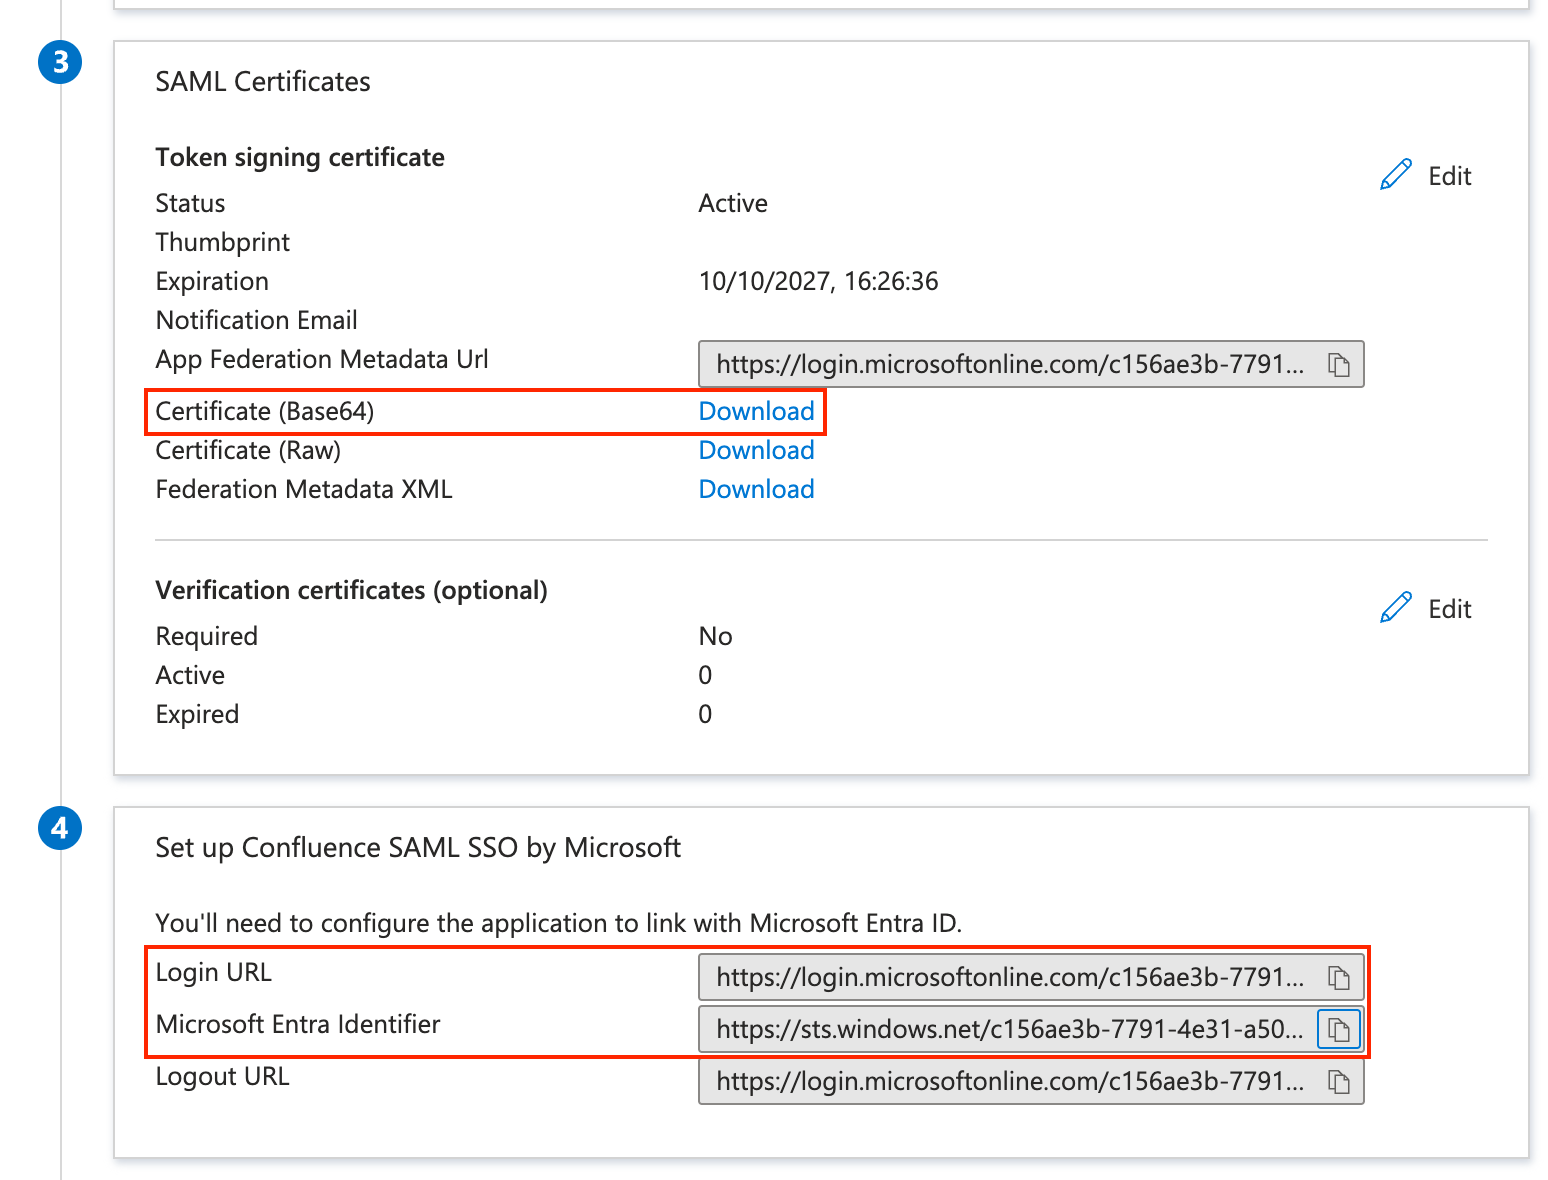
- Still in the Azure SAML settings, download the Certificate (Base64 encoding) and copy the Login URL and Microsoft Entra Identifier:
Go back to the Confluence Authentication Methods screen and use the information copied from Azure. Click Save configuration when finished.
Azure Confluence Login URL Identity provider single sign-on URL Microsoft Entra Identifier Single sign-on issuer Certificate (Base64) X.509 Certificate 
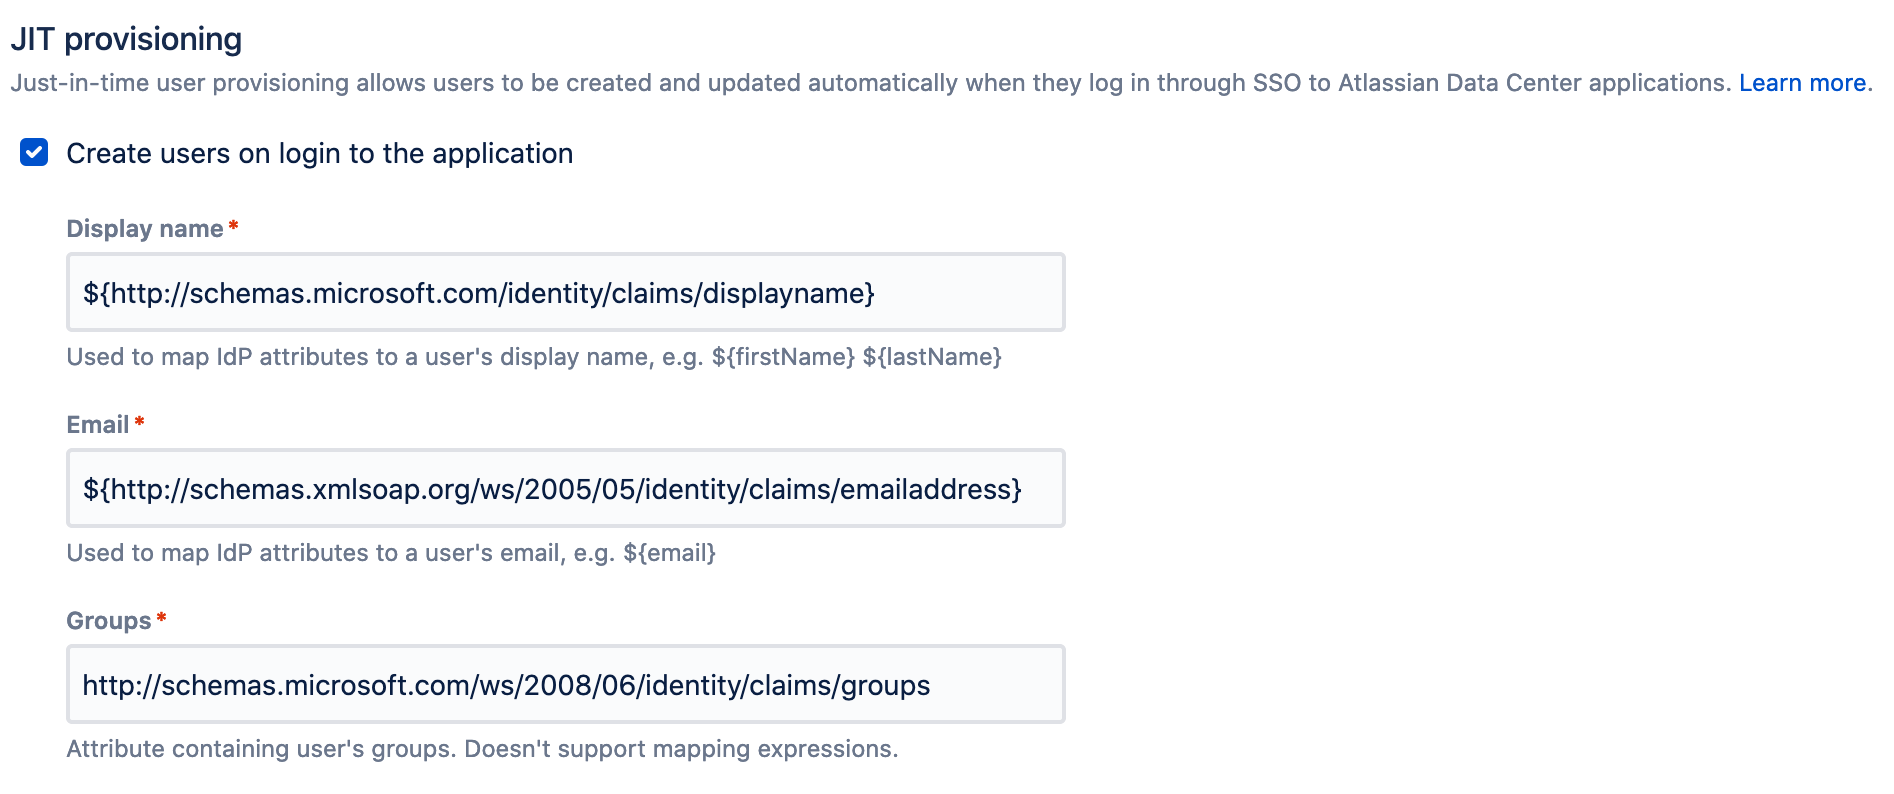
- Confluence 7.7+ only: In Confluence 7.7, JIT User Provisioning was introduced. As part of this change, you now have to define a username mapping. It requires an expression following the pattern ${attributeName}, and that claim/attribute will be used to match the username during the SSO login.

- Confluence 7.7+ only: Also introduced by the JIT Provisioning, you can chose to create a user in Confluence when the username mapping doesn't match an existing user. You'll have to check the option Create users on login to the application, and then define claim/attribute mappings from Azure AD that will contain the user's Display Name, Email and Groups (the Groups attribute doesn't support mapping expressions).
To test the authentication, you can use a link like this (it will redirect you to the Azure login screen and then back to Confluence if the authentication is successful):
https://<base-url>/plugins/servlet/external-loginThis link only works when running SSO for Atlassian Data Center app version 4.0.X or 4.1.X. This link is not available in version 4.2.X or later.
