Creating a Connection to your LDAP Directory
You may find an LDAP browser useful to gather the information you need for your Crowd configuration. This page shows you how to create a connection to your LDAP directory when using Apache Directory Studio. You can then use the connection information gathered, to set up your LDAP directory in Crowd.
Step 1: Create a New Connection in Apache Directory Studio
- Start up Apache Directory Studio.
- Click the LDAP icon to create a new connection.
Screenshot: Creating a new connection in Apache Directory Studio
Step 2: Enter your Connection Information
- Enter a name for your connection.
Enter the 'Network Parameter' information as follows:
Hostname
The domain name for your LDAP server. If the LDAP server is not on the same network as Crowd, you may need to use the FQDN or IP address of the LDAP server.
Port
For normal LDAP connectivity, use 389. For SSL connectivity, use 636.
- Click the 'Check Network Parameter' button to ensure your connection is successful.
- Click 'Next'.
Screenshot: Entering the connection information in Apache Directory Studio
Step 3: Enter your Authentication Information
Choose the 'Authentication Method' from the dropdown list.
Some LDAP servers allow anonymous access. If your LDAP server allows this, you can change the 'Authentication Method' dropdown from 'Simple Authentication' to 'Anonymous Authentication' and click 'Finish' to go straight to Step 4.
Enter the 'Authentication Parameter' information as follows:
Bind DN or user
Enter the full DN of the account that will be used to connect to the LDAP directory. This account should have the ability to browse the entire LDAP directory tree.
Bind password
Enter the password for the Bind DN account.
- Click the 'Check Authentication' button to ensure this account can authenticate.
- If this authentication is successful, click 'Finish'.
Screenshot: Entering the authentication information in Apache Directory Studio
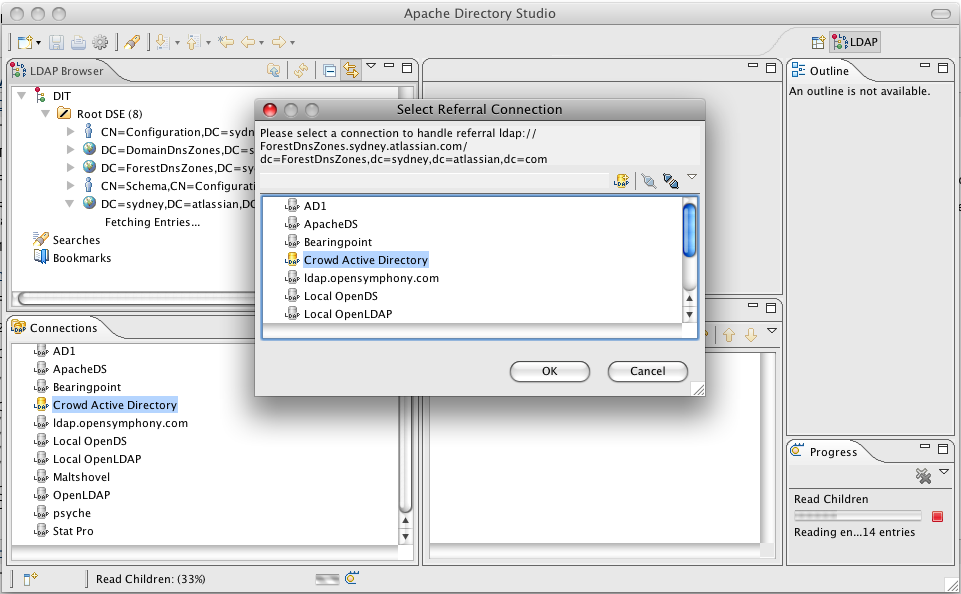
- If you are prompted for a 'Referral Connection', select the same directory.
Screenshot: Selecting a referral connection in Apache Directory Studio
Step 4: See the Base DNs
If the configuration is successful, you should now have a list of the base DNs available under this LDAP directory's root DSE.
Screenshot: Viewing the base DNs in Apache Directory Studio
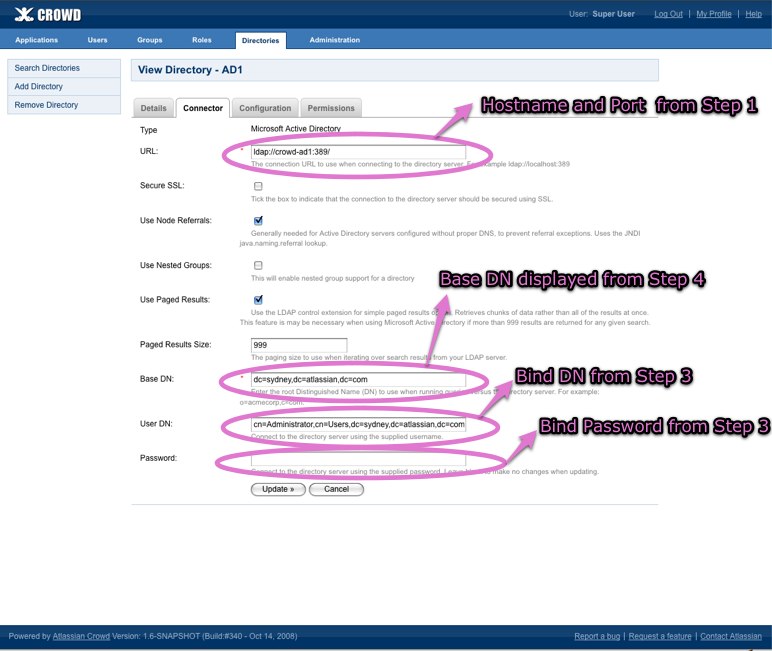
Step 5: Use the Same Connection Information in Crowd
Use the same connection information to set up your LDAP directory in Crowd.
Screenshot: LDAP directory configuration in Crowd
RELATED TOPICS
Using Apache Directory Studio for LDAP Configuration
Configuring an LDAP Directory Connector


