Associating priorities with projects
Once you're happy with the priorities available in your Jira instance, it's time to associate them with some projects. You can choose a different set of priorities for each project by using priority schemes.
What's a priority scheme?
A priority scheme works like a mapping that allows you to associate a subset of priorities with particular projects. You can use it to achieve the following goals:
- restrict the set of available priorities for a project,
- control the order in which priorities are displayed,
- select a default priority that is assigned to all newly created issues in a project.
A single priority scheme can be reused across multiple projects so that a group of similar projects (i.e. projects which might be used for similar purposes) can share the same priorities. It's also easier to add or remove priorities for these projects because all you need to modify is a single priority scheme.
Default priority scheme
Jira comes with a default priority scheme that contains all priorities, and is associated with all projects until you change it. You can't edit this scheme, but you can associate it as you wish.
Managing priority schemes
To manage priority schemes and complete the actions listed below:
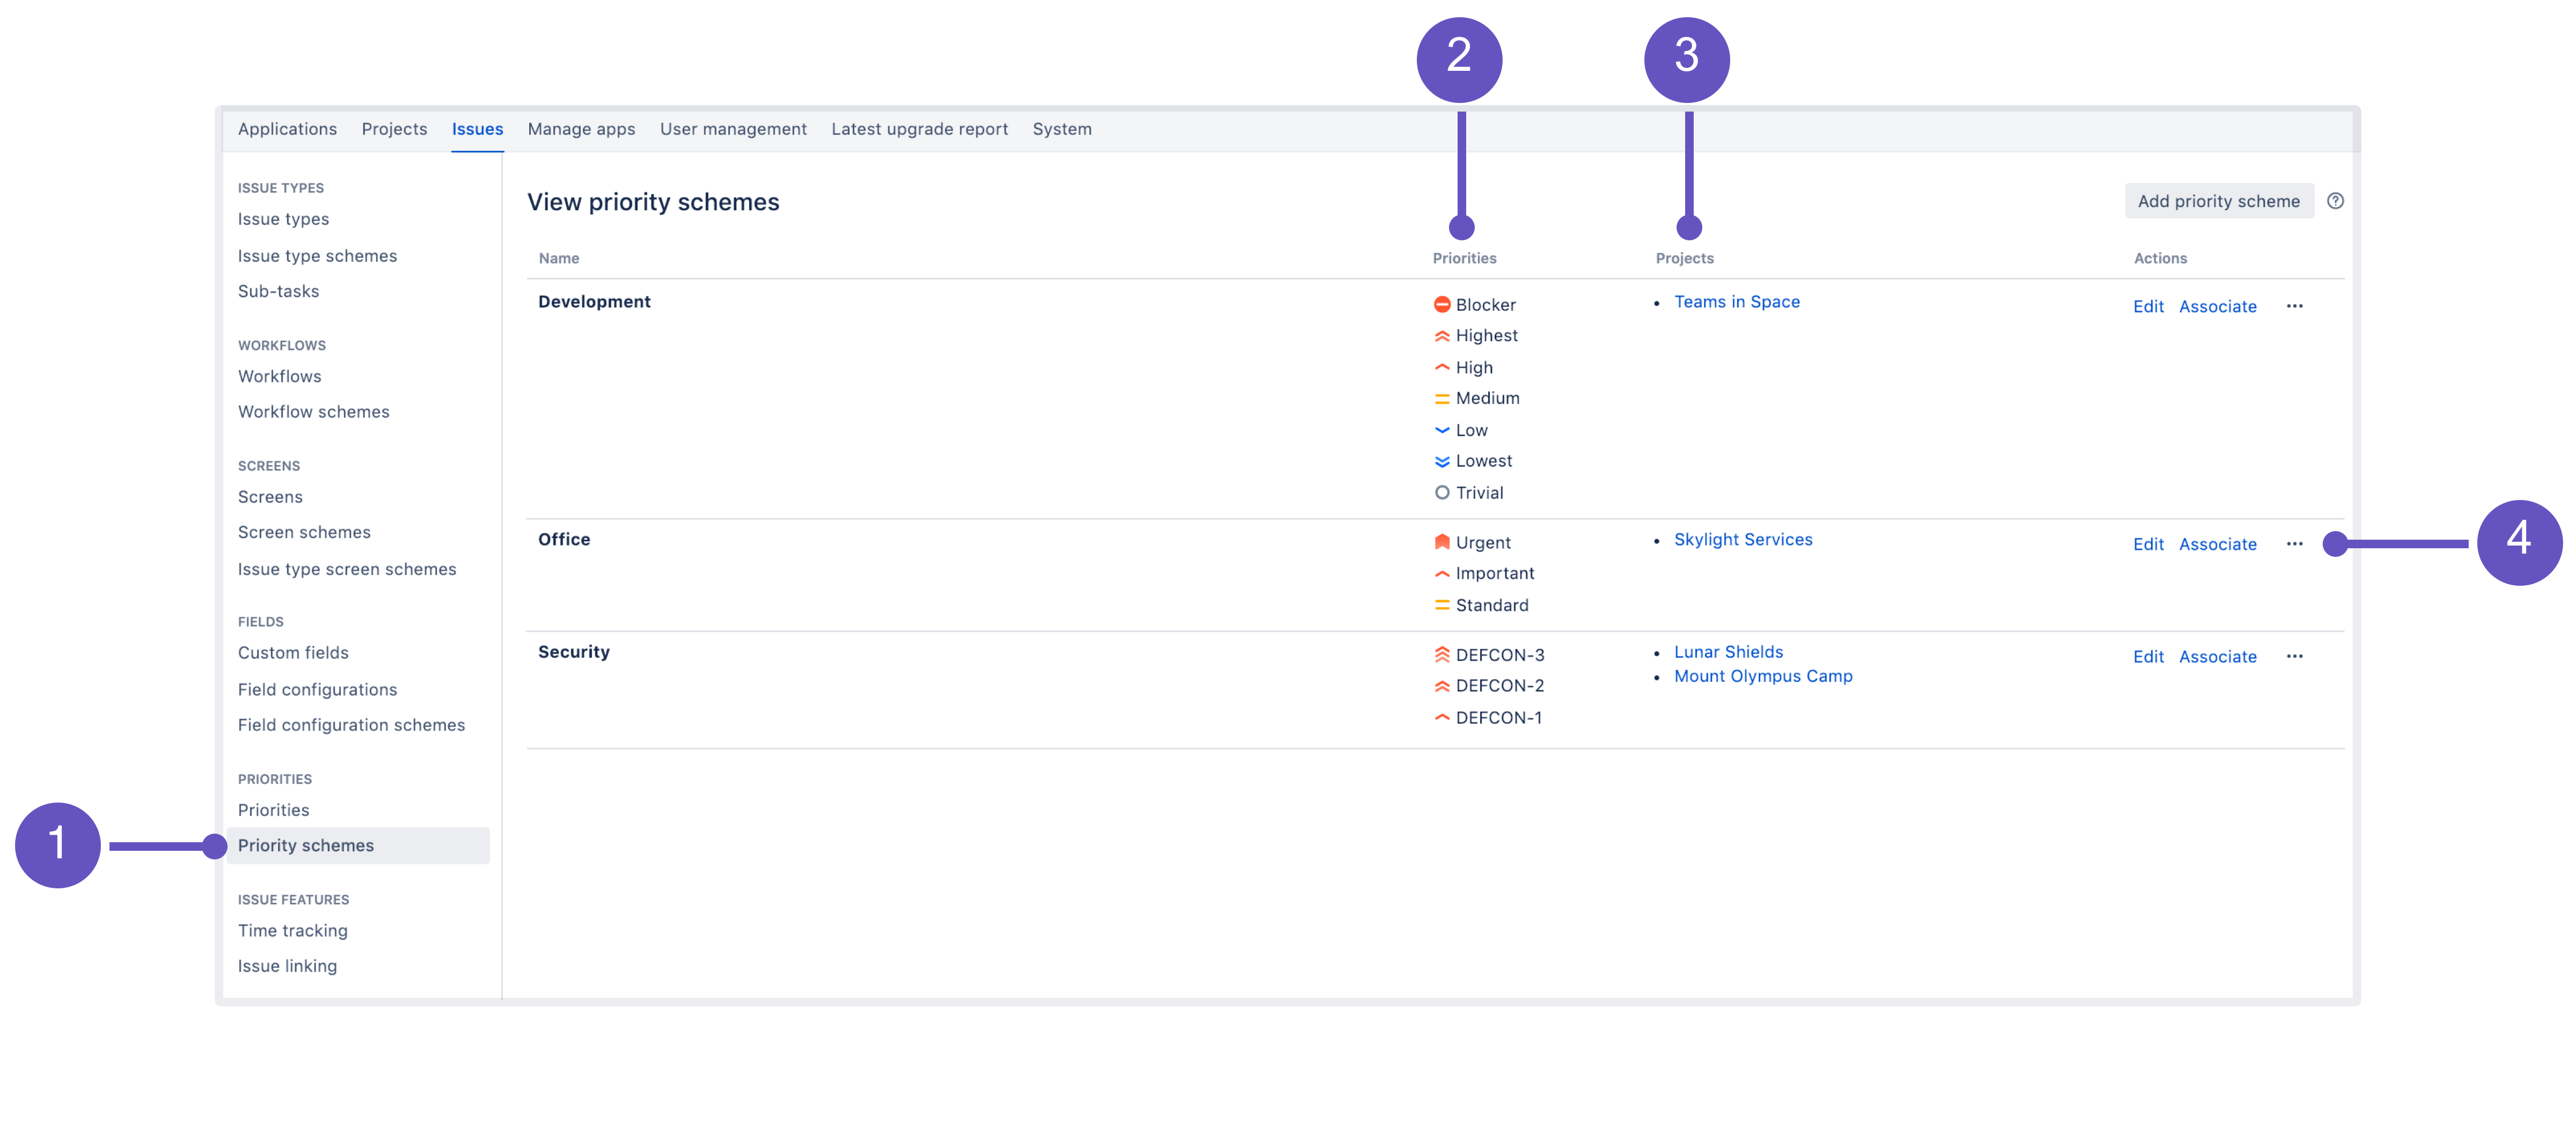
- In the upper-right corner of the screen, select Administration > Issues.
- Under Priorities (the left-side panel), select Priority schemes. You need to have the Jira admin global permissions to get there.
- This is where you can find all priority schemes.
- Priorities used by a scheme.
- A list of projects that use this set of priorities.
- Actions that you can perform on a scheme: Edit, Associate, and Delete.
Creating priority schemes
Managing priority schemes is difficult if you don't have any. Create a priority scheme, and decide which priorities apply to it.
To create a priority scheme:
- From the Priority schemes page, select Add priority scheme.
- Enter the name and description for your scheme. Make it meaningful, so that other admins know they can reuse this scheme instead of creating a new one.
- Add priorities by dragging and dropping them from Available priorities to Selected priorities. The order on the list matters—that's how your users will see priorities when assigning them to issues.
- Select a default priority. It will be preselected whenever an issue is created in a project that uses this scheme.
Associating priority schemes
Next, associate your priority scheme with a project.
- From the Priority schemes page, select Associate next to the priority scheme you want to associate.
- Select the projects that you want this scheme to apply to. If a project is already using a different scheme, it will switch to this one.
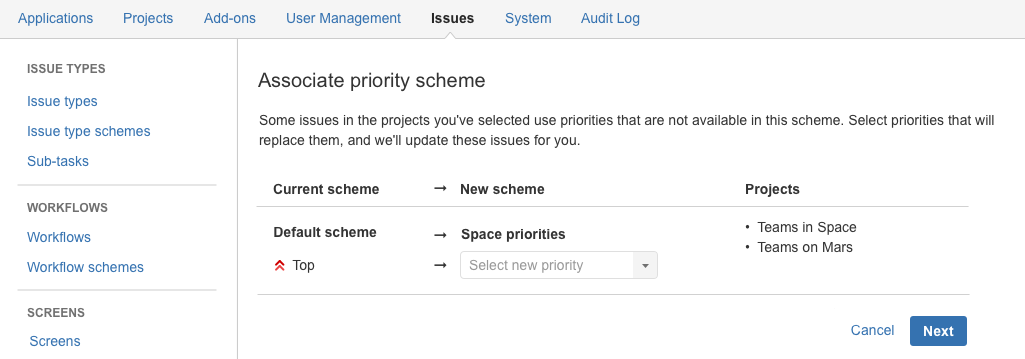
- If some issues in the projects you've selected use priorities that are not available in this scheme, you'll be asked to choose priorities that will replace them. See Replacing obsolete priorities.
Other actions
Apart from creating and associating priority schemes, you can also edit and delete them.
| Action | Description | ||||
|---|---|---|---|---|---|
| Editing | To edit a priority scheme, select Edit next to the scheme you want to edit, and then change the name, default priority, or priorities selected for this scheme. If you removed priorities that are currently in use by some issues, you'll be asked to choose priorities that will replace them. See Replacing obsolete priorities. | ||||
| Deleting | To delete a priority scheme, select Delete next to the scheme you want to delete. There are certain restrictions:
| ||||
| Ordering with JQL | It's important to know how JQL works with priorities. If you use JQL to order issues by their priorities (e.g. descending), they will be ordered according to the importance of the priorities on the global list of priorities. The global list is what's displayed on the Priorities page. The order from priority schemes is not relevant for JQL. To put it in an example, let's say the priorities in your Jira instance are arranged in the following way:
After appending a JQL query with e.g. |
Replacing obsolete priorities
When you edit an existing scheme or associate a scheme with projects that were already using a different one, you might be asked to replace obsolete priorities. That's because some issues are using priorities that are not available in the new or edited scheme. An issue can't live without a priority, so you need to replace the old with the new. It's simply about choosing e.g. Highest (new scheme) to replace Top (current scheme). Once you select priorities, we'll update all these issues for you.


