Navigation Map Macro
Screenshot: page with a Navigation Map macro displaying pages with the label 'printer-how-to'.

Want more flexibility? Check out the Content by Label Macro for a more modern way to display a list of pages with specific labels and more.
Add this macro to your page
To add the Navigation Map macro to a page:
- From the editor toolbar, choose Insert
 > Other Macros.
 - Choose Navigation Map from the Navigation category.
- Enter a label.
- Choose Insert.
You can then publish your page to see the macro in action.
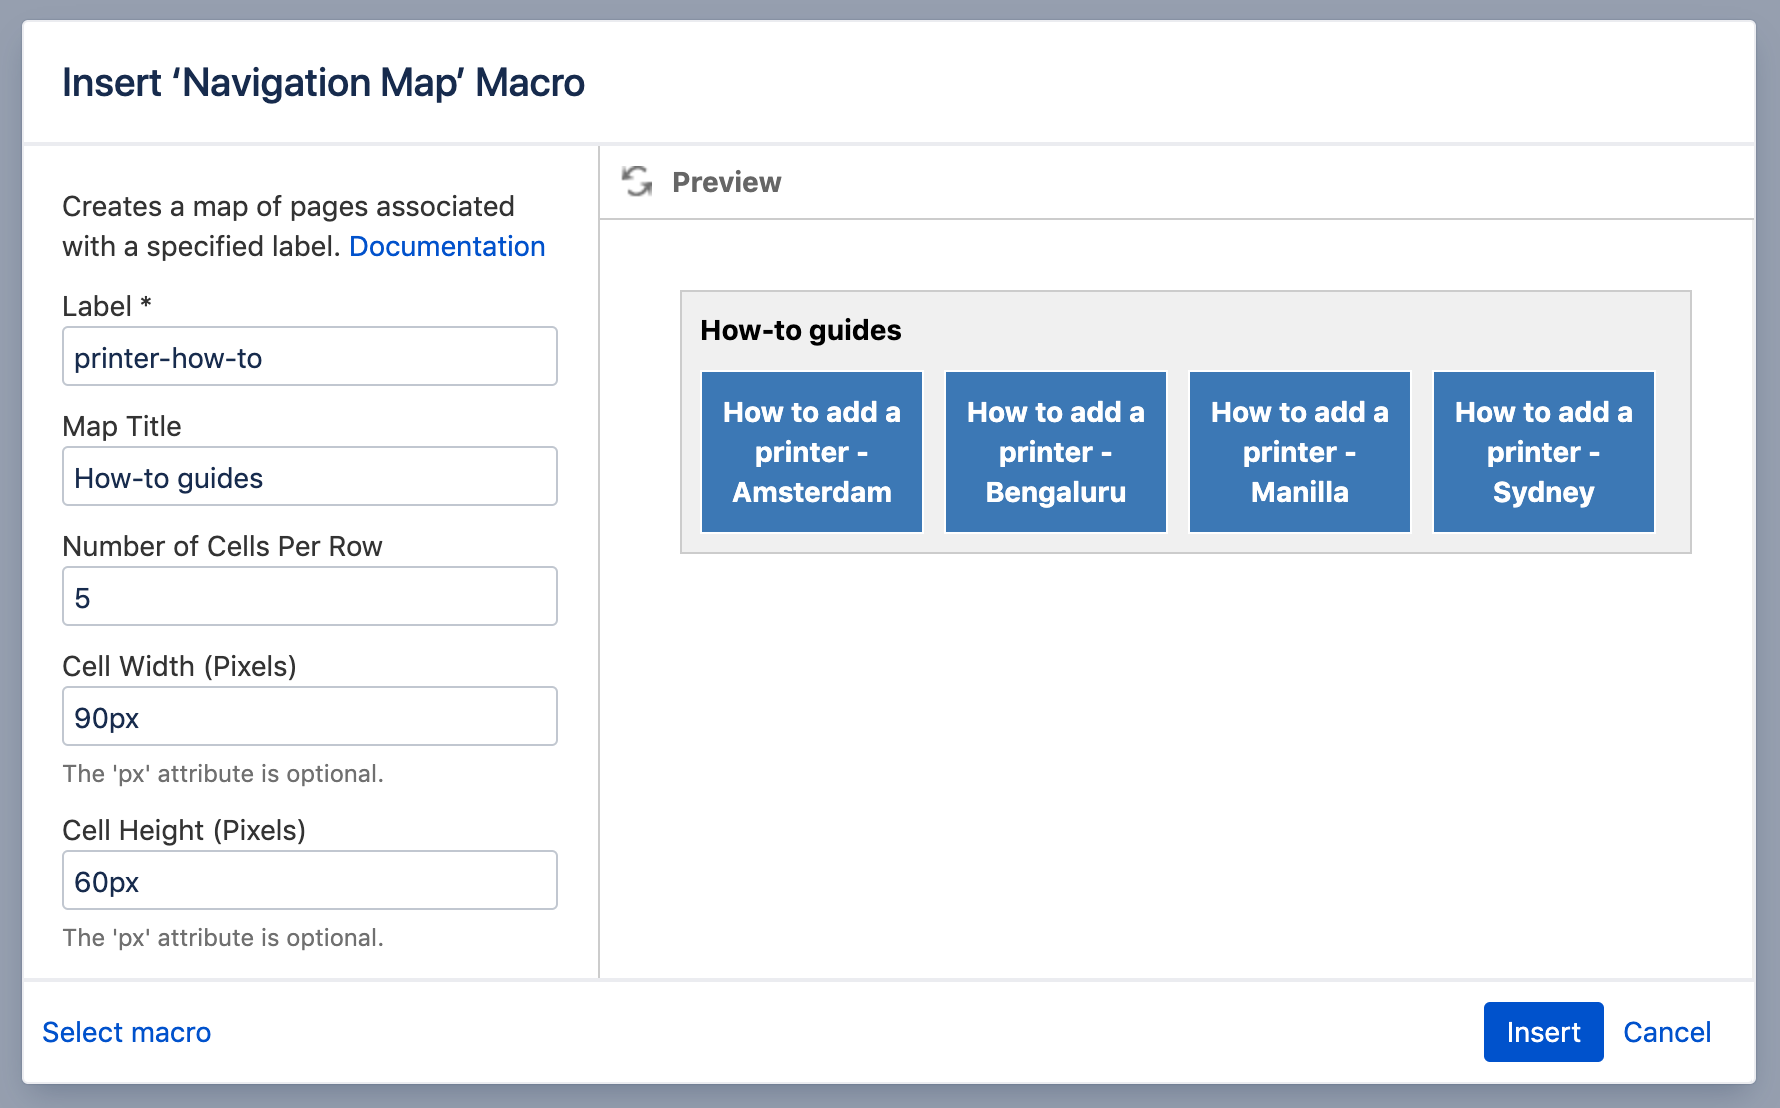
Screenshot: specifying a label and title in the Navigation Map macro
Change the macro parameters
Macro parameters are used to change the behaviour of a macro.
To change the macro parameters:
- In the editor, click the macro placeholder and choose Edit.

- Update the parameters as required then choose Insert.
Here's a list of the parameters available in this macro.
Parameter | Default | Description |
|---|---|---|
Label | none | Specify the label associated with the pages you want to show in the navigation map. This parameter is unnamed in storage format and wikimarkup. |
Map Title | none | Specify a title for the navigation map. |
Number of Cells Per Row
| 5 | Specify the number of cells in a row |
Cell Width (Pixels) | 90 | Specify the cell width (enter a number only, don't include |
Cell Height (Pixels) | 60 | Specify the cell height (enter a number only, don't include |
Navigation Map Theme | Confluence | Define a theme for the navmap. See further info below. |
Where the parameter name used in Confluence storage format or wikimarkup is different to the label used in the macro browser, it will be listed below in brackets (example).
Create your own navmap theme
If you want to create your own navmap 'look and feel' (for example, one with rounded corners), you need to add a customized navmap macro theme file to the WEB-INF/classes/com/atlassian/confluence/plugins directory. The file name convention to use is
/macros/advancednavmap-mytheme.vm. Use the name of your choice for the mytheme part of the file name, which is also the value you use for this parameter. Hence, if your theme was called navmap-roundededges.vm, use the value of roundededges for this parameter.
The theme must be written in Velocity. See Velocity User Guide for more information.
Other ways to add this macro
Add this macro as you type

Add this macro using wiki markup
This is useful when you want to add a macro outside the editor, for example as custom content in the sidebar, header or footer of a space.
Macro name: navmap
Macro body: None.
{navmap:mylabel|wrapAfter=4|title=My map name|cellHeight=50px|theme=navmap-mytheme.vm|cellWidth=80px}