How to upload custom Priority Icons in Jira Cloud
Platform Notice: Cloud - This article applies to Atlassian products on the cloud platform.
Summary
For the Jira Server and Data Center solution, please click here.
You can modify the icon for already existing Priorities or new Priorities following the guide here. To use custom icons for your Prioroties, you will need to store the images somewhere, that is accessible to all of your users.
One way to achieve this is storing the images in a Jira issue, as attachments.
Solution
Store the images in a Jira issue, as attachments
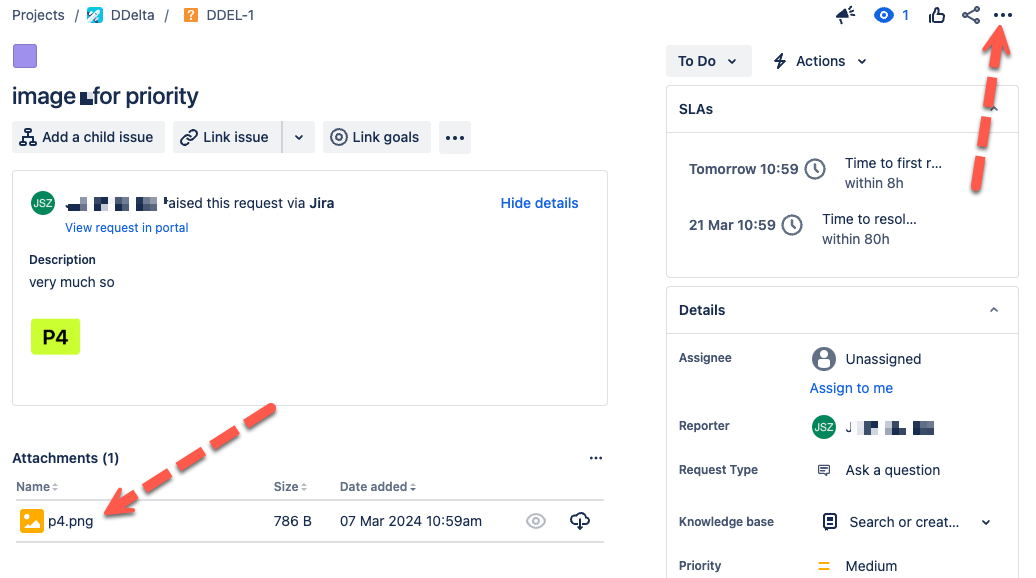
- Create a Jira issue, and upload your icons as attachments.
- Open the issue and from the ... Action menu on the top right, click Export to XML
- On the new page that opened up, filter for attachments.
- You should find something like this:
<attachments>
<attachment id="10017" name="p4.png" size="786" author="1174241273131f2ae" created="Thu, 7 Mar 2024 10:59:07 +100"/>
</attachments>
Using the attachment ID and name from the output above, generate the URL to use in the following steps.
https://<YOUR-DOMAIN>.atlassian.net/secure/attachment/<attachment id>/<name>
Using the example above, my URL will be:
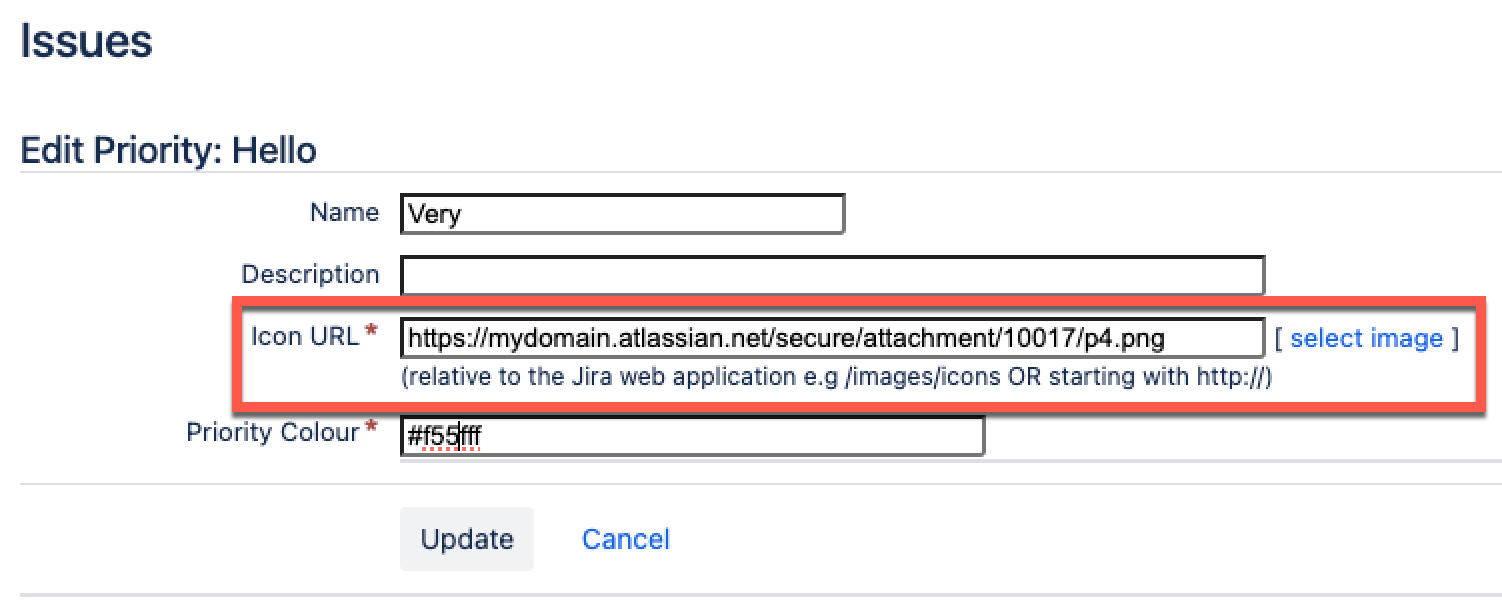
https://mydomain.atlassian.net/secure/attachment/10017/p4.png
Add the attachment URL to a Priority
- Click Jira Settings > Issues > Priorities
- Click the 'Edit' link next to the desired priority.
- Paste the generated URL into the Icon URL field.
- Click the Update button.
The new icon should be available now:
In order to view the icon correctly, both conditions below should be met:
- The issue where the icons are uploaded should be accessible by all logged-in Jira users
- In the case where the icons are not showing up, please check on the issue itself and ensure you are able to view the attachments OR the URL to access the attached icons has not changed
JRACLOUD-34231 - Allow upload of custom priority icons


