How to configure the Jira Align ADO Connector for OAuth Authentication
Summary
It is possible to configure the ADO connector to use OAuth for its Authentication method but requires some steps on both sides to guarantee that it will work successfully.
Environment
Jira Align
Solution
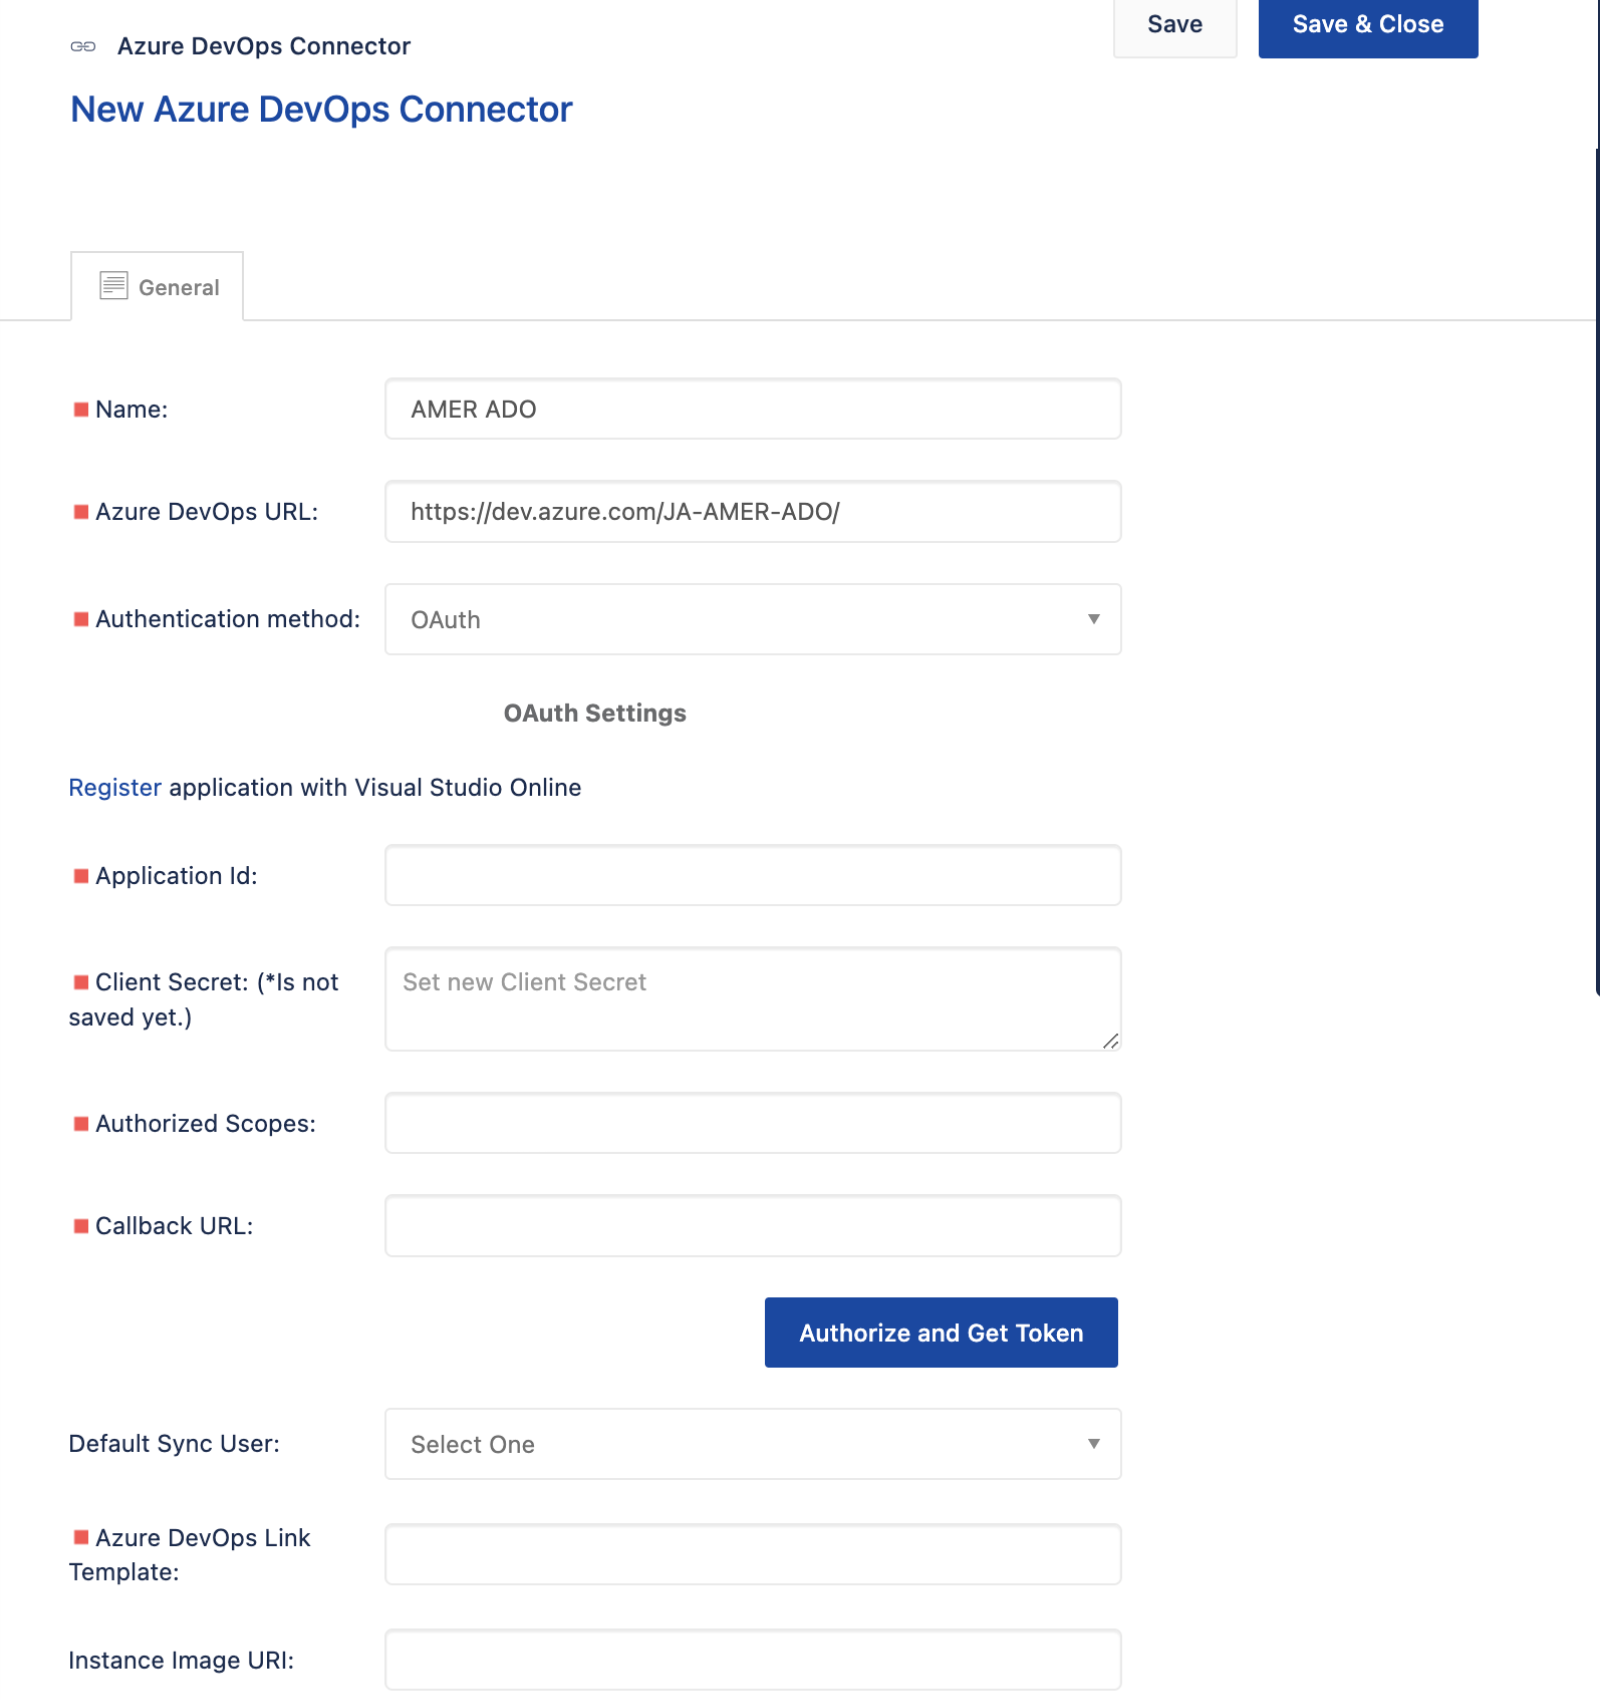
1 - Go to Admin > Azure DevOps Settings > Add Connector (for a new connector), or open the panel for one that already exists.
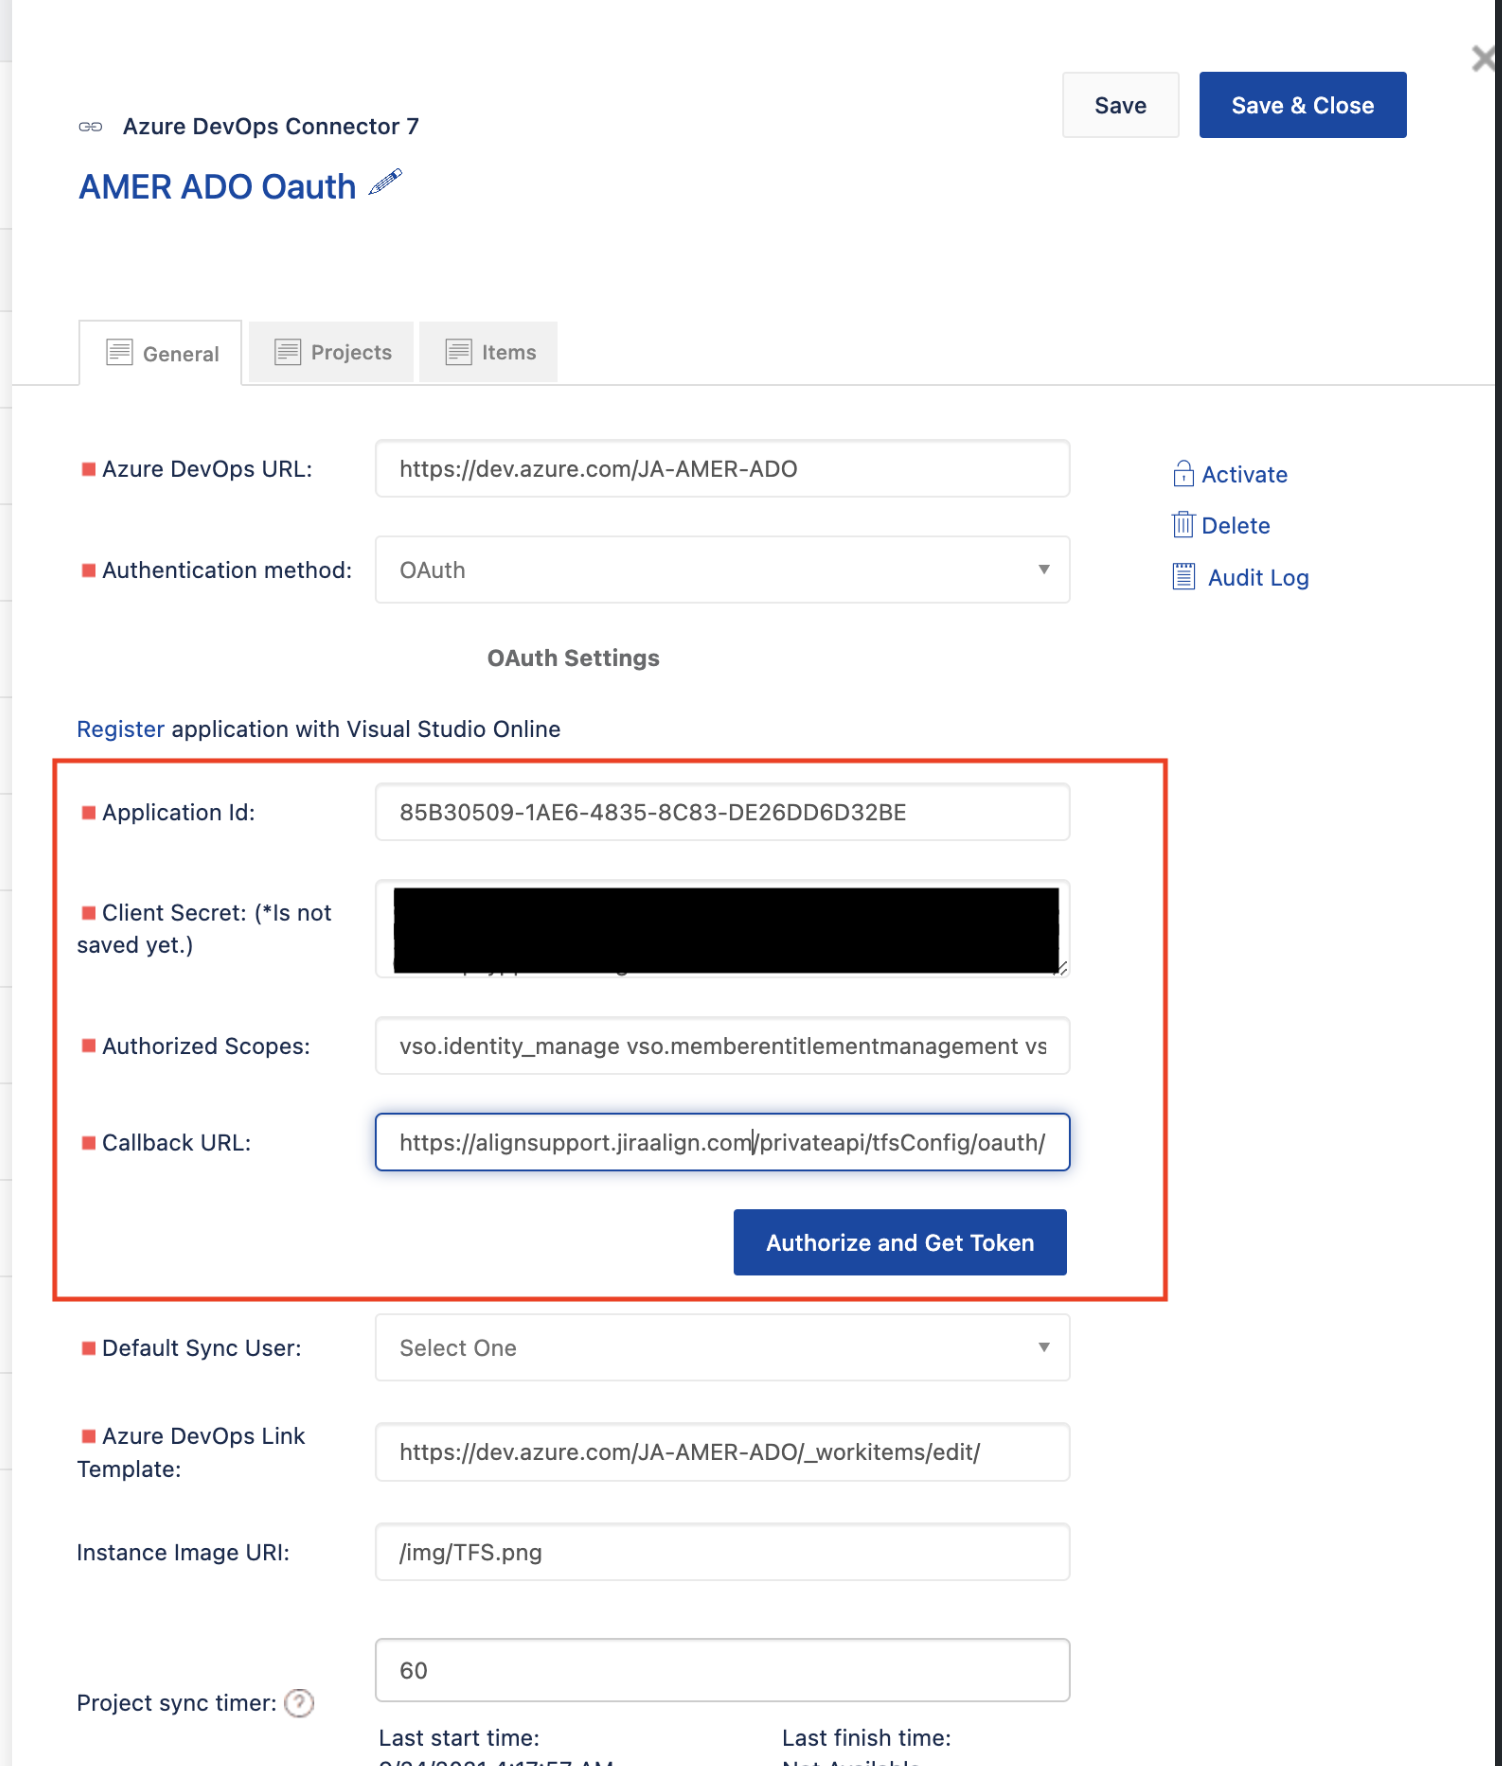
2 - Enter the Name of the connector, the Azure DevOps URL, and select the Authentication Method as OAuth
3 - The next part needs to be done in the Azure DevOps UI through Visual Studio Online. It can be started by clicking on the Register on the ADO slide-out panel, or preferably through the Azure DevOps (to avoid the wrong account/tenant being used). The next steps follow this approach.
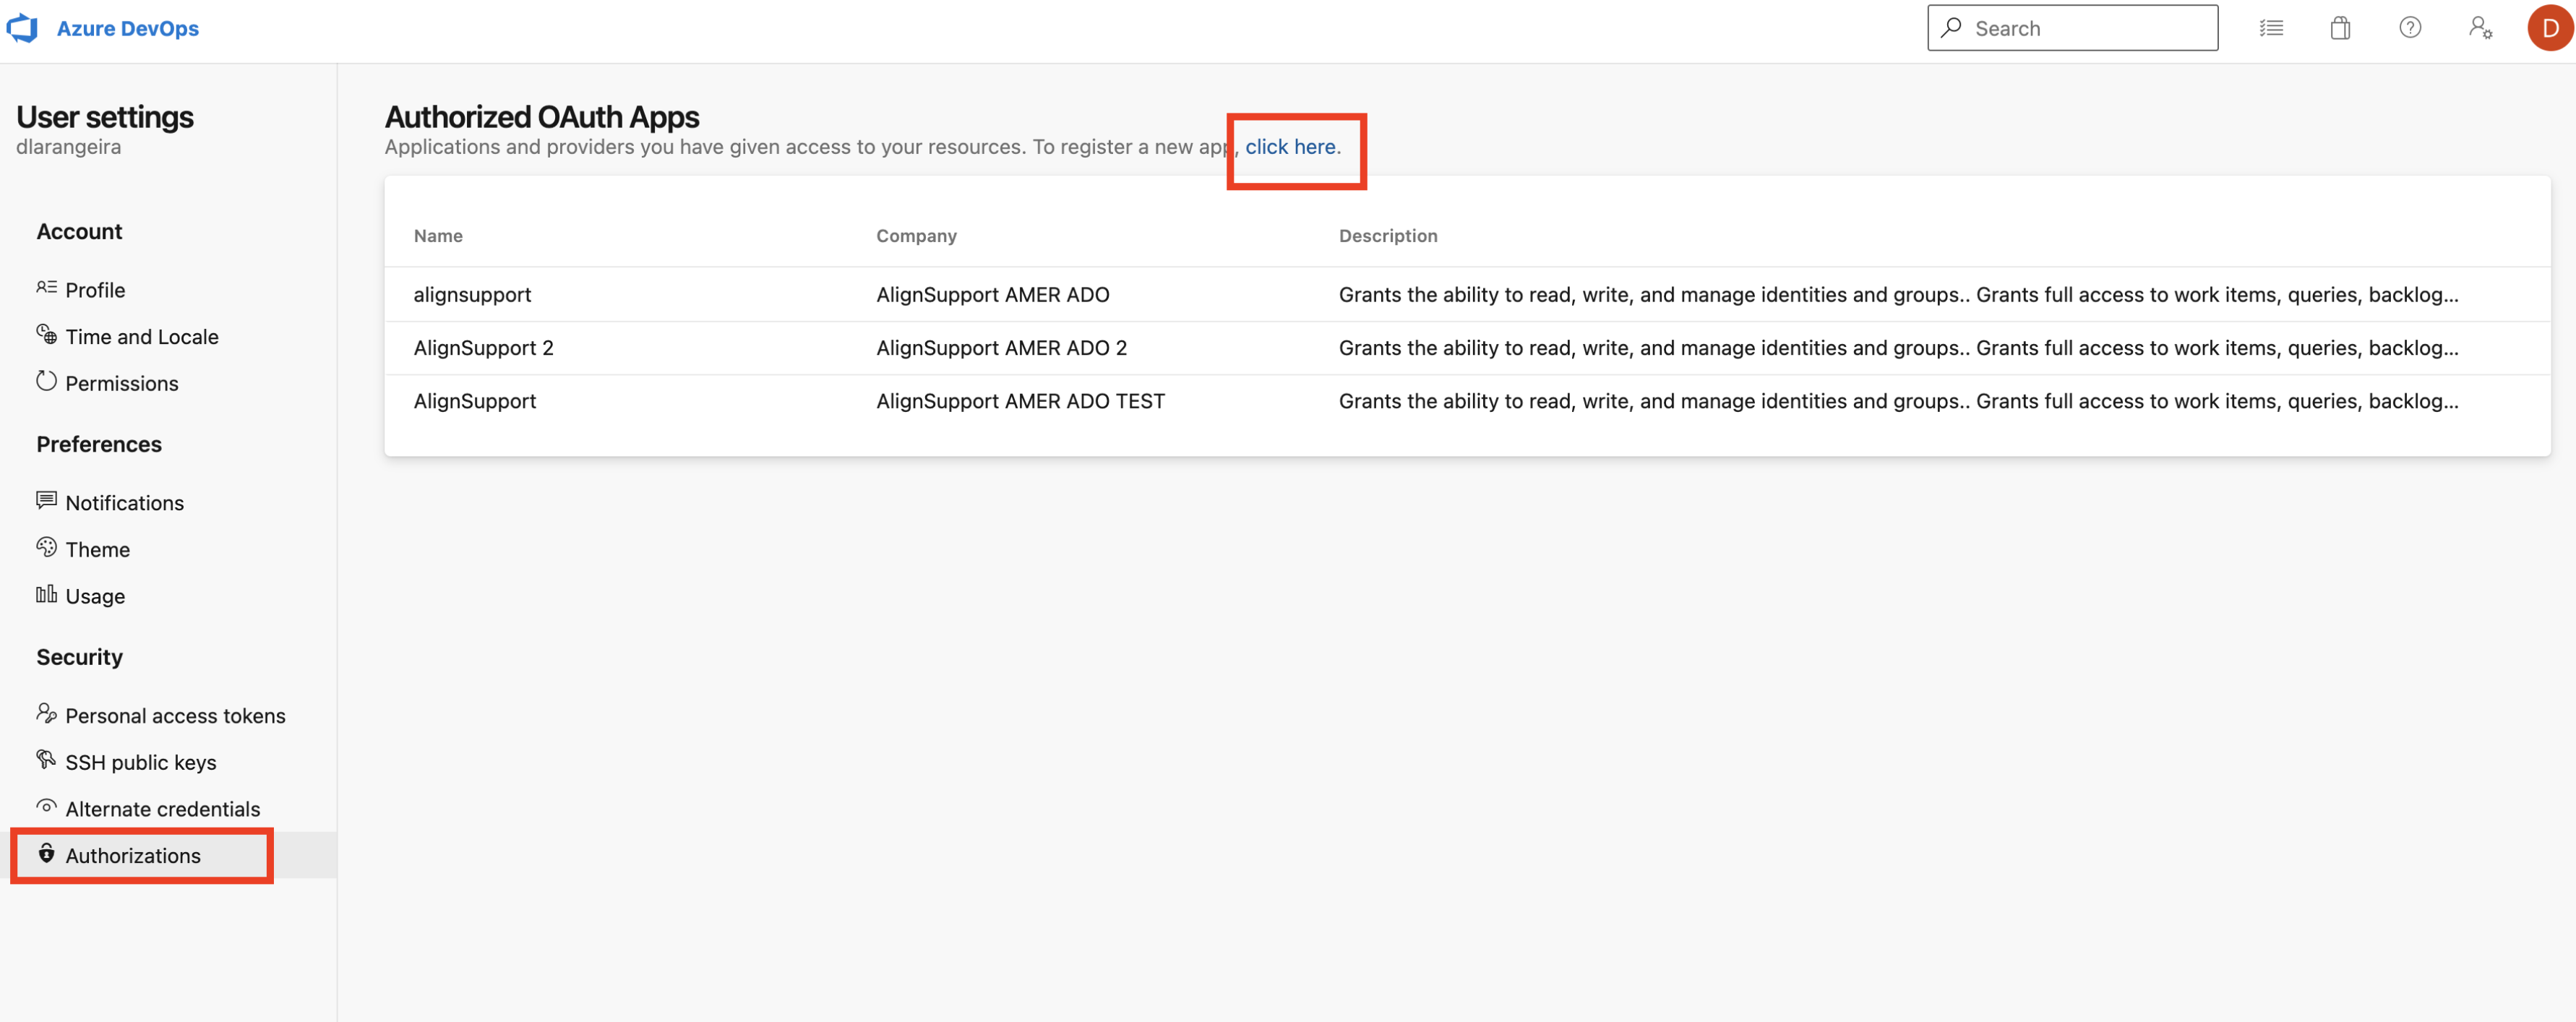
4 - Log in to Azure DevOps with the account that will be used to create the OAuth token. Click on User Settings > Personal Access tokens
5 - Click on Authorization > click here to create a new one
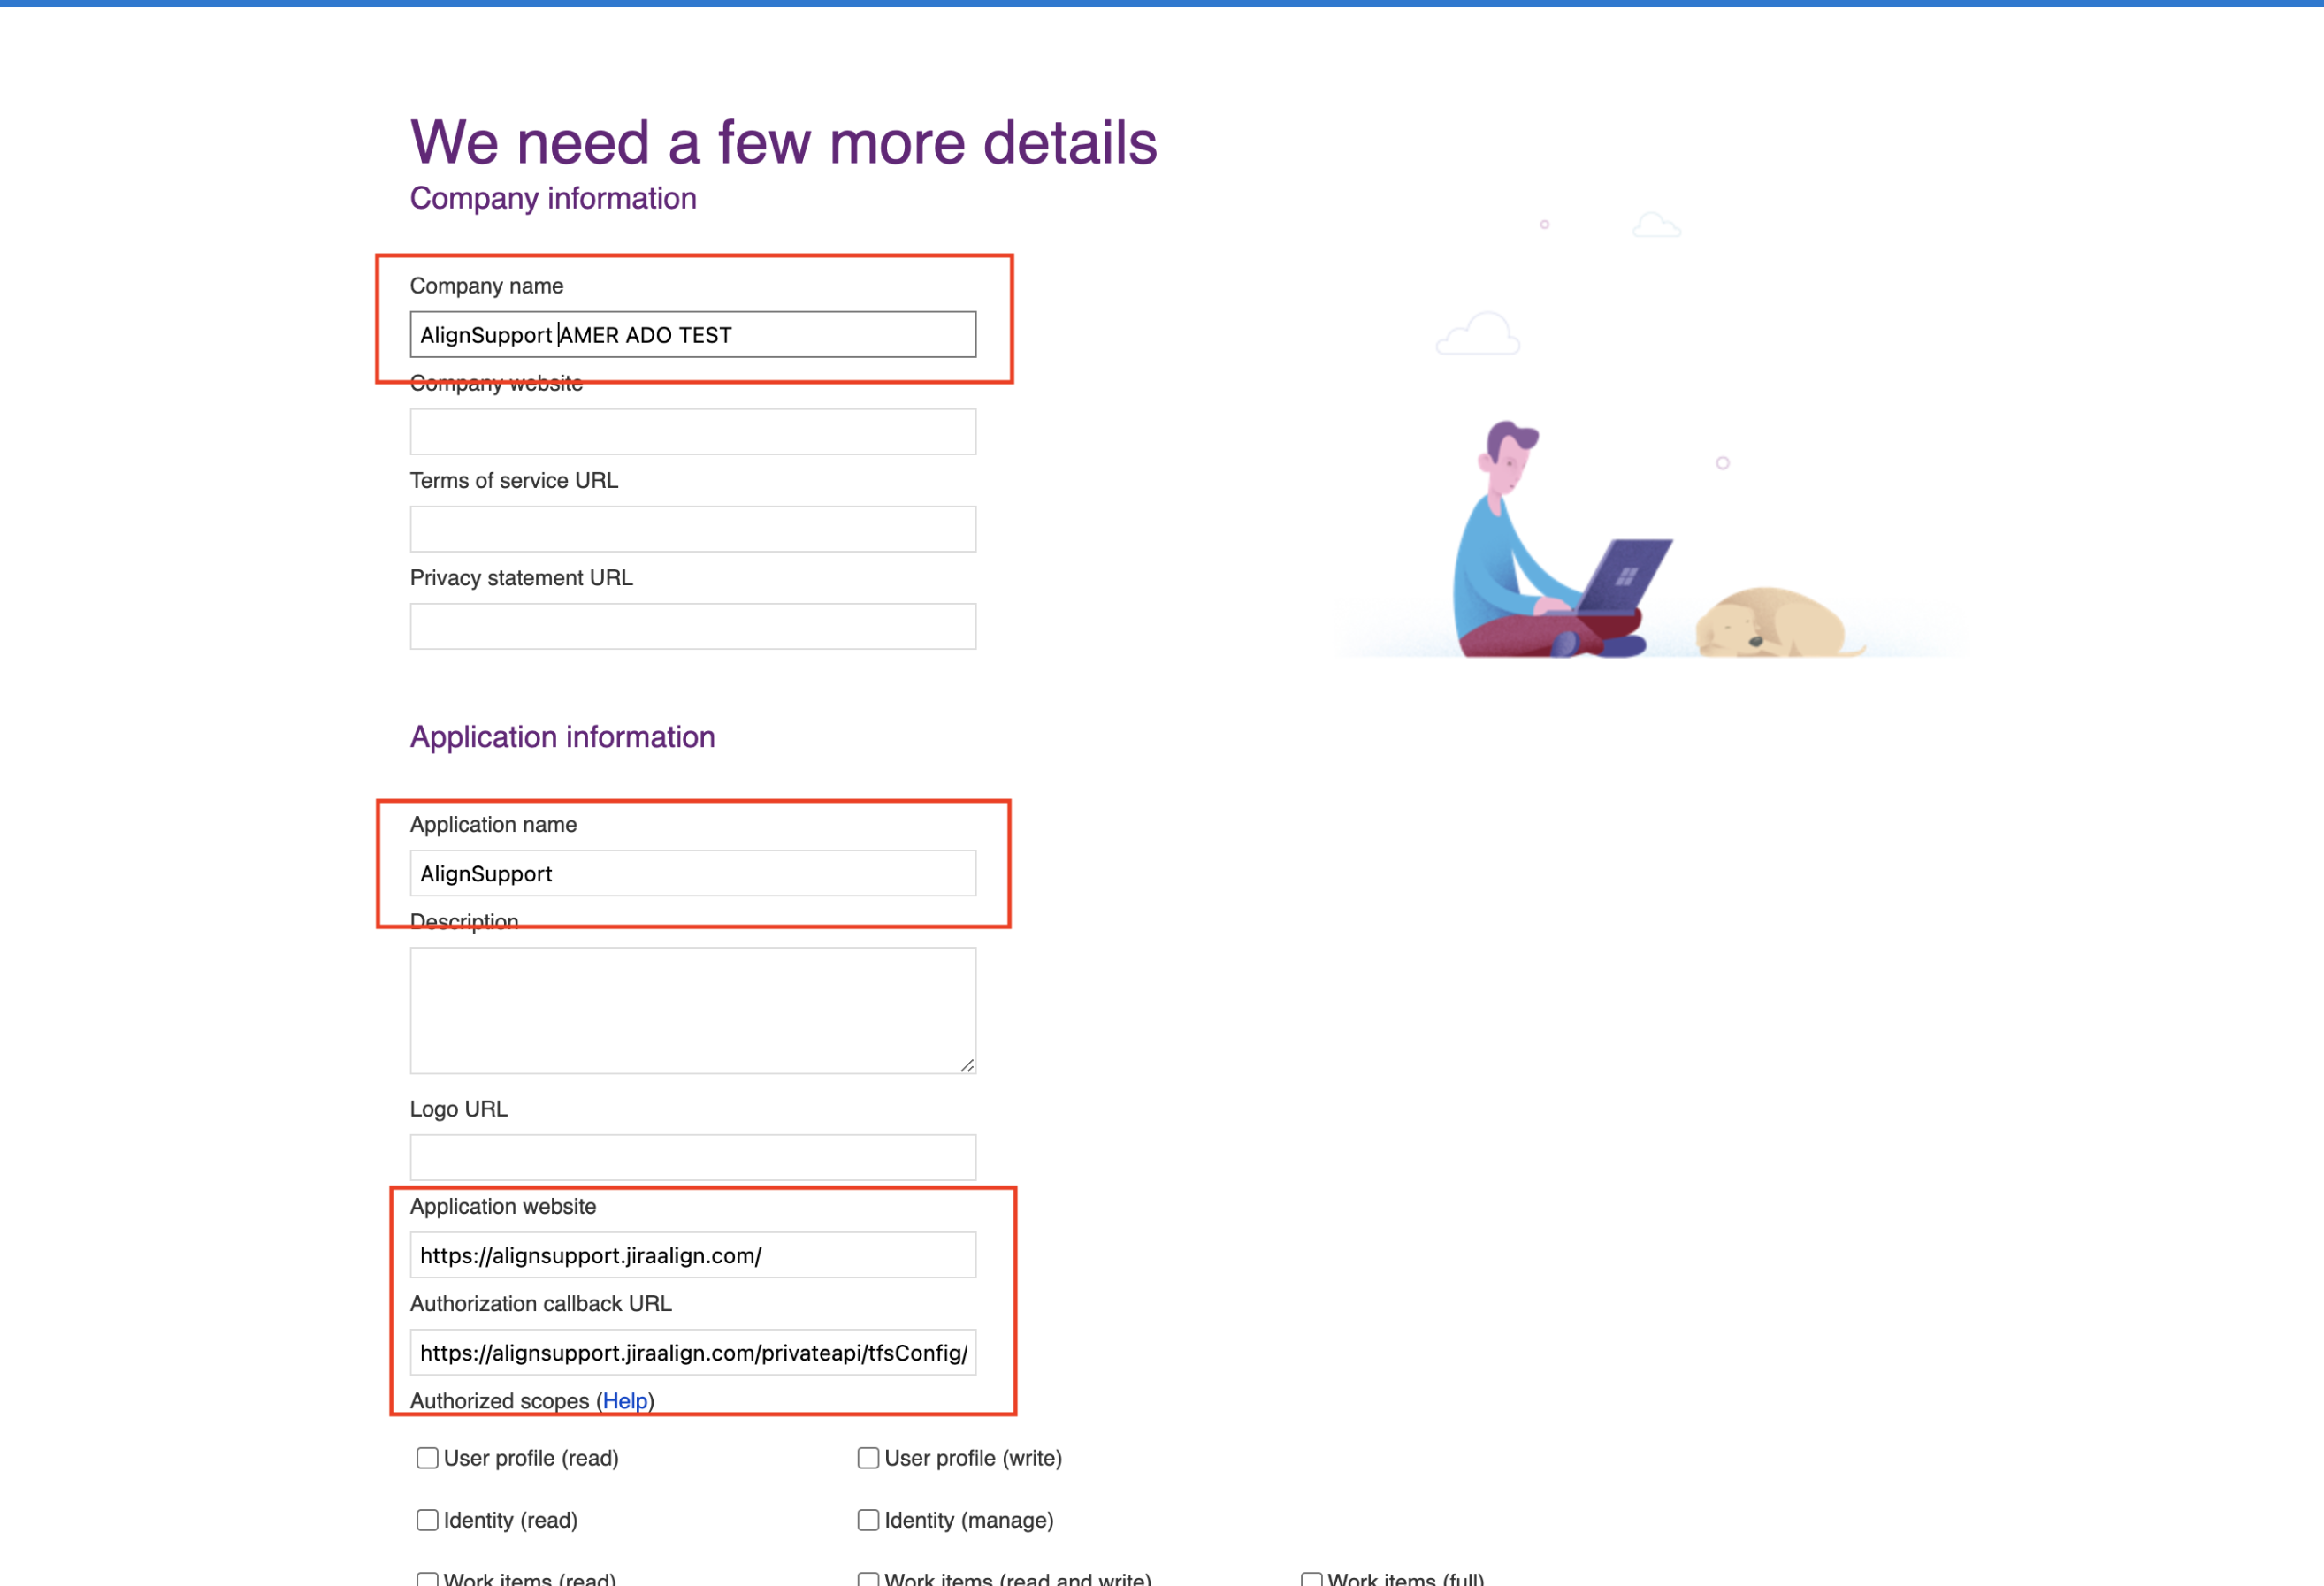
6 - On the new screen, the fields that need to be filled in are:
Company name = the name your company uses
Application name = the name you want the link to have
Application website = the JA URL
Authorization callback URL = the URL should be "https:// {yourinstancename}/privateapi/tfsConfig/oauth/callback/", where you change the JA instance path that is on {yourinstancename}
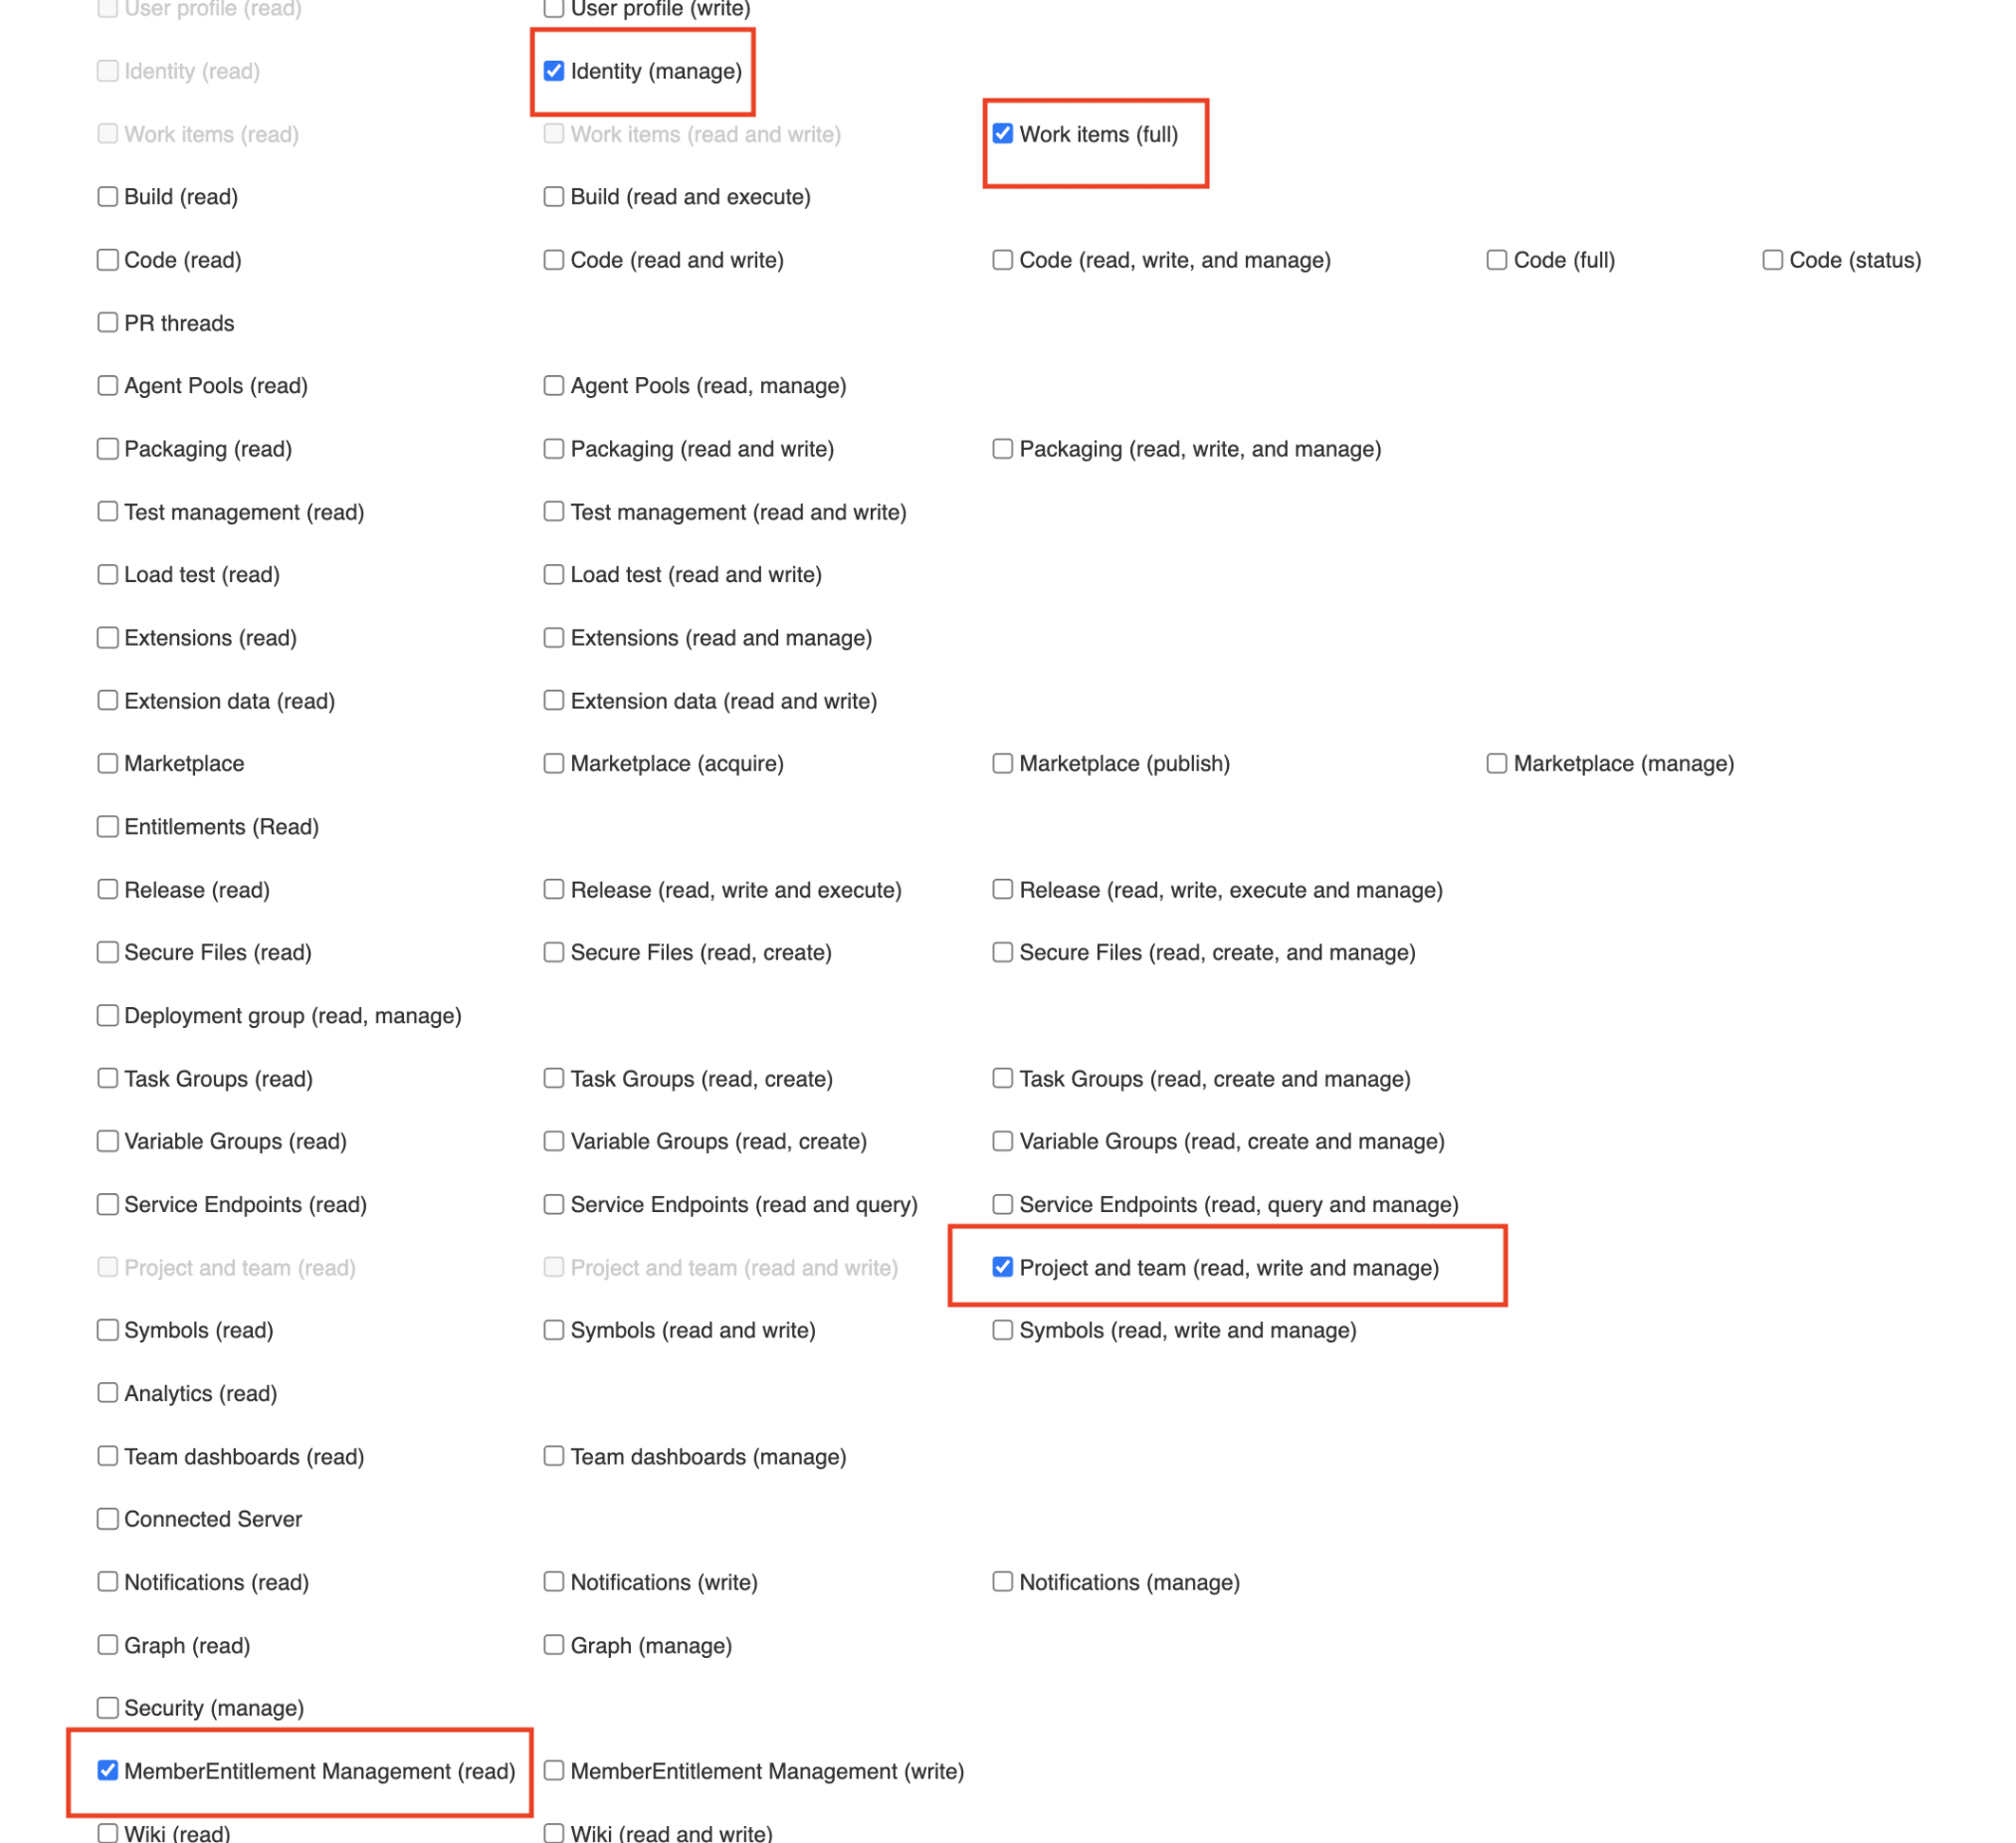
7 - At the bottom of the page, select the required Authorization scopes:
MemberEntitlement Management (read)
Identity (manage)
Work items (full)
Project and team (read, write, and manage)
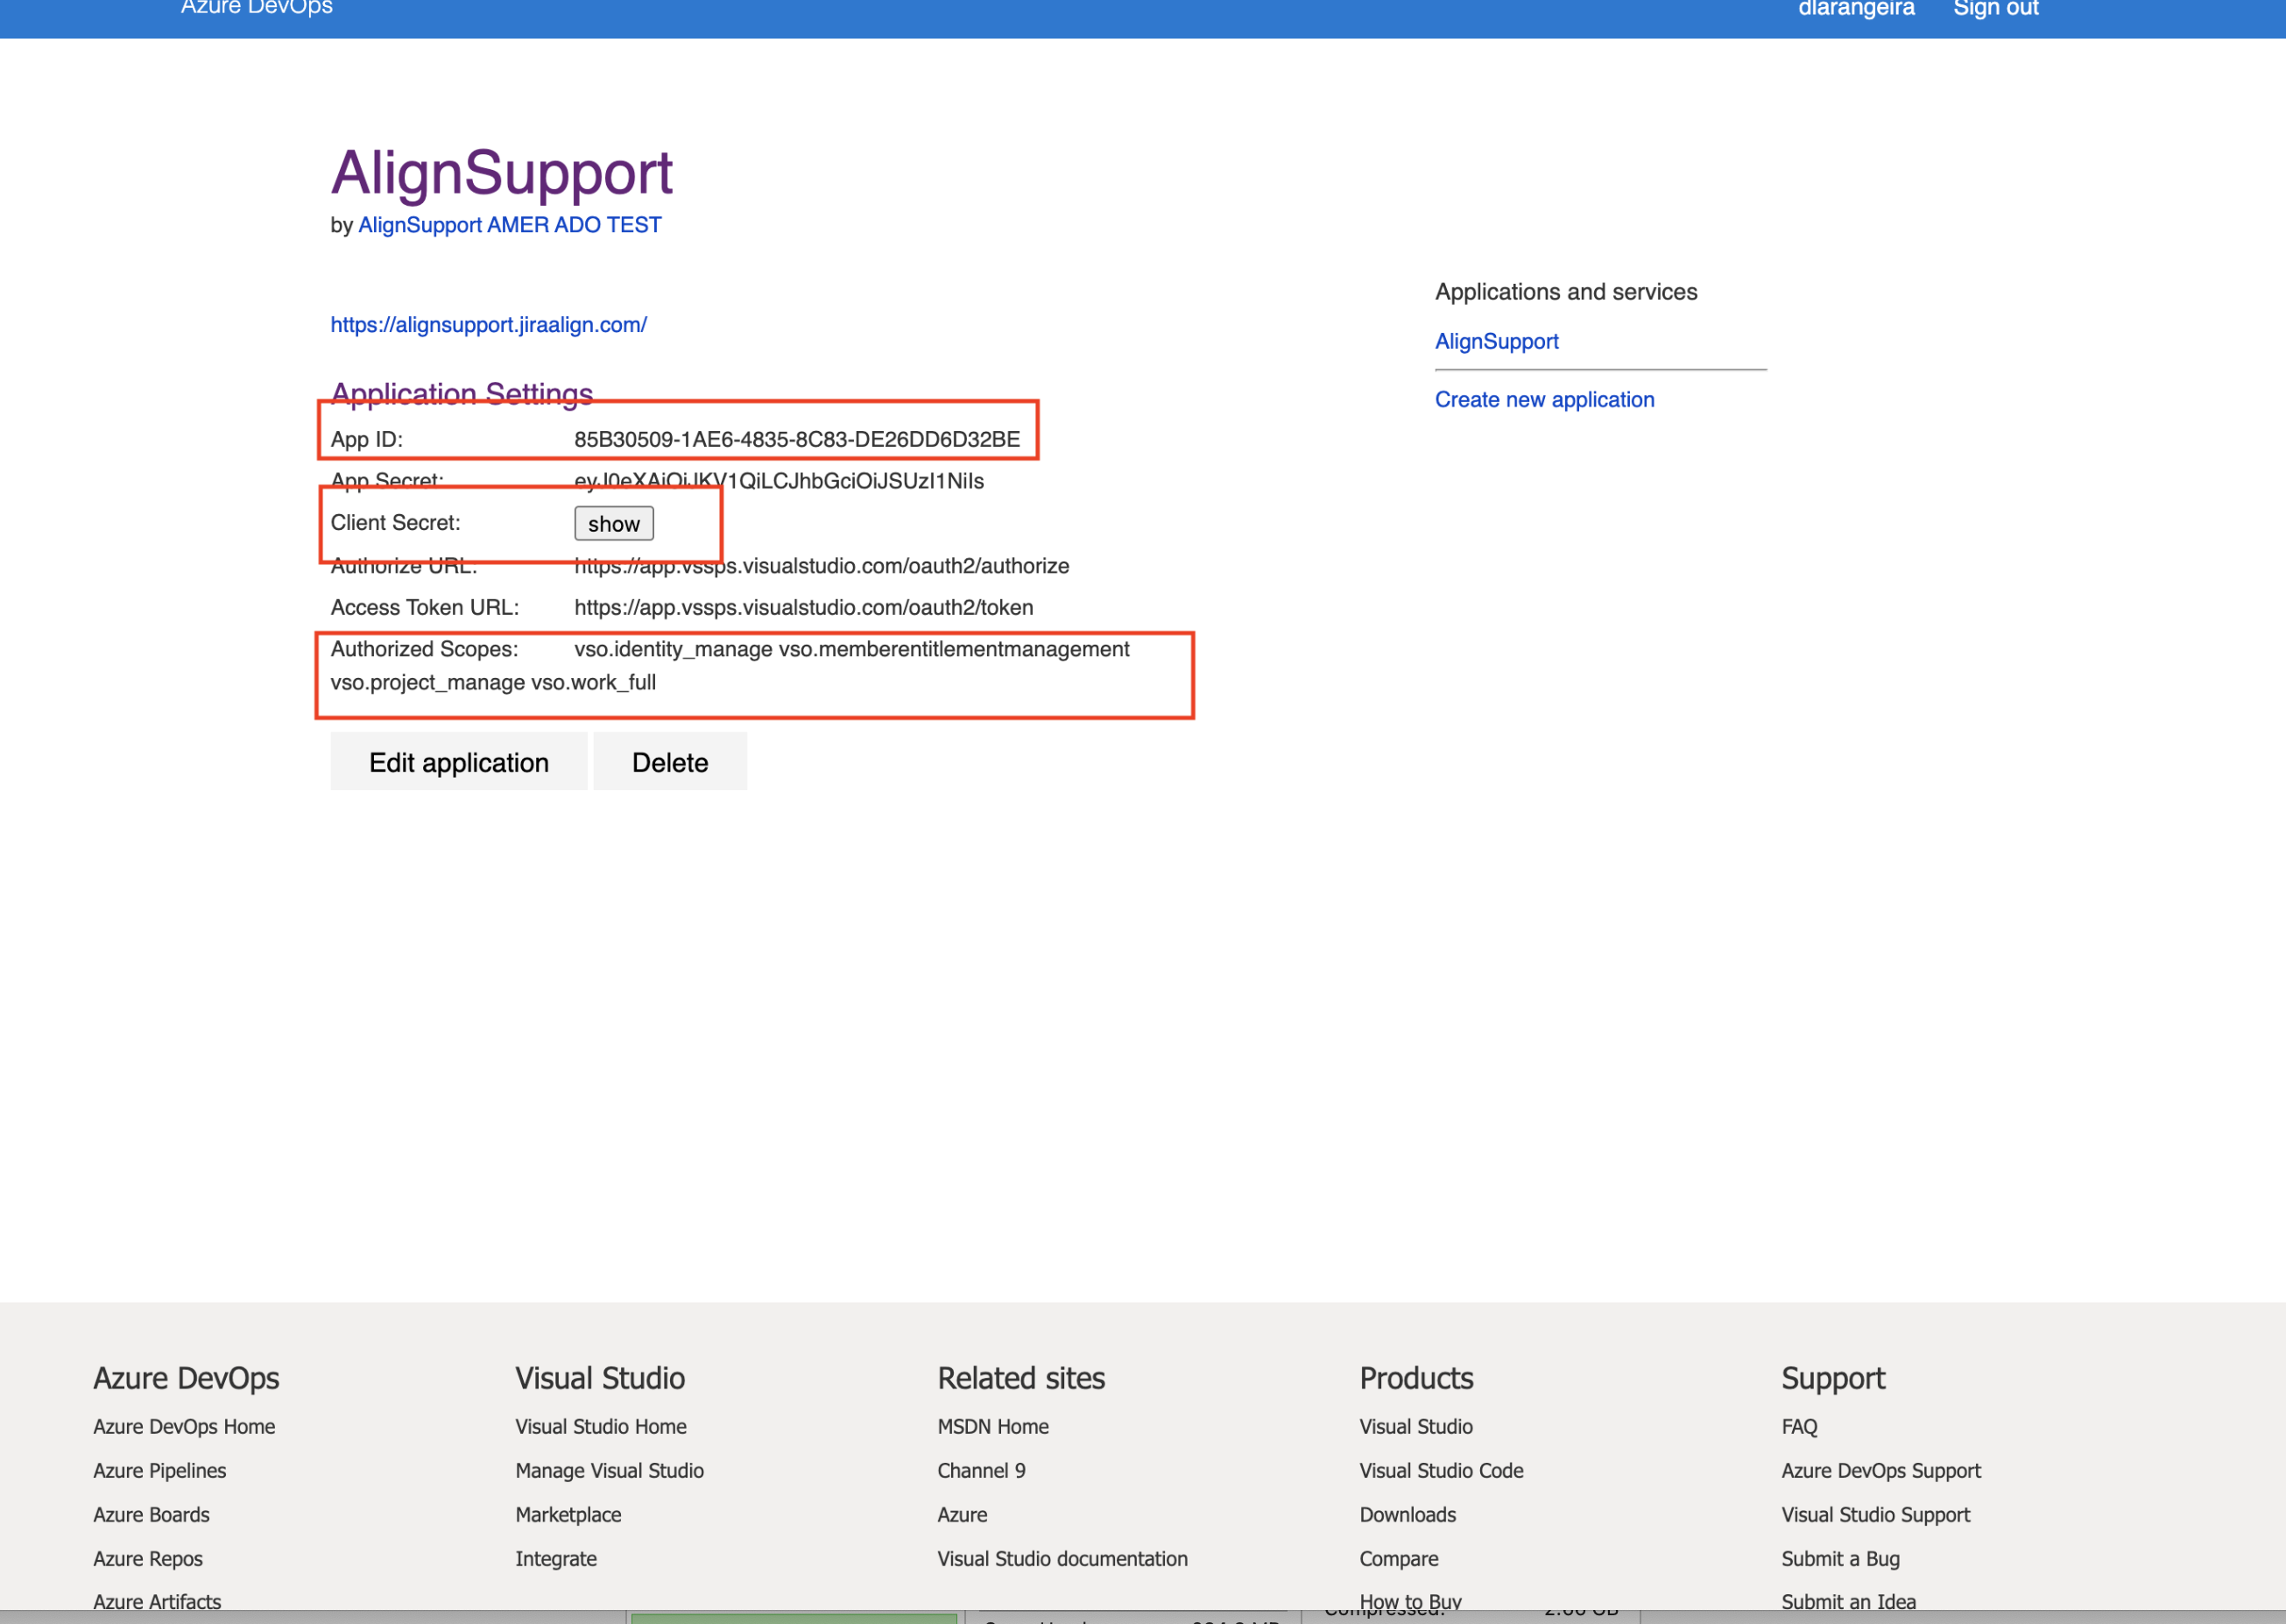
8 - Click Create (at the bottom of the page), and it will show you the details of the link created.
9 - From these details, we will need the APP ID, Client Secret, and Authorized Scopes
10 - Come back to the JA ADO panel, and fill in the appropriate fields with the data above. For the Callback URL, we will use the same as the one used on the Authorization callback URL.
11 - Click Save to keep the information
12 - Click Authorize and Get Token, which will redirect you to a page to Accept the token/link
13 - After that, come back to JA, and the Authorize and Get Token should change to Re-Authorize And Get Token (if it didn't, hit it once again and/or refresh the screen).
14 - At this point, if no errors were observed, the configuration for the OAuth is complete. You can now finish the configuration of ADO as normal, and activate it.
Additional Details
Once done, you can see the details on the link created by going to: https://app.vssps.visualstudio.com/profile/view
On the left side, under Authorizations, you can see the authorizations that exist and their grants, under Applications and Services you can find the ones created with the details from Step 9 (and edit/update them as needed).
img8
Here you can confirm as well that the user is correct and that the instance of ADO where this was created is the one expected.
Common Issues
If the integration is not working and the logs show the below message:
Message: Attempted to perform an unauthorized operation.Check the following:
When accessing ADO Instance > User Settings > Personal Access Token > Authorizations, the token created is present here.
When accessing https://app.vssps.visualstudio.com/profile/view the token/authorization is under the correct user/Tenant.
When accessing ADO Instance > Organization Settings, “Policies, and Third-Party Application access via OAuth” is enabled.
