Customize your invitation emails to customers
Hi Service Deskers,
We've got great news. You can now customize the email that is sent to your customers when you have invited them to your service desk. In the new customer invited notification rule, you can edit the message content and the subject. You can also disable the customer invited notification email altogether.
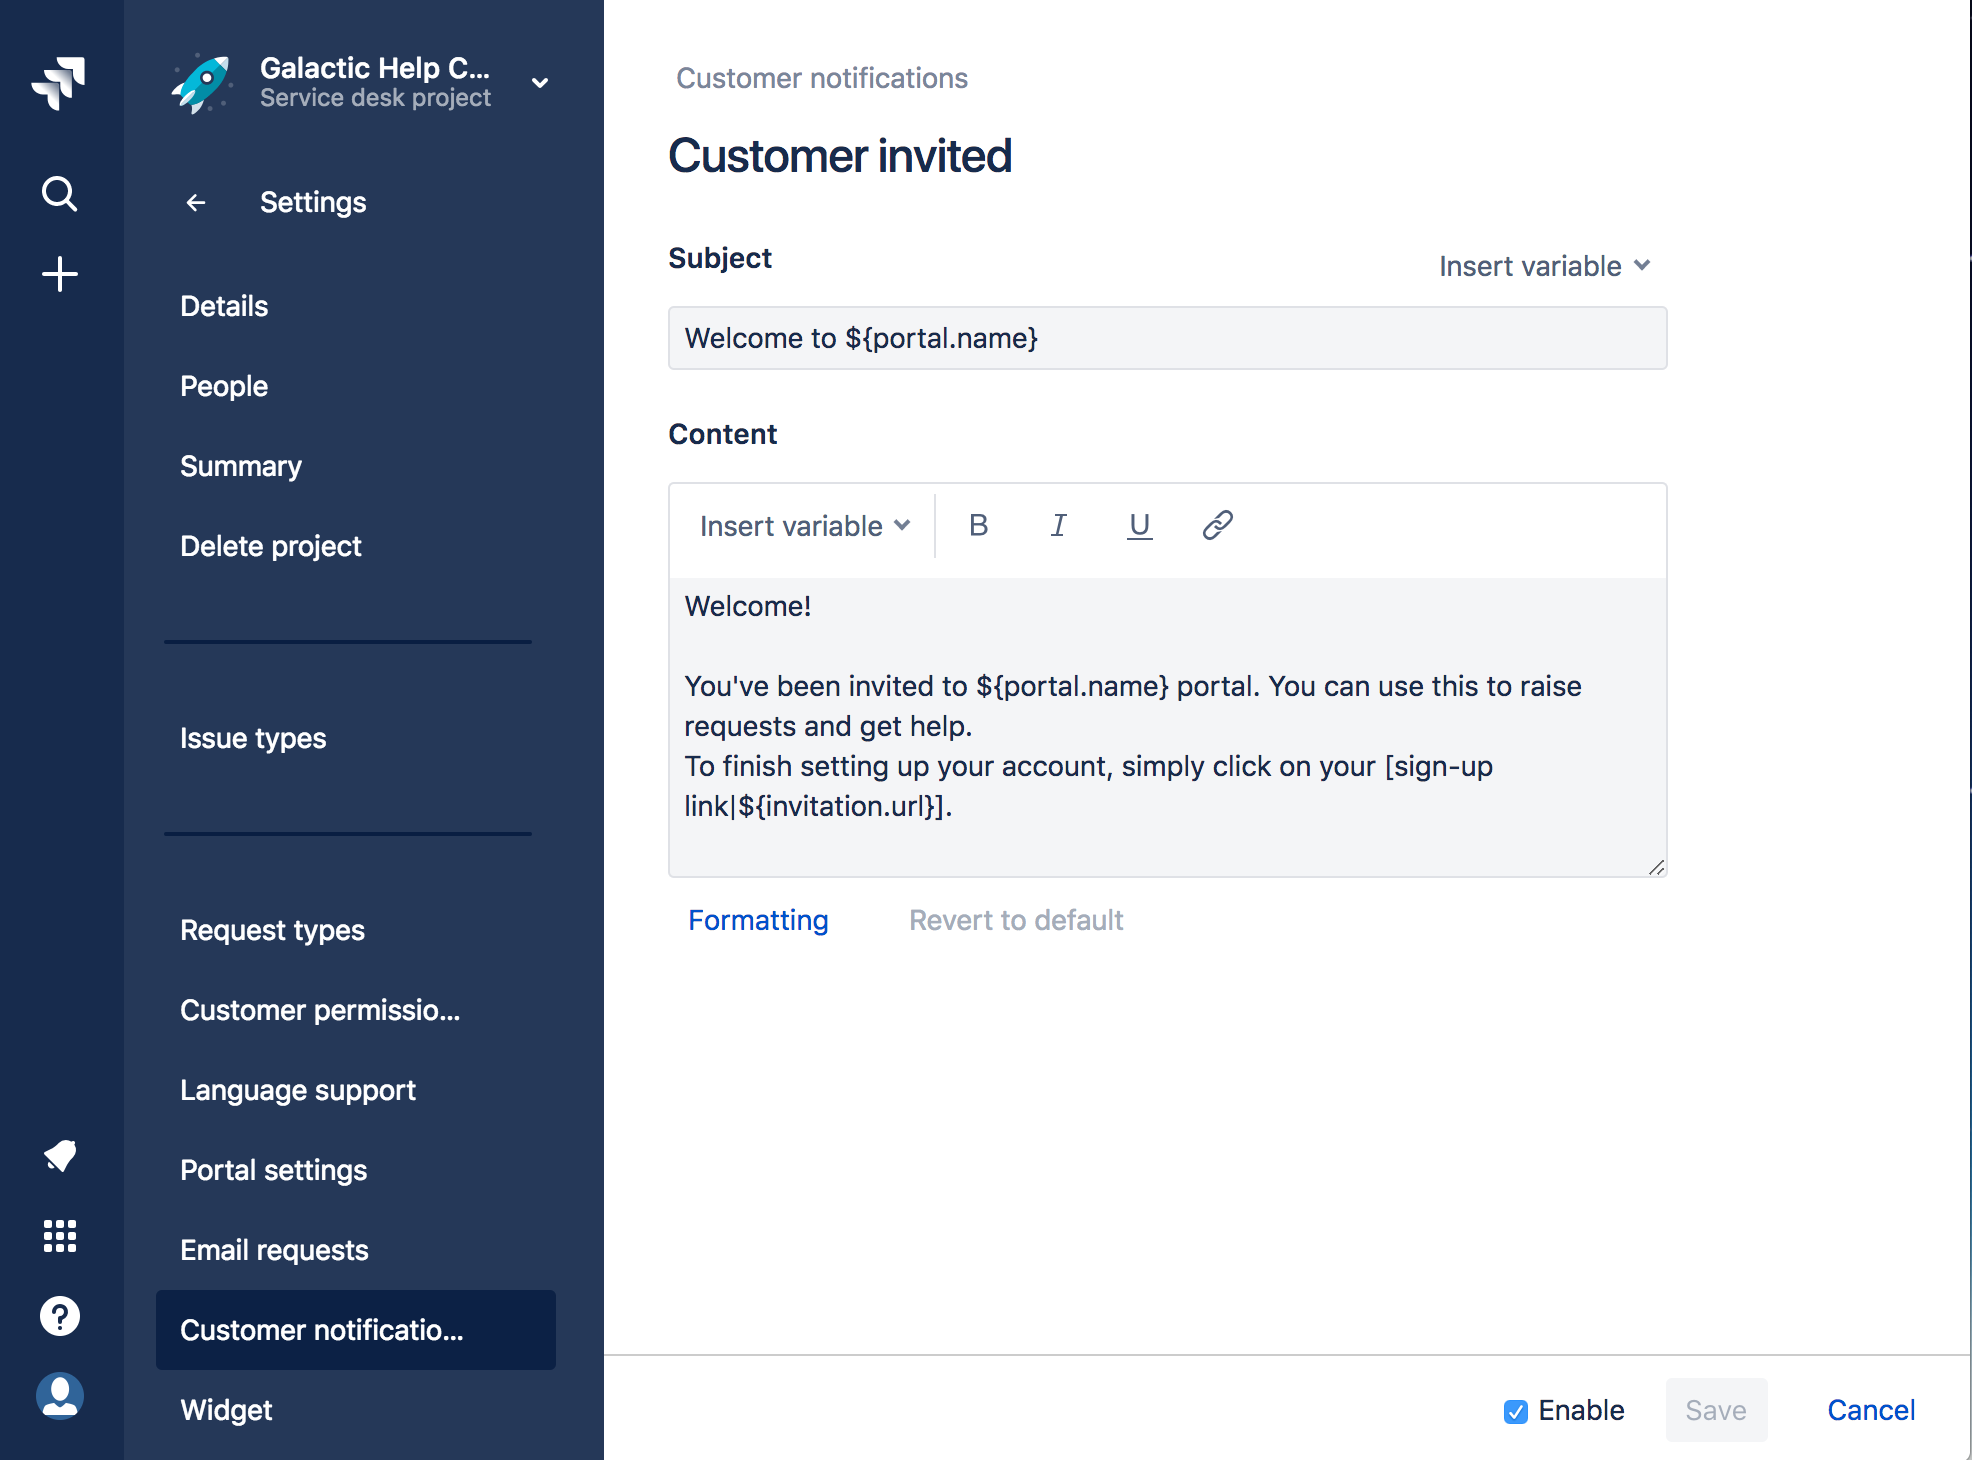
When editing the email, you can choose to insert a few variables like the portal name, invitation URL, and help center name. These variables will automatically fill in the correct information and links when the email is sent. The only variable that is necessary to include is the invitation url as each one is unique to each customer and they will have trouble joining your portal without it.
To get started customizing the emails your customers will see when you invite them to your service desk:
- Go to Project settings (
 ) > Customer Notifications
 - Then under the Notification section, find the Customer invited rule and click edit.
- This will take you to the customization page for this new rule where you can edit the subject and the message.
- If you'd like this email to send automatically, be sure the enable checkbox is selected. If you'd like to stop sending customers this invitation email, simply un-check the enable checkbox.
- When you're finished editing, click Save.
To change which events trigger notifications, create a custom notification in the Automation settings. Custom notifications are automation rules that send an email.
Once you've given your customer invitation emails your special voice, check out our latest bug fixes .
Cheers,
The Jira Service Desk team