4. Link your project to Insight asset management
A change request should be opened against something – be it a configuration item, physical server, or some other asset that you need to change or improve. We’ll help you create a basic inventory of assets in Jira Service Management and then link it to your project so you can start including assets in changes.
Over time, you can improve your inventory and make any adjustments to this configuration you need.
Insight at a glance – basic overview
This is a basic overview of Insight, just to show you how it all works and connects together. If you’d like to learn more, here’s a getting started guide.
If you’re not so familiar with the basics, assets in Insight are called objects. This is what it looks like in Insight:

Object types: These work like categories that group your actual assets. They would typically be offices, computers, or devices.
Objects: These are your assets, grouped within object types. Each asset has attributes that help identify and describe it, just like issue fields.
Linking your inventory and including assets
Objects can be selected and included in issues through Insight custom fields that link projects to your Insight inventory. Such a custom field can be linked to your whole inventory or only parts of it – this will affect the objects that can be selected by users.

Selecting an object

Viewing the object in your issue
Create a basic Insight inventory
Create the object schema
To create a basic Insight inventory:
In the Jira top navigation bar, select Insight > Insight Object Schemas.
Select Create Object Schema.
Choose Create Sample IT Asset Schema.
Give it a name and click Create.
Your inventory has been created with a sample structure, but it still needs some objects and adjustments.

Add attributes needed for approvals and automation rules
Approvals and automation rules that you will add in the next steps rely on the Importance and Owner attributes of your objects in Insight. Let’s add these attributes, you can make the adjustments later.
Add the following attributes to the Applications object type, which is under Asset details. You can choose other object types, but we’ll use this one in examples:
| Attribute name | Type and Type value | Values |
|---|---|---|
| Importance |
| To add the options, click the cog icon > Configure.
|
| Owner |
| You can choose the value when you edit an underlying object. Choose a user or group who will be responsible for this particular object. |
Create some objects
Add a Jira Software object to the Applications object type. You can add more objects if you wish.
Link your inventory to your Jira project
Your Insight inventory can be linked to Jira projects by using the Insight custom fields. They behave like regular Jira custom fields but have additional configuration that lets you map it to your inventory, or some parts of it.
For more details, see Adding Insight custom fields to screens in Jira.
Create the Insight object/s custom field
To create the Insight custom field:
Go to Administration > Custom fields.
Select Add custom field.
Select All, and choose Insight Object/s.
Give it a name Affected object and associate the field with change requests and your project.
Click Create.
Associate the field with the Create and View/Edit screens, like you did in one of the previous steps.
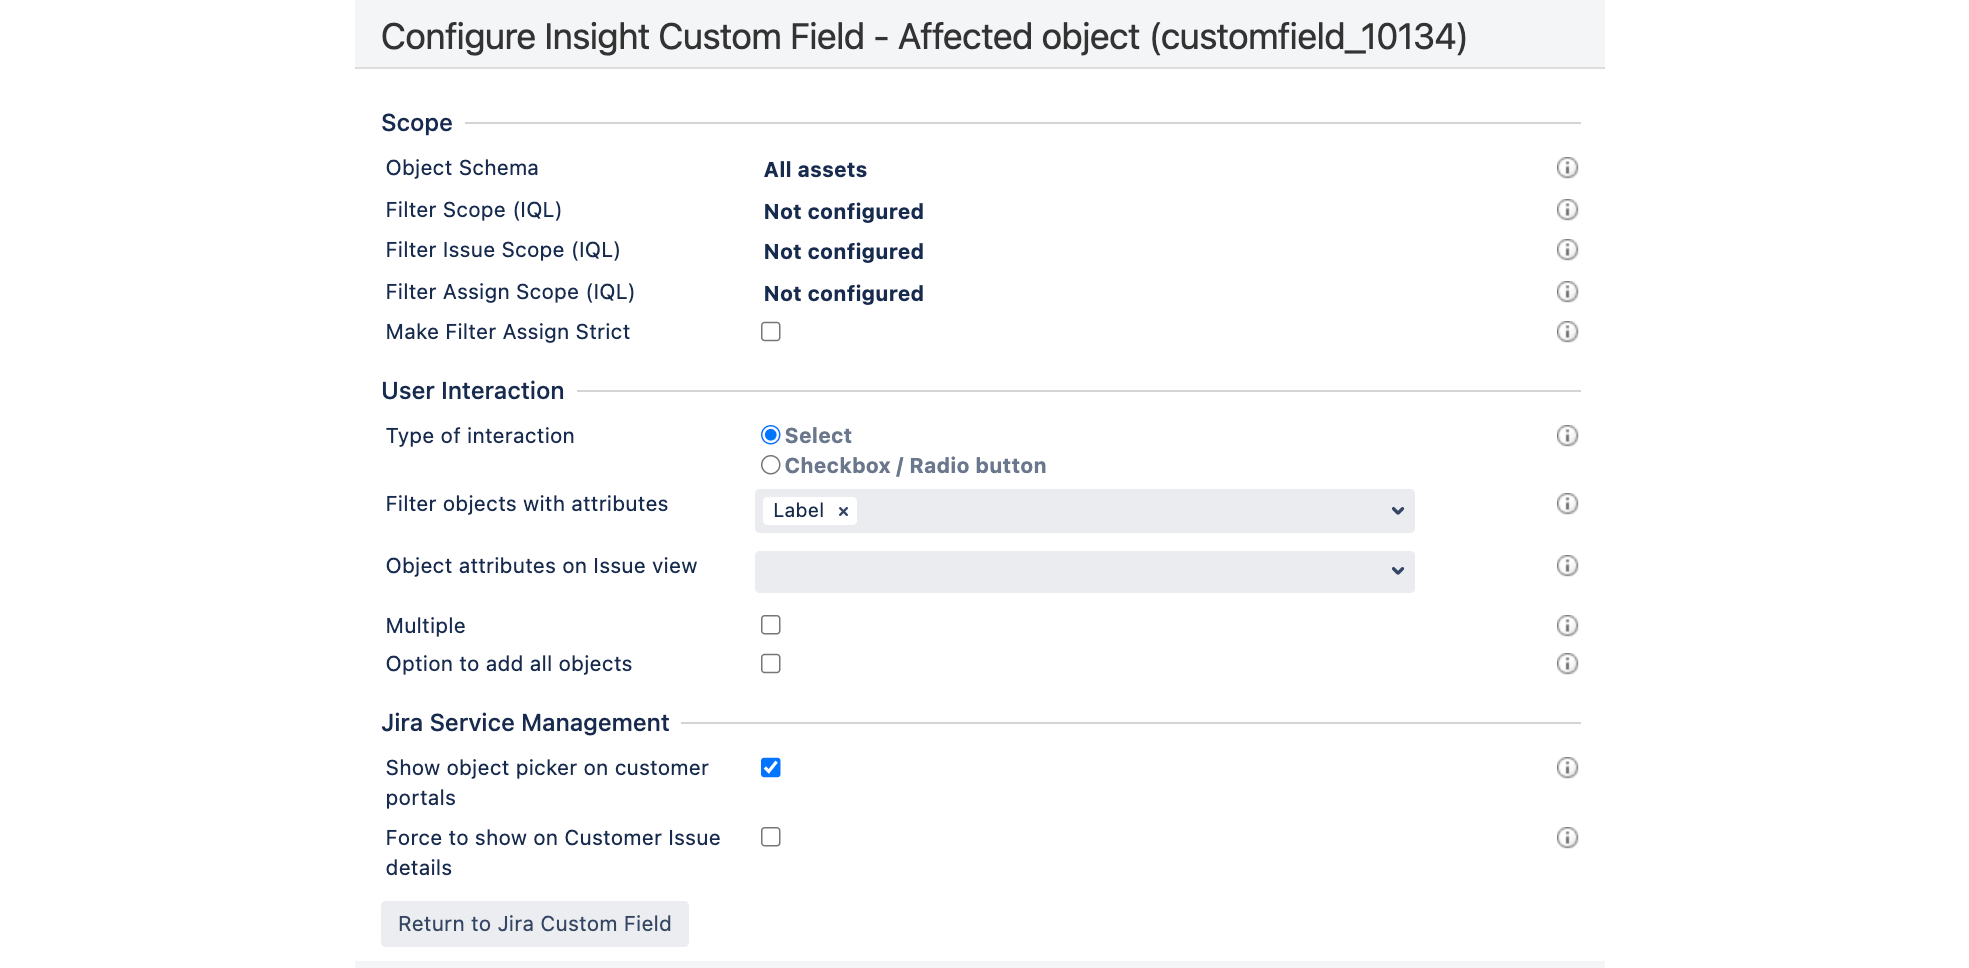
Configure the field
We’ll map the field to your whole inventory, just to have access to all assets. You can adjust it later if you wish to.
To configure the Insight custom field:
On the Custom fields page, search for your custom field.
Select … > Configure.
Select Edit Insight Configuration.
Set Object Schema to the object schema you created. That’s your inventory.
Leave the remaining fields as they are.
Enable the field on the portal
Like with other custom fields, if you’d like your customers to be able to select a value for this field, you need to enable and show it on the customer portal.
View the field
When you create a new change, your custom field should be displayed on the screen. You should also be able to select objects from your inventory.
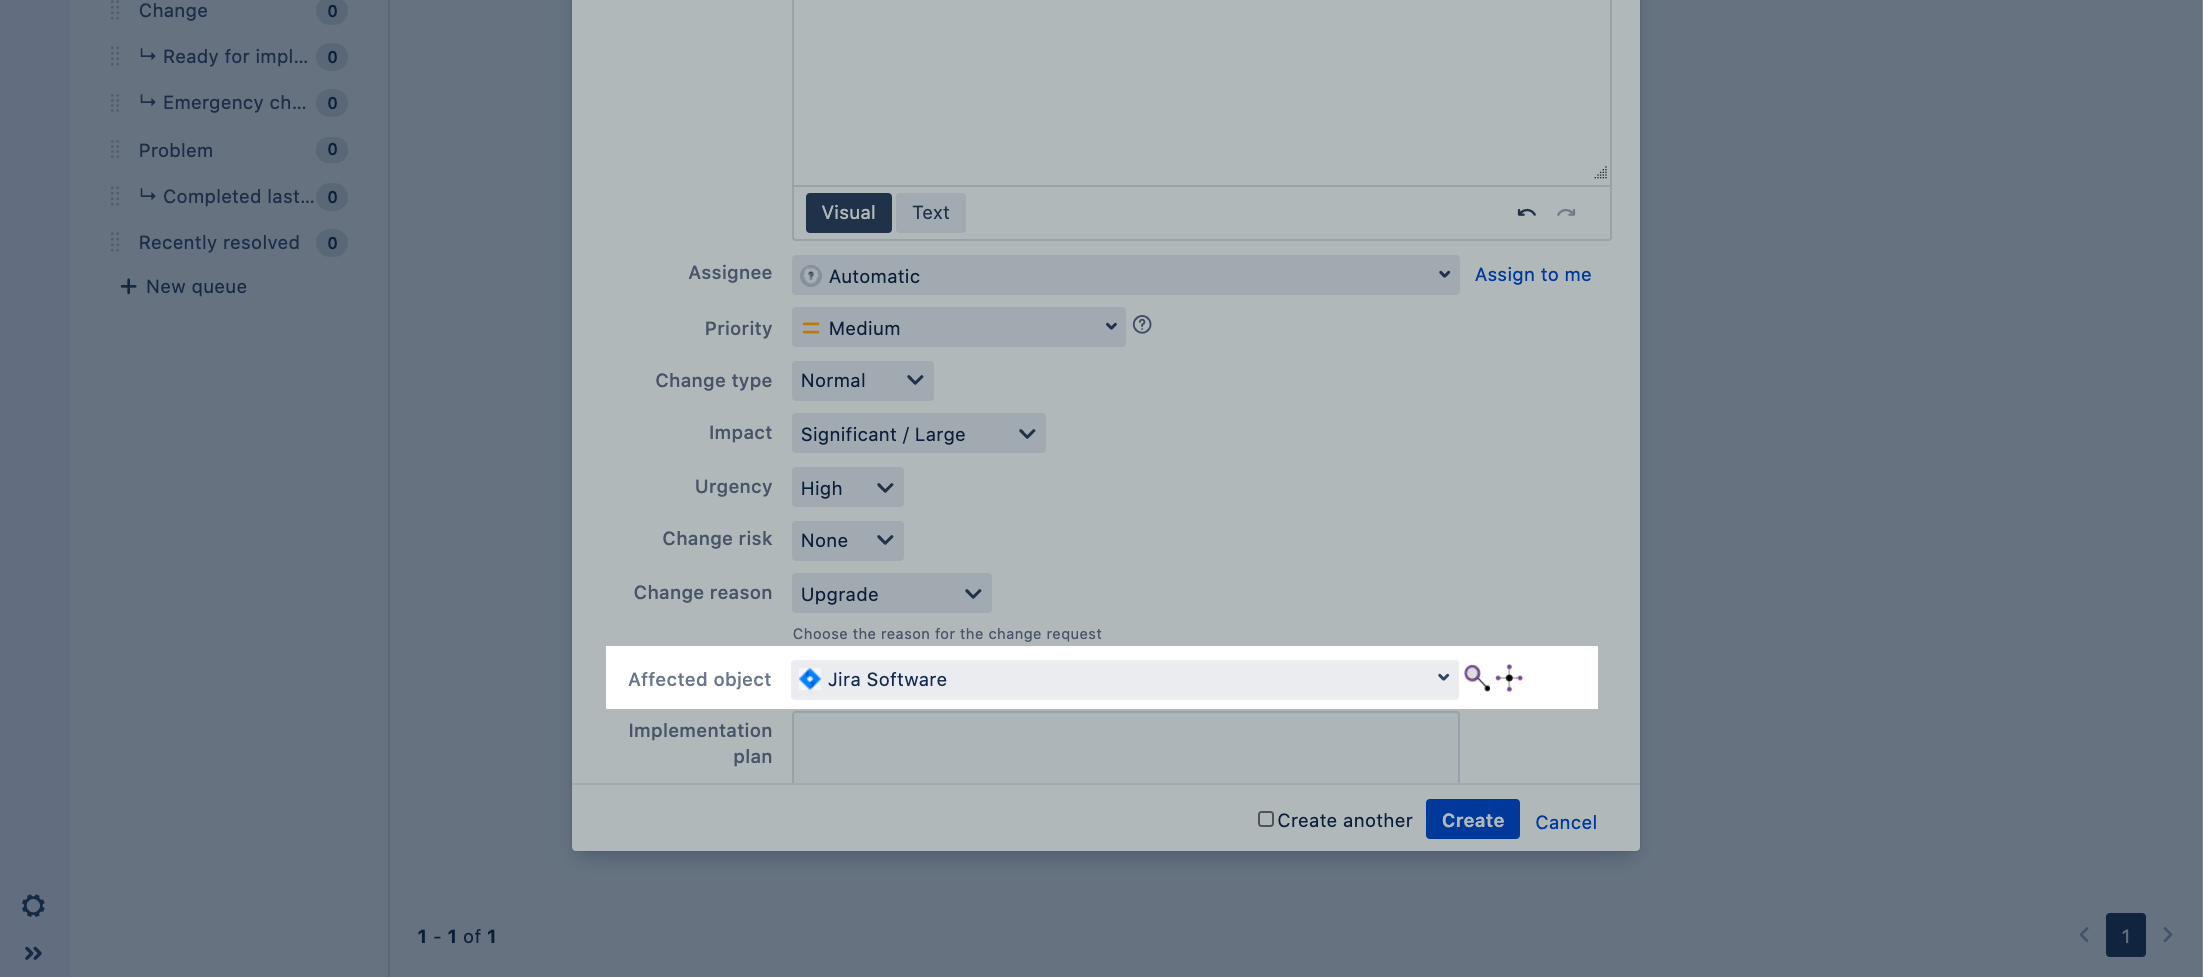
Agent view

Customer portal
Next steps
When you’re ready, go to 5. Add approvals to your workflow.