Setting up request types
Set up request types
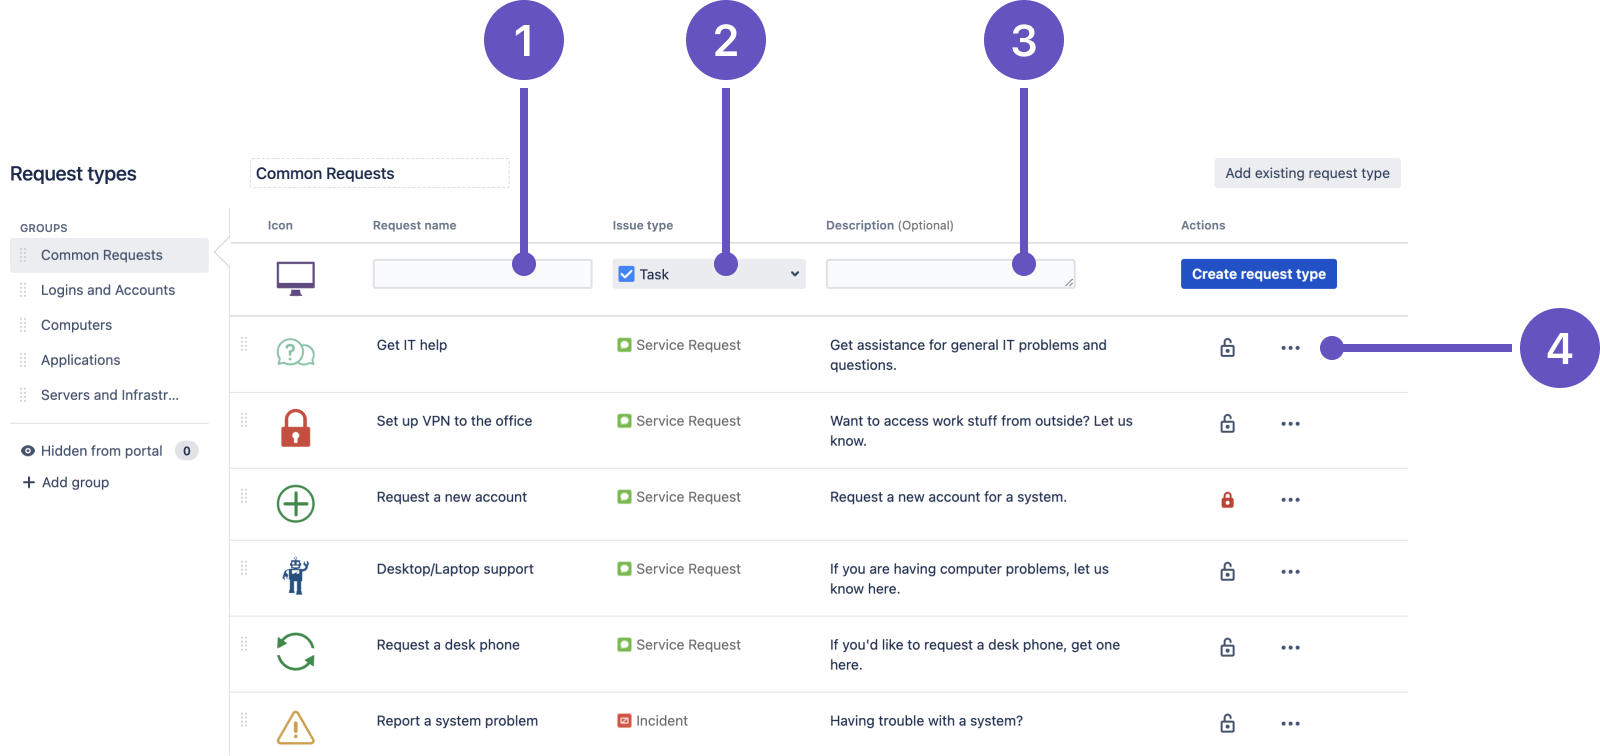
Each request type in a service project is based on an issue type. Open Project settings then Request types to manage your project's request types:
- Request name: give the request an intuitive name by using keywords that your customers look for.
- Issue type: add a new request type by selecting the issue type the request is based on.
- Description: help your customers choose the right request type by providing helpful descriptions.
- Edit fields and restrictions: menu from where you can customize request fields, workflow statuses, add restrictions, and add request types to groups on your customer portal.
A single issue type can be the basis for many different request types. For example, the Service Request issue type serves as the basis for both the "Get IT help" and "Connect to wi-fi" requests.
Organize request types into groups
We recommend using groups if you have seven or more request types, so you can make your request types easier to find on the customer portal. You must have more than one group for the groups to appear in the customer portal. For example, 'Logins and Accounts', 'Applications', and 'Common Requests':
Administrators and project administrators can manage request type groups in Project settings then Request types. Select a group to add new or existing request types to it. You can also create a new group by selecting + Add group and these request type groups are unique to each service desk project.
- Drag and drop request types to rearrange them in your groups (and, consequently, on your customer portal).
- If you assign multiple groups to a single request type, the request type will appear on multiple tabs.
- The group names are listed based on their order in project settings within the search results and the recent requests sections of the portal and the global help center.
- If your service desk uses the same group name in multiple projects, you’ll need to add translations in each project to make sure that the group name is translated.
Customize the fields on a request type
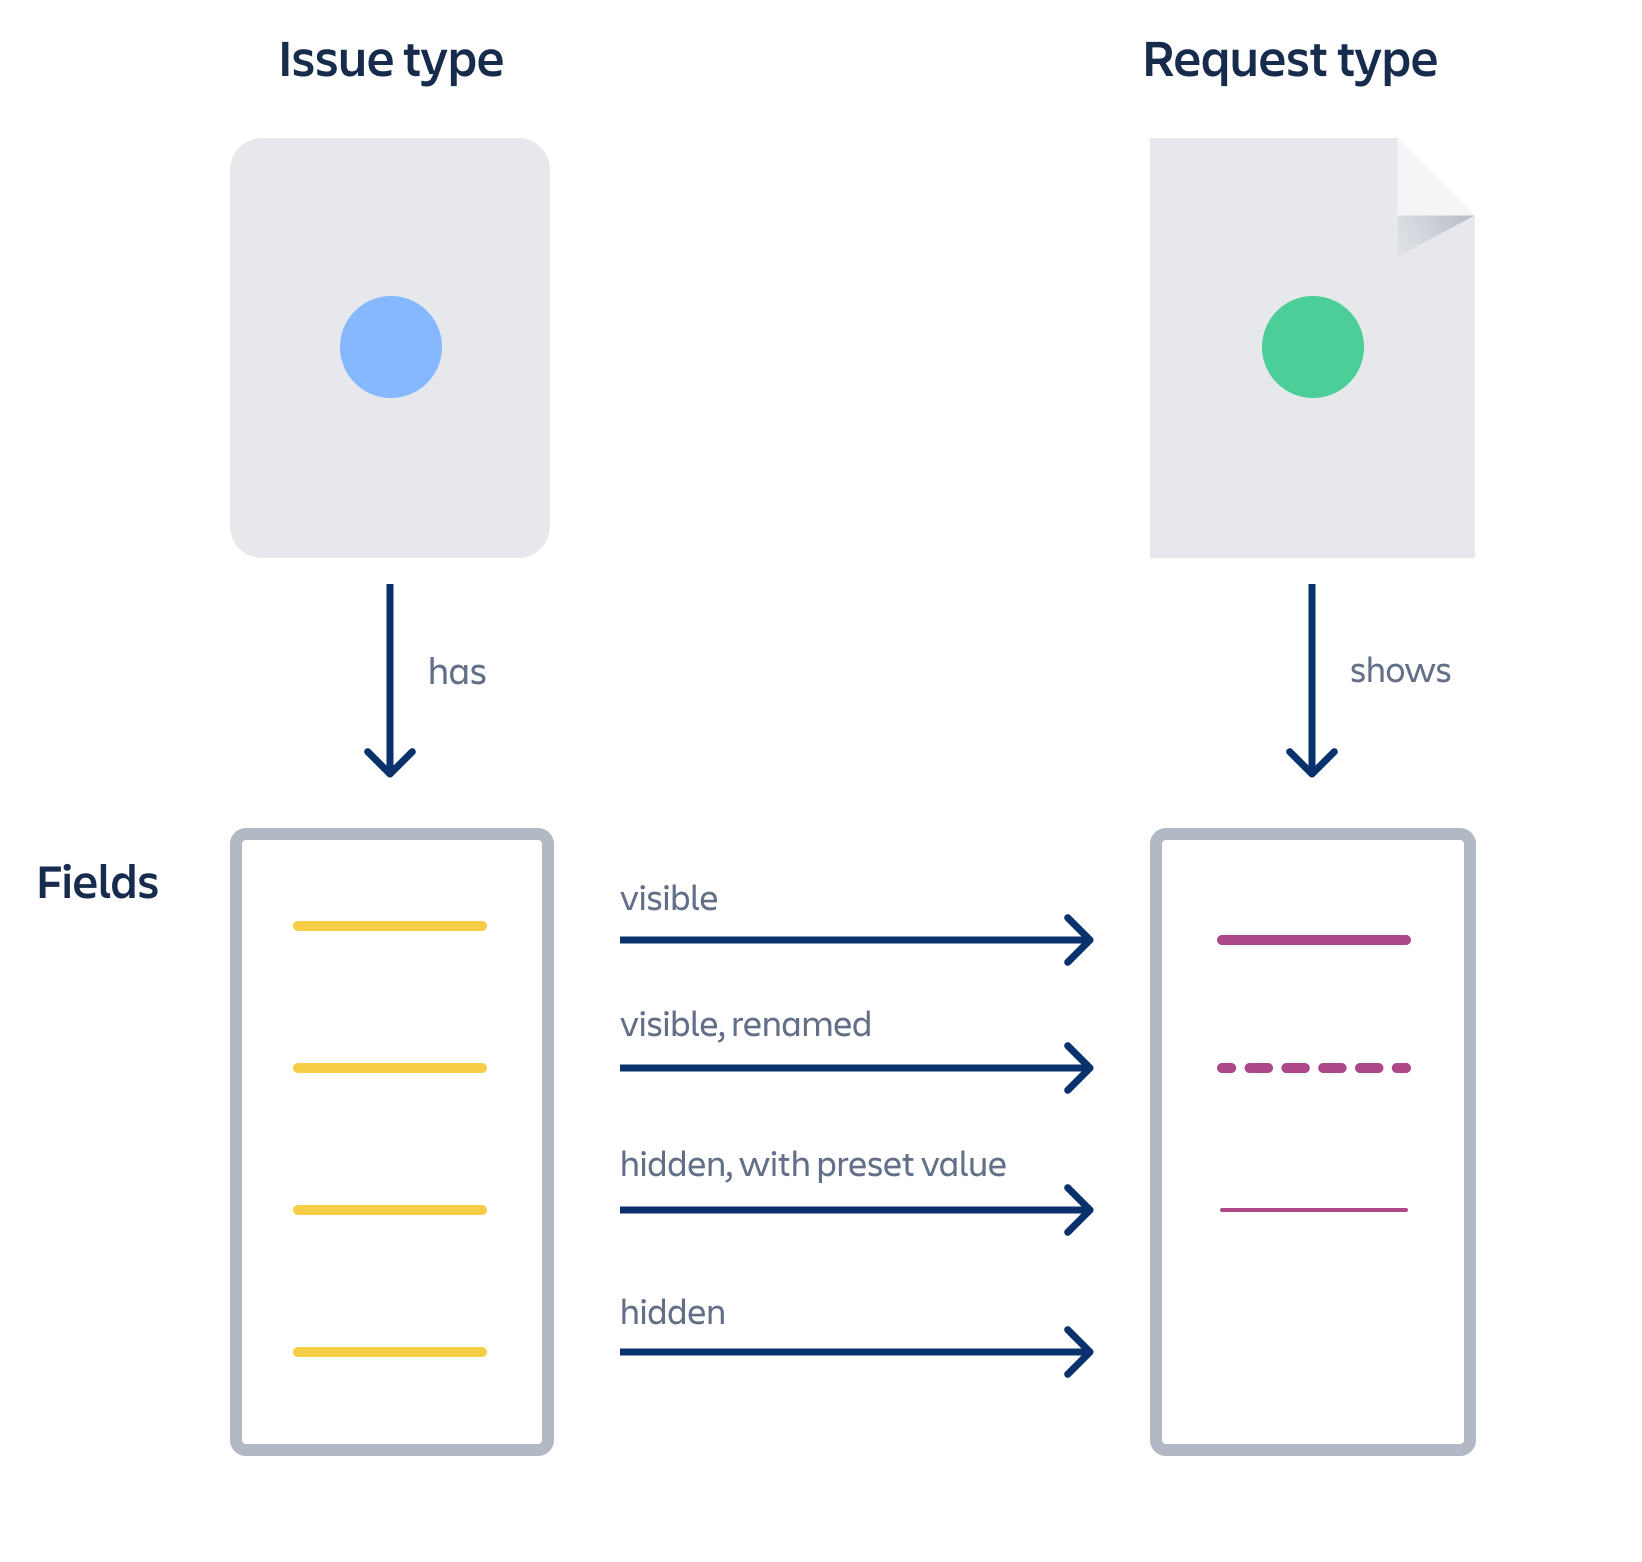
The fields and descriptions that appear in a request type are based on the field configured for the issue type (that is, the issue type the request type is based on).
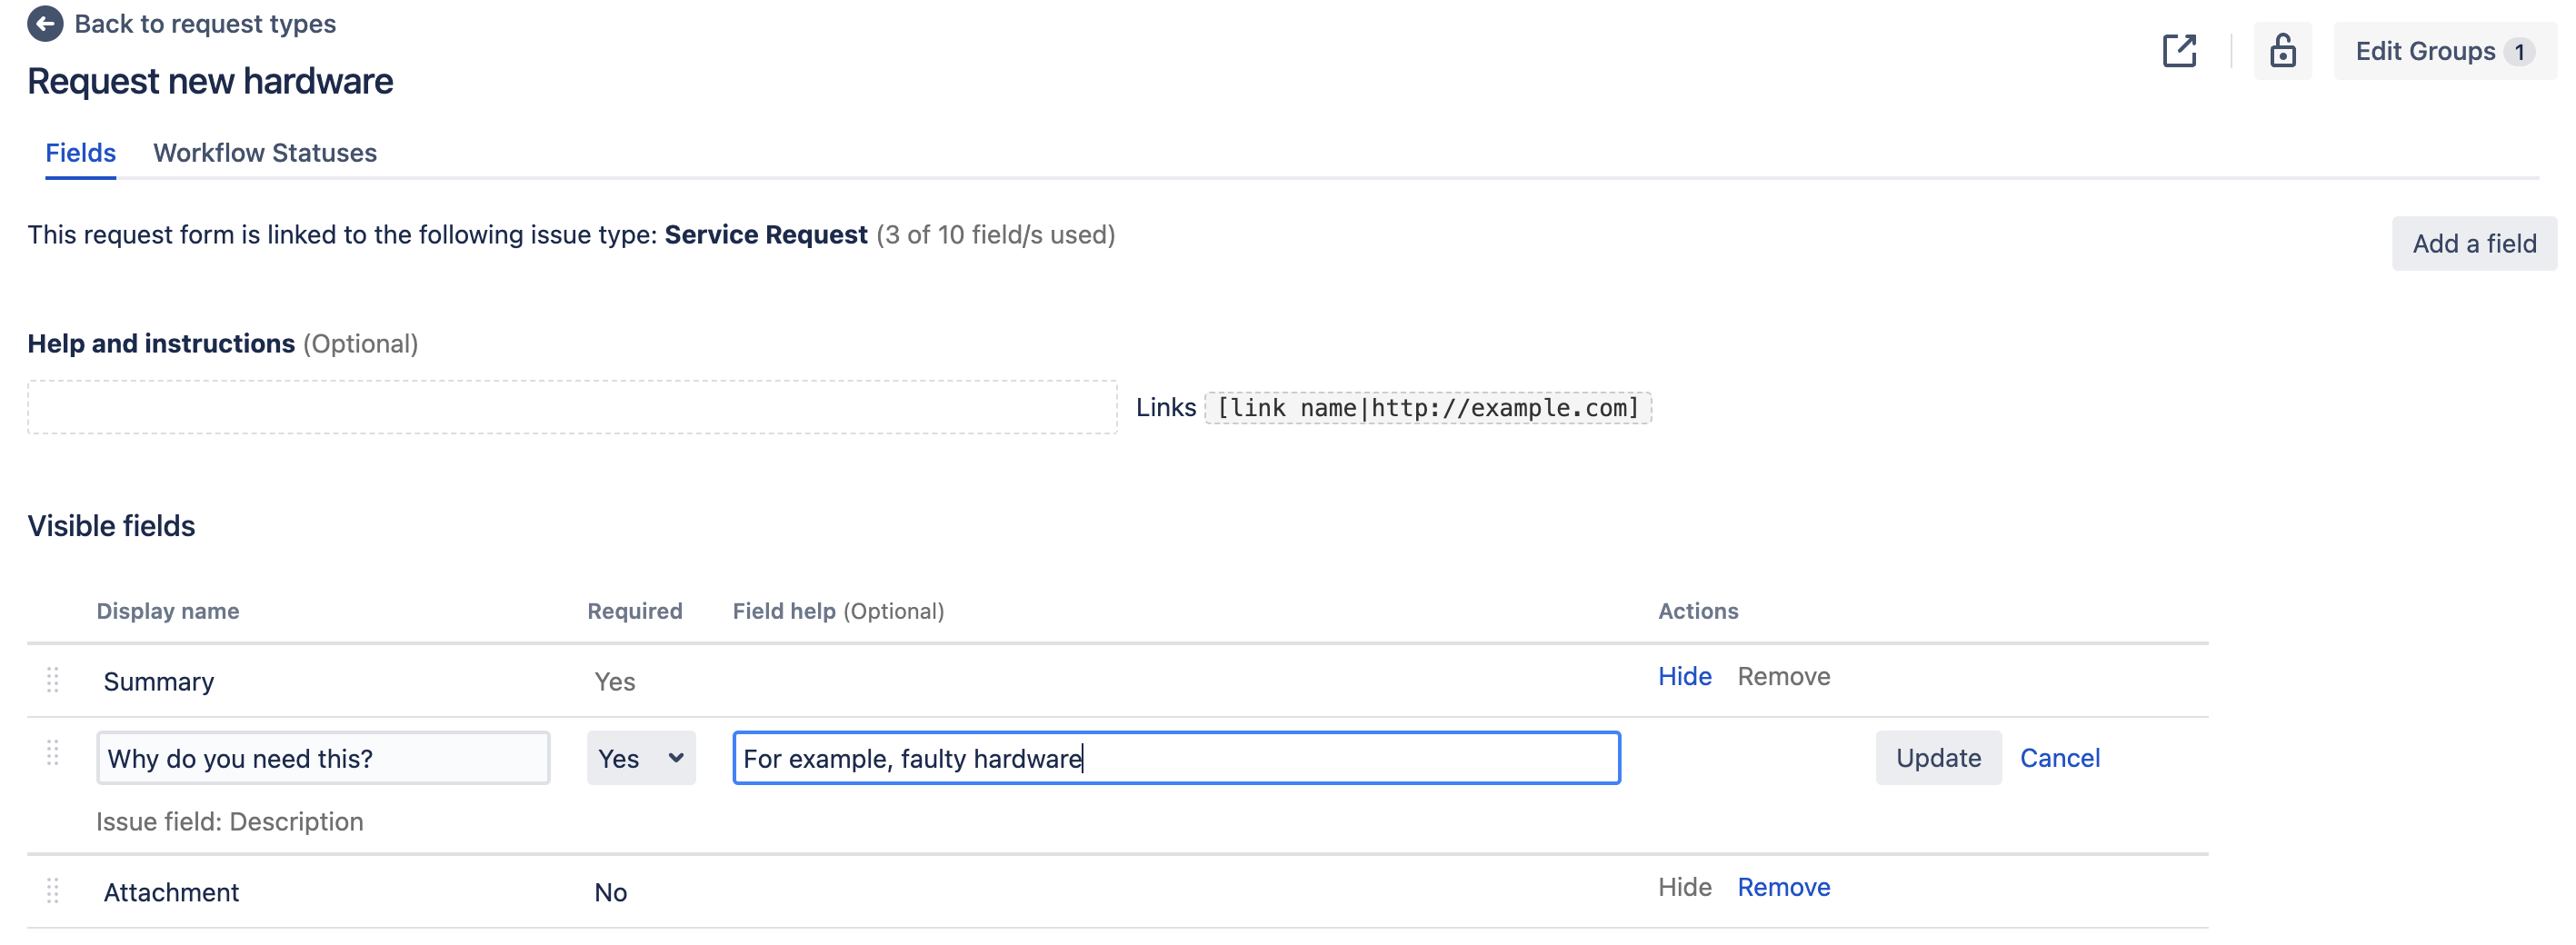
When editing the request type fields, you can use the Fields tab to change the default Jira field names to more customer friendly language. For example, the "Summary" field appears as "What do you need?" for customers.
You can also keep fields hidden but available on the request type so that their value can be used for other processes. For more details about how different types of fields work in Jira Service Management, see Hidden fields and unsupported fields.
If the issue type doesn't have the fields you need, you must add a field to the Jira issue type that the request type is based on. If the issue type uses multiple screen schemes, the new field must be available in the create screen. See Associating a screen with an issue operation.
Customize the workflow statuses for a request type
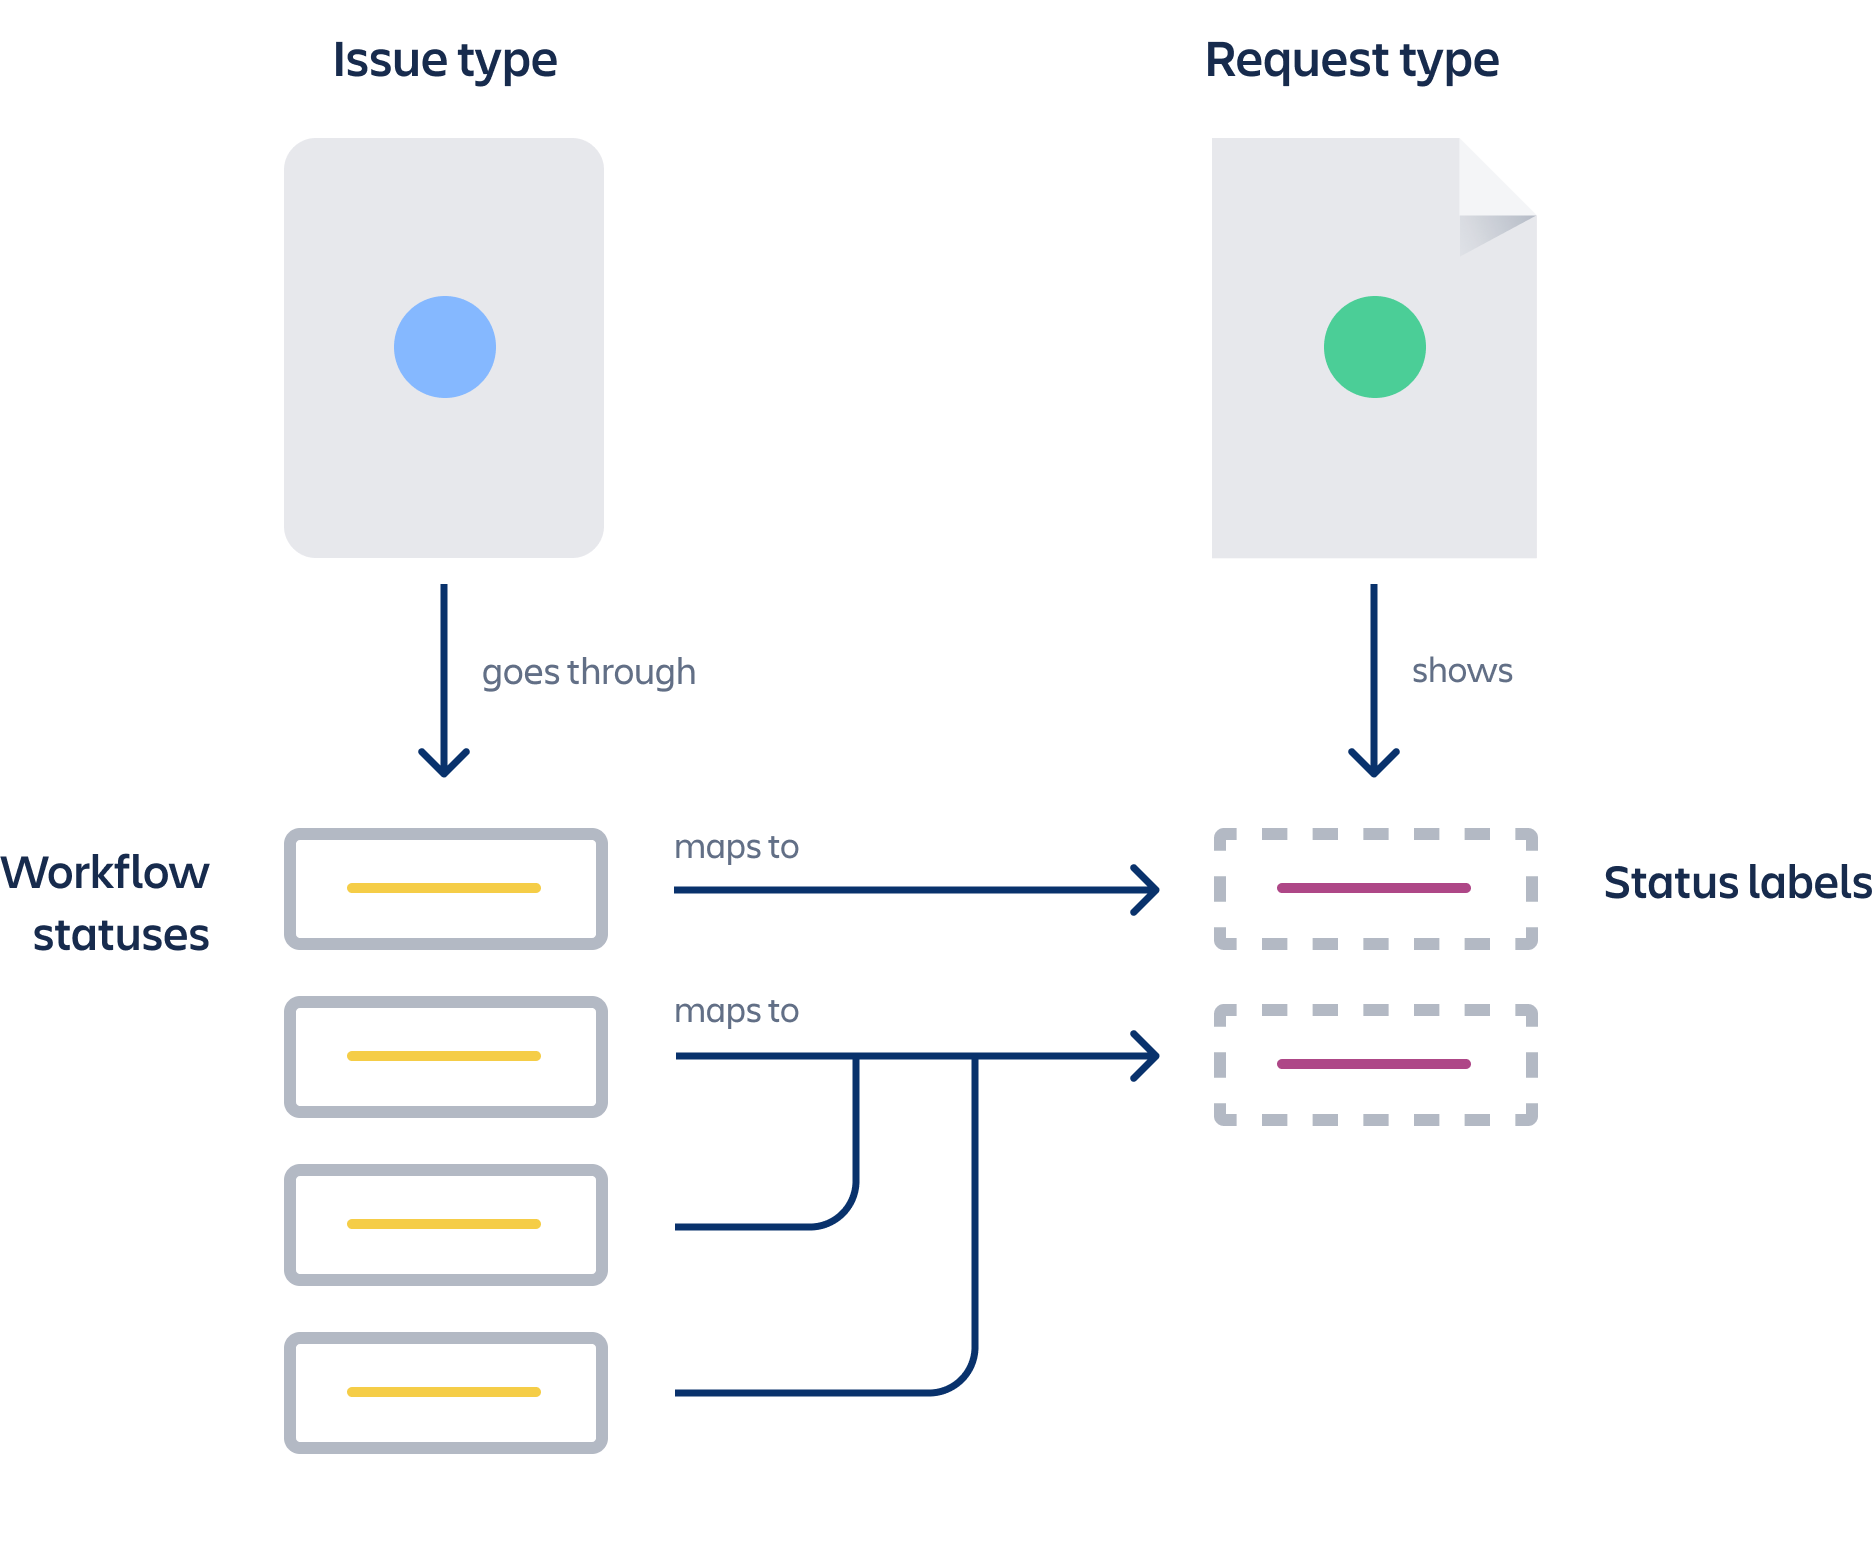
Jira Service Management uses the workflow associated with the request's issue type for the flow of the request.
You can re-map the default workflow statuses to more customer friendly statuses that will appear for customers, and you can also map multiple statuses to a single customer status to simplify the appearance of the workflow. Use the Workflow statuses tab to customize the workflow that customers will see.
Only changes between these customer-visible 'status names' will be reflected in the Customer Portal and its notifications (e.g. a transition between two workflow statuses can be hidden on the Portal by giving them the same 'status name'). For more information about notifications, see Managing service project notifications.
If you need to change the workflow of a request, you must edit the workflow associated with the service project by going to Project settings > Workflow.
Restrict access to request types
You can add restrictions on request types to control who can raise a specific request type and make sure that requests get routed to the appropriate channels. More about restricting request types
Set up Request type field in the issue view
By default, the Customer request type custom field is created by Jira Service Management and is available in the issue view when you create a new project.
But for your existing service projects, you’ll need to complete the steps below to make sure that agents can use this field in the issue view:
- Log in as a Jira admin.
- In the sidebar, select Project settings and then Fields.
- Search for the field Customer request type and check if this custom field has been associated with the Create issue screen of your service project.
If the field has already been linked, you can skip the steps below. - In the upper-right corner of the screen, select Administration and then select Issues.
- Under Screens (in the left-side panel), select Screens.
- Search for your project and select Configure against the Request fulfilment create issue screen.
- In the Field list, type Customer request type and the select Add.
- Repeat steps 5 and 6 to add this field to the Request fulfilment view/edit Screen too.
Good to know:
- The above steps need to completed in each service project where you want to use this field in the issue view.
- The field label for the Customer request type custom field in the issue view is Request type.
Hidden fields and unsupported fields
Each request type in a service project is based on an issue type. Every issue type has a set of allowed (and possibly required) fields associated with it. As you set up the request type, you can choose to include fields that are hidden on the customer portal but still provide a value to assist with your internal processes and reporting. For example, you might want to set the value of the "Label" field as "hardware" for the "Request new hardware" request type, and set the value as "software" for the "Request new software" request type.
Some fields used by an issue type are not supported for use in the customer portal; if you include these fields on a request type, they will automatically be added to the Hidden fields with preset values section and you'll be required to set a value for them.
Other fields aren't supported for use in Jira Service Management.
These fields can be added to the request type and given a preset value, but you cannot make them visible on the customer portal:
- Assignee
- Linked issues
- Any fields that are defined by other Jira applications
- Group, project, and version picker custom fields
These types of fields can't be added to a request type and won't appear in the in the Add a field dialog:
- Issue type
- Log work
- Reporter
- Time tracking
Set up URLs with auto-populated request fields
You can generate URLs that will automatically populate selected request fields with contextual data. This way you can direct your customers to the customer portal from an external website and transfer certain details into the request fields.
URLs can fill in the following request field types:
Field type | Example usage | Description |
|---|---|---|
Summary |
| URI encode value and attach it to the custom field. |
Description |
| |
Priority |
| |
Text |
| |
Textarea | ||
Date |
| Format = |
Due date | ||
Date time |
| Format = |
Label picker |
| Comma separated labels. |
Checkbox |
| Pass values of the option ID to be selected, separated by comma. |
Multi-select | ||
Radio |
| Pass a single value to be selected. |
Select | ||
Cascading select |
| Pass 1 or two values. The first value is the first select option to be selected. If a second value is passed, then it is the second select value to be selected. |


