Managing your releases
Before you begin
Depending on how your organization is structured, the content on this page is meant for Advanced Roadmaps admins and plan owners.
The guide discusses the typical end-to-end path that users and administrators may find themselves taking part in when using features of Advanced Roadmaps. You'll also find high-level content on concepts, as well as some recommendations and optional steps you can consider, as you flesh out your plans.
Managing releases
Advanced Roadmaps dynamically loads your Jira issues into your plan, and suggests releases you can work with. The data in your plan is always up-to-date, and lets you track the progress of your releases, as well as determine if these releases will be completed on time. You can also group project-specific releases into cross-project releases, which easily gives you a higher level view of your goals.
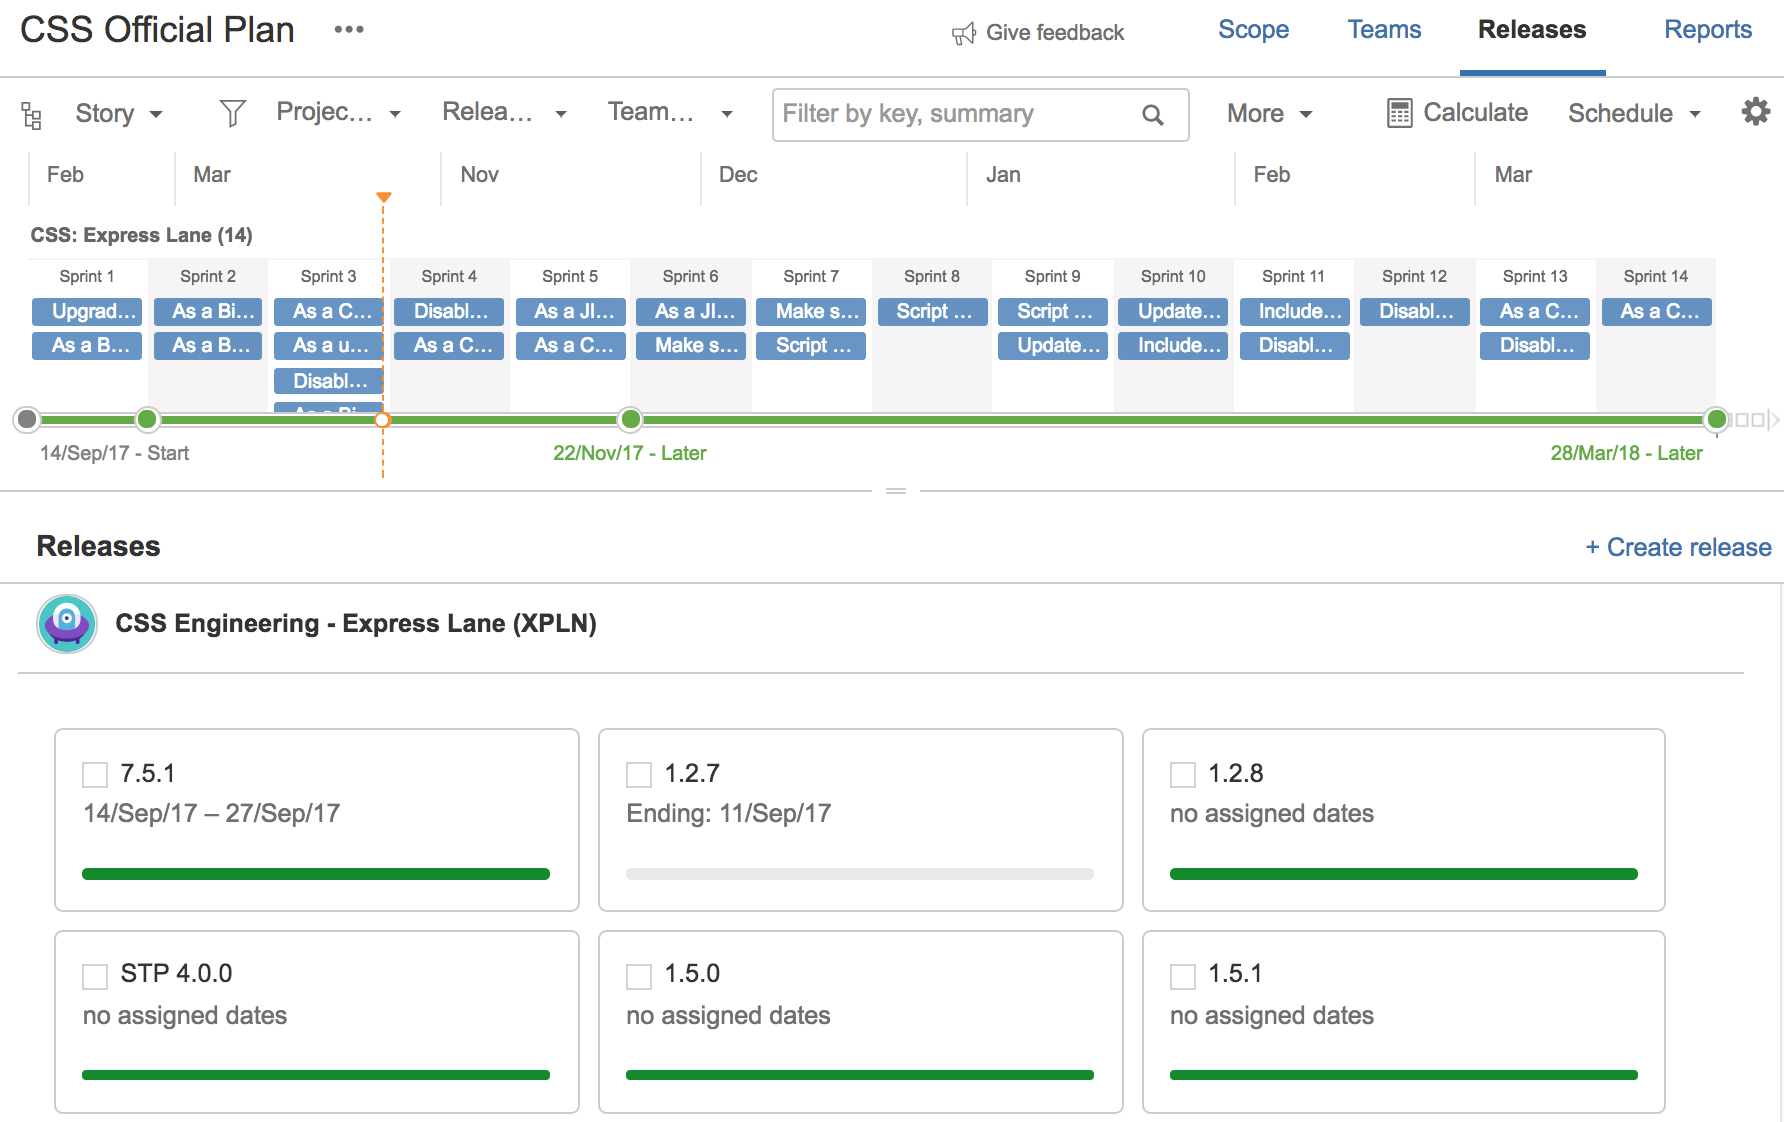
Accessing the functionality of releases is different between plans with the improved interface and live plans (versions 2.0 to 2.27).
- Accessing releases in plans with the improved interface
You can access the functionality of releases via the releases view at the top left section of your plan. - Accessing releases in live plans
Whether you're using a live plan or a plan with the improved interface, you can perform the following basic release management tasks:
- Creating project-specific and cross-project releases
- Editing releases
- Removing releases from a plan
To start managing the releases in your plan, see Releases in live plans or Releases in plans with the improved interface.
Best practices when managing releases
We recommend to keep in mind the following best practices for your release configurations. Note that these are only recommendations, and your configurations should be aligned with how your teams work in your organization. In saying that, always keep in mind velocity and capacity metrics when you're setting up your releases.
Understanding how work is scheduled based on team velocity is the first important step. Once this is sorted out, the next step is to decide how you want releases to be mapped out and scheduled in your plan. The release settings of your plan will impact how tasks in sequence are scheduled, and will display whether your roadmap is on track or off track.
Selecting releases to include in a plan
When you're using the wizard to create a plan, you'll be prompted to select the releases to include in the plan. This is a step that you can choose to skip; however, we recommend that you take the time to choose the releases that are relevant to your work. This is because only the issues that are assigned to the selected releases will be included in your plan.
Removing releases from a plan
Over time, you might find accumulate hundreds of issues in your plan, and this might affect the performance of your plan. If this happens, we recommend you consider removing releases from your plan. Choosing which releases to remove will ultimately depend on how you and your teams work. But as a start, you can consider removing releases that have already shipped — since these releases have shipped, then you wouldn't need to keep track of the issues in this releases anymore.
Using fixed release dates
Note the following functionality differences, depending on whether you're manually scheduling issues , or you're auto-scheduling issues:
When manually scheduling issues
- Releases will turn red only if any of the assigned issues are scheduled beyond the release date.
- This does not indicate that there's too much work in the release — rather, it simply indicates that there's work scheduled beyond the release date.
When auto-scheduling issues
- This is as close as you can get to the notion of "there's too much work scheduled in a release."
- If the work assigned to a release is larger than the available team capacity to complete it, then work will be scheduled beyond the release end date. Effectively, this makes the release turn red.
Using dynamic release dates
In live plans:
If you set a dynamic release date for a release, then that release becomes scope-boxed. It then becomes no longer possible to overbook that release — the scheduler will calculate your schedule based on the scope and resources assigned to that release, and will then adjust your timeline accordingly. See Releases in live plans for more details.
In plans with the improved interface:
The concept of dynamic release dates does not apply in plans with the improved interface at the moment. Currently, if you're purely manually scheduling issues, you would not get a value for release dates. Instead, issues would be grouped into specific releases that don't really have an end date. We're still considering how best to support dynamic release dates in the improved interface.At the moment, to generate a "dynamic" release end date, you'll need to auto-schedule the issues in your plan. Depending on how your auto-schedule settings are configured, a date for this may be generated.
Using cross-project releases
If you're worried about multiple teams working on issues that are assigned to a commonly shared release, then you can consider using a cross-project release.
By doing so, your plan will include individual releases for each project assigned to the individual teams, and the cross-project releases will keep these individual releases in sync. This helps you monitor the multiple releases more efficiently, and ultimately reduces administration tasks.


