Configure the Sidebar
If you have administration permissions for a space, you can customize the space's sidebar to have its own logo, change the way the hierarchy is displayed, and add shortcut links to help navigate to important content quickly.
To start configuring the sidebar, choose Space tools > Configure sidebar.
Change the space name and logo
To change the space name:
- Choose
 next to the space name.
 - Type in a new space name and Save.
- Logo - change the space name and logo
- Reorder - drag to reorder shortcuts
- Hide - hide or show pages, blogs, shortcuts or navigation display options.
To change the space logo:
- Choose the next to the space name.
- Choose Upload an image.
- Select an image from your computer.
- Adjust the size of the image to fit within the highlighted circle.
- Choose Save.
Things you should know:
- Space logos are 48px x 48px. Logos smaller than these dimensions will be centred with whitespace around them.
- You can only change the space logo for a site space. For your personal space, your profile picture is used as the space icon.
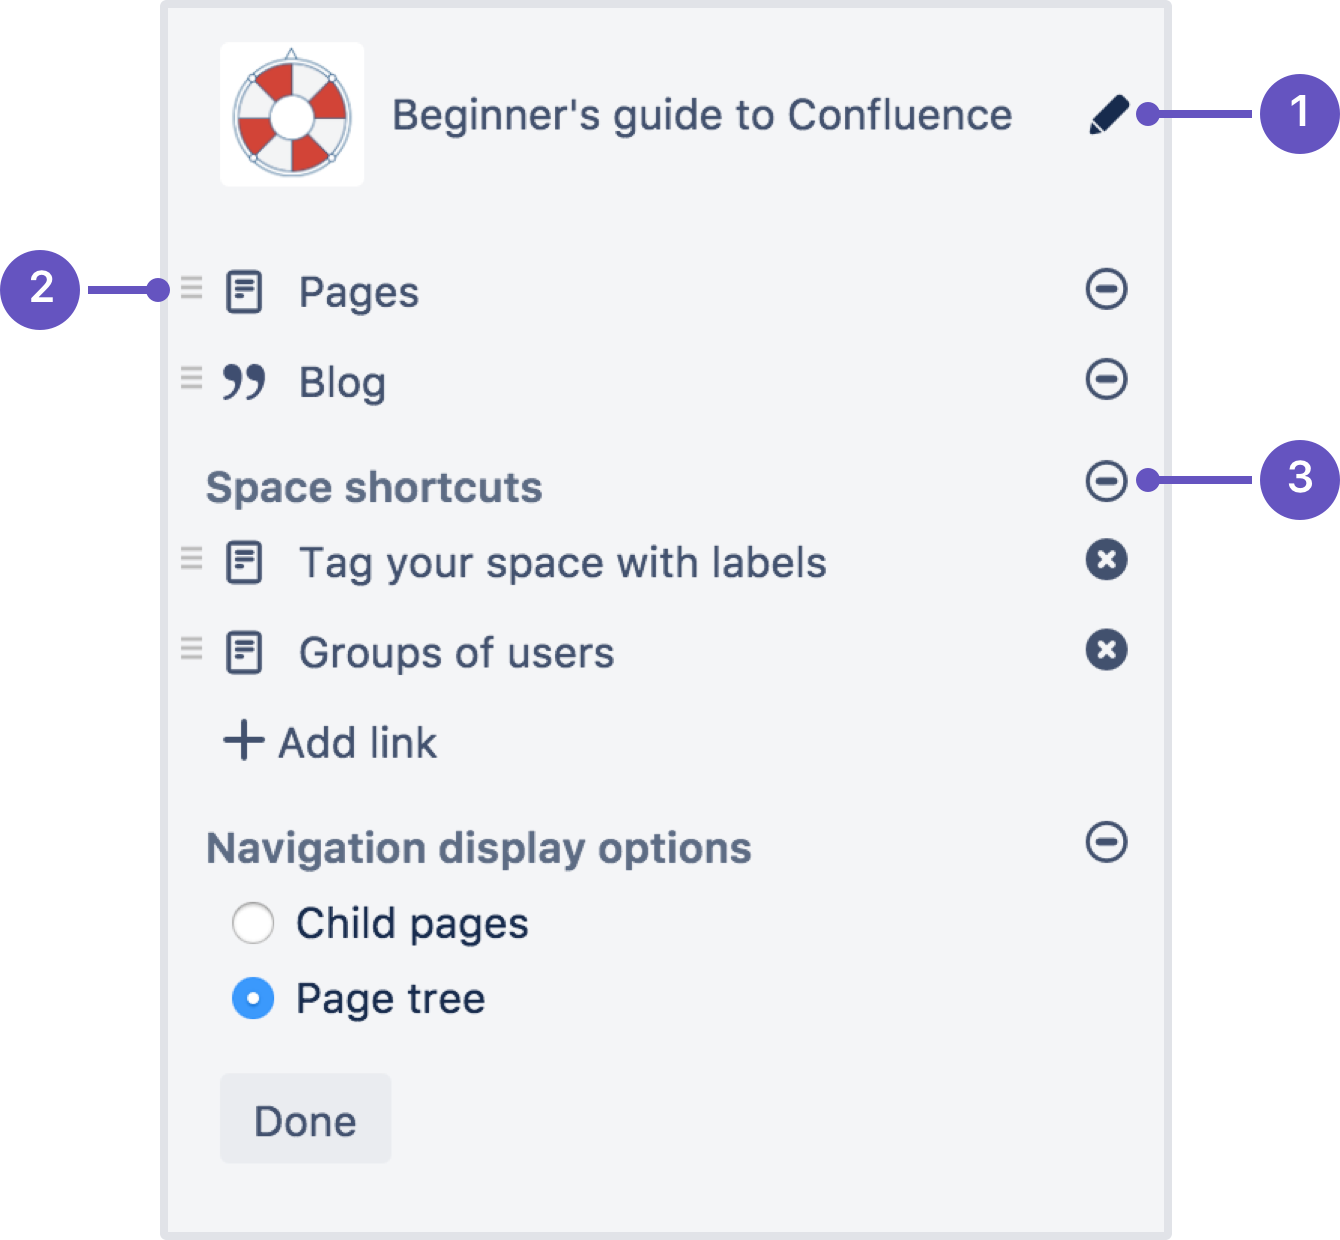
Configure the sidebar links
- Choose the icons to show or hide pages, blogs, shortcuts or navigation options.
For example, if you want your space to be used primarily as a blog you can hide the 'Pages' link. - Add-ons such as Team Calendars for Confluence Server may add other links in this section of the sidebar and you can also show or hide these.
- Choose Add link to add a shortcut link to the sidebar. This could be a link to an important page for your team, or to an external site.
- Drag links to reorder them within each section (you can't move a link from one section to another).
Change the navigation display options
- Choose Child pages to see the current page and its children in the sidebar.
- Choose Page tree to see the page tree for the entire space, expanded to the current page.
- You can also choose to completely hide the navigation display options and instead add the pages you want to be visible as shortcut links. Alternatively, you can remove the sidebar navigation altogether and use a Page Tree Macro or Children Display Macro on your homepage for navigation instead.
Adding custom content to a sidebar
You can further customize a sidebar using wiki markup to add custom content.
To add custom content to your sidebar:
- Go to the space and choose Space tools > Look and Feel from the bottom of the sidebar.
- Choose Sidebar, Header and Footer.
- Enter your custom content in the Sidebar field.
The sidebar, header and footer fields all use wiki markup, check our guide to wiki markup for help, or check out some common customizations below.
Last modified on Oct 5, 2022
Powered by Confluence and Scroll Viewport.