Automatically Assigning Users to Groups
For each directory in the application you may define a set of groups that will be automatically assigned to the user upon first successful login to this application using such directory.
If the directory is shared among different application in Crowd, you may define a different set of auto-assigned groups per application.
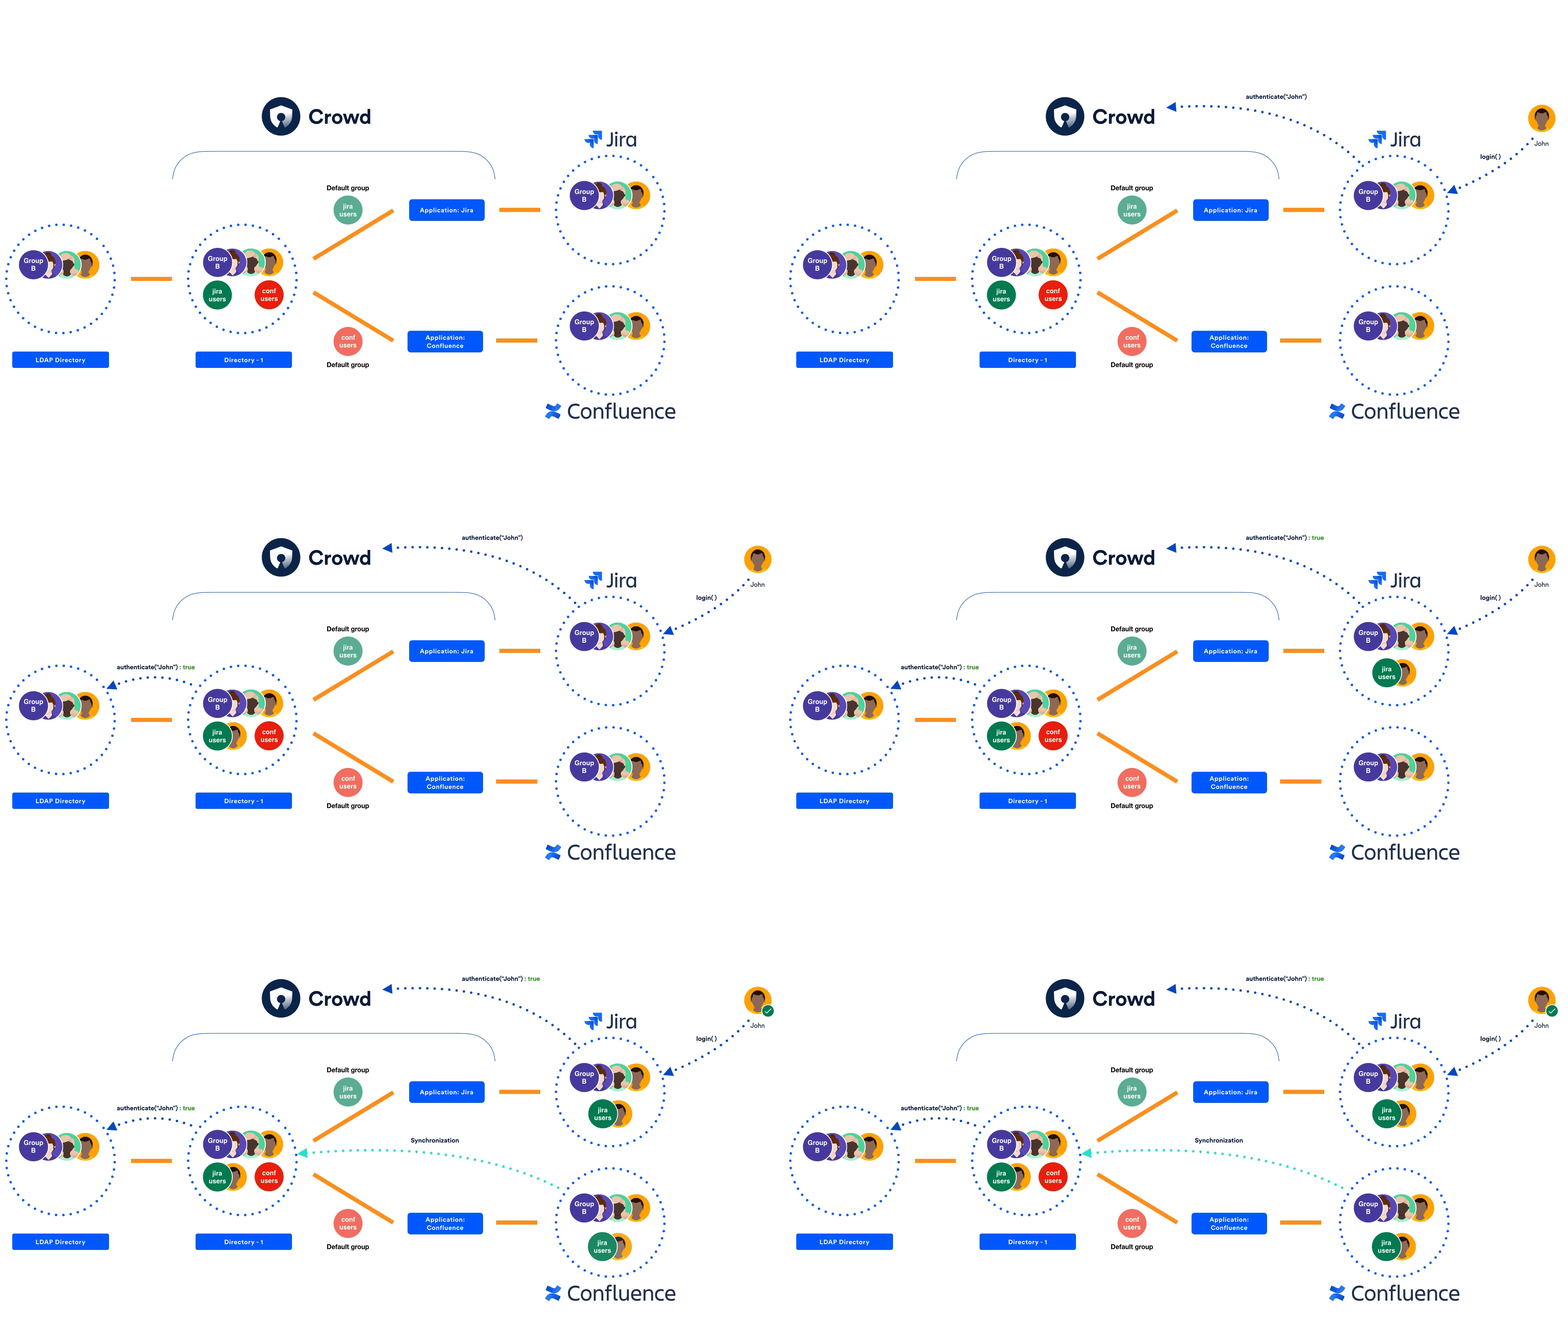
Example
Here's an example that will help you understand the concept of automatically assigned groups better:
There are two products, Jira and Confluence, which are mapped to the same remote directory using Crowd. In Crowd, there is only one definition of this remote directory.
The administrator has defined two local groups called jira-users and conf-users in the directory and mapped these groups to applications: jira-users to Jira and conf-users to Confluence.
Now, when users log in to Jira for the first time, they will be assigned to the jira-users group upon successfully authenticating with the remote directory.
Use case scenario
Whenever you have multiple applications connected to Crowd and some of these applications have different sets of users that have access to it, you might want to optimize your license usage so that only users actually using these products consume product licenses.
You could achieve that by manually assigning your users to groups per product, however, this solution does not scale with growing number of users.
Using automatically assigned groups per application allows you to optimize yours products license usage, as only users that authenticated to an application would be assigned a license.
Defining automatically assigned groups per application
To add new automatically assigned groups per application:
This instruction assumes that you have already defined directory mappings for your applications. If not, please consider the following guide.
- Log in to the Crowd Administration Console.
- In the top navigation bar, click Applications.
- Search for the application you wish to update, and click the link on the application name.
- Select the Directories & Groups tab.
- In the Actions menu, click Configure automatically assigned groups.
- Search for your groups.
- Select the groups by clicking on it or hitting Enter.
After selecting a group you may select another one by repeating steps 6 to 8 - Click Add and then confirm your configuration by clicking Save.
To remove automatically assigned groups per application
- In the Automatically assigned groups screen, find your group/
- Click 'x' icon next to the group
- Click Save.
Screenshot: Application directory mapping - configuring automatically assigned groups per application
Screenshot: Dialog for adding default groups per application
- Groups will be automatically assigned to users only when they first log in to a product connected to Crowd.
- When you remove or add a group to the list, users who have already been added to a default group will not be added to the new groups, or removed from the old ones.
Configuring product
Once automatically assigned groups are defined for application in Crowd, make sure that the Update group memberships when logging in advanced option is set to Every time the user logs in for Crowd directory in the product represented by this application in Crowd.
This option can be set on the directory configuration screen. See the following documentation with instructions how to configure Crowd directory in products:
- Integrating Crowd with Atlassian Jira
- Integrating Crowd with Atlassian Confluence
- Integrating Crowd with Atlassian Bitbucket
- Integrating Crowd with Atlassian FishEye
Automatically assigning groups per directory
You can configure Crowd to assign new users to specific groups automatically. You can define default groups for each directory so that every user that logs in becomes a member of these groups automatically.
To add new default groups for a directory:
- Log in to the Crowd Administration Console.
- In the top navigation bar, click Directories.
- Search for the directory you wish to update, and click the link on the directory name.
- Select the 'Options' tab.
- Click the 'Add Groups' button.
- Search for your groups.
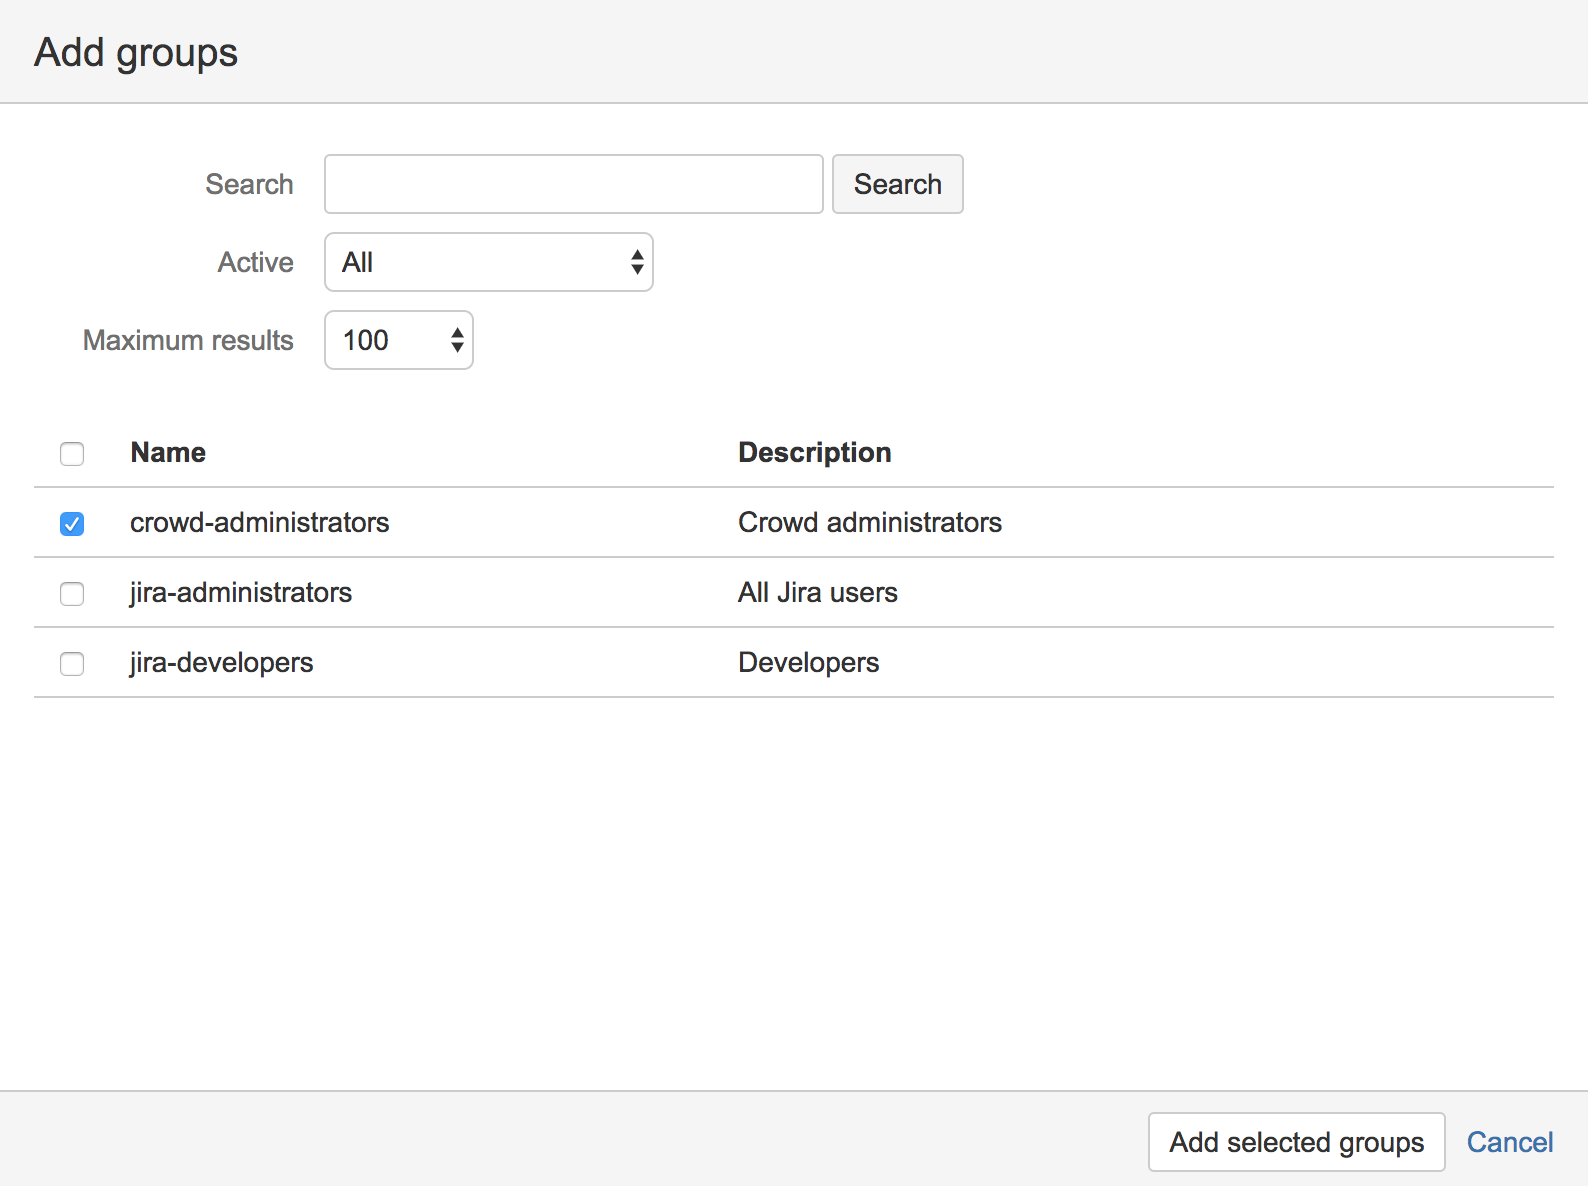
Crowd will list the groups in the selected directory that match your search criteria but excluding groups that are already defined as default groups for the selected directory.Crowd will display a maximum number of groups as specified in the 'Maximum Results' field. If too many groups match the search, you can change the search criteria and click 'Search' again. (There is no way to move to the next page of matching groups.)
- Select your groups.
- Click Add Selected groups.
To remove a group from the list of default groups for a directory:
- In the Options tab, find the group on the list.
- Click the 'x' button next to the group name.
Once you have removed the group from the list, users will not be added automatically to the group when they log in. Existing users will remain members of the group.
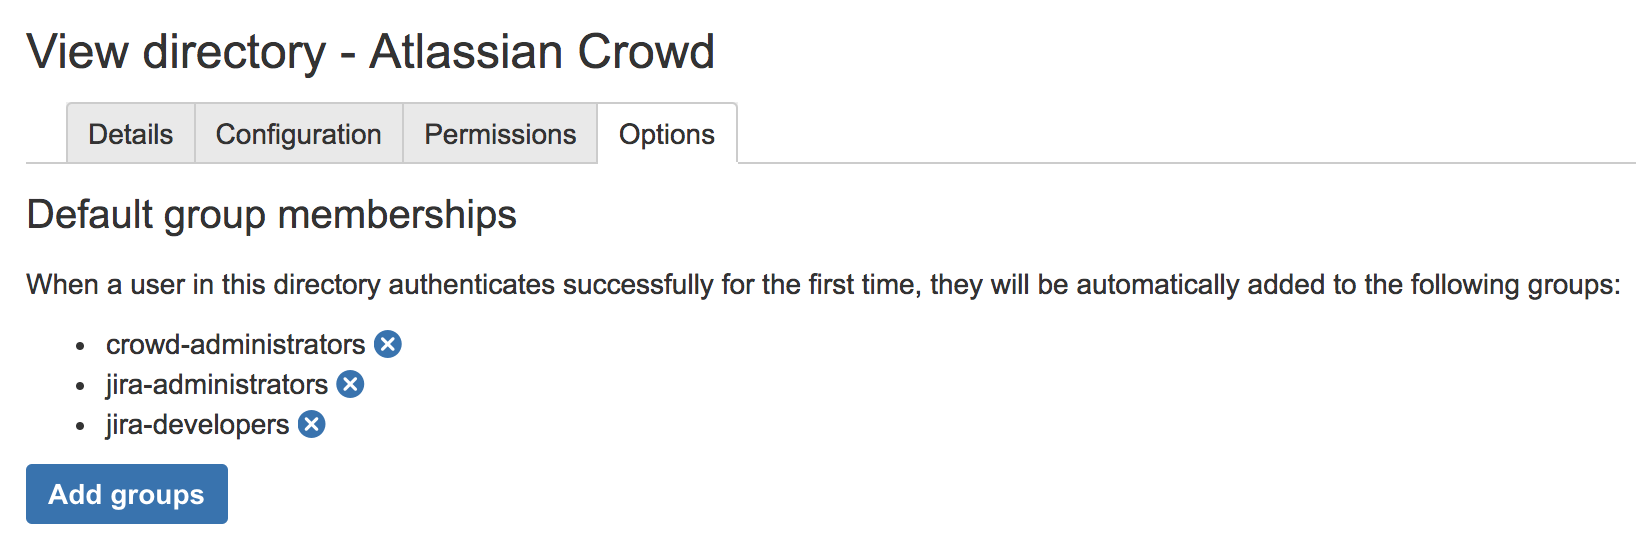
Screenshot: Default groups for a directory
Screenshot: Popup for adding default groups
RELATED TOPICS
Managing Groups
Managing Group Members
Managing Directories
Crowd documentation


