Customize Jira Service Management's bug report workflow
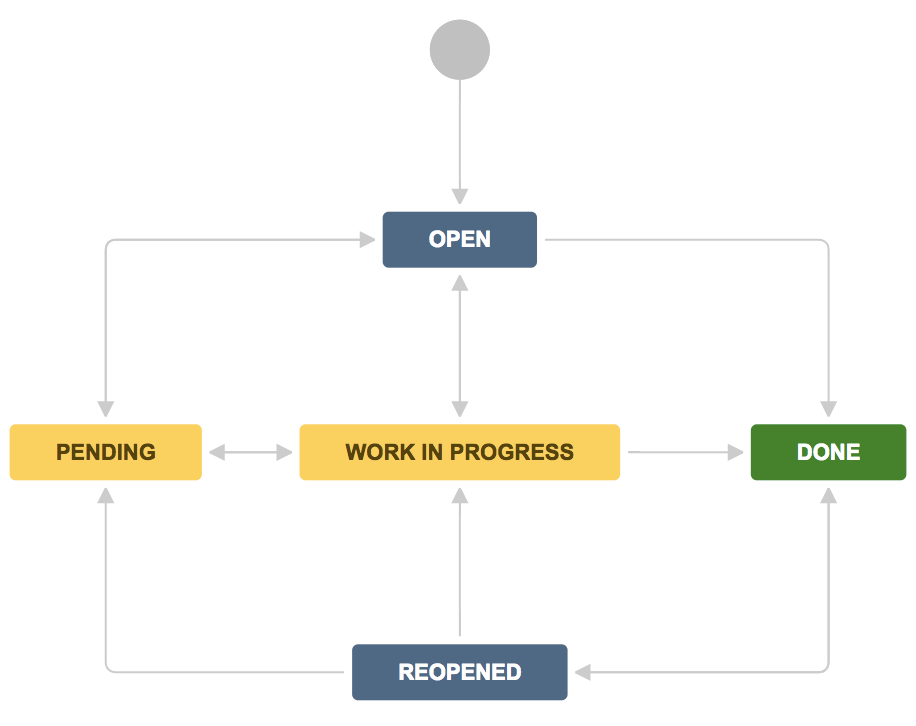
When a customer reports a bug using the portal, Jira Service Management assigns the request to your organization's Bug workflow. By default, this workflow is the same for both Jira Service Management and Jira Software issues.
This workflow follows the basic process above. Jira administrators can customize it to adapt to the needs of your customers, developers, and service desk agents.
Customize your bug report and resolution workflow
Jira's default Bug workflow is a good starting point for most teams. As your organization grows, you may want to update your workflow to suit the specific needs of your business. For example, you can add steps for approvals or QA verification.
You need to be a Jira admin to make changes to workflows. Changes to workflows affect all projects that use the workflow. Be careful!
To edit the bug workflow:
- In your service project, select Project settings () > Workflows.
- Select the edit icon () next to the entry titled <Project key>: Jira Service Desk default workflow.
- Use the workflow editor to add or remove steps and transitions.
Read more about working with workflows.
Add a "waiting on development" step to the request's workflow
You may want to add a stage to your bug workflow for when a development team investigates the issue. This status helps your service team track which bugs are being handled by a development team. And, it informs customers when the issue is being looked at by developers.
To add a new step in the workflow:
- Follow the above steps to customize the <Project key>: Jira Service Desk default workflow.
- Select + Add status.
- Give the status a name. For example, Waiting on development team and select Add.
- Give the status a description. This helps administrators who manage workflows across Jira Server apps.
- Switch the category to In progress.
- Select Create.
To add an incoming "escalate to development team" transition:
- Select the Waiting on development team status.
- Select Add Transition.
- In the From status drop down, select Work in progress.
- In the To status drop down, select Waiting on development team.
- In the Name field, provide the call to action. For example, Escalate to development team.
- In the Screen drop down, select Workflow Screen.
- Select Add.
To add a transition to allow the agent to mark the request as done:
- Select + Add transition.
- In the From status drop down, select Waiting on development team.
- In the To status drop down, select Done.
- In the Name field, provide the call to action. For example, Mark as close.
- In the Screen drop down, select Resolve Issue Screen.
Publish your draft workflow.


