Making queues for your service project teams
Your teams will spend the majority of their time working out of the queues you set up. Agents do not have the permissions to add new queues or configure existing ones; however, Jira Service Management queues allow you to automatically triage and prioritize issues for them. If you want your team to focus on requests that must be completed by next week, for example, you can set up a queue that only contains requests with a set due date in that week.
Your site comes with preconfigured queues (for example, "Unassigned issues"), but let's go ahead and create three new queues for your team:
- From your service project sidebar, select Queues ().
- Select New queue and name your first new queue "Service requests".
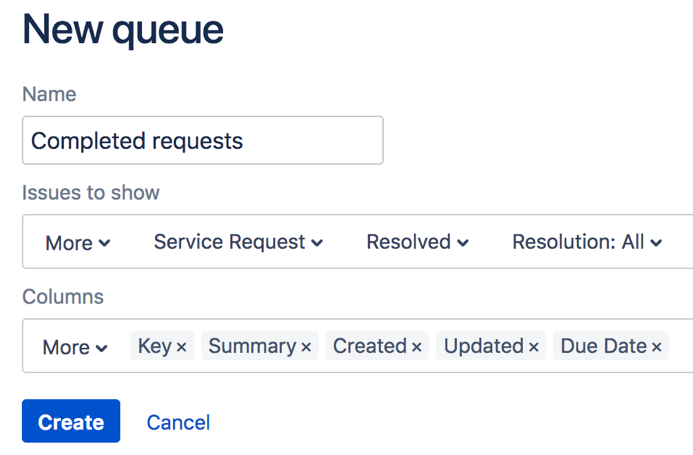
- Define the issues you want to appear in this queue by selecting the following drop-down menus: Type (select "Service Request"); Status (select "Waiting for support"), and Resolutions (select "Unresolved"):
- Select the following column names that will display in this queue from the More menu: "Key", "Summary", "Created", "Updated", "Due Date". You can reorder the columns by dragging the name (for example, "Key") across the column field.
- Select Create to add this queue to your team's workspace.
- Create two new queues with the following two search queries:
"Completed requests" for Service requests that have been successfully resolved.
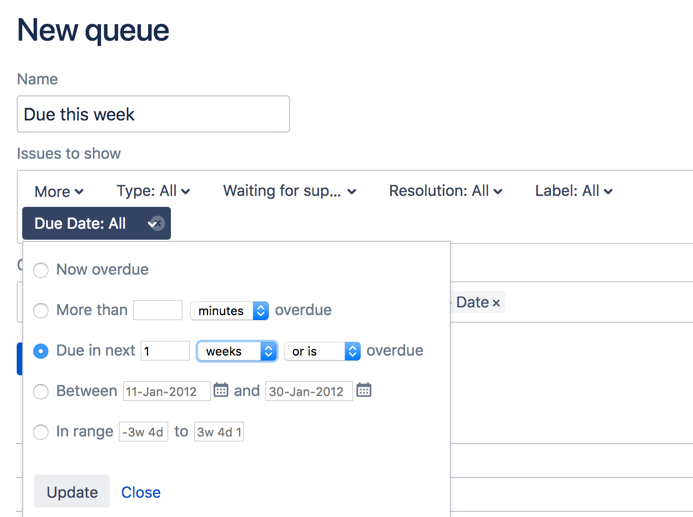
"Due this week" for requests that must be completed in the next week - Reorder your saved queues by clicking and dragging them to their new location.
You now have three new queues in your project! You will next learn how to add agents to your site so you can get your teams up and running with Jira Service Management.


