Editing multiple issues at the same time
Before you begin
Required permissions
To perform a bulk change operation, you need the appropriate project-specific permission and the global bulk change permission. For example, you would need to have both the Move issue and Bulk change permissions to perform the Bulk move operation. If you cannot access the Bulk Change functionality, ask your project admin to grant you the required permissions.
Using the bulk change wizardThe bulk change wizard will progress you through your bulk change. To open the wizard:
- Perform a search with the required filters to produce a list of issues, then from the top right corner select Tools, then Bulk change.
Bulk edit issues in the Backlog. Use Shift+select to choose multiple issues and then right-click the selected items to start the bulk change operation.
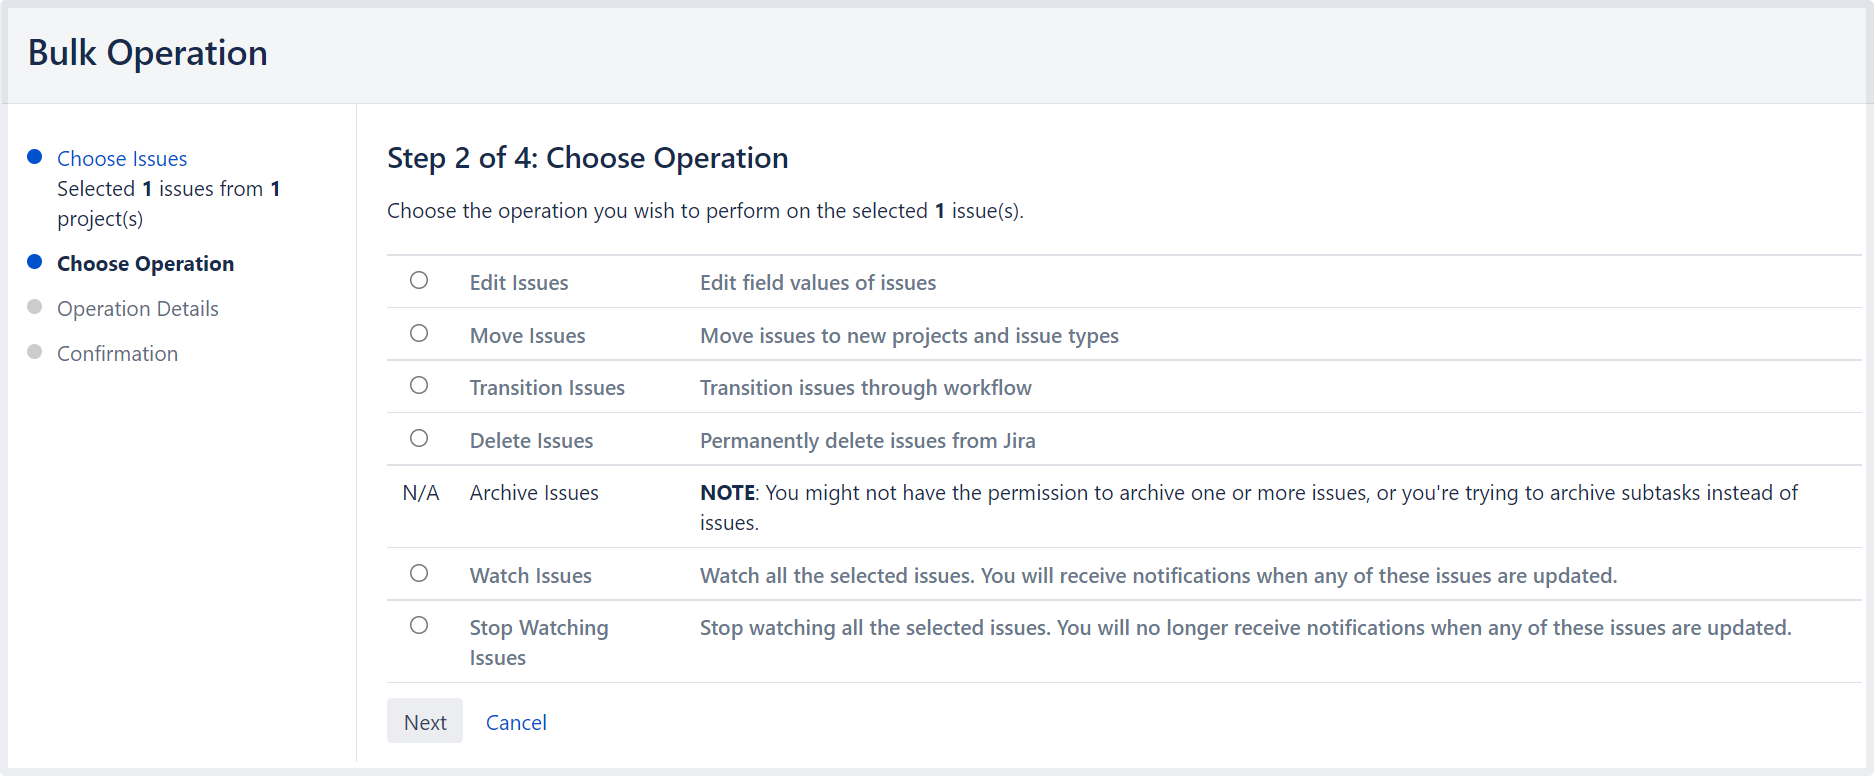
To go back to any step of the operation, select the relevant step in the menu on the left-hand side of the wizard. Selecting Cancel will cancel the entire process.
Disable notifications for bulk operations
You can disable уmail notifications for a particular bulk operation by deselecting the Send Notification checkbox in the bulk operation wizard. For this option to be available, you must be a Jira administrator or project administrator of all the projects associated with your selected issues.
Disable customer notifications. Some bulk operations, such as Change comment, might trigger email notifications to your customers. To prevent a flurry of emails, a Jira admin can temporarily disable outgoing mail in Administration (![]() ) > System > Mail > Outgoing mail. This setting controls both Jira and customer notifications, so remember to turn it back on when you're done with your bulk edit.
) > System > Mail > Outgoing mail. This setting controls both Jira and customer notifications, so remember to turn it back on when you're done with your bulk edit.
Transition multiple issues
This bulk operation allows you to transition multiple issues through a workflow at the same time. You can only perform one transition bulk operation at a time. You will also need to provide any values required to complete the transition. For example, to close multiple issues, you will need to provide a value for the Resolution field, such as Done, Fixed, or Won't Fix.
To transition multiple issues:
- Perform a search with the required filters to produce a list of issues.
- Select Tools > Bulk Change.
- Select the issues you'd like to perform the bulk operation on and then select Next.
- Select Transition Issues and then select Next.
- Select the available workflow action. The actions available are dependent on the issues (and their associated workflows) that you have selected. Select Next.
- Select a value for any required fields for this transition, and if available, decide whether you'd like to send email notifications. Select Next.
- Review your bulk operation, and select Confirm when you are happy with the operation.
Delete multiple issues
This bulk operation allows you to delete multiple issues at the same time. To delete multiple issues:
- Perform a search with the required filters to produce a list of issues.
- Select Tools > Bulk Change.
- Select the issues you'd like to perform the bulk operation on, and select Next.
- Select Delete Issues and then select Next.
- If available, decide whether you'd like to send email notifications. Select Next.
- Review your bulk operation, and select Confirm when you are happy with the operation.
Move multiple issues
This bulk operation allows you to move multiple issues at the same time. The issues you're moving need to be mapped to both a project and an issue type, and in doing this, you may need to also map the status and fields of the issues. Subtasks need to be mapped, too.
You can bulk move both standard issues and sub-tasks to another project and issue type, as well as convert a sub-task to an issue and vice versa. To learn more about issue types, see Issue fields and statuses.
You can also select both a sub-task and its parent to bulk move. However, you’ll only be asked to move sub-tasks if you’re moving a parent issue to another project. This is to maintain the parent/sub-task relationship (i.e. the sub-task is always located in the same project as the parent issue). For example, you have issue B being a sub-task of issue A and you try to bulk move both A and B simultaneously. You will be prompted to select a target project and issue type for issue A. If you select a new project for A, you will be prompted to move the sub-task to a new issue type based on issue A's new project. If you don't change the project for issue A, the sub-task will not be required to be moved.
To move multiple issues:
- Perform a search with the required filters to produce a list of issues.
- Select Tools > Bulk Change.

Select the issues you'd like to perform the bulk operation on, and select Next. The bulk move operation may require additional information depending on which issues you have selected to move (expand the following dropdown for details).
Select Move Issues and then select Next.
Confirm your changes and complete the operation. Note that you'll need to specify "Status migration mappings for invalid statuses" and "Values for required fields and fields with invalid values" once for each different target project and issue type combination.
When all move parameters — e.g. target project, status mappings and field updates — have been specified for all issues, you will be presented with a confirmation screen displaying all changes that will be made to the issues being moved. The following details are displayed as applicable:Issue Targets: the target project and issue type
Workflow: the target workflow and invalid status mappings
Updated Fields: new values for fields that require updating
Removed Fields: values to be removed in fields that are not valid in the target
The issues will only be moved once the Confirm button is clicked from the confirmation page. If the operation is exited anytime before this step, no changes will be made to the issues
Edit multiple issues
This bulk operation allows you to edit multiple issues at the same time. The bulk edit operations available depend on the issues selected and the nature of the field/s you want to change.
To edit multiple issues:
- Perform a search with the required filters to produce a list of issues.
- Select Tools > Bulk Change.
- Select the issues you'd like to perform the bulk operation on and then select Next.
- Select Edit Issues and then select Next.
Select the bulk edit operation from the list of available operations (expand more information for a full list of available and unavailable operations, and their conditions).
Watch / stop watching multiple issues
These bulk operations allows you to start watching or stop watching multiple issues at the same time.
To watch multiple issues:
- Perform a search with the required filters to produce a list of issues.
- Select Tools > Bulk Change.
- Select the issues you'd like to perform the bulk operation on and then select Next.
- Select Watch Issues and then select Next.
- Review your bulk operation, and select Confirm when you are happy with the operation.
To stop watching multiple issues:
- Perform a search with the required filters to produce a list of issues.
- Select Tools > Bulk Change.
- Select the issues you'd like to perform the bulk operation on, and select Next.
- Select Stop Watching Issues and then select Next.
- Review your bulk operation, and select Confirm when you are happy with the operation.
Archive multiple issues
This functionality is available with the Jira Data Center license.
If you want to archive thousands of issues at once, instead of selecting the issues manually, you can make a bulk change. By default, this option allows you to archive all the issues on the current page or a maximum of 1000 issues. However, a system admin can raise this limit if needed.
The issues will be archived with all their subtasks. Note that issues might have multiple subtasks so archiving might take a while because of a great number of subtasks.
To archive multiple issues:
- Perform a search with the required filters to produce a list of issues. You can archive all the issues on the current page or a maximum of 1000 issues.
- Select Tools > Bulk Change.
- Select the issues you'd like to perform the bulk operation on, and select Next.
- Select Archive issues and then select Next.
- Review your bulk operation, and select Confirm when you are happy with the operation.