User guide - Jira Service Management agent
Welcome!
Welcome! Your organization has installed the ProForma for Jira. ProForma allows you to quickly create all of the fields you need on user-friendly forms that embed in Jira issues and requests. Using forms on Jira issues allows you to include all of the fields you need, organize fields in a way works for you and control what information is visible to whom.
Using ProForma Forms on Jira Issues/Requests
Team members can add, delete, edit or fill out forms on Jira issues/requests. This guide will provide an overview of using ProForma for Jira.
Viewing Forms
If your Jira instance uses New Issue View, you will need to click on the ProForma icon in order to see the forms section.
Form States
A form on a Jira issue/request will be in one of three states:
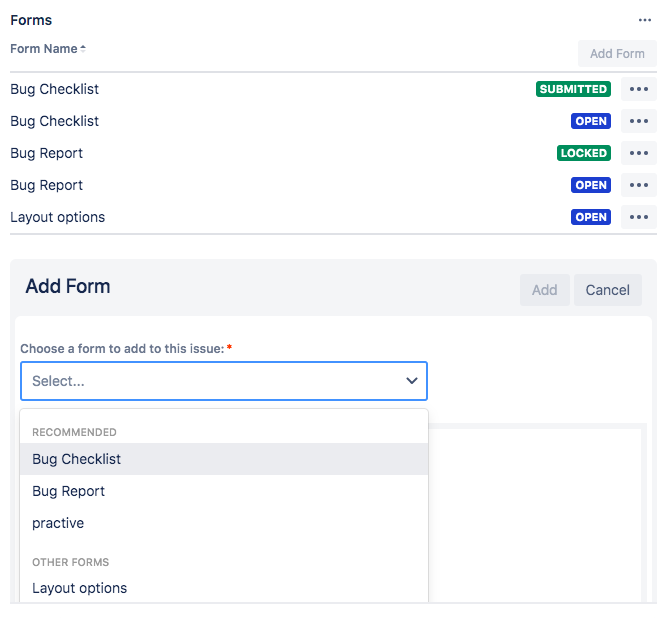
Open – Open forms have not yet been submitted or have been reopened to make edits. A user can fill out or edit open forms.
Submitted – A user can submit a form upon completion. Submitted forms will need to be reopened in order to be edited.
Locked – Locked forms can only be reopened and edited by a user with Administer Project permissions.
Add a Form to an Issue or Request
ProForma forms embed in Jira issues and Jira Service Management requests. You can add as many ProForma forms to an issue/request as needed.
To add a form to an issue/request:
When viewing an issue, expand the Forms section if necessary.
Click Add Form.
A dropdown menu will show a list of available forms. Forms that have been recommended for the particular issue type will be shown at the top of the list. Select the desired form.
Click Add. The form will now be included on the issue.
Form Accessibility
Visible or not visible on the Portal?
Visible on Portal: When adding a form to an issue/request in a Service Management project, you can choose to make it accessible to customers (visible on the Jira Service Management portal) by using the external setting.
Visible only on the Issue: Forms that are set to internal do not display on the portal and can only be accessed from the issue.
To change the internal/external setting of a form:
When viewing an issue, expand the Forms section if necessary.
Click on the form name. The form will open in the viewer.
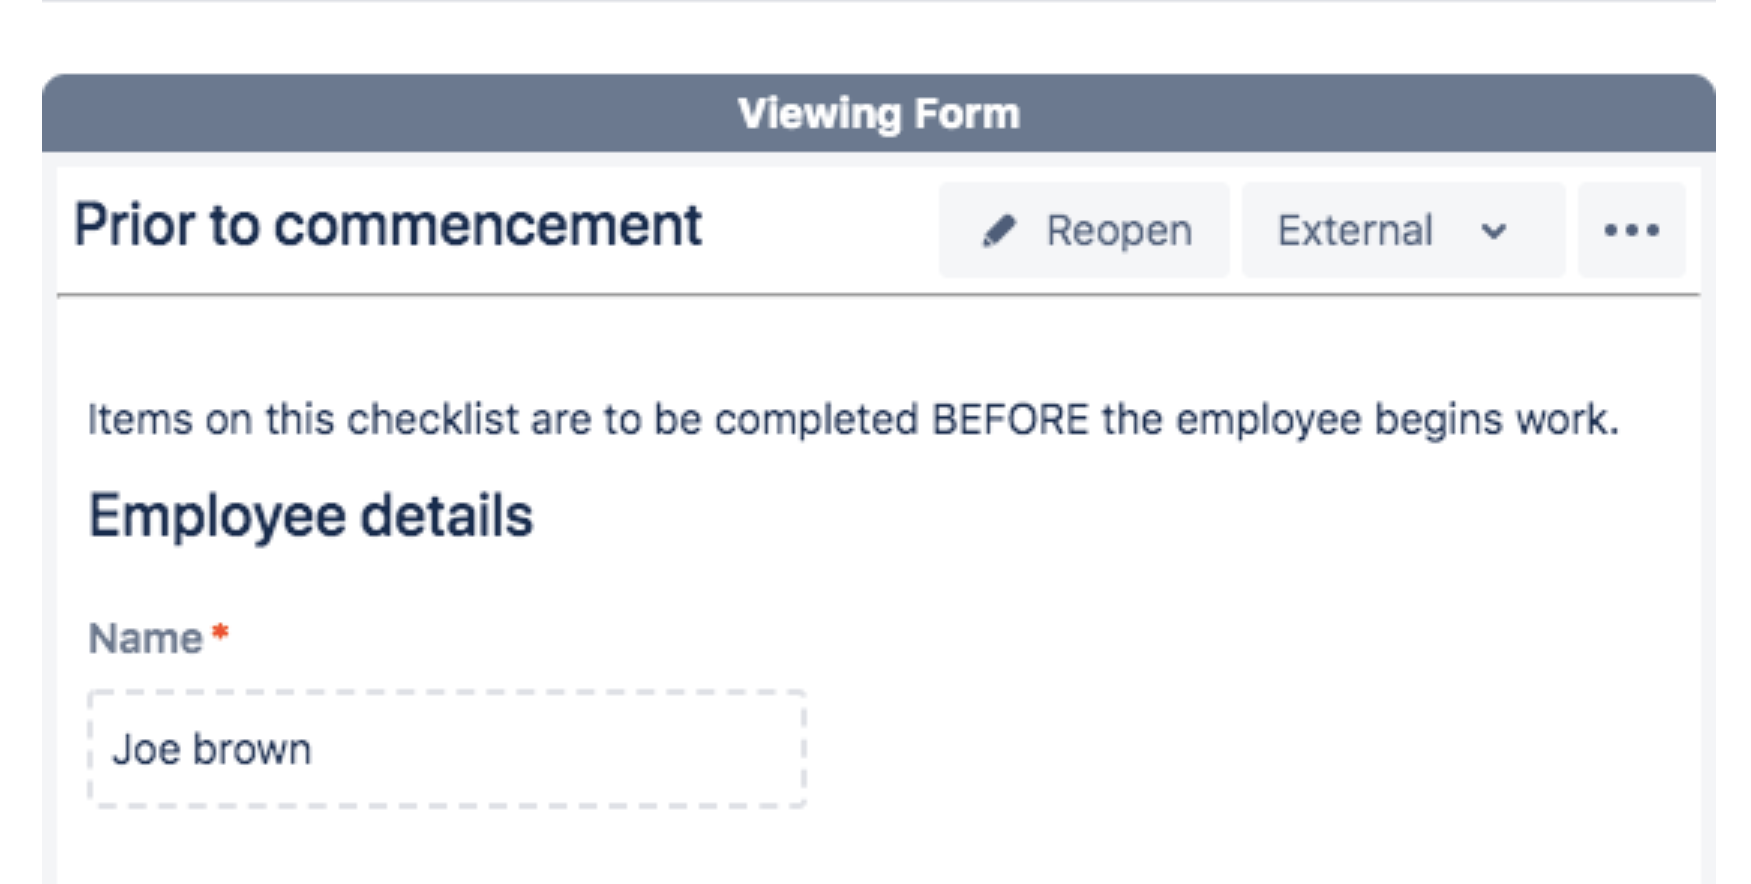
A button at the top of the viewer will indicate the current internal/external setting. To change the setting, click on the button and select Make Internal / Make External.
A dialogue box will open to confirm that you want to change the accessibility of the form.
Submit a Form
Submitting a form demonstrates that the user or customer has completed the form to their satisfaction. Forms cannot be submitted unless all validation requirements have been met.
To a submit a form on an existing issue:
When viewing the issue, expand the Forms section if necessary.
Click on the name of the indicated form.
Click Submit, or if the form has been edited, click Save and Submit.
A dialogue box will open to confirm the that you want to submit the form.
Reopen a Form
There may be times when you wish to re-open a form that already been submitted so that you, or a customer using the JSM portal can make edits to the form contents. To reopen a form:
When viewing an issue, expand the Forms section if necessary.
Click on the name of the indicated form. The form will open in the viewer.
Click on Reopen button at the top of the viewer.
A dialogue box will open to confirm that you want to reopen the form.
Note that if the form has been set a form to lock upon submission, administer project permissions will be required to reopen the form.
Edit the Contents of a Form
To edit an open form:
When viewing an issue, expand the Forms section if necessary.
Click on the name of the indicated form. The form will open in the viewer.
Click on the Edit button.
A blue banner across the top of the form will indicate that you are in Edit Mode. Make the necessary changes.
Click Save and Submit.
Alternatively, you can Save your work in progress and submit the form at a later time.
To edit a submitted form:
When viewing an issue, expand the Forms section if necessary.
Click on the name of the indicated form, The form will open in the viewer.
Click on the Reopen button and confirm that you want to reopen the form.
Click on the Edit button.
A blue banner across the top of the form will indicate that you are in Edit Mode. Make the necessary changes.
Click Save and Submit.
Alternatively, you can Save your work in progress and submit the form at a later time.
Download a PDF or a XLSX of a Form
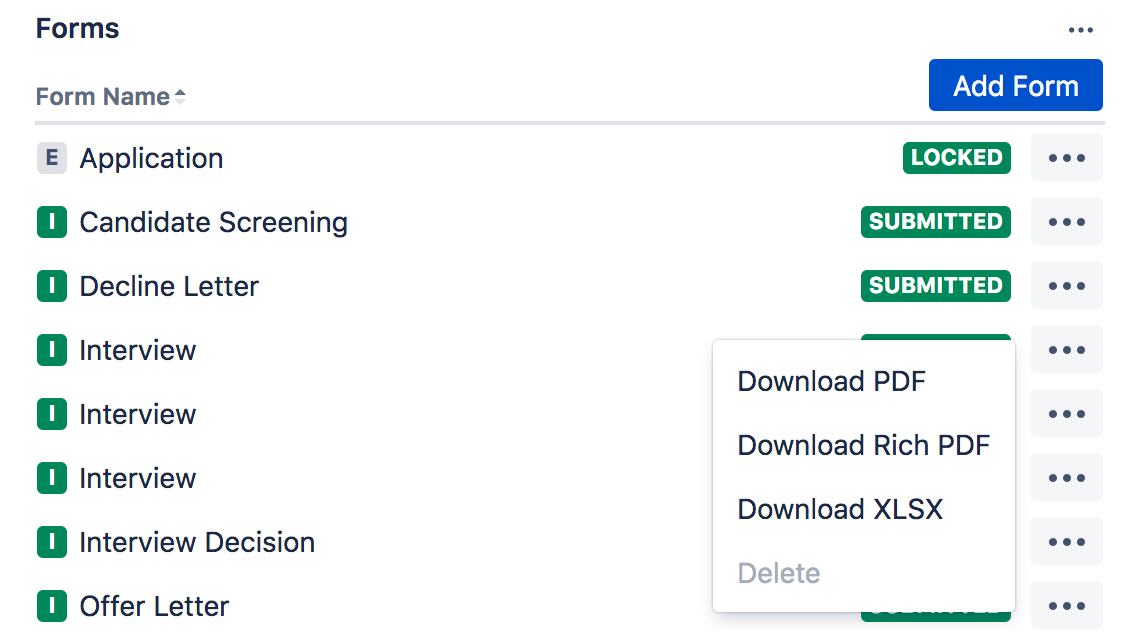
Every form included on an issue/request can be downloaded as a PDF or XLSX file.
To download a PDF or XLSX file a form on an issue:
When viewing an issue, expand the Forms section if necessary.
Click on the ... button for the indicated form.
Click on Download PDF (vertical listing of field responses), Download Rich PDF (Formatted PDF of form responses) or Download XLSX.
Create a Jira Issue from a Form
If the Issue Forms feature is enabled and a form(s) has been properly configured , you can create Jira issues directly from a ProForma form. To create an issue from a form:
Go to the Jira navigation bar.
Click on Issue Forms.
Use the Change link to select the relevant project.
Select the relevant form from the form list, or search for the form using the search bar.
Fill out the form.
Click Create. A Jira issue will be created.
How Customers Use the Jira Service Management Help Center
You can publish forms to the Jira Service Management portal/help center in order for your team to to collect exactly the information they need for a given request type. When requests with these forms are submitted, the forms will be included on the issues and can be managed as described in the previous section. This section describes how your customers can submit Jira Service Management requests.
Make a Request
To place a request, navigate to the help center.
Select the appropriate service pesk.
Click on the category that corresponds with your request.
You will see a list of request types. Select the most appropriate option.
Complete the fields on the screen, then click Send.
Edit a Request
There may be times when you need to edit the information that was submitted with a request. A service agent will "open" your submitted request form in order to make it editable. To edit the request:
Go to the service project.
You will see a counter with the your total number of open requests in the upper right hand corner of your screen. Click on the counter.
Click on My requests.
Click on the appropriate request.
When the request opens, you will see a list of all of the forms associated with your request. Click on the form you wish to edit. (Only forms which are Open can be edited.) The form will open in the viewer below.
Click the Edit button.
Fill out the form and click Save and Submit.
Alternatively, you can Save your work in progress and submit the form at a later time.
Fill Out a Follow-up Form
A service agent may need follow-up information and may ask you to complete a second form on the same request. To complete a second form:
Go to the service project.
You will see a counter with the your total number of open requests in the upper right hand corner of your screen. Click on the counter.
Click on My requests.
Click on the appropriate request.
When the request opens, you will see a list of all of the forms associated with your request. Click on the name of the new form. The form will open in the viewer.
Click the Edit button.
Fill out the form and click Save and Submit.
Alternatively, you can Save your work in progress and submit the form at a later time.
Move Between Forms
You can easily navigate between multiple forms on a request.
Go to the service project.
You will see a counter with the your total number of open requests in the upper right hand corner of your screen. Click on the counter.
Click on My requests.
Click on the appropriate request.
When the request opens, you will see a list of all of the forms associated with your request. Click on the name of the desired form. The form will open in the viewer below.
A flag in the form list will indicated which form is displayed in the viewer.
Download a PDF of the Request
You can download a PDF of any request form or follow-up form for easy portability. To download a PDF:
Go to the help center.
You will see a counter with the your total number of open requests in the upper right hand corner of your screen. Click on the counter.
Click on My requests.
Click on the appropriate request.
When the request opens, you will see a list of all of the forms associated with your request. Click the indicated form.
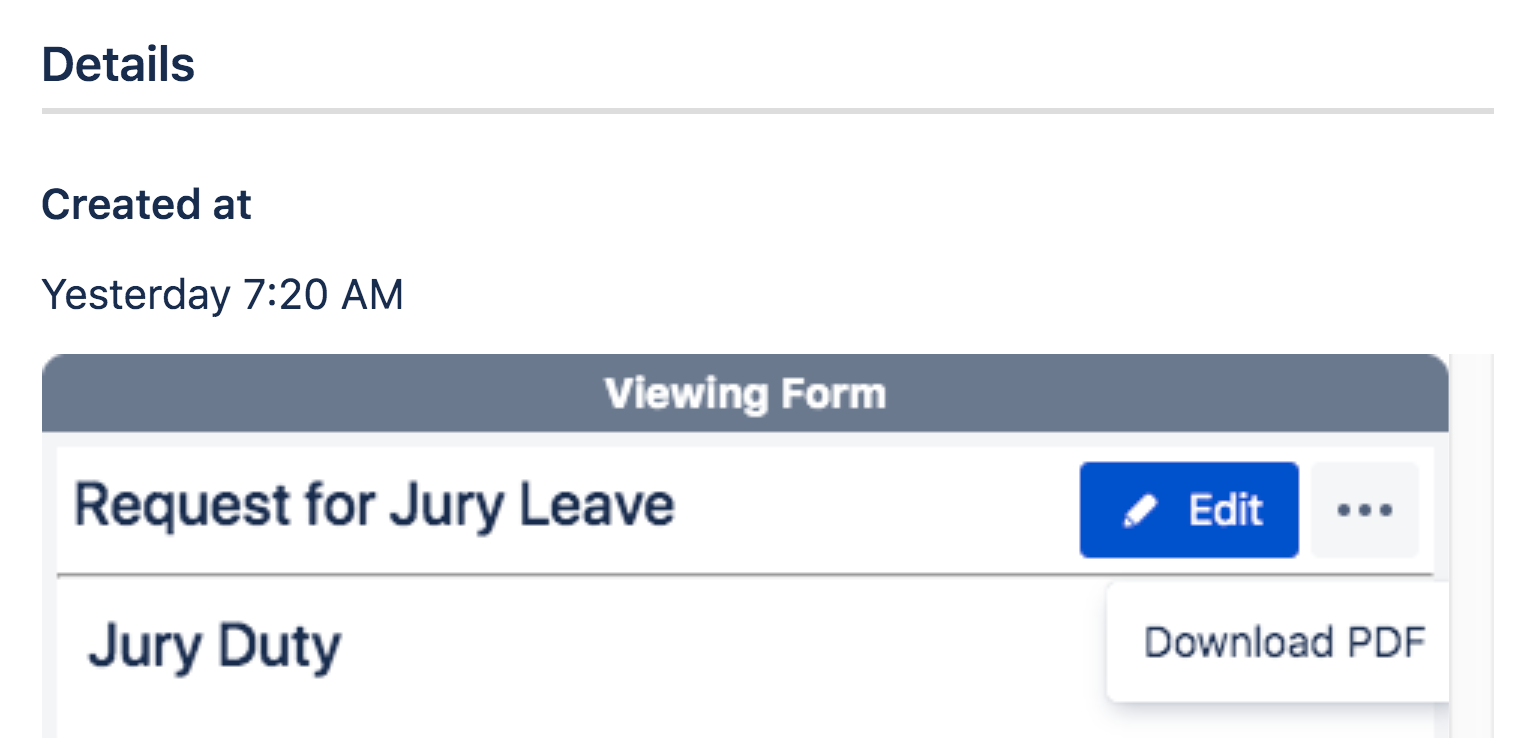
Click on the ... button.
Click on Download PDF.
Find Requests You're Participating In
Jira Service Management not only allows you to manage requests you submit. It is also a portal for participating in or (for selected users) approving requests submitted by others.
To view request that you are participating in:
Go to the help center.
You will see a counter with the your total number of open requests in the upper right hand corner of your screen. Click on the counter.
Click on All requests.
Use the filters to select Where I am a participant.
Find Requests Awaiting Your Approval
Jira service management not only allows you to manage requests you submit. It is also a portal for participating in or (for selected users) approving requests submitted by others.
To view request that you need to approve:
Go to the help center.
You will see a counter with the your total number of open requests in the upper right hand corner of your screen. Click on the counter.
Click on Approvals.


