User guide - Jira Service Management project admin
Building Forms
Form Building Permission
ProForma forms will not impact your Jira performance or the configuration of your Jira instance.
It is perfectly safe to delegate responsibility for creating the forms to the teams that will use the forms. Users with Administer Projects permission can create forms in ProForma.
From Scratch
From an Existing Form Template
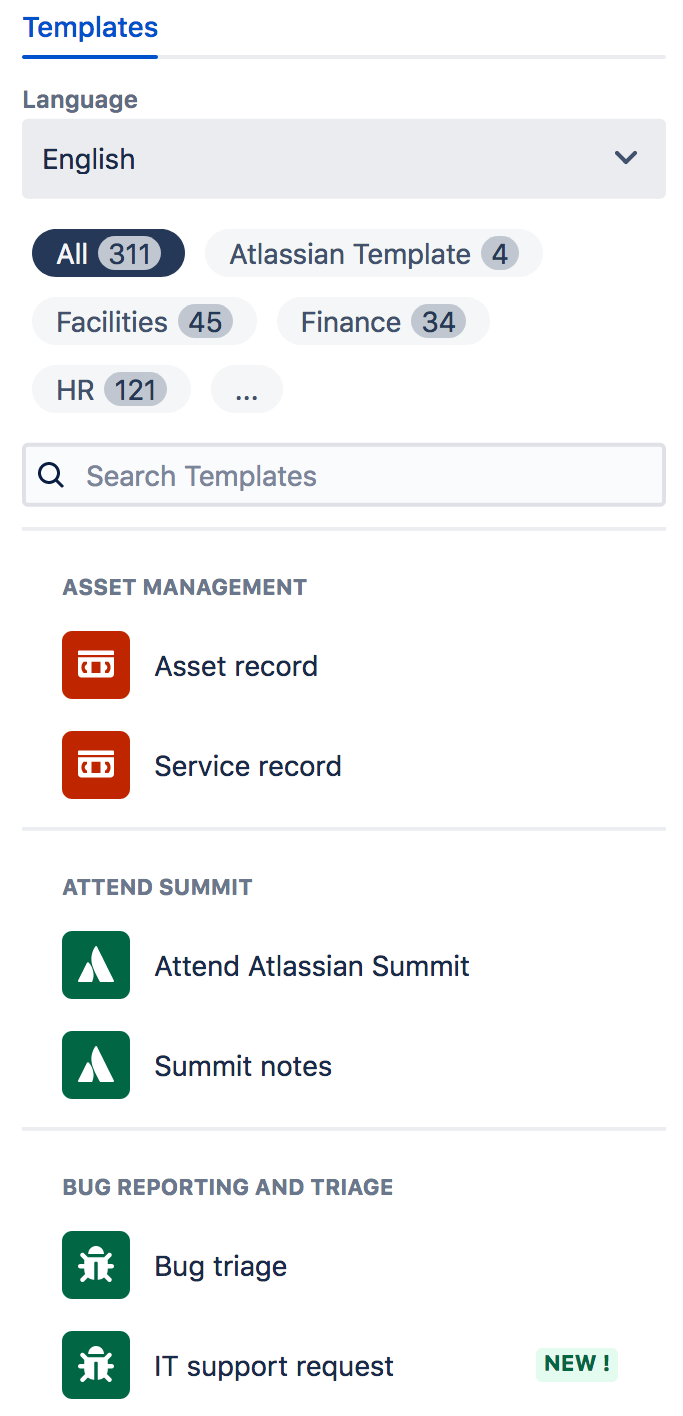
From the Template Library
ProForma includes a library with hundreds of ready-to-use form templates. These templates can be used as is, modified to meet your teams' practices or embedded in another form.
To use a template from the library open the form builder and select the Insert Form option.

A sidebar will be displayed.
To browse templates you can:
Select All to see all available templates.
Narrow your search by selecting the relevant team. Clicking the … will show additional teams.
Use the search bar to find a specific template or process.
Click on a template to preview it.
Click Insert Template. The template will be open in the form builder. Make any desired modifications and click Save.
Note that if you are embedding a template into an existing form, the template will be added at the bottom of the form. You can then drag and drop the form elements to the desired location.
Form Builder
Adding, Copying, Moving and Deleting Form Elements
There are multiple ways to add, copy, move and delete elements (formatting options, section or questions) on your forms:
Adding Elements
To Add a form element (formatting options, section or questions):
To add a form element, select the desired item from the toolbar. Or type a / followed by the first letters of the item you wish to insert.

Copying Elements
To copy a question, click on the question to see a blue outline. Then use keyboard short cuts to copy (Cmd/Ctrl C) and paste (Cmd/Ctrl+V) the question.
Use the Select All keyboard shortcut (Cmd/Ctrl A) to copy and paste entire forms. You can also copy and paste forms and form elements across Jira instances.
Moving Elements
To move a form element, click on the item to see a blue outline. Use the icon on the left to drag the item to its desired location.
Alternatively, you can relocate a question by cutting (Cmd/Ctrl X) and pasting ( Cmd/Ctrl V) it.

Deleting Elements
To delete an elemet, click on the item to see a blue outline, then click on the garbage can icon. Alternatively, you can use the delete/backspace buttons on your keyboard.

Question types and validation
Question Type | Form Question and Validation Options |
|---|---|
Short Text |  Validation: Response required. Minimum and Maximum: character and words limits. Format: Regex pattern and validation message. Linked Fields: Can be linked to Jira single or multi-line text fields. |
Long Text |  Validation: Response required. Minimum and Maximum: character and words limits. Format: Regex pattern and validation message. Linked Fields: Can be linked to Jira single or multi-line text fields. |
Paragraph |  Validation: Response required. Minimum and Maximum: character and words limits. Format: Regex pattern and validation message. Linked Fields: Can be linked to Jira single or multi-line text fields. |
 Validation: Response required. Minimum and Maximum: character and words limits. Linked Fields: Can be linked to Jira single or multi-line text fields. The ProForma email field functions as a text field that automatically validates for an @ character. | |
URL |  Validation: Response required. Linked Fields: Can be linked to Jira URL fields. If the Jira administrator has enabled the URL Questions on the configuration page, responses to URL fields will be rendered as clickable links when the form is in view mode. |
Radio Buttons |  Validation: Response required. Required choice: An option users are required to chose. Linked Fields: Can be linked to Jira radio buttons fields or single select lists. The ProForma field will inherit the choice list options from the linked Jira field. |
Checkboxes |  Validation: Response required. Required choice: An option users are required to chose Minimum and Maximum number of choices: Limits how many choices may be selected. Linked Fields: Can be linked to Jira multiple choice (check box) fields or multiple choice select lists. The ProForma field will inherit the choice list options from the linked Jira field. |
Dropdown | 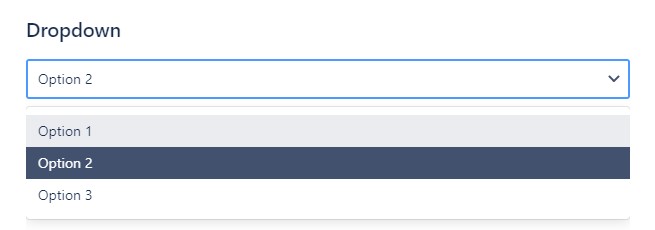 Validation: Response required. Required choice: An option users are required to choose. Linked Fields: Can be linked to Jira single choice (radio buttons) fields or single choice select lists. The ProForma field will inherit the choice list options from the linked Jira field. |
Multi-Select Dropdown |  Validation: Response required. Required choice: An option users are required to choose. Linked Fields: Can be linked to Jira multi-select dropdown fields or checkboxes. The ProForma field will inherit the choice list options from the linked Jira field. |
Date |  Validation: Response required Earliest and Latest date: Limits on date selection Linked Fields: Can be linked to Jira date fields. Note that currently, ProForma fields cannot be linked to the Due Date field. ProForma forms use a calendar-picker widget. Alternatively, users may choose to manually type a properly formatted date. Dates are displayed in correspondence with the locale the user has selected in their language settings. For example, select English (US) to see dates in the mm/dd/yyyy format. |
Date and Time |  Validation: Response required. Earliest and Latest date/time: Limits on date/time selection. Linked Fields: Can be linked to Jira date/time fields. Note that currently, ProForma fields cannot be linked to the Due Date field. ProForma forms use date and time-picker widgets. A user may choose to manually enter properly formatted date or time. Manually entered times must be formatted HH:MMam or HH:MMpm. Dates are displayed in correspondence with the locale the user has selected in their language settings. For example, select English (US) to see dates in the mm/dd/yyyy format. |
Time |  Validation: Response required. Earliest and Latest time: Limits on time selection Linked Fields: Can be linked to Jira date/time fields. ProForma forms use a time-picker widget that displays half hour increments. Alternatively, a user may choose to manually enter a time. Manually entered times must be formatted HH:MMam or HH:MMpm. |
Number |  Validation: Response required. Minimum and Maximum: minimum and maximum number values. Whole numbers only: Do not allow decimal numbers. Linked Fields: Can be linked to Jira number fields. |
Single User |  Type: Two types of user search options are available:
Validation: Response required. Linked Fields: Can be linked to Jira single user picker fields. To search for a user, begin typing the user's name in the field. The field will match the username (not the email address). Also note that a ProForma user picker field that is linked to a Jira user picker field, will not reflect any constraints (filtering to specific groups) that exist on the Jira field). This limitation will be addressed in future development. |
Multiple Users |  Type: Two types of user search options are available:
Validation: Response required. Linked Fields: Can be linked to Jira multiple user picker fields. To search for a user, begin typing the user's name in the field. The field will match the username (not the email address). Also note that a ProForma user picker field that is linked to a Jira user picker field, will not reflect any constraints (filtering to specific groups) that exist on the Jira field). This limitation will be addressed in future development. |
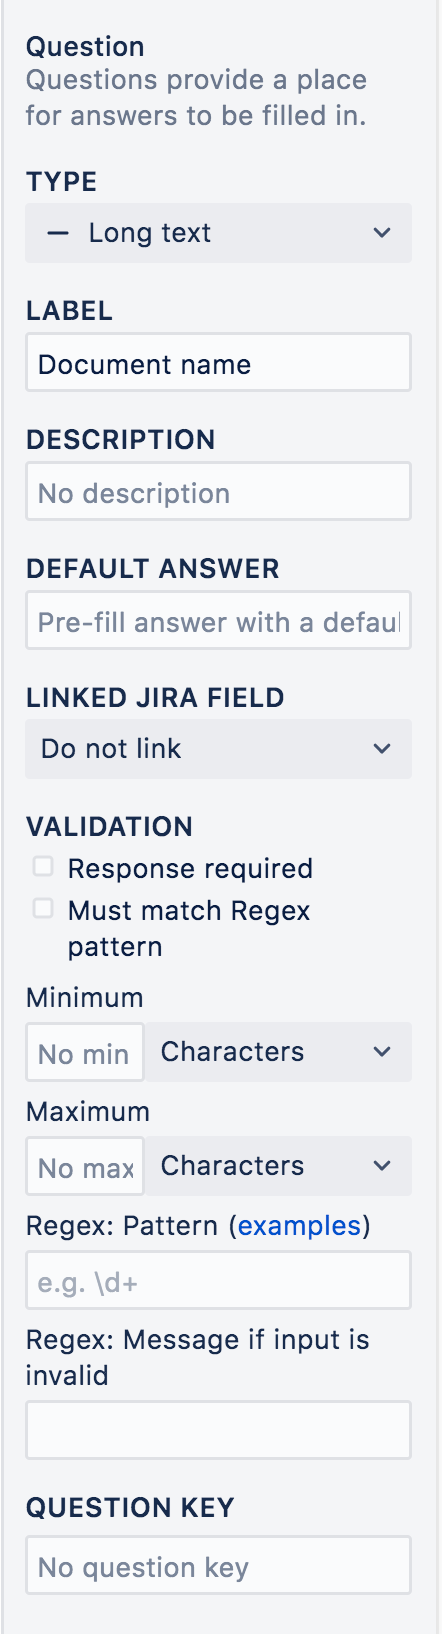
Question Properties
When you create a question in the form builder, a sidebar will display allowing you to set the question properties:
Label – The text of the question that will appear to the user.
Description – A place to provide the user with supplementary information such as examples, recommended formatting or field level instructions.
Default Values – The form builder lets you set a default value for any field. Note that default values are not available in the Legacy form builder.
Linked Jira Field – A list of Jira Fields that can be linked to the ProForma field. Check out how to link ProForma fields to Jira fields
Validation Options – Validation options vary by question type. See the table below for details.
Question Key – The form builder includes question keys which allow form you to set an identifier for the question, making it easier to find the question in the JSON data structure.
Text questions have two additional properties:
Regex: Pattern – This allows you to define a pattern of characters for your text fields. Learn more about regex
Regex: Message if input is invalid – The message users will see if their input does not match the defined regex pattern.
Choice questions also have two additional properties:
Choices – The options a user will be able to choose from
Data Connections – A link to an external data source that will populate the choice list. Learn more about data connections
In the Legacy form builder, some question types are grouped together. Use the Style dropdown to select the desired option. This includes:
Text – Narrow or wide
Choice – Single Choice, Multiple Choice, Dropdown
Date – Date, Time, Date and Time
User Lookup – Single User, Multiple Users
Making a Field Available for Linking
Attachment
Custom cascading choice lists (single or multiple)
Custom next-gen people fields
Due date
Labels
**Field created by other apps
Using Conditional Logic
Create a choice (radio button, checkbox or dropdown) question on your form. (Note that currently multi-select dropdown questions cannot be used to trigger conditional logic.)
Add a section anywhere below the choice question.
Click on the section divider. The properties panel will give you the option to have the section shown Always, or Conditionally.
After selecting Conditionally you’ll be given a list of all the choice questions in the form (including questions that are part of previous conditional sections) which precede the conditional section.
Select the appropriate question. A list of the choice options will be shown and you can select the choices that will trigger the section to be shown.
Add the relevant questions and content to the section.
Data Lookups
Open the relevant form in the form builder.
Add a choice question to the form.
Enter the question label, description and validation as desired.
Use the Data Connection dropdown menu to select the appropriate connection. You will see data from the external source populate the choice list.
Click Save.

Form Settings
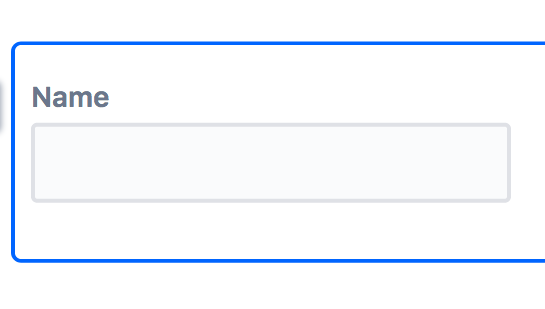
Name – Set the name of the form.
Language – The ProForma form builder supports 25 different languages. Use the dropdown box to select the language.
When issue is created – This setting lets you indicate if you would like to:
Lock the form to prevent changes after the form has been submitted
Automatically generate a PDF of the form and attach it to the issue when the form is submitted
Recommended Form – You can also associate the form with a specific issue type. When an agent clicks Add Form on an issue of that type, this form will be listed as a recommended option.
Jira Service Management Portal – For Service projects, use this setting to associate the form with a request type, making the form appear on the customer portal.
Create Issue – If the Issue Forms feature has been enabled, you can associate the form with a request type or issue type. This will allow users to access the form directly from the Jira navigation bar. When the users submits the form a Jira issue will automatically be generated.
Leave form open – If this options is selected, then the form will stay in an open state, allowing the customer to continue to add to and edit their responses after the request is created. Validation will be enforced when the request is created.
Ignore validation – If you choose to leave the form open, then two more options will become available. Checking the Ignore validation option means the customer will be able to create the request even if required fields are left blank or their responses do not meet validation criteria. Validation rules will not be enforced until the the form is submitted.
Hide submit button – If you would like a form to stay perpetually open, or to only allow a Service Management Agent to determine when the form is complete, you can choose to hide the Submit button. The form will remain in an open state and will be editable from the portal. Only an agent will be able to submit the form.
Form Automation
Automatically add a ProForma form when an issue is transitioned to a new status
Automatically transition an issue when a form is submitted
Prevent an issue from being transitioned if a form is not attached to the issue, or if the forms on the issue are not submitted
Go to the Settings tab of the form builder and click Add Rule.
Give your rule a name.
You will see a series of dropdown boxes. Use the first dropdown box to indicate when the action should take place. An automated action can be triggered by the submission of a form, a workflow transition or a Jira workflow validator.
If the actions is triggered by a form being submitted, or by the issue transitioning to a new status, another dropdown box will ask you to indicate the issue/request type you would like the rule to apply to.
The next dropdown lets you place conditions such as specifying the issue’s current status, or if all of the forms on the issue have been submitted.
The final step is to indicate the action to be taken. This step may include the option to allow duplicate forms on the same issue, and to set the form that is being added to internal or external.
At least one form is attached to the issue – configured in the Jira workflow
All forms on the issue are submitted – configured in the Jira workflow
A specific form is attached and submitted on the issue – configured in the form setting and in the Jira workflow
Go to a Jira Settings > Issues > Workflows
Click Edit next to the name of the indicated workflow
Click on the indicated transition and select the Validators tab
Click Add validator and select the appropriate ProForma validator from the list.
Click Add.
Make a Form Accessible on the Customer Portal/Help Center
Create the Request Type:
If it does not already exist, create a request type by going to Project Settings > Request types .
Click Add new request type .
Provide a name. Select the appropriate issue type and icon.
Click Next .
Select the appropriate group(s).
Click Create.

Associate the Form with the Request Type:
Navigate to the form, Project Settings > Forms .
Click the Edit button to the right of the form name. The form will open in the form builder.
Click on the Settings tab.
Use the toggle to enable the form on the Service Management Portal
Select the indicated request type.
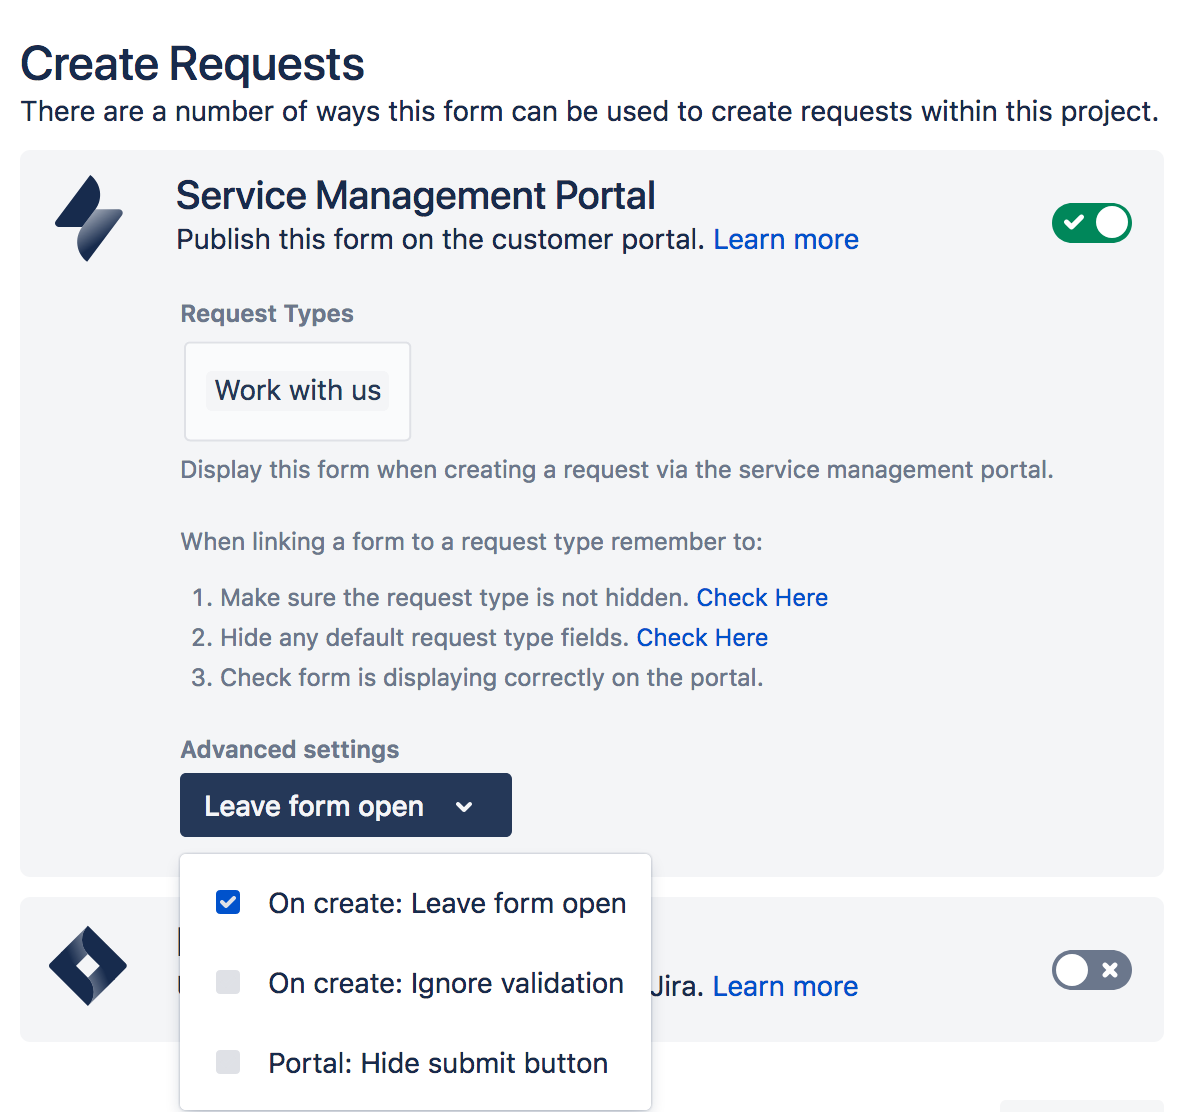
You can also enable some Advanced options that govern how the form will behave on the portal. ProForma forms that are OPEN can be edited by the customer. When a customer Submits a form, they are signaling that the form is complete. SUBMITTED forms cannot be edited unless they are reopened by an Agent.
Leave form open – If this options is selected, then the form will stay in an open state, allowing the customer to continue to add to and edit their responses after the request is created. Validation will be enforced when the request is created.
Ignore validation – If you choose to leave the form open, then two more options will become available. Checking the Ignore validation option means the customer will be able to create the request even if required fields are left blank or their responses do not meet validation criteria. Validation rules will not be enforced until the the form is submitted.
Hide submit button – If you would like a form to stay perpetually open, or to only allow a Service Management Agent to determine when the form is complete, you can choose to hide the Submit button. The form will remain in an open state and will be editable from the portal. Only an agent will be able to submit the form.
Make the Request Type Visible on the Portal
From your service project, go to Project settings () > Portal settings.
Select the Portal Groups tab.
Choose the group you want to add request types to, or select Create group to create a new group.
Select Add request form and search for an existing request type to add. You can add a request type to more than one group.
Drag and drop request types to rearrange them within your groups.
Drag and drop groups to re-arrange them in your portal.
Using ProForma Forms on Jira Issues/Requests
Viewing Forms
Form States
Open – Open forms have not yet been submitted or have been reopened to make edits. A user can fill out or edit open forms.
Submitted – A user can submit a form upon completion. Submitted forms will need to be reopened in order to be edited.
Locked – Locked forms can only be reopened and edited by a user with Administer Project permissions.
Add a Form to an Issue or Request
When viewing an issue, expand the Forms section if necessary.
Click Add Form.
A dropdown menu will show a list of available forms. Forms that have been recommended for the particular issue type will be shown at the top of the list. Select the desired form.
Click Add. The form will now be included on the issue.
Form Accessibility
Visible or not visible on the Portal?
Visible on Portal: When adding a form to an issue/request in a Service Management project, you can choose to make it accessible to customers (visible on the Jira Service Management portal) by using the external setting.
Visible only on the Issue: Forms that are set to internal do not display on the portal and can only be accessed from the issue.
To change the internal/external setting of a form:
When viewing an issue, expand the Forms section if necessary.
Click on the form name. The form will open in the viewer.
A button at the top of the viewer will indicate the current internal/external setting. To change the setting, click on the button and select Make Internal / Make External.
A dialogue box will open to confirm that you want to change the accessibility of the form.
Submit a Form
When viewing the issue, expand the Forms section if necessary.
Click on the name of the indicated form.
Click Submit, or if the form has been edited, click Save and Submit .
A dialogue box will open to confirm the that you want to submit the form.
Reopen a Form
When viewing an issue, expand the Forms section if necessary.
Click on the name of the indicated form. The form will open in the viewer.
Click on Reopen button at the top of the viewer.
A dialogue box will open to confirm that you want to reopen the form.
Edit the Contents of a Form
To edit an open form:
When viewing an issue, expand the Forms section if necessary.
Click on the name of the indicated form. The form will open in the viewer.
Click on the Edit button.
A blue banner across the top of the form will indicate that you are in Edit Mode. Make the necessary changes.
Click Save and Submit .
Alternatively, you can Save your work in progress and submit the form at a later time.
To edit a submitted form:
When viewing an issue, expand the Forms section if necessary.
Click on the name of the indicated form, The form will open in the viewer.
Click on the Reopen button and confirm that you want to reopen the form.
Click on the Edit button.
A blue banner across the top of the form will indicate that you are in Edit Mode. Make the necessary changes.
Click Save and Submit .
Alternatively, you can Save your work in progress and submit the form at a later time.
Download a PDF or a XLSX of a Form
When viewing an issue, expand the Forms section if necessary.
Click on the ... button for the indicated form.
Click on Download PDF (vertical listing of field responses), Download Rich PDF (Formatted PDF of form responses) or Download XLSX.
Create a Jira Issue from a Form
Go to the Jira navigation bar.
Click on Issue Forms .
Use the Change link to select the relevant project.
Select the relevant form from the form list, or search for the form using the search bar.
Fill out the form.
Click Create . A Jira issue will be created.
Linking to a Form
Ensure the Issue Forms configuration is enabled.
On the Settings tab of the form, use the toggle to enable the form as an Issue Form.
Select the appropriate Issue Type.
Click on the Copy button to copy a link to your clipboard.
Reporting
Linked Jira Fields
Form Responses Spreadsheet
Navigate to Project Settings.
Click on Forms from the left hand navigation bar.
You will see a list of all forms in the project. Click on the … button to the right of the form name and select Responses. A spreadsheet rendering all of the responses to each from field will be downloaded.
How Customers Use the Jira Service Management Help Center
Make a Request
To place a request, navigate to the help center.
Select the appropriate service project.
Click on the category that corresponds with your request.
You will see a list of request types. Select the most appropriate option.
Complete the fields on the screen, then click Send.
Edit a Request
Go to the service project.
You will see a counter with the your total number of open requests in the upper right hand corner of your screen. Click on the counter.
Click on My requests.
Click on the appropriate request.
When the request opens, you will see a list of all of the forms associated with your request. Click on the form you wish to edit. (Only forms which are Open can be edited.) The form will open in the viewer below.
Click the Edit button.
Fill out the form and click Save and Submit .
Alternatively, you can Save your work in progress and submit the form at a later time.
Fill Out a Follow-up Form
Go to the service project.
You will see a counter with the your total number of open requests in the upper right hand corner of your screen. Click on the counter.
Click on My requests.
Click on the appropriate request.
When the request opens, you will see a list of all of the forms associated with your request. Click on the name of the new form. The form will open in the viewer.
Click the Edit button.
Fill out the form and click Save and Submit .
Alternatively, you can Save your work in progress and submit the form at a later time.
Move Between Forms
Go to the service project.
You will see a counter with the your total number of open requests in the upper right hand corner of your screen. Click on the counter.
Click on My requests.
Click on the appropriate request.
When the request opens, you will see a list of all of the forms associated with your request. Click on the name of the desired form. The form will open in the viewer below.
A flag in the form list will indicated which form is displayed in the viewer.
Download a PDF of the Request
Go to the help center.
You will see a counter with the your total number of open requests in the upper right hand corner of your screen. Click on the counter.
Click on My requests.
Click on the appropriate request.
When the request opens, you will see a list of all of the forms associated with your request. Click the indicated form.
Click on the ... button.
Click on Download PDF .
Find Requests You're Participating In
Go to the help center.
You will see a counter with the your total number of open requests in the upper right hand corner of your screen. Click on the counter.
Click on All requests.
Use the filters to select Where I am a participant.
Find Requests Awaiting Your Approval
Go to the help center.
You will see a counter with the your total number of open requests in the upper right hand corner of your screen. Click on the counter.
Click on Approvals.