Approving a service project request
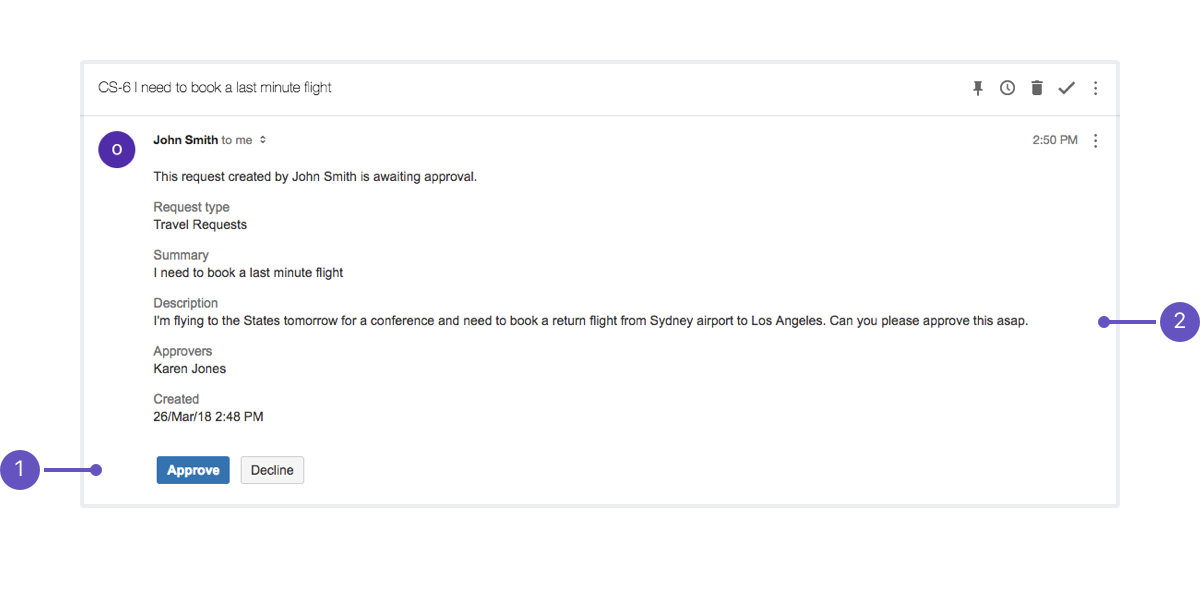
Jira Service Management projects have an option to include an approval step and assign approvers to their issues. You may be asked to approve a service request if you've been assigned the role of "approver". When this happens, you'll receive an email notifying you that your approval is required. If the Request Details and Approval buttons variables have been added to the project's approval notifications template, you can action the request from within the email. If not, there will be a link to the customer portal where you can view and action the request.
How to approve and decline from the customer portal
Pro tip: Ask your Project Administrator to add Request details and Approval buttons to your approval notifications template, so you can quickly action a request from within your email. See Managing service project notifications.
It's likely that you've upgraded from a version of Jira Service Management prior to 3.12, and the approval notifications template hasn't been updated.
- Navigate to the service desk customer portal by either selecting the link in your email, or entering the URL.
- View the approval request and review the supporting information.
- Leave a comment by selecting Add below the comment field. Depending on the settings in the project’s workflow, your comment may or may not be required. Even if it’s not required, it helps to let the customer know why you responded the way you did, especially if you’re declining the request.
- Select Approve or Decline. If a comment is required, you will need to provide a comment in the Approve this request or Decline this request dialogs.
Note that even if you’ve already added a comment to the request, you'll still need to enter a comment to proceed. - The customer will receive a notification of the selected action you have taken.
- Approvals section, which lists the appointed approvers for the request. This section only appears when there are pending approvals for the request.
- When a request is approved, the Approvals section disappears, and details about the approval will be added to the Activity section.
For example, Your request was APPROVED and the status changed to Waiting for support.
How to approve and decline from email
Good news! You're using the default approval notifications template.
- View the approval request and decide what action you'd like to take.
- Select either the Approve or Decline button within the email. If you aren't logged into the customer portal, you will be prompted to do so. You'll then see:
- If you hit Approve, a confirmation screen.
- If you hit Decline, a screen prompting you to leave a comment and confirm your decision. Depending on the settings in the project’s workflow, your comment may or may not be required. Even if it’s not required, it helps to let the customer know why you’re declining the request.
- The customer will receive a notification of the selected action you have taken.
- Approval buttons, that let the approver action requests from within their email.
- Request details, that show the full details of a request (including request type, summary, creation date, and the same fields chosen in the request type settings).
If you're the only approver required on the request, and you approve it, the request will be moved to the status defined in the workflow for the approve transition. If there is more than one approval required, the status will remain the same until all approvers have responded, and your approval will be noted on the request.
If you decline a request (or any of the approvers decline it), it's automatically moved to the status as defined in the workflow for the decline transition, and your response is noted on the request.

