Using Jira groups to share requests
Jira groups is a collection of internal users (usually employees) managed in Jira by a Jira admin. Project admins can add these groups to their service projects and assign them specific roles. Learn how to manage project role memberships
Use Jira groups in your service projects to take advantage of the integration with Jira and leverage Jira’s user management model for managing internal customers of your service desk at scale. If your service desk caters to both internal employees and external customers, we recommend that you use groups for internal customers and organizations for external customers to effectively manage permissions.
On this page:
Here’s some ways in which users can utilize the ability to share requests with groups in your service desk instead of rebuilding internal customer groups using organizations:
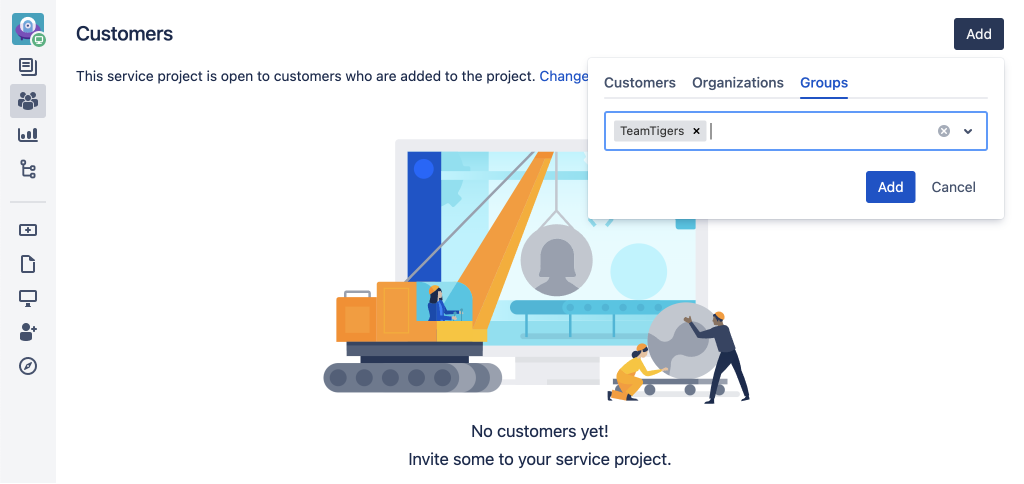
- Project admins can bulk add internal users (who’re part of existing Jira groups) as customers of their service project using the Groups tab on the Customers page.
Group members added as customer groups from the project settings page retain their group membership on the Customers page (in versions below 5.9, the association between groups and members isn’t displayed). - Project admins and agents can use the Groups field available in the issue view to efficiently share requests with all members of a group (provided the group has been added as a customer of the service project).
- From the customer portal, help-seekers can share requests with Jira groups they’re a part of (only if a project admin has allowed this sharing capability on the Customer permissions page).
Add a group as a customer
Project admins can add Jira groups as customers to service projects from:
- the Customers page. Learn how to manage service project users
- the Users and roles page (by assigning the Service Desk Customers role). Learn how to manage project role memberships

Share requests with groups from the issue view
Project admins and agents can share requests from the issue view with Jira groups added as customers of the service project (similar to how requests can be shared with organizations), without any additional permission management. Changes to group membership can impact access to the request. For example, if a member gets added to a Jira group after the request is shared by an agent, the new member can also access it.
If email notifications are enabled for groups, group members are notified when they’re added to requests and they can search for requests on the My requests page.
The customer email notifications rule for groups is set to off by default to reduce bulk notifications. You can change this setting from the Customer notifications page. Learn how to manage service project notifications
To share a request with a group from the issue view, type the group name in the Groups field and select the appropriate group.

Groups field in the issue view.
Help-seekers can view all the groups added to their request, even the ones they aren’t part of.
Allow customers to share requests with groups
Extend the sharing capability to help-seekers so that customers can share requests with groups they’re part of from the customer portal. As the right set of request participants can be easily looped into requests, this can help you minimise duplicate tickets and streamline the process of informing stakeholders. Learn how to extend sharing capability to help-seekers


Use automation rules to share requests with groups
You can create automation rules to share requests with relevant groups and loop in multiple members of a customer group with minimal effort. This allows internal customers to stay on the top of important requests at scale. For example, you could create automation rules to share legal requests with all members of the Legal team. Learn more about Jira automation
Here’s an example automation rule to share requests with groups.
- Add a Jira group as a customer to your service project.
- Navigate to Project settings > Automation and select Create rule.
- From the list of available triggers, select Issue created and then select Save.
- From the Add component section, select New condition > Issue fields condition.
- Tailor condition to filter a specific request type, and then select Save.
For example, set the condition to match labels that contain "security".
- From the Add component section, select New action > Edit issue.
- From the Choose field to set list, select Groups.
- In the Groups field, select Copy from issue and the group you’d like to share request with.
To send notifications, select the This rule should send emails checkbox. - Select Save and turn on the automation when you’re ready.

Collect assets from large audience
Here’s some ways agents can collect assets from large audiences using groups without additional permission management:
- Build a pool of internal voters for a request - For example, if your IT help desk receives a ticket related to network connection issues, you can quickly build a pool of staff or teams that can view this request and get votes or suggestions to escalate the issue or communicate traction.
- Use a single request form to collect data - By looping in the right set of request participants, you can keep appropriate stakeholders informed at scale and obtain their inputs on the same ticket.