Working with workflows
Here's an example of a default workflow:

Workflow statuses and transitions
A status represents the state of an issue at a specific point in your workflow (e.g. "In progress"). An issue can be in only one status at a given point in time. When defining a status, you can specify properties if needed.
A transition is a link between two statuses that enables an issue to move from one status to another. To move an issue between two statuses, a transition must exist.
A transition is a one-way link, so if an issue needs to move back and forth between two statuses, two transitions need to be created. The available workflow transitions for an issue are listed on the View issue screen.
See Defining a screen for details on adding and configuring issue screens.
Active and inactive workflows
There are slight differences between editing an inactive and an active workflow. We place restrictions on the modifications you can make to an active workflow due to the impact the changes will have on projects and issue types that use this workflow.
| Workflow status | Description |
|---|---|
Inactive workflow | An inactive workflow is a workflow that isn't currently being used by any projects. Since there are no issues currently transitioning through an inactive workflow, you can edit the workflow's steps and transitions directly. To edit an inactive workflow, see Working in text mode. Your changes will be automatically saved as you edit an inactive workflow. You won’t need to manually save or publish your changes. |
Active workflow | An active workflow is a workflow that is currently being used by one or more projects. When you edit an active workflow, Jira first creates a draft of it so you can modify this workflow you see fit. When you've finished, you can publish your draft and, optionally, save your original workflow as an inactive backup. The following limitations apply when editing a draft for an active workflow:
See Cannot add transitions or delete steps in draft workflows. To make any of the modifications listed above, you need to copy the workflow (see Creating a workflow), modify the copy, and then activate it. |
You can access all the active and inactive workflows that exist on your Jira instance from the Workflows tab:
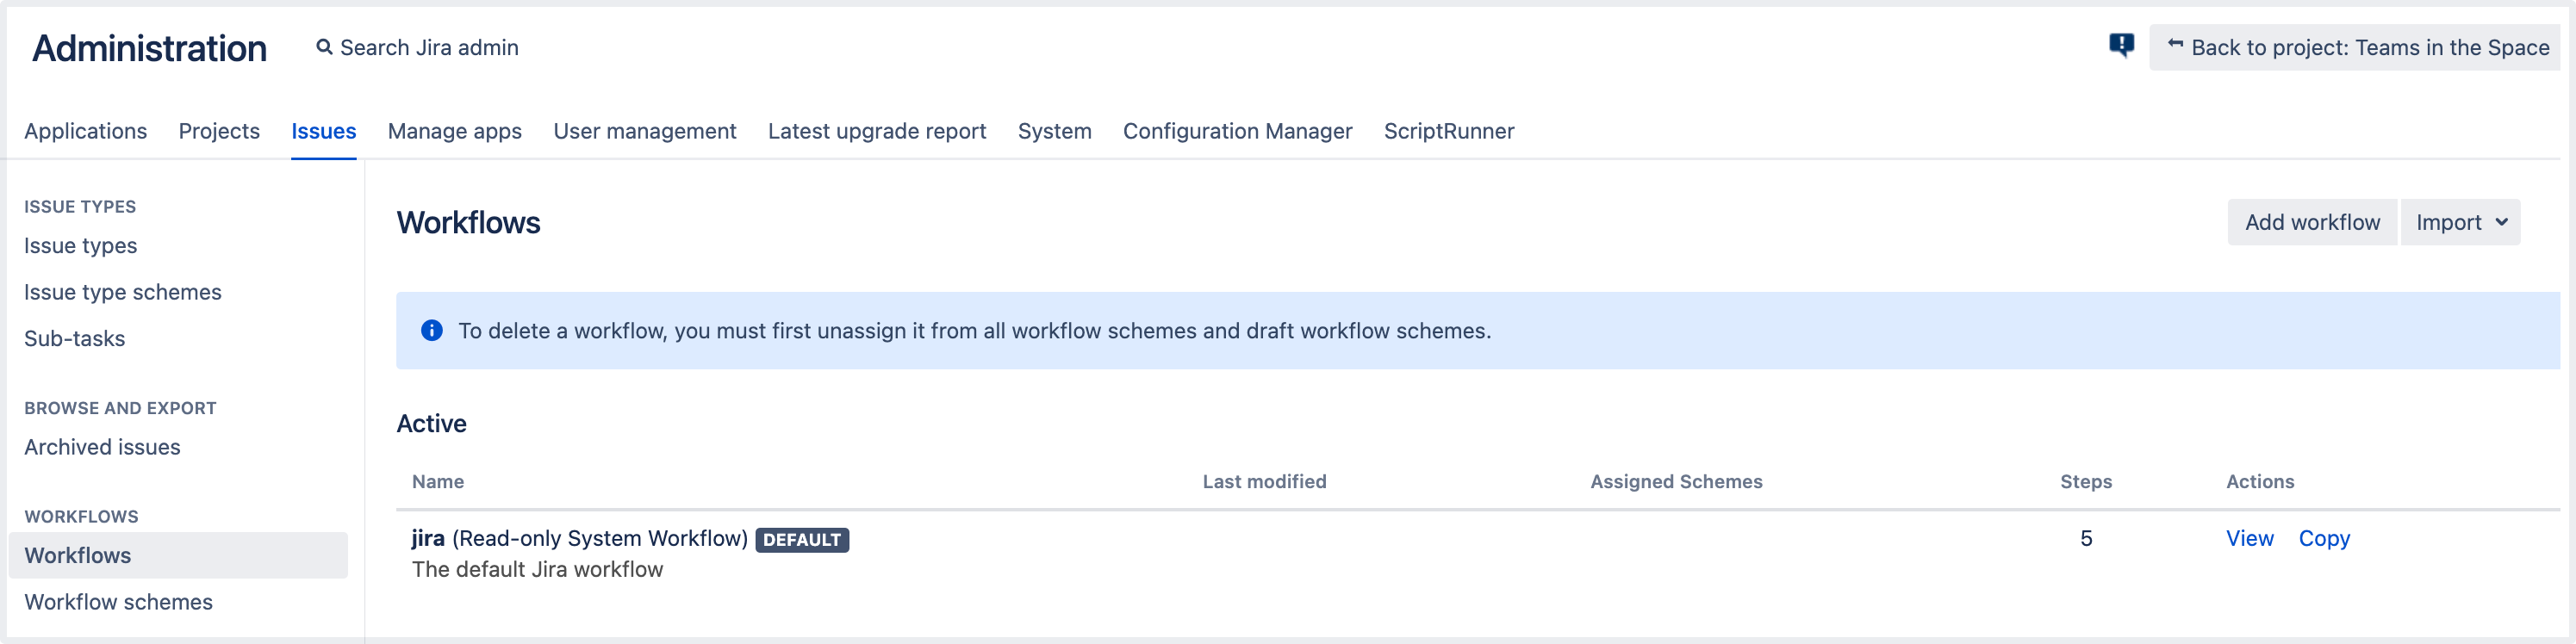
Active workflows are at the top of the page with the inactive ones listed underneath. Selecting the Inactive tab will expand the list of workflows that aren’t associated with any schemes or projects:

If you want to make the inactive workflow active, follow guidelines from Activating a workflow.
Using the workflow designer
You need to log in as a user with the Jira system administrators global permission to work with the workflow designer.
The workflow designer is a graphical tool that allows you to view a workflow’s layout, and create and edit its statuses and transitions. To access the designer, you only need to start editing a particular workflow.

With the workflow designer, you can:
Manage statuses and transitions by adding, clicking, and dragging.
Modify or delete workflow properties to update certain statuses and transitions. Note that you can delete the properties from the workflow but not Jira.
- Add a global transition that allows every other status in the workflow to transition to the selected status. Select Allow all statuses to transition to this one in the properties panel for the status.
- Change the screen that a transition uses. See Working in text mode for details.
- Configure advanced transition options, such as triggers, conditions, validators, and post functions. Learn more on the Advanced workflow configuration page.
Statuses are global objects. Changing a status name on one workflow also changes it in all workflows that use that status.
Creating a workflow
There are a few ways you can start a new workflow. These include cloning an existing workflow, creating a new workflow, and importing a workflow.
Copy an existing workflow
- In the upper-right corner of the screen, select Administration
 > Issues.
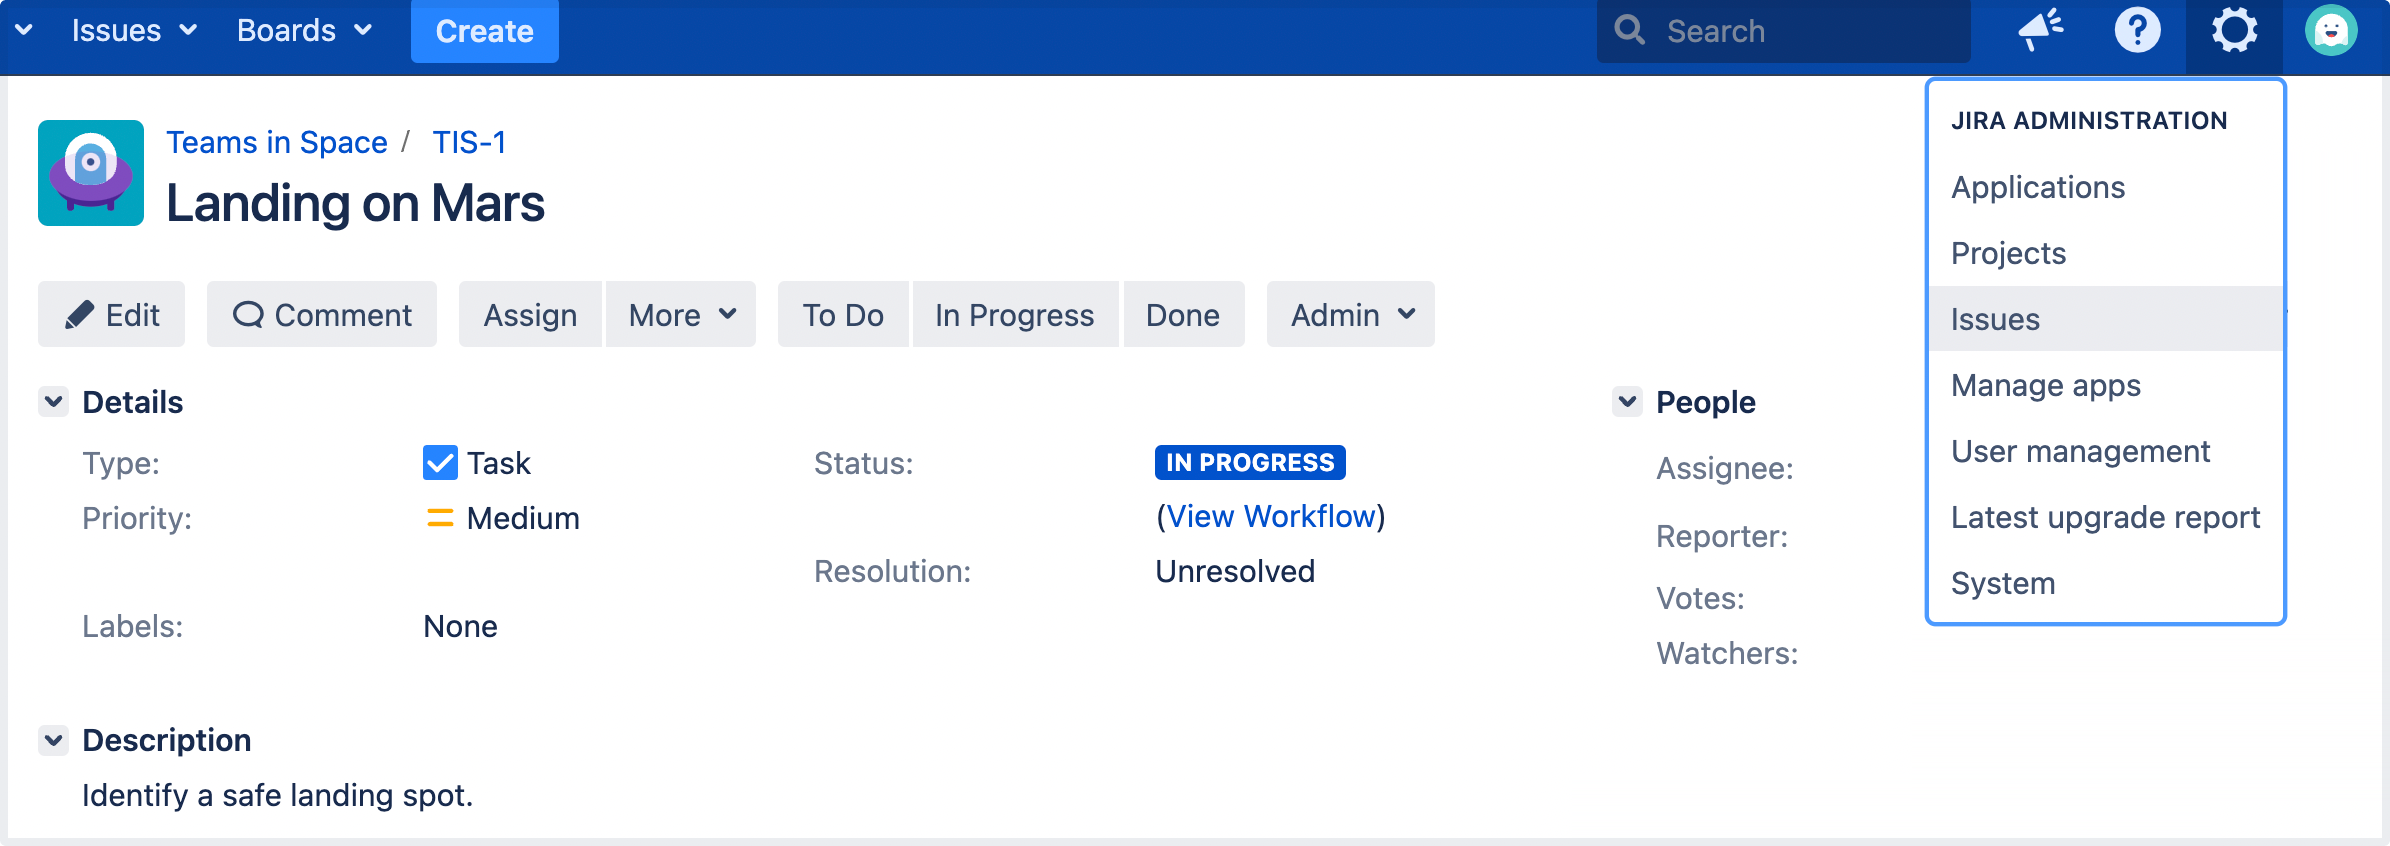
In the left-side panel, select Workflows to open the Workflows page, which displays all of the workflows in your system.
- Copy an existing workflow by selecting the Copy link in the Actions column. Enter a workflow name and description, then select the Copy button.
- Customize your workflow by adding or editing steps and transitions.
When you've finished customizing your workflow, see Managing your workflows for details on how to use it with a Jira project.
Create a new workflow
- In the upper-right corner of the screen, select Administration > Issues.
- In the left-side panel, select Workflows.
lect Add workflow.
Enter a name and description for your workflow and then select Add.

The workflow opens in edit mode, and contains a step called Open and an incoming transition called Create.
- Continue with your workflow customizations, by adding and editing statuses and transitions.
To edit or remove already added elements, select a particular status or transition and use editing options in the panel that appears.
Make the workflow active by associating it with a workflow scheme for a particular project. See Configuring a workflow scheme outside of a project for details.
Import a workflow
Follow guidelines from Importing workflows.
Configuring a workflow
Edit a project's workflow
If you can’t change or remove statuses or transitions when modifying an existing workflow, check out these articles for assistance:
Whenever you create a new Jira project, your project automatically uses the default workflow scheme. The scheme associates all available issue types in the project with the Jira system workflow.
Jira system workflows are read-only and can’t be edited. Jira creates an editable copy of the system workflow and workflow scheme for your project.
To edit a workflow:
- In the upper-right corner of the screen, select Administration > Projects.
Select the relevant project.
In the Workflows section (left-side panel), select Workflows.
Select the pencil icon in the Actions column to edit the workflow. As you enter the edit mode, Jira automatically does the following:
creates a draft copy of the system workflow named "Your Project Name Workflow (Draft)"- creates a new workflow scheme for the workflow named "Your Project Name Workflow Scheme"
- associates any existing issues in your project with the new workflow
- You can now edit your draft workflow. Click on a status or transition to see editing options in the panel that appears.
- When you've finished editing, select Publish. The dialog allows you to publish your draft and, optionally, save your original workflow as an inactive backup.
Replace a project's workflow
If you want to use a different workflow in your project, you need to associate the current workflow scheme with a new workflow of your choice. See Configuring workflows for a workflow scheme.
Set the resolution field
After you finish working on a particular issue, you’ll likely need to update the issue and indicate that the work has been done. To achieve this, you need to set the “Resolution” field for the issue.
Note the difference between the Resolution and Status fields. The Resolution specifies why an issue is closed, while Status indicates an issue’s position in its workflow.
In Jira, an issue is either open or closed based on the value of its “Resolution” field:
- An issue is open if its resolution field has not been set.
- An issue is closed if its resolution field has a value (e.g. Fixed, Cannot Reproduce).
This is true regardless of the current value of the issue's status field (Open, In Progress, etc). Therefore, if you need your workflow to force an issue to be open or closed, you will need to set the issue's resolution field during a transition. There are two ways to do this:
- Set the resolution field automatically via a post function.
- Prompt the user to choose a resolution via a screen. See Working in text mode for details.
Rename workflow transition buttons
If you copied the system workflow and you wish to rename the workflow transition buttons on the View issue page, you must delete the following properties from all transitions in the copied workflow:
jira.i18n.titlejira.i18n.description
Otherwise, the default names (i.e. values of these properties) will persist. Read more about transition properties.
Work in text mode
Text mode is an advanced way of working with workflows, and it shows the difference between steps and statuses. In text mode, you work directly with steps. For details, see Working in text mode.
Deleting a workflow
Delete a project’s workflow
You can't delete a workflow that's assigned to a workflow scheme. First remove the workflow from the scheme and then delete the workflow.
- In the upper-right corner of the screen, select Administration > Projects.
In the Workflows section (left-side panel), select Workflows.
Scroll down to the Inactive tab and expand it to view the list of all inactive workflows.
Find the relevant workflow, then select Delete.
Advanced workflow configuration
See the documentation on Advanced workflow configuration.
Do more with Jira
Customize the behavior of workflow transitions with advanced workflow configuration and discover even more ways to configure workflows with top workflow apps on the Atlassian Marketplace.