Adding target dates
This page discusses the usage of Advanced Roadmaps live plans. If you're using the redesigned planning interface, see the following pages instead:
Adding target dates is helpful when planning work for your team. When you're at the start of planning work, you may have an idea of the tasks that must be completed, and when these tasks should be completed. Most of the time, you won't have more information beyond that. In such cases, using target dates — specifically target start dates and target end dates — helps you set high-level targets for the work you're planning.
With target dates, you can:
- quickly visualize long-term plans
- compare the target dates that you set for your work against your calculated plan
- your current plan against the originally planned schedule, as you track your plan over time
- define high-level estimates on issues — as you break down issues, you can compare your original high-level estimates against broken down estimates that are more defined
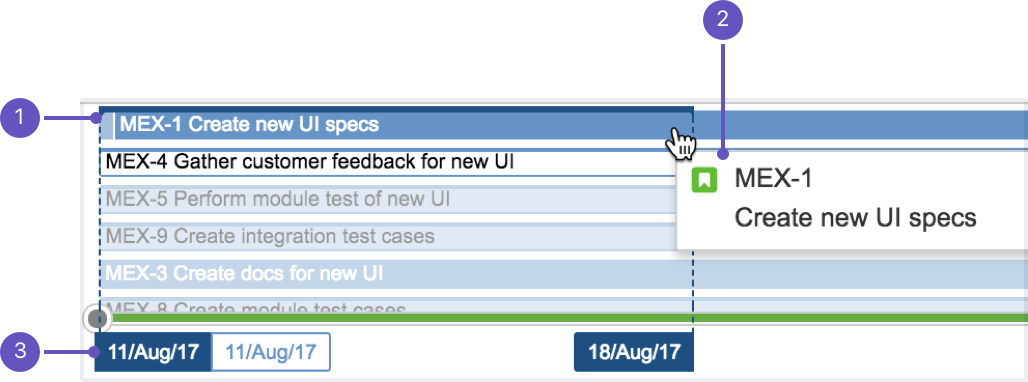
- Issue in the timeline, with target dates set: The blue line above the issue indicates that this issue has target dates set for it
- Details of the issue when clicked: Clicking on the issue displays its details, as well as the target dates that are set for the issue
- Target dates of the issue: The target dates are highlighted in blue, while the scheduled dates are not highlighted. In the example above, the target start date is 11th August 2017 (highlighted in blue), and the target end date is 18th August 2017 (also highlighted in blue).
Defining target dates for a work item
- In your plan, click the Scope tab to display the scope table.
- Go to the schedule settings (next to Calculate in the timeline) > select Target schedule.
- In the scope table, click the drag and drop icon () > select Target start and Target end to make these columns display.
- If necessary, create the work items that haven't been created yet.
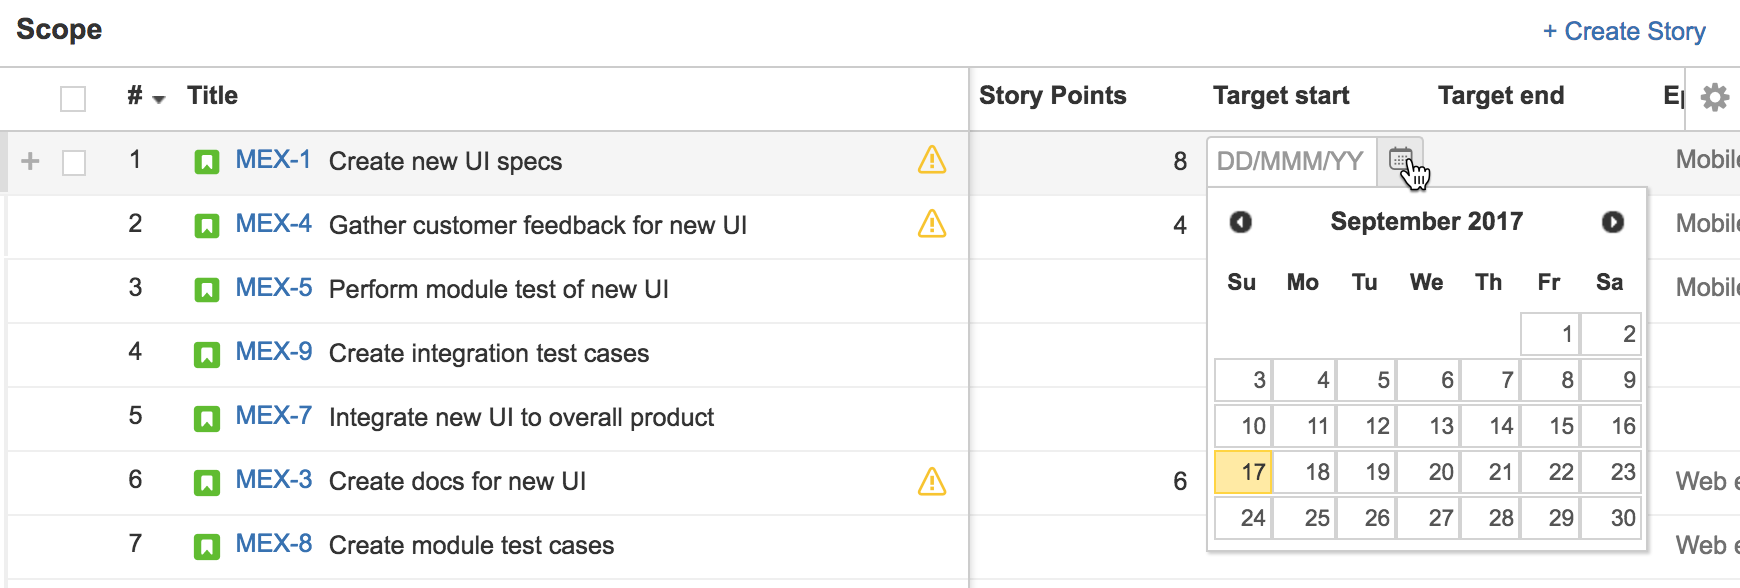
- From the Target start column, hover over the row of each work item > click the calendar icon that appears > set the date for when work should start for that work item.
- From the Target end column, hover over the row of each work item > click the calendar icon that appears > set the date for when work should be completed for that work item.
- Click Calculate. In the timeline, the tasks with target start and target end dates will then display with a blue colored line at the top.
Work items that are not estimated will show up in the schedule if the "schedule unestimated items" option is enabled, and:
- these work items have both target start and target end dates set, or
- if these have a version or sprint assigned manually to them.
Baselining a plan against target dates
Let's say you already have a working plan, with all work items estimated and scheduled accordingly. You can set target dates for your plan, based on how the work items are currently scheduled in your plan.
The example above shows your currently scheduled plan, which is your baseline plan, against the target dates that are set.
In this example, you have the issue IOS-1 App Basics - iOS, and work for this issue has been scheduled from 15th December to 11th January. You can then set the target dates based on the calculated or scheduled dates for the work items.
Your plan with the originally scheduled dates then becomes your baseline plan. You can track your baseline plan against the target dates — and essentially check how work is progressing against the target dates.
To baseline your plan against target dates:
Before you start, make sure:
- your plan is already calculated and scheduled in the timeline,
- your plan already contains all necessary work items, and
- all work items are already estimated accordingly.
- In your plan, click the Scope tab to display the scope table.
- Go to the schedule settings (next to Calculate in the timeline) > select Target schedule.
- In the scope table, click the drag and drop icon () > select Target start and Target end to make these columns display.
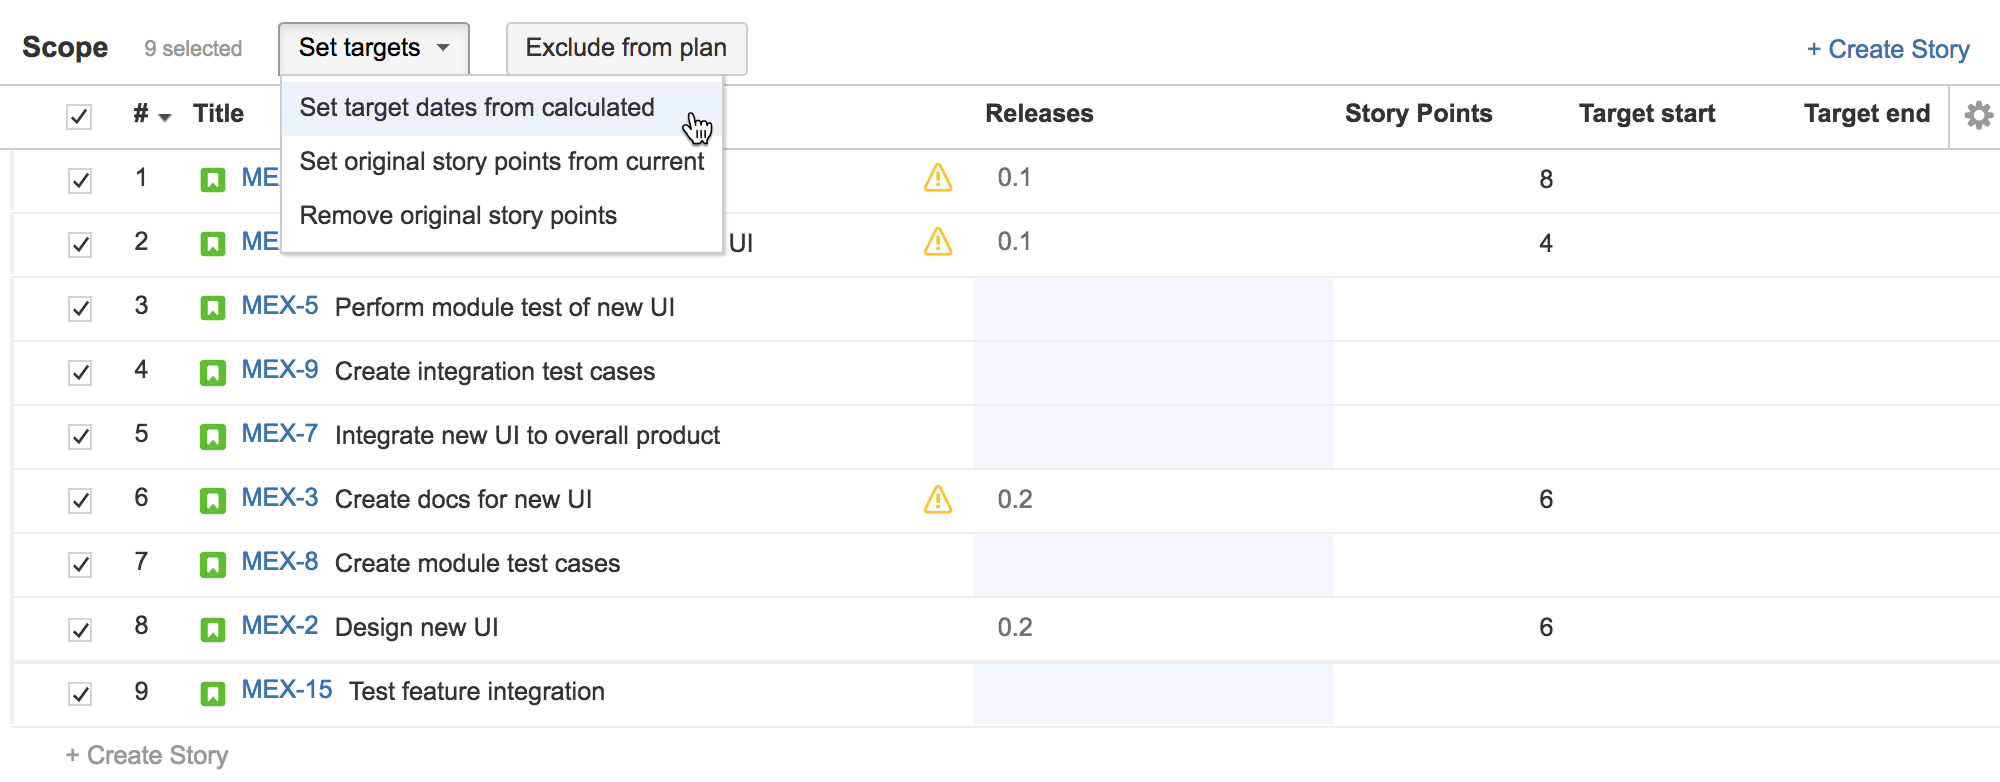
- Select all work items by clicking the checkbox in the left-most column of the scope table. This will display target options at the top of the scope table.
- Click Set targets > Set target dates from calculated. This will make your currently scheduled plan as your baseline plan, and will add blue lines above each issue, which indicate the target dates for the scheduled issues.


