Using scope and dependencies
This page discusses the usage of Advanced Roadmaps live plans. If you're using the redesigned planning interface, see this page instead.
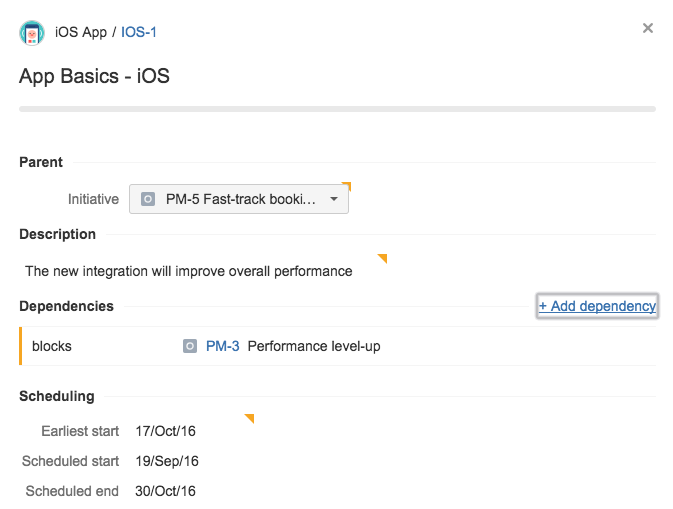
In the scope details view, you can see the details of each issue, as well as add scheduling dependencies to issues.
The following information are displayed in the scope details view, for each issue:
| Field | Description |
|---|---|
| Parent | Shows the parent issue |
| Description | Issues description |
| Dependencies | Issues relationships and dependencies |
| Earliest start | Defines the earliest date it can be scheduled for |
| Scheduled start | The start date produced by schedule calculation |
| Scheduled end | The end date produced by schedule calculation |
To view issue details in the scope details view:
- In your plan, click the Scope tab to display the scope table.
- In the scope table, click an issue. The details view will display.
To add a scheduling dependency to an issue:
Before you begin, make sure you have the link issues permission in your Jira instance.
- In your plan, click the Scope tab to display the scope table.
- In the scope table, click the issue to which you want to add a scheduling dependency.
- Click + Add dependency, then specify the relation between the issues.
- Celect Add dependency.
- Commit the changes back to your Jira Software instance.
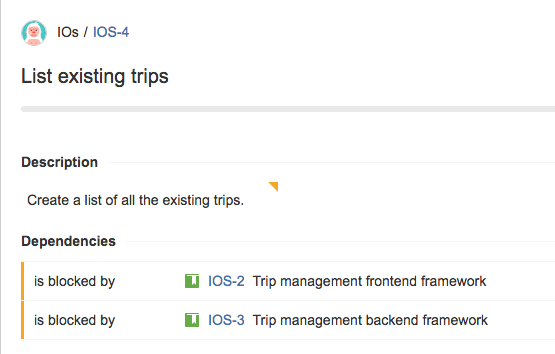
To illustrate, let's say you have an issue called List existing trips, and this issue depends on both the frontend framework and the backend framework being in place. You then need to add a dependency, so the frontend framework work must happen before listing the existing trips is implemented.
- In your plan, click the Scope tab to display the scope table.
- Click the List existing trips issue.
- Add two dependencies to the issue, as follows:
As a result, the List exisiting trips issue will then be scheduled after the frontend framework and backend framework issues. - Commit the changes back to your Jira Software instance.


