Concepts
Automation for Jira Server helps you extend and automate Jira - without the need for scripts. Think of it like Lego. You simply put the building blocks together & automate the processes you need easily.
When you install Automation for Jira Server, we set you up with sample rules where you can get started.
Rules
Rules are how you automate and extend Jira. Each rule is made up of a Trigger that kicks off a rule, Conditions which refine the rule & Actions which execute it. Using the drag and drop interface, you put together these building blocks in endless ways to create automation rules.
An example of a simple rule is: when a Jira issue is created (Trigger), and the priority is High (Condition) then assign the issue to Bob (Action). Sorry Bob.

These building blocks can be combined and customized to solve almost any use case.
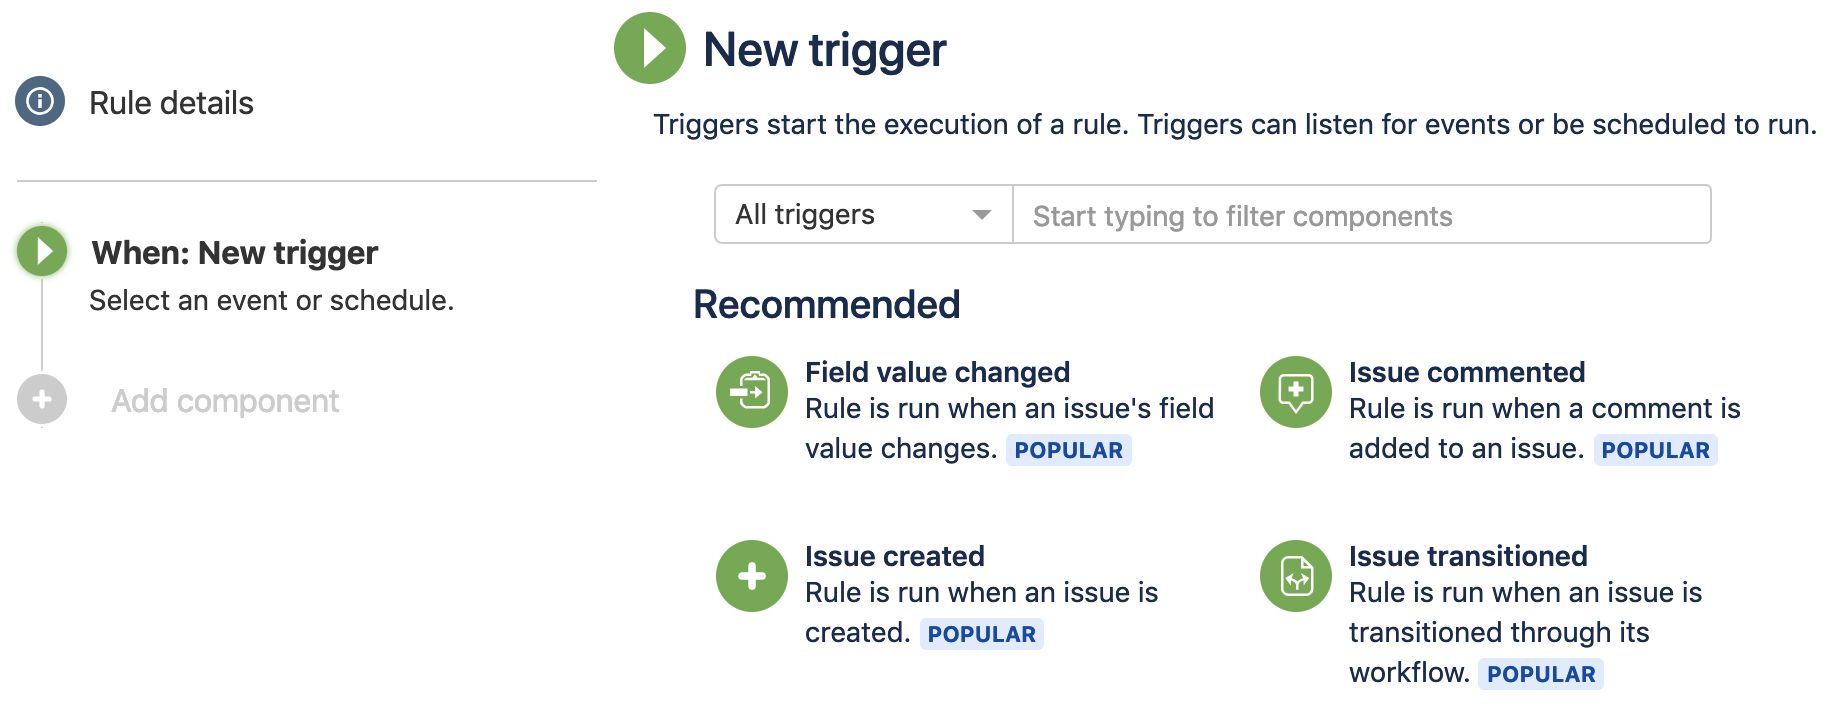
Triggers
Every rule starts with a trigger. You can choose from over 20 triggers including: issue transitioned, scheduled trigger and issue created. Once you have selected the trigger you wish to use, you will see it join the 'trunk' on the left side. If you wish, you can customize your trigger before moving on to your next component and completing your rule.
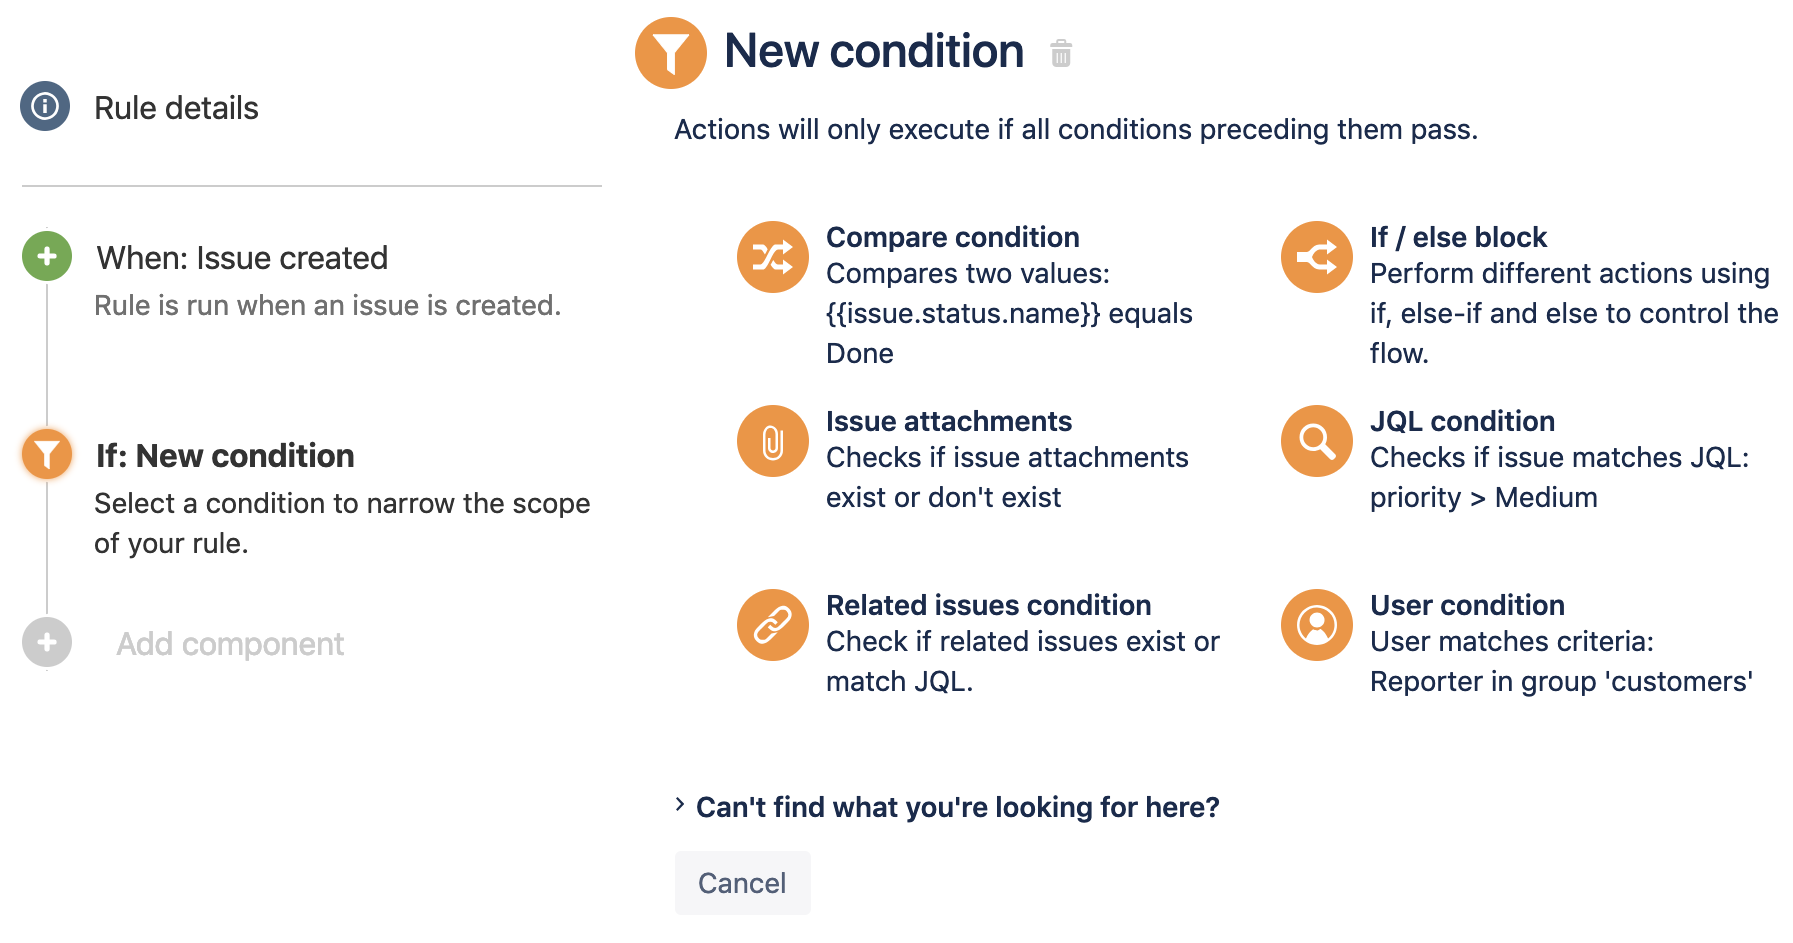
Conditions
Conditions allow you to narrow the scope of the rule, e.g. only escalate an issue if it is high priority. Rules don't have to have conditions, but if you want to include them, they can be placed anywhere in the rule chain. If one condition fails, the rule will stops running. The exception is with the IF/ELSE condition.
Actions
Actions are the "doers" of rule chains. They can perform many tasks, such as editing issues, sending notifications, creating sub-tasks, adding audit messages and tons more. With actions you can make changes to Jira and external systems.

Branching / related issues
In the real world, a Jira issue rarely exists in isolation. Issues can have sub-tasks, be stories part of a larger epic, or simply be linked to other issues using certain relationships.
Many times when automating, we need to apply certain actions not just to the source issue that triggered an automation rule, but also issues that are related to that source issue.
Automation for Jira Server makes this extremely easy with our branch rule / related issues as well as our related issue condition.
This can create very powerful rules that can work across complex issue relationships. For example, checking that all sub-tasks of a parent are resolved or syncing linked issues in another project.

Smart values
Smart values allow you to access pretty much any issue data from Jira. For example, you may want to send a Slack message and in that message include the issue key and issue summary. To access and print the key or summary, you can use:
{{issue.key}} - {{issue.summary}}Find out more about how to use smart values.
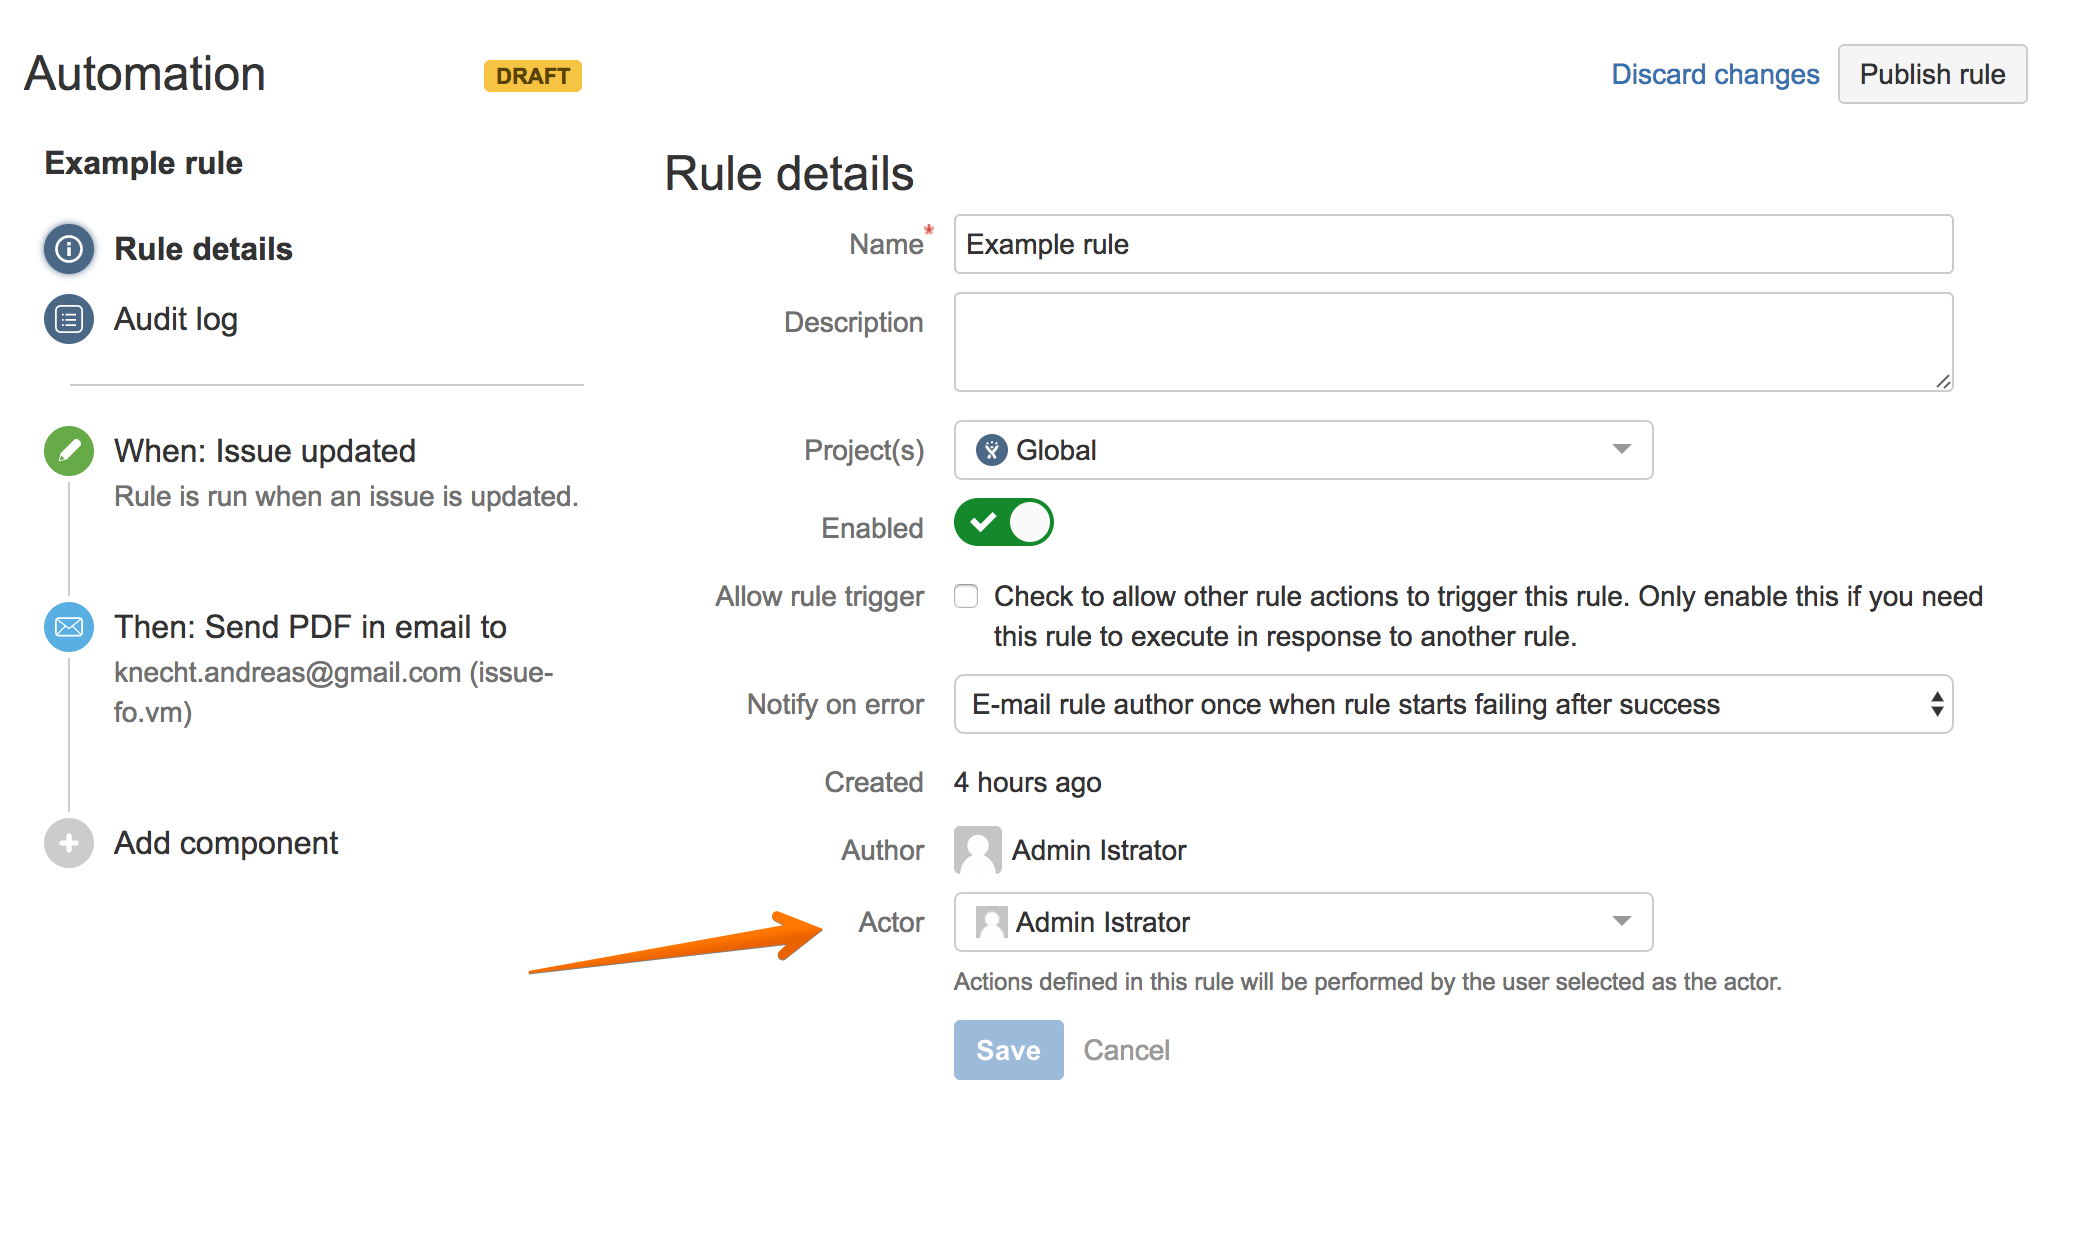
Rule actors
A rule actor is the person who executes the rule. Just like any other Jira user, the rule actor must have the relevant permissions to complete the action or trigger the rule. For example, if your rule includes a Comment issue action, then the rule actor must have the Add comment permission, otherwise the rule will result in an error.
It is best practice to create rule actors such as 'Auto-bot' or 'David Bowie Bot' with the appropriate permissions that you can reuse for rules instead of a specific team member. That way rules continue to run if a team member is away or wins the lottery and leaves.
To change the rule actor, simply navigate to the rule's details.
Turning rules on and off
The current status of the rule can be seen by the colored lozenge in the header.
- ENABLED The rule is currently active
- DISABLED The rule is not currently in use
- DRAFT The rule has some unpublished changes
The last (and best!) part in the rule creation process is to give it a name and turn it on. If you don't want your rule to run as soon as you've created it, you can change its status to disabled using the toggle button in the rule list or in the rule details.


Once your rule is enabled, you can track its every activity via the audit log.
Editing rules
In the rule-chain view (left side), you can drag and drop components into and along the rule-chain. You can also add new components by clicking in the rule chain between components.
In the rule details view (right side), you can edit the details of the rule, such as what projects it runs across, its name, etc.

Allow Rule Trigger - Rules triggering other rules
By default, actions in one rule will not trigger another rule. This is to avoid rule execution loops. You can change this setting by enabling/disabling the Allow rule trigger checkbox. Only enable this if you need this rule to execute in response to another rule.
At each stage of editing your rule components, save the changes using the 'save' button. You can revert the changes by selecting cancel to return the selected rule component to the previous state. This does not cancel all of your changes to the entire rule, it only cancels the changes to the selected component.
When you have finished making your changes, you can either "Publish" or "Discard" your changes. Once published, the new rule is active but the status remains as it was when you started editing your rule, i.e. if it was Enabled, it'll remain Enabled, if it was Disabled it'll remain Disabled.
Rule scope
By default, both project and global admins can create and edit rules. Global admins can, however, further restrict which project admins should be allowed to edit rules in global configuration. It is good practice, especially for bigger companies, to restrict who creates the rules to a select group of people.

Rules are created with the following scopes:
| Scope | Description | Permission - Create/Edit |
|---|---|---|
| Global | Rule runs for issues in all projects | Global Admin |
| Multiple Projects | Rule runs for issues in selected projects | Global Admin |
| Project Specific | Rule runs for issues in only one project | Project Admin, Global Admin |
This article explains permissions for project automation.
You can amend the scope to specific projects by updating the 'Restrict to projects' setting in 'Rule details'.

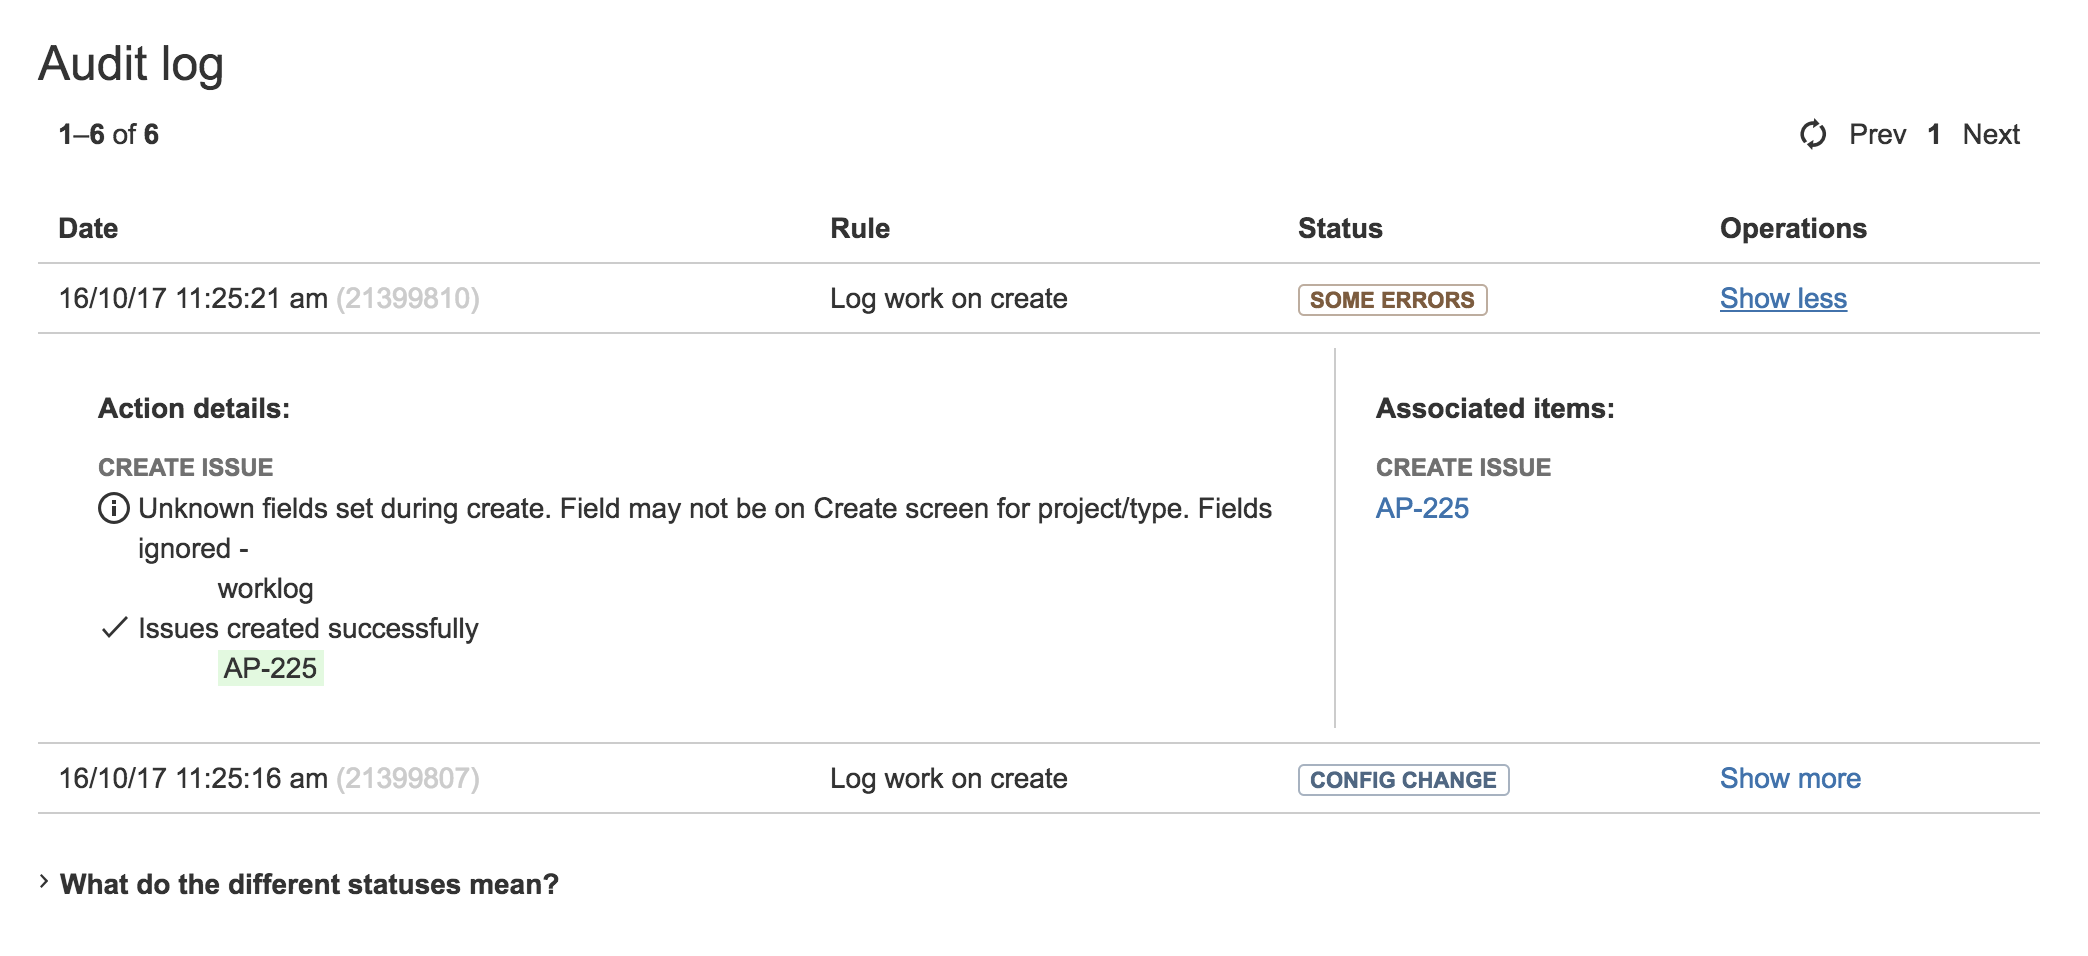
Audit log
Each rule has an audit log, within which you can see when the rule was triggered, the final result of the execution and any actions that may have been applied. You can view audit logs at individual rule, project-wide or at a global level. Reviewing your audit logs is one of the most beneficial ways of debugging your rules.