Send web request action now provides response data
We have two big goals with Automation for Jira Server. The first is to continue to simplify the app so that even non-tech folk like me can continue to automate Jira easily. The second is to add quiet power. Our newest improvement very much fits in that second bucket.
Our send web request action can now listen and provide response data!
Before we dig into the details, let’s briefly summarize the basics.
Remind me, what is a webhook?
With most APIs, there is a request followed by a response. No request is required for a webhook, it just sends the data when it’s available. To use a webhook, you register a URL with the company providing the service. That URL is a place within your application that will accept the data and do something with it.
How did Automation for Jira Webhooks work before?
Previously we could send a webhook request to any third party (Salesforce or Confluence, for example) and tell it to perform an action such as ‘add a new user’. It would fire BUT forget. Powerful but limiting as all we could do was request an action. We couldn’t do anything with the response data.
How does it work now?
We now have the ability to listen for a response from the webhook request. You can add it to smart values, which means you can add external data to a comment or description and so on.
So, now when we send a webhook request to Salesforce, we can tell it to perform an action AND to return some data to us. For example, add a new user — then send us all of the information about that user and populate certain custom fields in Jira. Essentially you can edit any field with data from any third party.
Show me how it works
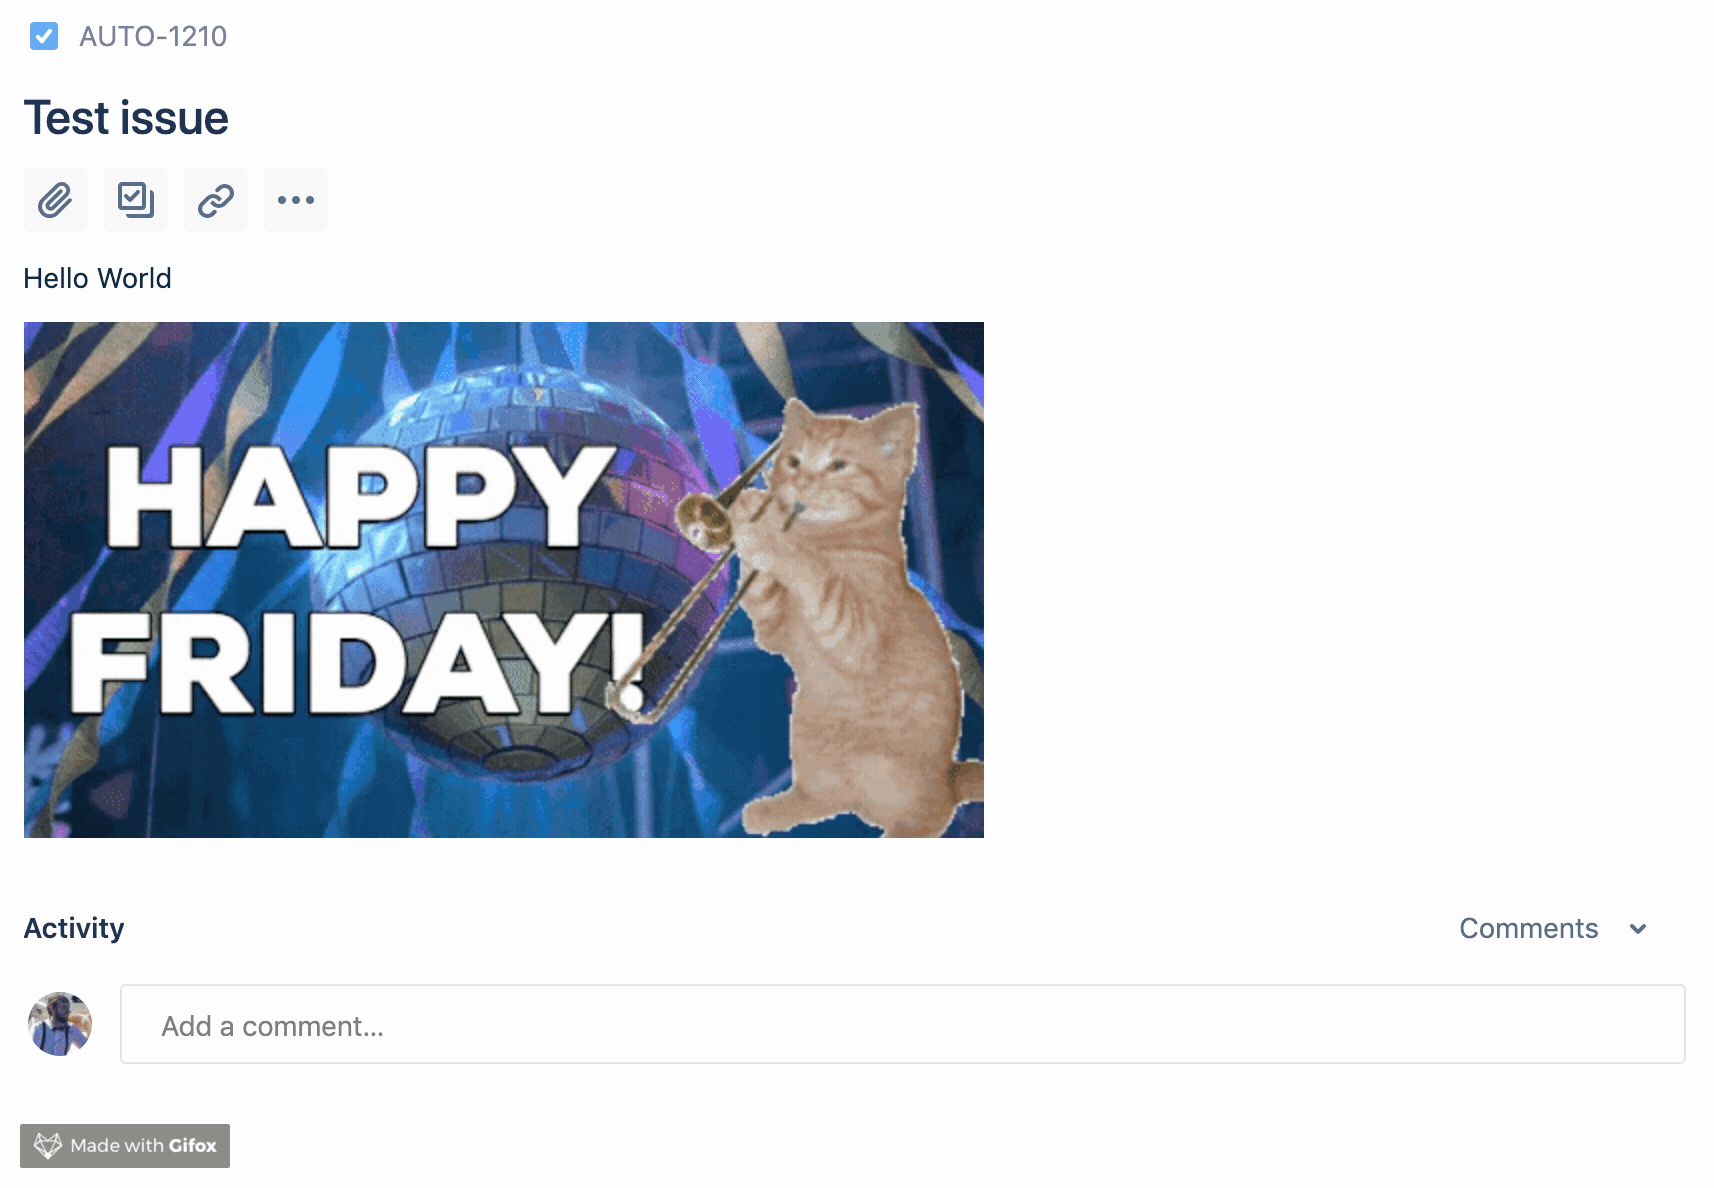
Let’s take a look at a typical corporate example — how can you add a cat gif into your Jira issue description, directly from a third party like Giphy?
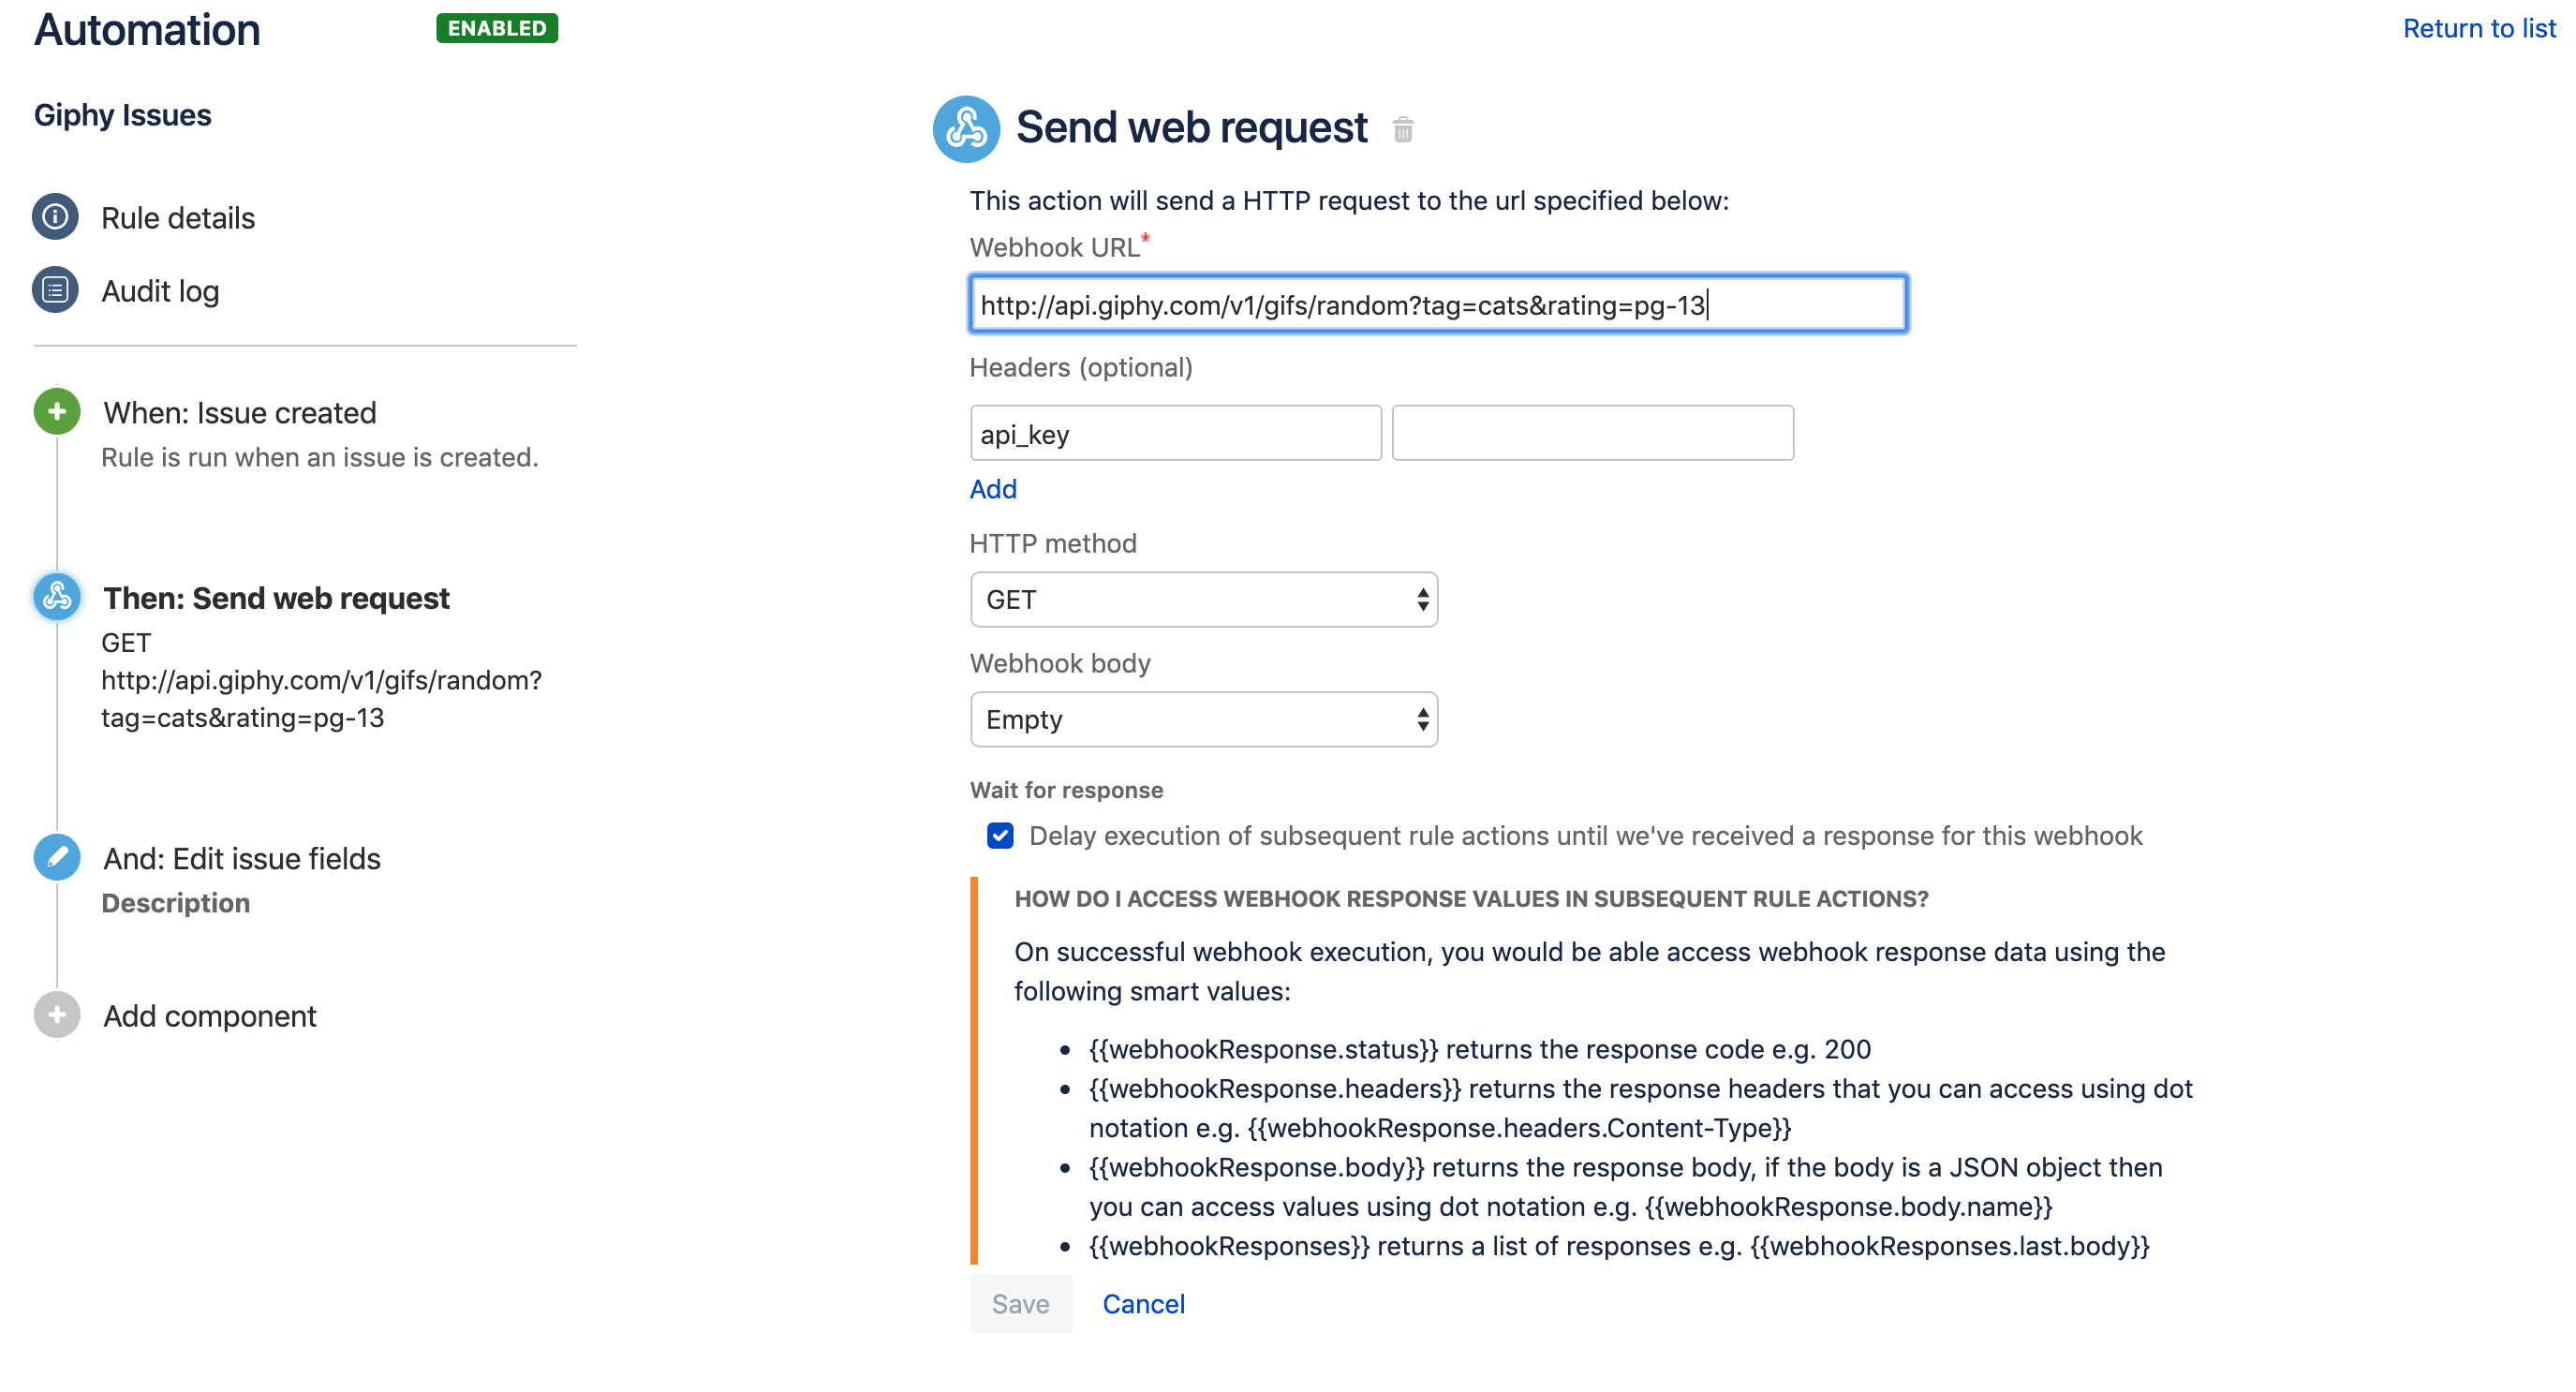
Step 1: Build your rule in Automation for Jira
You can use any trigger you want but for us, we will use ‘issue created’ trigger. Then we move on to the ‘send web request’ action. You will need to use a webhook URL for Giphy or whichever third party you are working with.
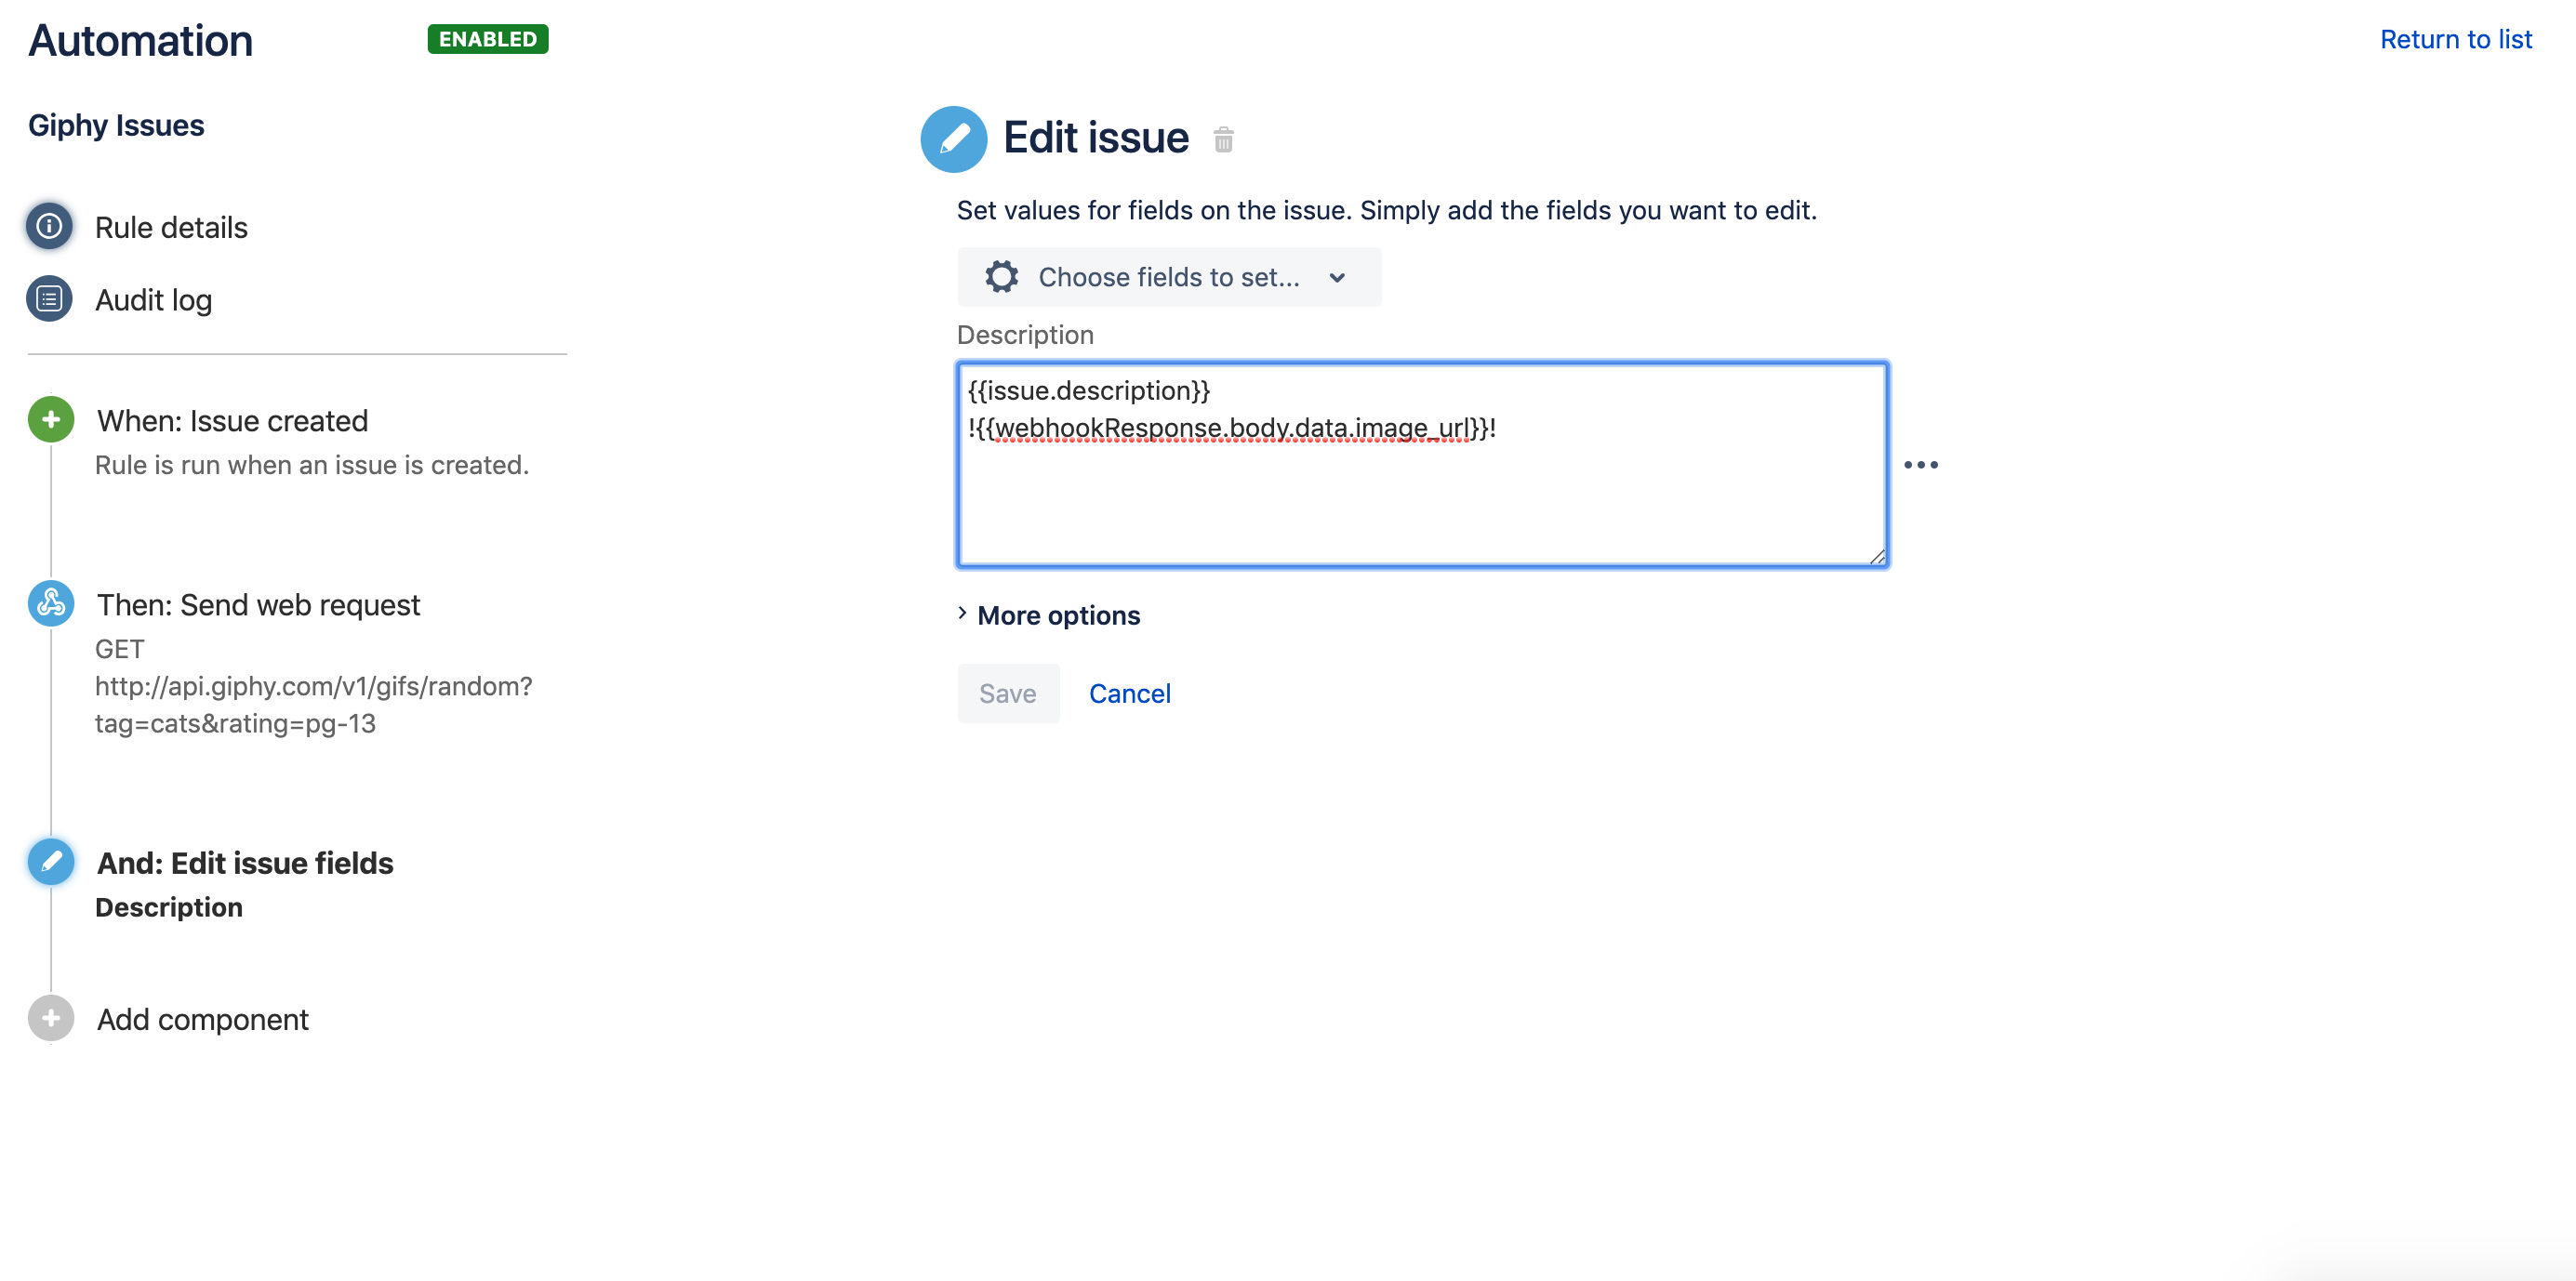
Step 2: Now we use the ‘edit issue’ action. In here, because we want to append the image on to the end of the description, we put {{issue.description}} and !{{webhookResponse.body.data.image.url}}!
And voila! The result is a cat playing the trumpet and wishing us well. Obviously, this is a fun example but the use cases are almost endless. You can essentially integrate Jira with any third party.