Too many users affecting syncing from an identity provider
This insight checks if your total number of users exceeds the limit of users you can sync from an identity provider using SCIM.
How does the user count affect syncing?
Atlassian Cloud limits the number of users you can sync from an IdP. Having more users in a single cloud organization affects performance and user actions around Jira. If you have more users than the limit, you can still migrate them (with the risk of the same performance issues), but users above the limit won’t be synced and updated on the cloud side.
Learn more about limits in cloud user provisioning
What’s the recommendation?
You should reduce the number of users below the limit to make sure syncing works correctly and that you don’t experience any performance issues in the future. If you’re unable to do it, you can request to increase the limit for your organization.
Delete users who never logged in RECOMMENDATION
When viewing this insight on the dashboard, you can copy an SQL query that returns the list of users who never logged in from your database.
Reviewing users by using an SQL query
To retrieve a list of users with the SQL query:
Copy the SQL query from the dashboard and run it on your database.
Review the returned list of users and prepare to delete them.
Reviewing users manually
You can also view such users in Jira, but that would require reviewing them manually, which isn’t the best option with your numbers.
To view users in Jira:
Go to Administration > User management.
Review users by Login details. Check for Never logged in or a Last login date.
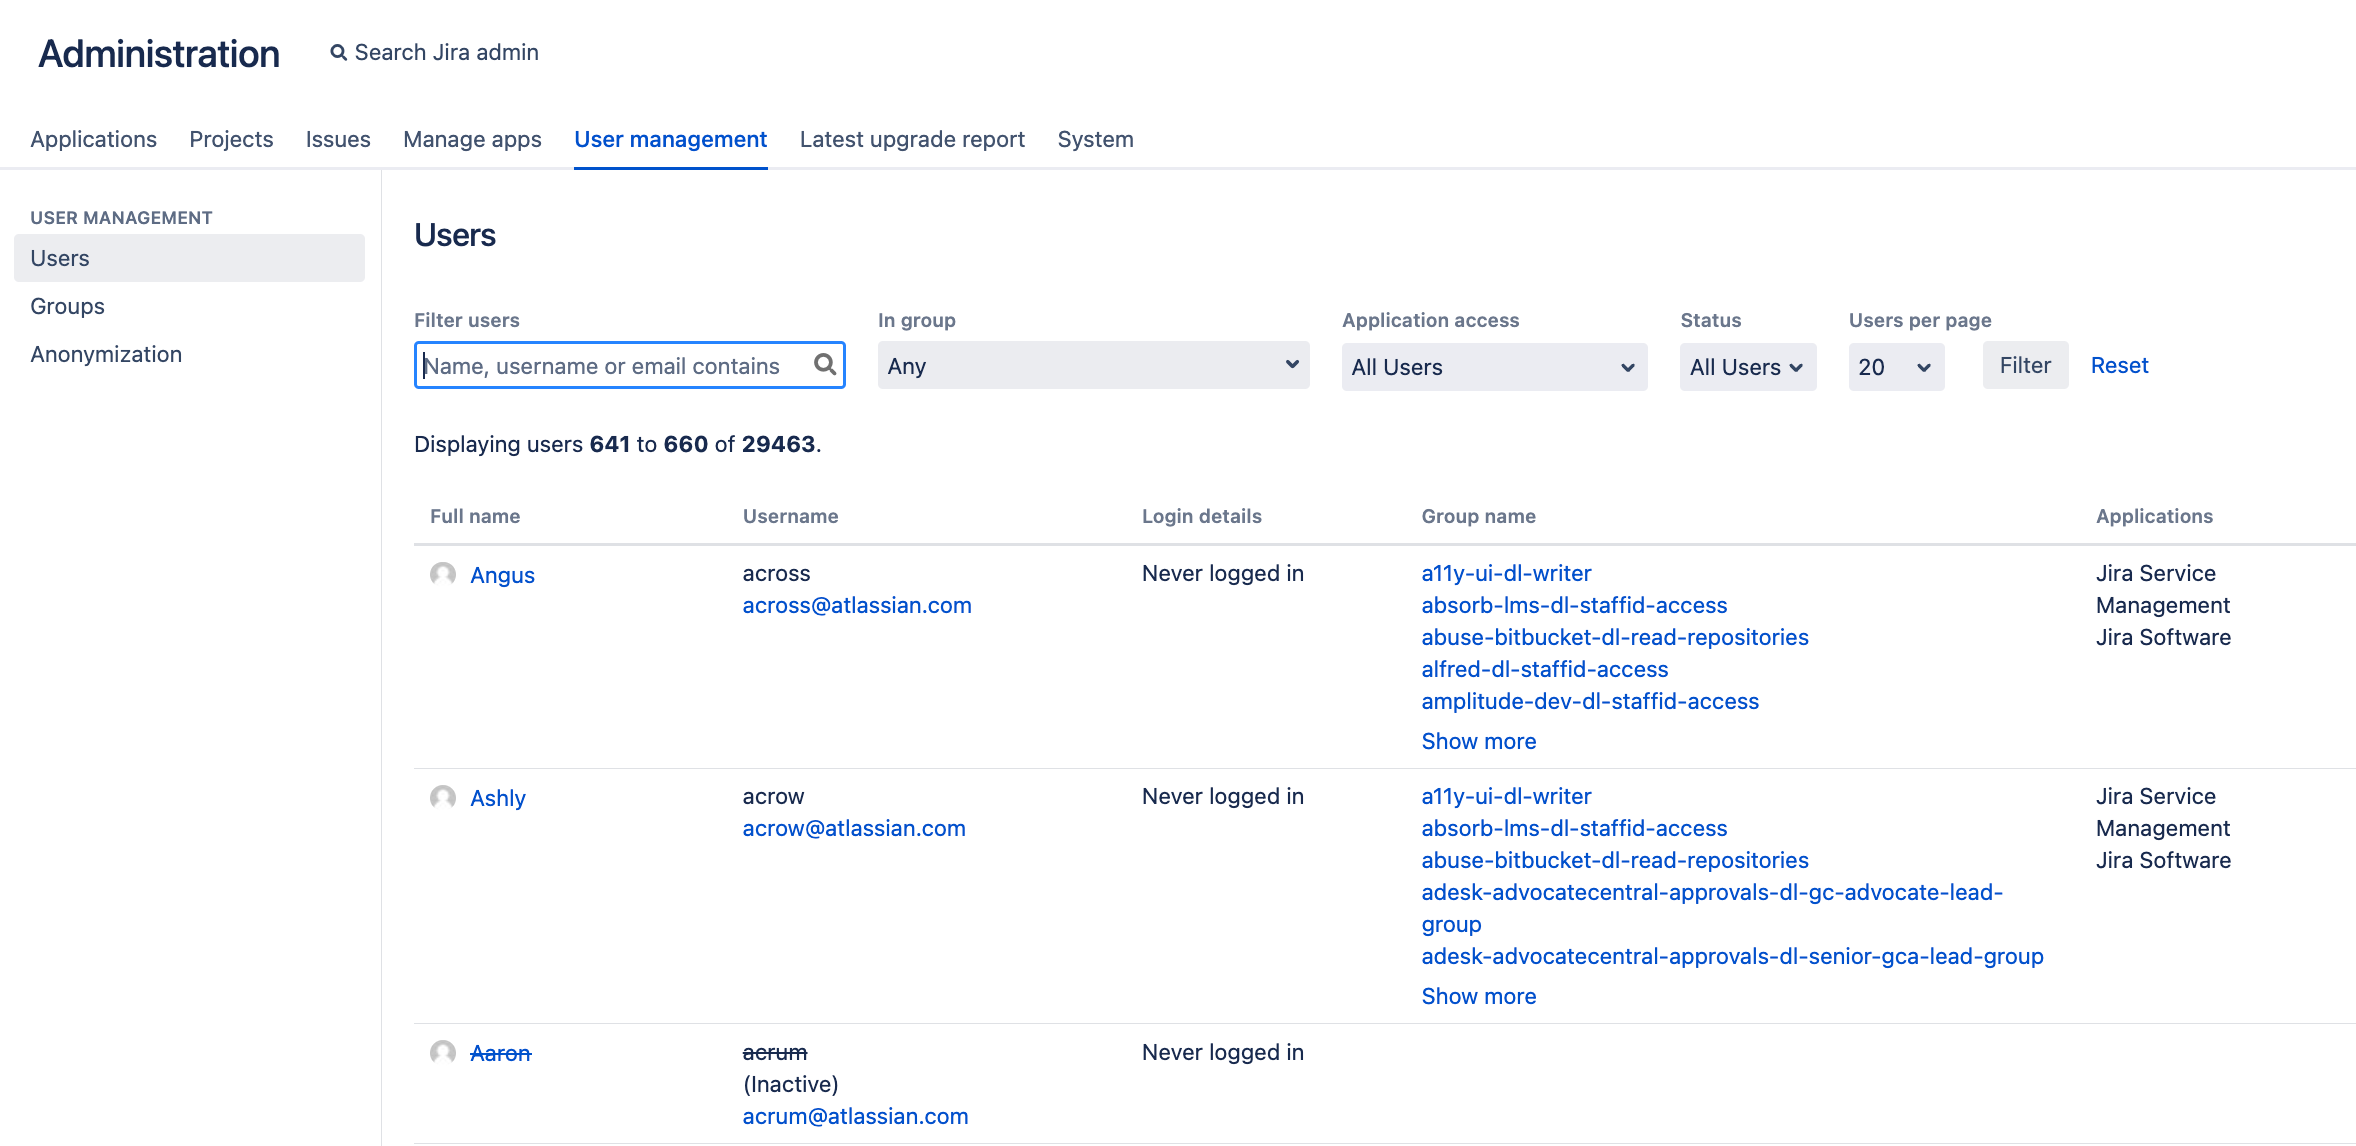
Filtering on the user management page
You can use the following filters on the User management page to help you find candidates for deletion.
Inactive status: This will return users who were deactivated, but not the ones who never logged in or haven’t logged in for a long time.
Application access: None: This will return users who don’t have access to Jira. They also won’t have access after the migration and won’t count towards your license.
Delete the users
You can delete these users with one of the following ways:
- Delete users directly in your external directory. This will make sure they won't be provisioned to cloud after the migration.
- Exclude users from your provisioning and syncing filters. If users don't have any content in Jira, they will be automatically deleted from the Jira internal directory.
- Manually delete users from the User management page. Note that if you delete users only in the Jira internal directory, they might be later provisioned to cloud, which is something you want to avoid.
Fix invalid and duplicated emails (former users and merge) RECOMMENDATION
You can run a user assessment in the migration assistant that will find users with invalid and duplicated email addresses. Users with such emails block your migration and must be fixed anyway.
Run a user assessment to identify users with incorrect emails
Access the user assessment faster
When viewing this insight on the dashboard, select the first View user assessment in the assistant link to open the assessment in your instance.
To run a user assessment:
Open the Jira Cloud Migration Assistant by going to Administration > Migrate to cloud.
On the home screen, find the Assess and prepare your users card, and select Begin assessing.
Once the assessment is complete, you should see the number of users with incorrect emails:
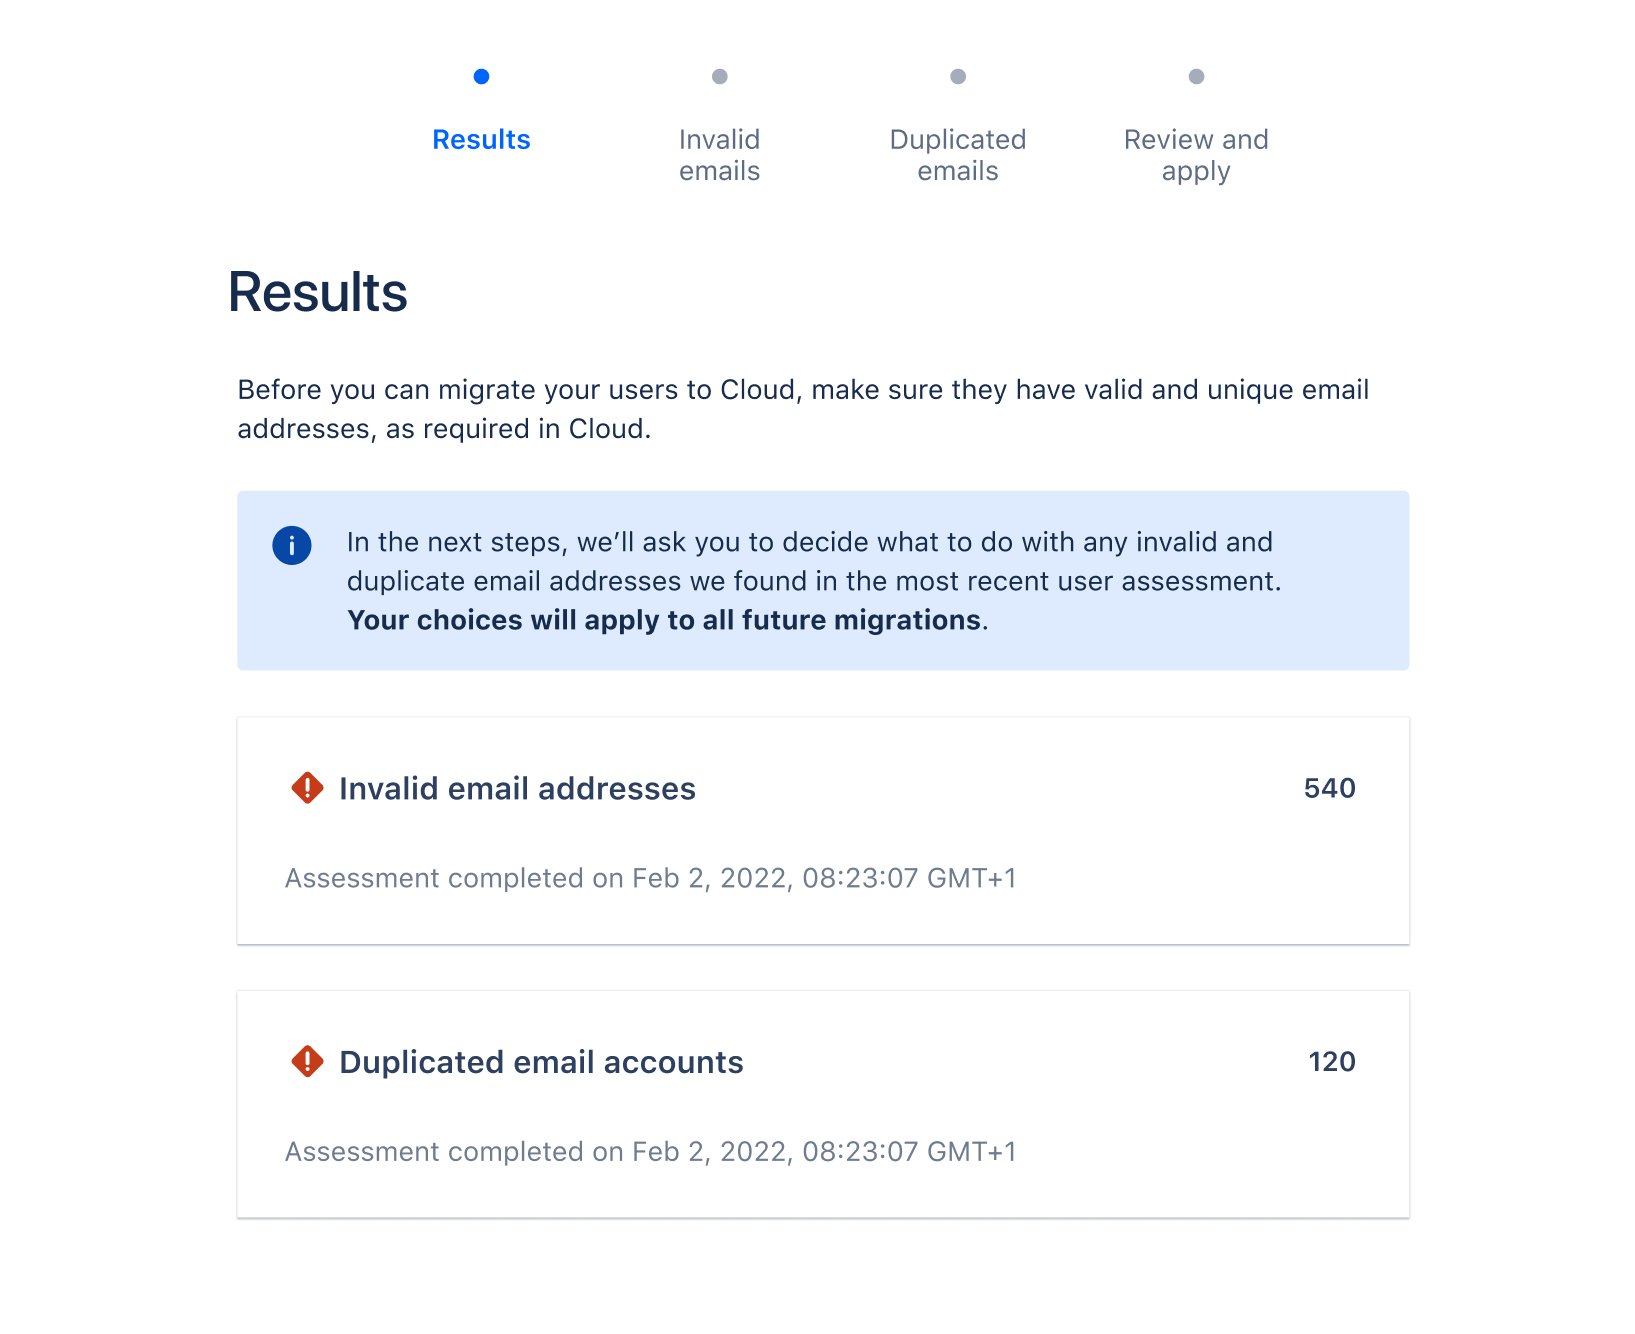
The results show the number of users that have invalid or duplicated email addresses. These users are potential candidates for deletion, but you should review them.
Fix invalid emails by migrating these users as former users
Before you begin
When fixing invalid emails, we’ll make the following choices:
CSV: Use the CSV file instead of automatic options. This will allow you to choose which users are deactivated and which migrated as active users.
Former users: Turning users with invalid emails into former users, deactivating them. Thanks to the CSV file, you’ll be able to choose a different option for selected users.
To fix users with invalid emails:
When viewing the assessment results, select Fix invalid emails.
You’ll see a few automatic options for fixing your users. Select the Update users based on CSV file, and download the CSV file.

How to edit the CSV file
The CSV file includes all users with invalid emails. You can view detailed instructions and explanations in the readme file.
Most important information on the CSV file
Pre-generated emails: All users will have dummy email addresses assigned. These addresses are valid, but aren’t actually working. If you’d like to migrate users as active users, you can change them to any working email you have access to.
Tombstone: All users will have this value set to false. This means they’ll be migrated as active users by default. You can change this value to true for users who can be deactivated and turned into former users.
To reduce the number of users by turning them info former users:
For each user that can be deactivated, change the Tombstone value to true.
For users that you’d like to keep, change the email address to a working email.
Save and upload the file to the migration assistant.
Fix duplicated emails by merging these users
Before you begin
When fixing duplicated emails, we’ll make the following choices:
Automatic option: In this case, we’ll use one of the automatic options instead of the CSV file. That’s because it’s easier and more efficient for merging duplicated emails.
Merging: We’ll merge all users that share the same email address to reduce the final user count.
After you fixed invalid email, select Fix duplicated emails. You’ll be moved to a similar screen where you can fix users with duplicate emails.
To merge users with duplicated emails:
Select the Merge duplicate users option.

Review changes and make a list of changed users
After choosing options to fix invalid and duplicated emails, select Review and apply.
Delete users from untrusted domains RECOMMENDATION
You can run a domain assessment in the migration assistant to identify all email domains used by your users. This can help you find domains that you don’t recognize, don’t trust, or that are suspicious and blocked by us.
Run a domain assessment
Access the domain assessment faster
When viewing this insight on the dashboard, select the first Review email domains in the assistant link to open the assessment in your instance.
To run a domain assessment:
Open the Jira Cloud Migration Assistant by going to Administration > Migrate to cloud.
On the home screen, find the Review domains card, and select Begin assessing.
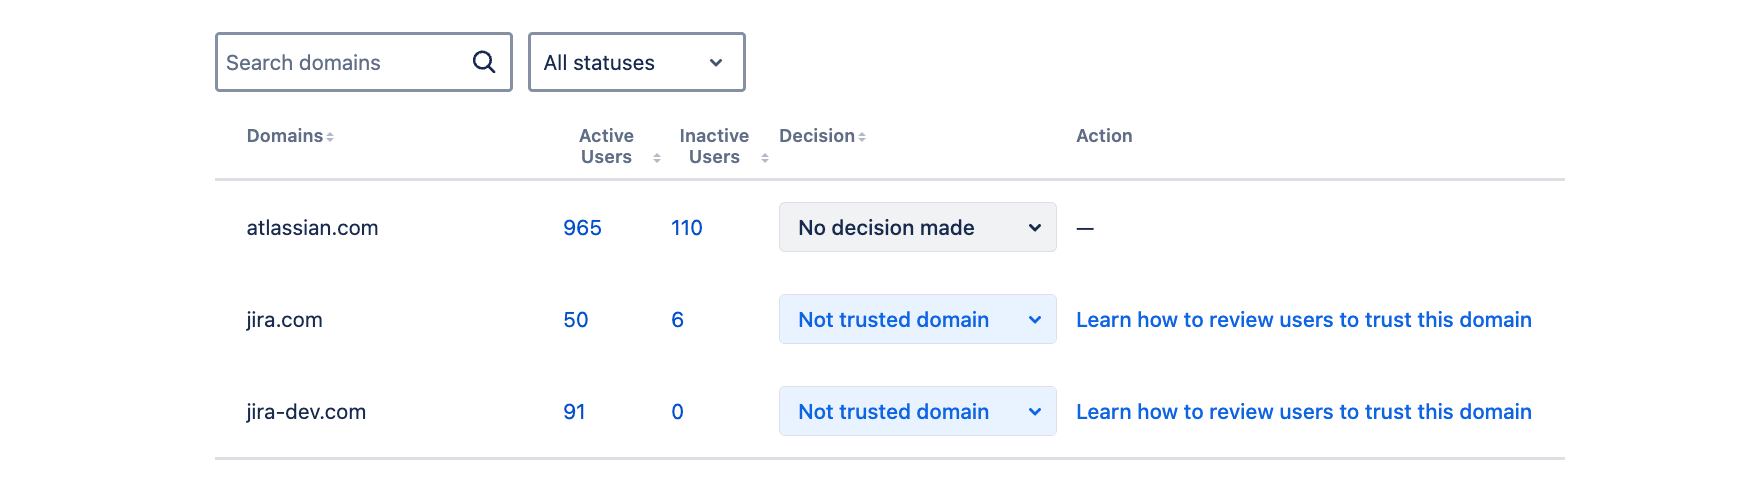
Once the assessment is complete, you should see the list of email domains found in your user directory
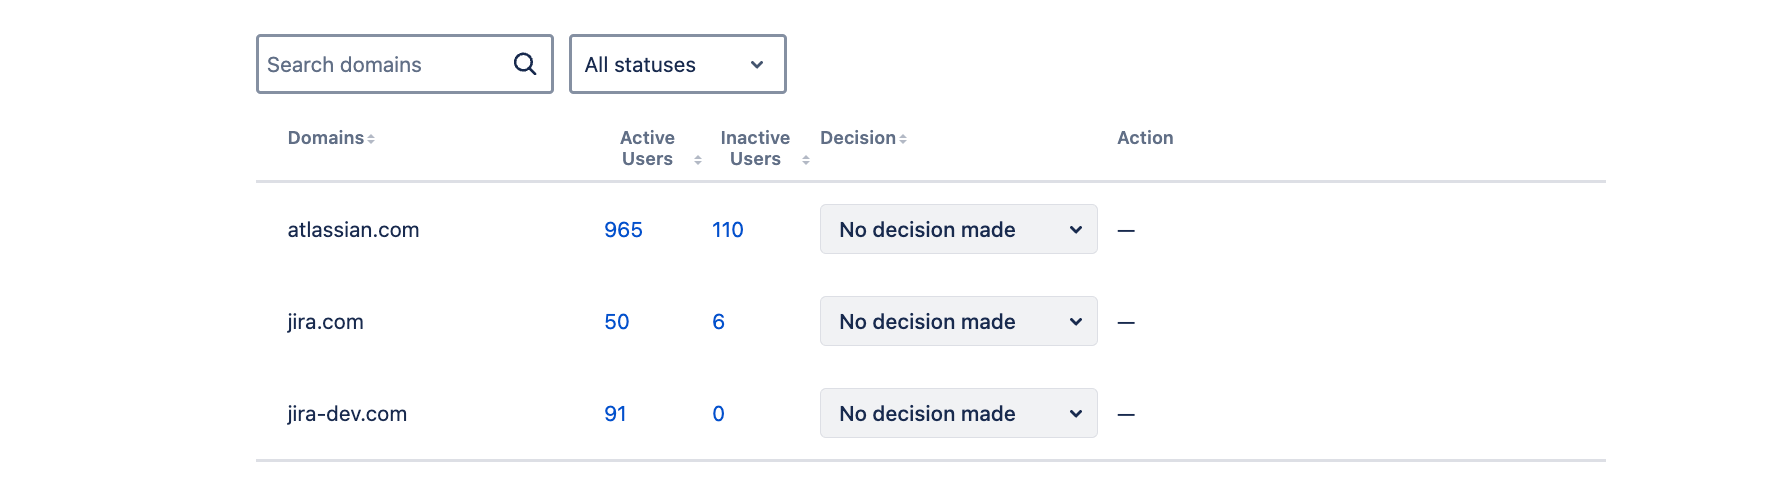
For every domain, you can select the number in Active / Inactive users to view the filtered list of users in Jira.
Review blocked domains
If we find any suspicious domains, we’ll block them. You should start by checking if you have such domains, as their users are the best candidates for deletion.
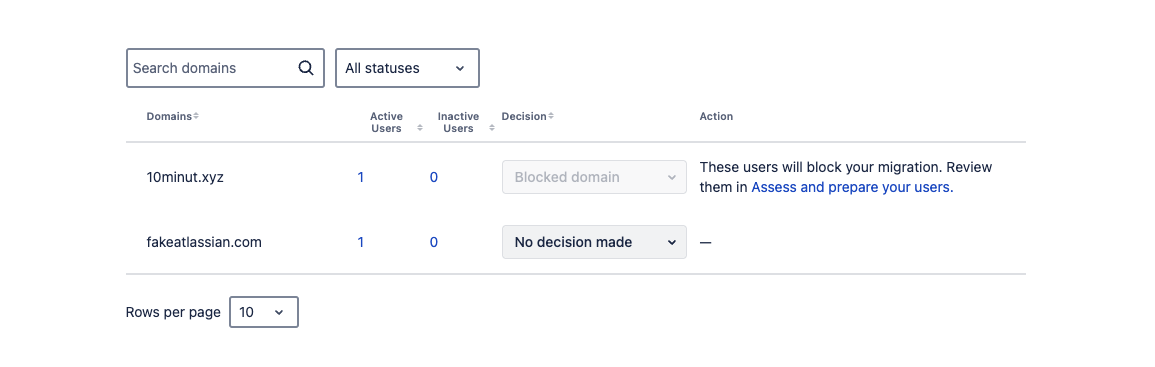
Select the number of users in these domains to view and delete them. You can delete such users in Jira, but you’ll also need to delete them from your external directory or exclude from provisioning filters.
Review remaining domains
For remaining domains, you can either review them in the user interface or by downloading a CSV file. The migration assistant requires that you mark all domains as trusted. If you find domains you don’t recognize or trust, you’ll need to delete their users so the domains disappear from the list.
Select the number of users in these domains to view and delete them. You can delete such users in Jira, but you’ll also need to delete them from your external directory or exclude from provisioning filters.
Learn more about reviewing email domains
Migrate only users referenced in projects RECOMMENDATION
When you migrate projects in the Jira Cloud Migration Assistant, you’ll have an option to migrate only users referenced in these projects, excluding all the rest.
You’ll be able to check the number of referenced users and groups without running the migration to give you an idea how many users you can exclude.
Migrate only users referenced in selected projects
You can choose an option to migrate referenced users after you add projects to your migration plan.
To migrate only referenced users:
Create a new migration plan in the Jira Cloud Migration Assistant.
Select the Choose what to migrate method, so you can manually select the data.
In the Projects card, select some projects to be included in your plan.
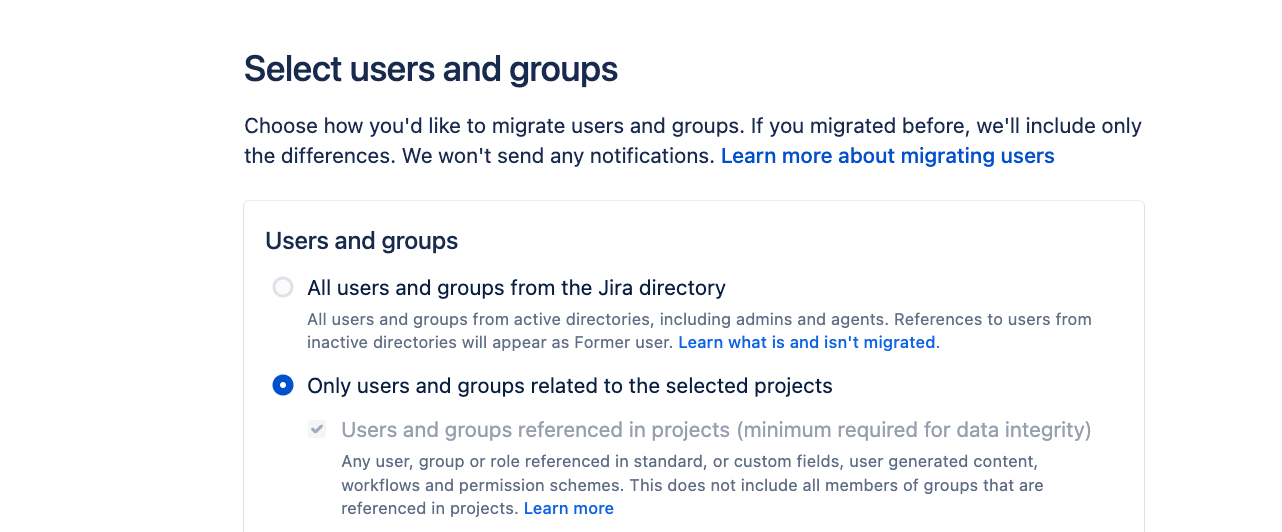
In the Users and groups card, select the Only users and groups related to the selected projects option. Learn more about the options you can choose
You can skip selecting data in other cards, such as Roadmap plans or Apps.
Check the number of referenced users and groups
You can check the number of referenced users and groups in the pre-migration report.
To download the pre-migration report:
1. Continue through the pre-migration checks until you reach the Review your migration screen. 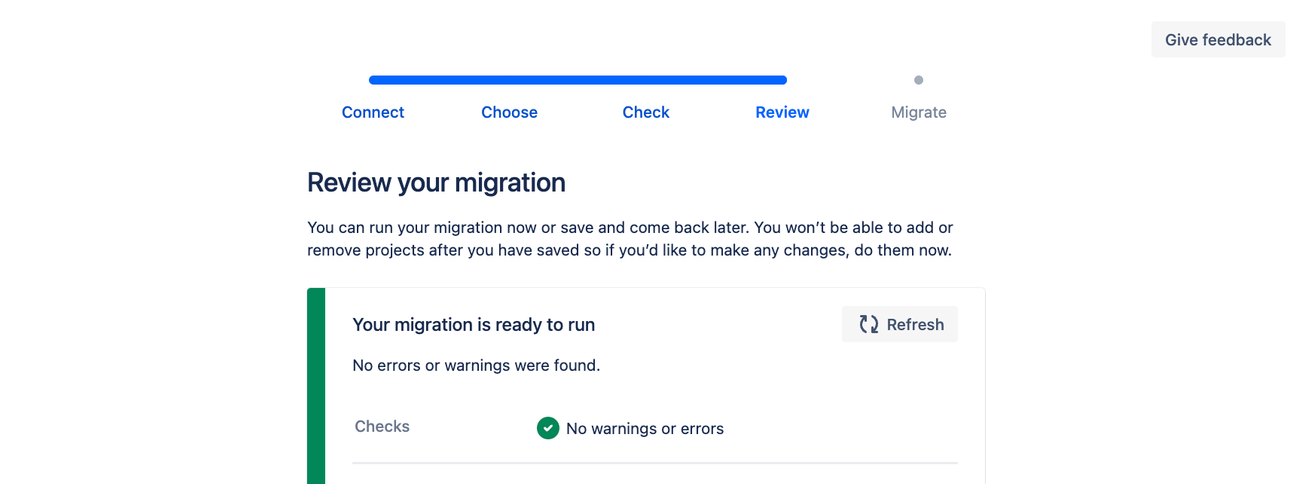
2. In the Logs and report tab, download the pre-migration report. 
3. Extract the archive, and look at the following files:
Summary: The file includes the number of users and groups included in migration.Users and groups: The files includes the details of referenced users and groups, and the projects they’re referenced in.
Repeat these steps for all projects you want to migrate to understand how many users you’ll actually need in cloud. When viewing the pre-migration report, make a list of referenced users and groups so you can exclude them from your provisioning and syncing filters on the cloud side.
Change user provisioning filters on the cloud side RECOMMENDATION
Depending on how your user provisioning and syncing filters are constructed, you might be syncing more users than necessary, for example including users who are no longer needed or who never even logged in.
Here are some ideas on how to avoid that:
Modify your LDAP (server) or SCIM (cloud) filters to exclude users that are no longer needed or were fixed using other recommendations
Making changes to users in your external directory, and not only the Jira directory. This will make sure that any updated or removed users won’t be provisioned to cloud
SCIM filters in Atlassian Cloud
You can’t connect an external directory directly to Atlassian Cloud. You will need to use an identity provider in-between. If you wish to modify filters, you’ll need to do it in your identity provider.
Here’s an idea on how to do this with Microsoft:
Here are docs for connecting Atlassian Cloud to identity provider. In some of them, like Okta, you’re able to specify who’s being synced when configuring this connection:
OneLogin: Learn how to configure user provisioning for OneLogin
Azure AD: Learn how to configure user provisioning for Azure AD
Google Cloud:Configure user provisioning with Google Cloud
Google Workspace: Learn how to set up user provisioning for Google Workspace
PingFederate: Learn how to configure user provisioning for PingFederate
JumpCloud: Learn how to configure user provisioning for JumpCloud
Learn more about user provisioning in cloud
LDAP filters in Data Center
Although it’s more important to update your filters on the cloud side, you can also do it in Data Center. This will let you delete some users more easily (for example, users with no content in Jira are deleted automatically after being excluded from syncing), and try some changes on your existing user base.
Reduce the number of users synced from LDAP to Jira
Request to increase the limit RECOMMENDATION
If you’re unable to bring the number below the limit, we can manually increase the limit for your organization. You should treat this option as the last resort, because it can affect performance.
Make sure that you accept the following risks before you request the increase:
Performance issues
User interface issues
User experience issues
Issues with applying permissions to large groups
To increase the limit, raise a Support ticket for Migration support, or leave a comment on your MOVE ticket with the following data:
User limit exception request
Exceeded limit: Users, Groups, or Users per group
Result: Your current number of users
Confirmation: Confirm that you accept the risks and would like to continue with the increase.