Associate fields with screens in Jira Cloud
Platform Notice: Cloud - This article applies to Atlassian products on the cloud platform.
Summary
There are several options to find a screen to associate fields in Jira. The best option for you will depend on which screens and fields you're looking to update.
- To update screens, you must have Administer Jira rights
- The steps below are for Company-managed projects only
Update specific screens in a project
When we need to update specific screens, for example, just for the Create or the View/Edit screen from a specific Issue type, the best option is to go directly to the desired project.
- Access Project settings
- Select Screens in the project settings navigation
- For Jira Software projects, this item is nested under the Issues expander
- On the Screens page, you'll see Issue types and the Screen Schemes for each type - Issue types can share the same Scheme, or have separate schemes
- Open the scheme that includes the issue type you're working with, and select the screen you want to update
- Add the field to the screen by searching at the bottom of the page
- If necessary, you can remove fields by hovering your mouse over them and selecting "Remove"
Select a screen from any project using global administration
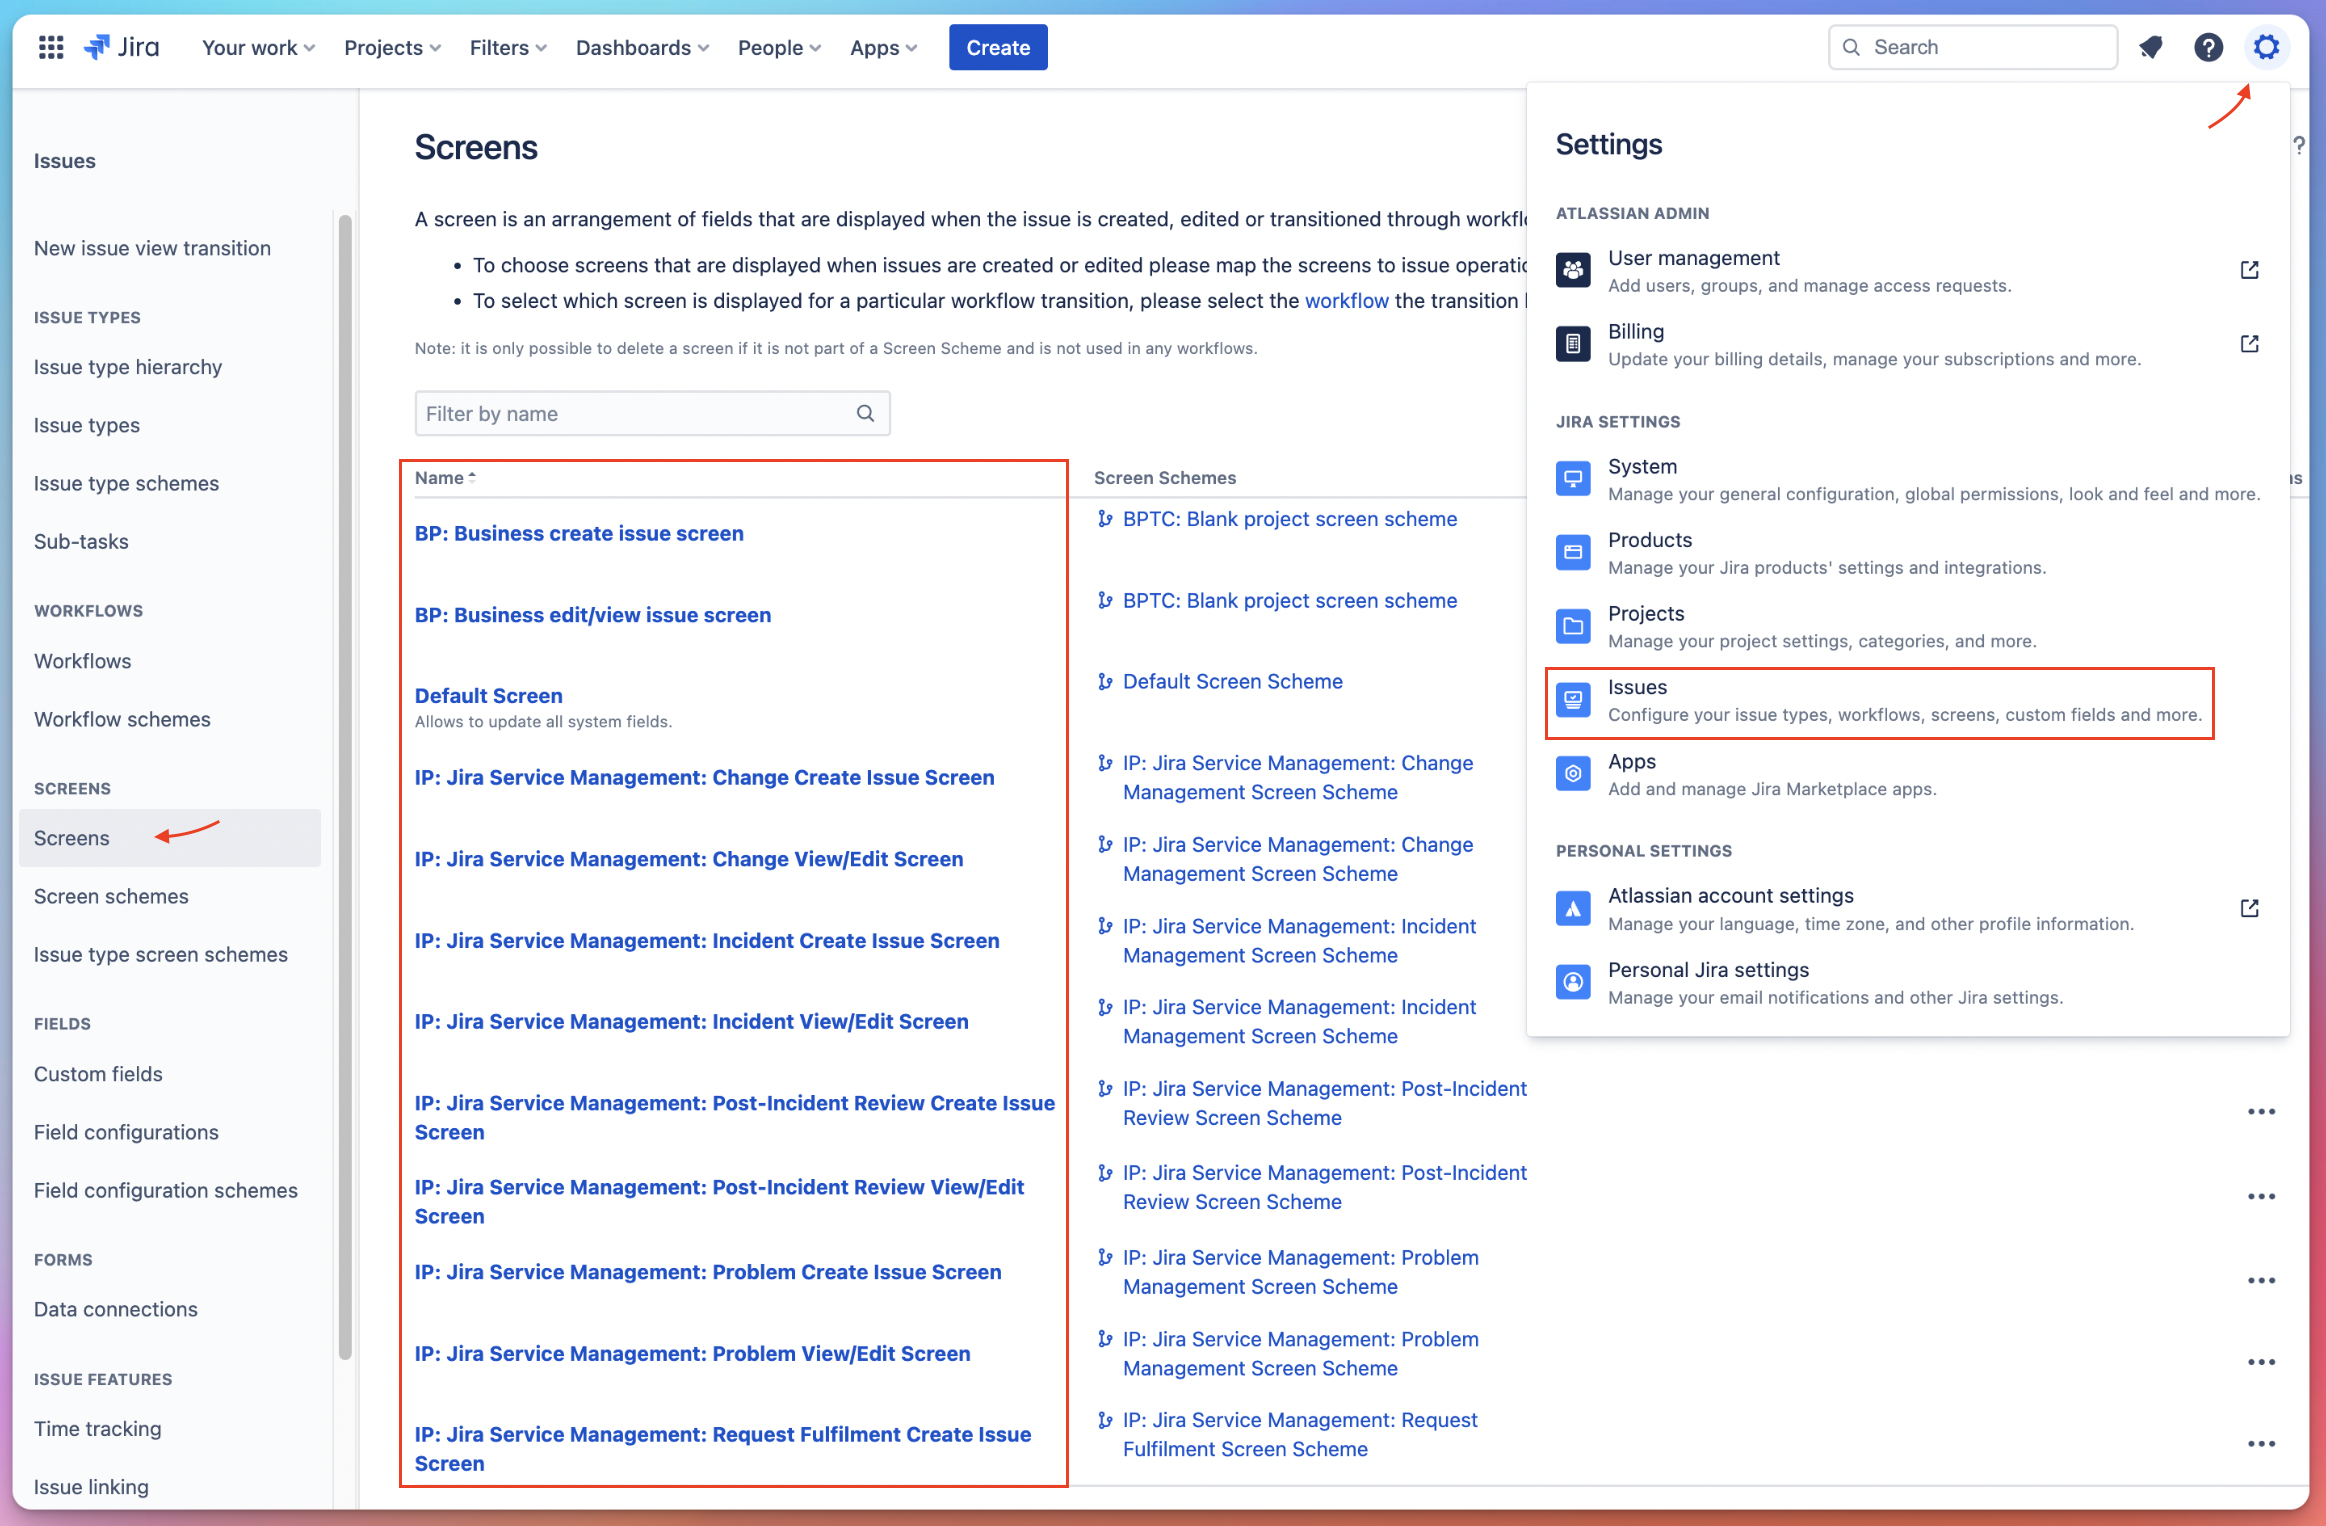
By accessing the Settings Cog and selecting Issues, you'll be able to access the Screens menu, listing all screens across all projects in Jira.
From there, you can search by screen name and select any screen to edit the fields present on that screen.
Find a transition screen from the workflow editor
If your Jira instance uses transition screens regularly, it can be difficult to find those screens when you're looking to edit the fields on them.
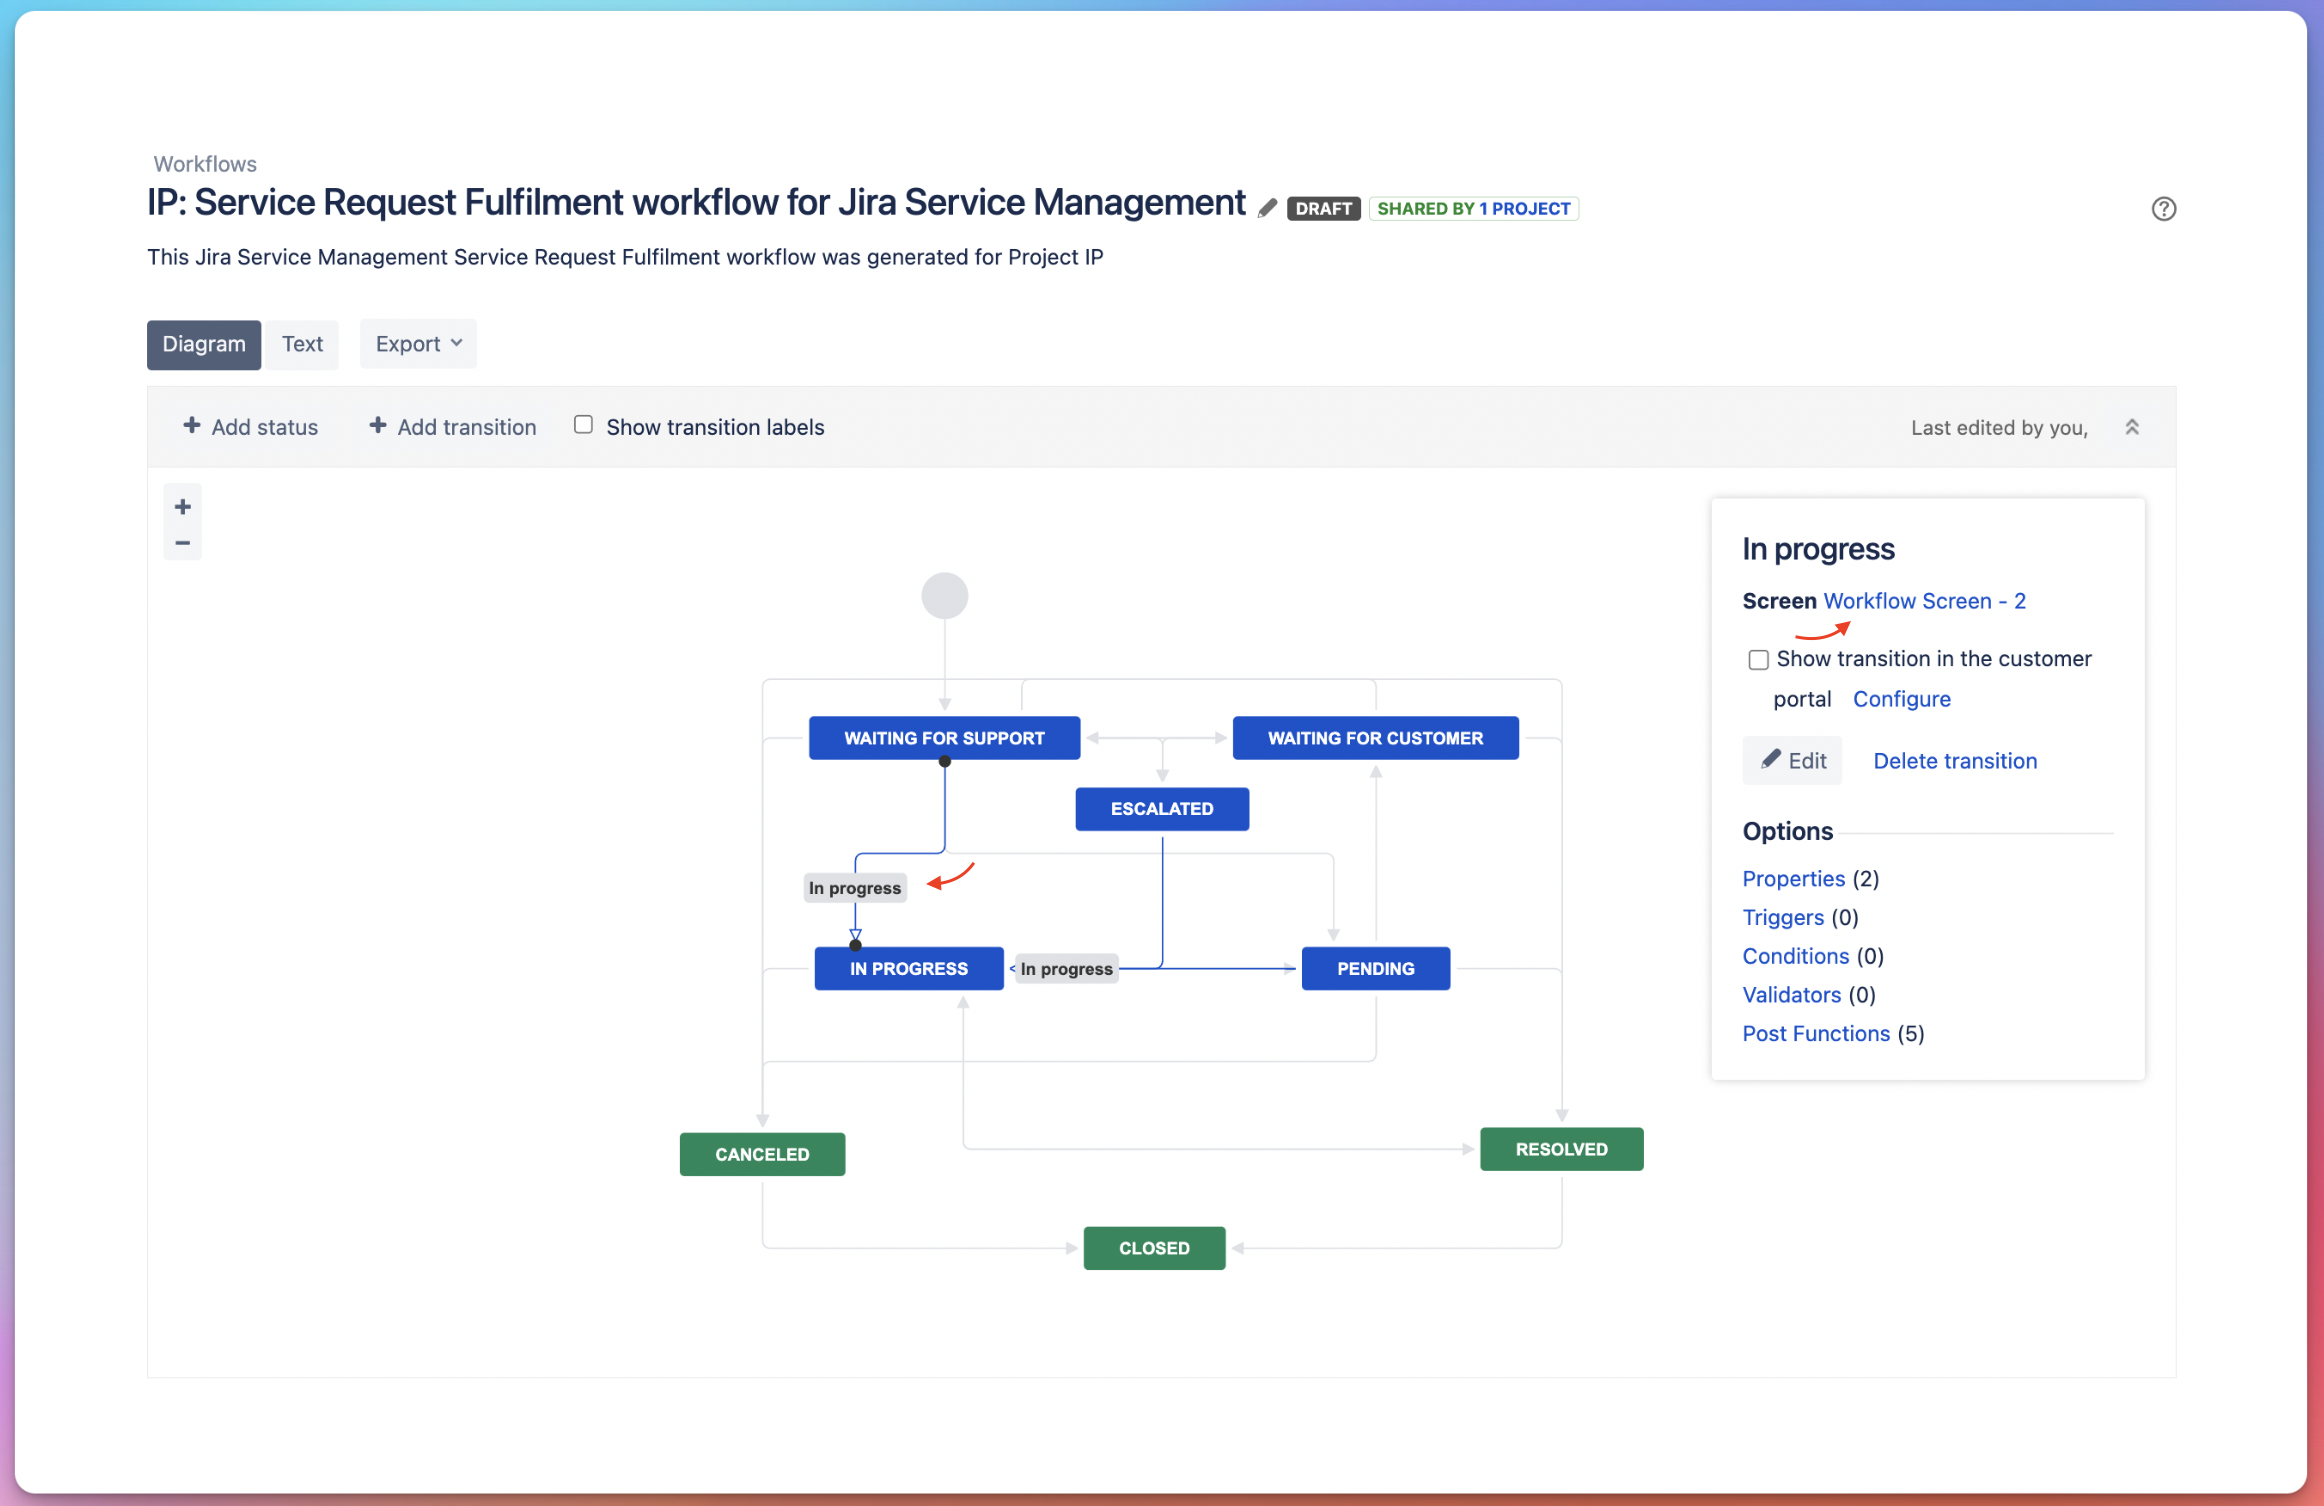
- Access Project settings > Workflows
- Select Edit
- You can select a specific transition and from there see the Screen linked to the transition
Click the name of the screen to be directed to the page to add and remove fields.
Associate a custom field with multiple screens at once
When a new Custom field is created, it’s possible to select one or multiple screens to include the new field.
If a pre-existing field needs to be added to several Screens, you can follow these steps:
- Go to Settings (Cog icon) > Issues
- Select Custom fields
- Filter or scroll to find your field
- Select More options (•••) > Associate to Screens
- Fill each checkbox to select the Screens where this field should appear
- Select Update to save the changes
Alternatively, you can reach this same page from a project's field configuration page.
- From a project that includes this field, select Project settings
- Select Fields
- For Jira Software projects, this item is nested under the Issues expander
- Select the pencil icon to edit
- Find the field in the list
- By selecting Screens next to the field, you'll be taken to the same page in step 5 above
- Fill each checkbox to select the Screens where this field should appear
- Select Update to save the changes
Add, edit, or remove fields using the Issue Layout editor
Jira administrators can also add custom fields to the Issue view without the need to add them to the Screen. The steps vary slightly depending on the project type in use.
Issue layout in Jira Software projects
- Select Project settings
- Select Issues > Layout
Issue layout in Jira Business projects
- Select Project settings
- Select Issue layout > Edit issue layout
Request type editor in Jira Service Management projects
- Select Project settings
- Select Request management > Request types > choose a category of request type
- Select one of the request types from the page
- Within the editor, you can add, remove, and reorder fields
Related Documentation
- How to associate a Screen Scheme with a single Issue Type
- We are making request types easier to configure on Jira Service Management Cloud
- Configure issue screens
- Defining a screen
- Add a Custom Field to Transition Screen
- Map a screen to a workflow transition in Jira
- Add a custom field to a screen

