Getting started with Bitbucket and Jira Cloud
When you connect the Bitbucket code hosting service with Jira Cloud, your team will enjoy the seamless integration of issues and code.
They'll see:
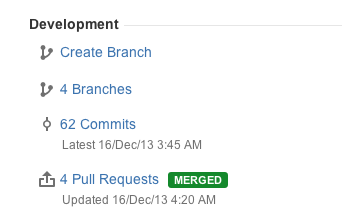
- the key details of branches, commits and pull requests right in your Jira Cloud issues
- they'll be able create new branches and pull requests directly from an issue in Jira.
Just so you know...
Bitbucket and Jira Cloud are independent services : you will have both a Jira Cloud account and a Bitbucket team each with their own set of users, permissions, and access rules.
Bitbucket teams are not accounts : they must be managed by an administrator (or administrators) who have individual Bitbucket accounts. However, the Bitbucket team can have its own payment plan.
- Every member of the Bitbucket team must have their own individual Bitbucket account. When you invite new team members using their email they are also automatically invited to sign up for Bitbucket and are automatically added to your team when they complete sign up.
You can transfer Bitbucket repository ownership to a team: this can be helpful if you want to create a team based upon existing repositories.
On this page:
Step 1. Sign up with Jira Cloud
If you don't already have Jira Cloud, set up a trial or a paid instance.
Step 2. Sign up with Bitbucket
If you already have an account, you can skip this section and go to Step 3.
To sign up for a Bitbucket account:
- Go to https://bitbucket.org/account/signup/.
Complete the sign up form:
FieldDetailsUsername
Your username must be unique across the entire Bitbucket site. Your username can be up to 30 characters – you can use letters, numbers, and underscores.
Bitbucket appends this username to the URL for all the repositories you create. For example, the username 'joe' has a corresponding Bitbucket URL of
https://bitbucket.org/joeEmail address
An email address that is unique across the entire Bitbucket site. Bitbucket will send you a confirmation email.
Password
A combination of up to 128 characters. If you are using a Google account to sign up, Bitbucket uses that password. You are responsible for ensuring that your account password is sufficiently complex to meet your personal security standards.
Click Sign up.
Bitbucket displays the Dashboard for your account. Take a second to look around the user interface.
Step 3. Create a Bitbucket team
Bitbucket teams
To better understand how teams work, let’s take a look at how they fit into the Bitbucket environment.
| Teams have | Details |
|---|---|
Users | Users develop code and manage the team. Each user has an individual Bitbucket account that can be added to (or removed from) any group or team within the Bitbucket universe. |
Groups | Groups are used to manage what users can do and what they can access in Bitbucket. Groups provide permissions (administrator, read/write, read only) to groups of individual users, and are assigned to repositories for the team. |
Repositories | Repositories are where the code lives. The repository is where you store, access, create, develop, modify, and share the code for a project. |
Create a team
This section describes how to create a team in Bitbucket Cloud. You'll need to have already created an individual account for yourself in Bitbucket Cloud.
To create a team:
- Click the
 icon then Team.
 - Complete the available fields:
- Team name
Consider using the same name as your Jira Cloud project, or one you can easily identify with a specific project. - Team ID
- Team name
- Now invite people to join your team by entering their Bitbucket username or email address and clicking Add.
Note: you are already a member of the team, and the administrator, by default. - Click Create.
Congratulations you have a team!
Note that two user groups, Administrator and Developer , are created by default.
You are taken to the team overview page where you can create your first team repository or manage the team's settings.
Step 4. Invite team members to your team on Bitbucket
You can add team members to your linked Bitbucket team account. These may be the same users you added to Jira. Users that you add to Bitbucket need not have accounts on the Jira instance.
Step 5. Add repositories to your Bitbucket account
A repository (aka repo) contains your project code. The Bitbucket service allows you to create an unlimited number of public repositories. The number of private repositories is restricted by your plan.
- You can transfer a Bitbucket repository from an individual Bitbucket account to your Jira team account.
- You can import a Git or Mercurial project from your local machine into Bitbucket.
- To learn about Bitbucket's few restrictions on repositories, see this page.
- Some users have security and backup concerns about code, see this page for details.
- See the Atlassian blog for information about Centralized vs. Distribute Version Control System (DVCS).
See Create a repository for the steps to follow.
Step 6. Connect Bitbucket to Jira Cloud
When you link your Bitbucket team account with Jira Cloud, the repositories owned by your Bitbucket account appear on the Manage DVCS Accounts page in Jira. A team member may create repositories under their individual Bitbucket account, but assign the team as the owner. These repositories also appear in Bitbucket under the list.
See Connect Bitbucket Cloud to Jira Software Cloud for the steps to follow.
What to do next...
What you do after getting started depends on your team's knowledge and needs:
- If your team is unfamiliar with code hosting using Bitbucket, you should work through the Getting Started guide.
- You can move Jira issues through a workflow using commit messages. See processing Jira issues for examples.
- You might want to set up shortcuts to services your team uses often. See Link to a web service in Bitbucket.
- Use the Release Hub in Jira to see the state of your team's work on the coming release. Read about checking the progress of a version.