Creating saved views
You can create different views of your plan to emphasize different aspects or scenarios, then recall those views when needed.
In this article, we'll cover the following:
Saving a view
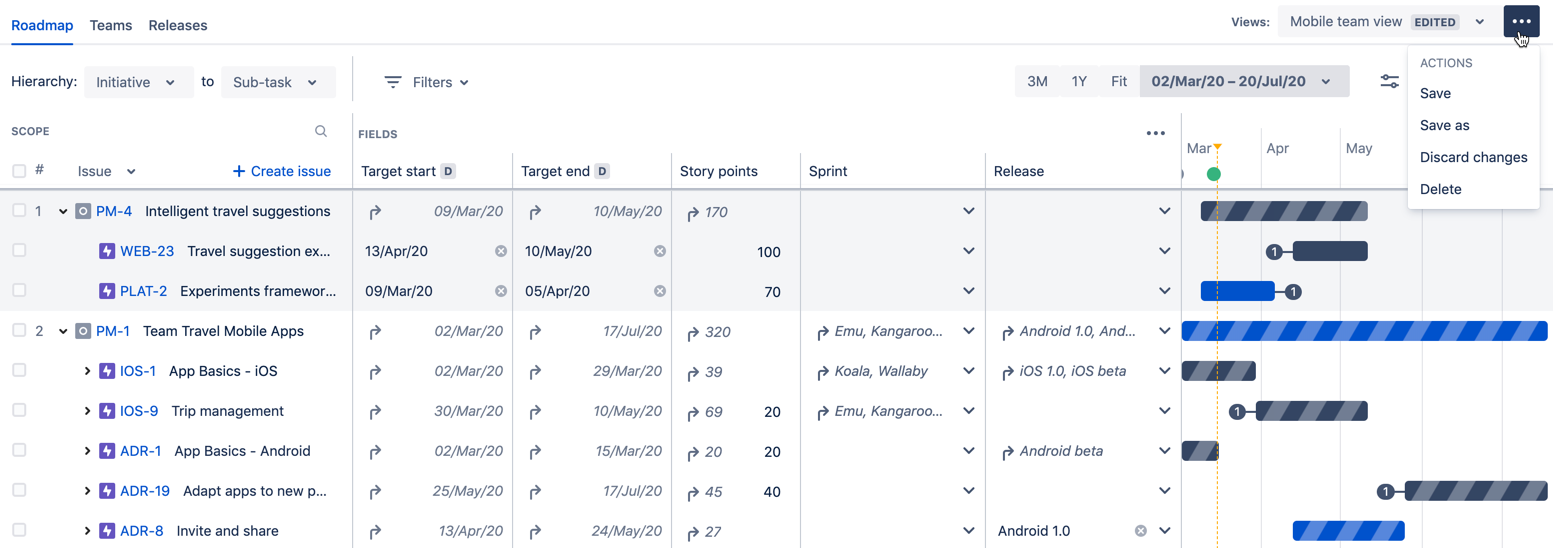
After you've created a view and made a change to it, an EDITED lozenge will appear after the saved view. The sample plan below is using the saved view called Mobile team view. The EDITED lozenge is displaying because some changes have been made to the view.
When this happens, you can choose to either save the changes to that same view (which would update and override any settings in Mobile team view), or create a new view entirely (all of your changes would be saved in a new view).
Saving changes in the same view
When you’re ready to save your changes, click> Save. The view will be updated with the changes made.
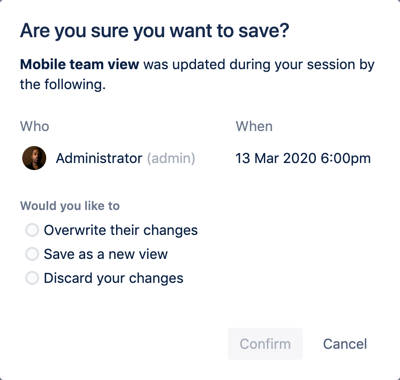
If another user is also working on your view and makes a change to the view before you save your own, you will be notified and asked how you would like to proceed:
From here, you can choose to do one of the following:
Overwrite the changes they’ve made: This will overwrite the changes they’ve made in the view with your own changes.
Save your changes as a new view: This will let you create a new view and save the changes you’ve made in that new view, preserving what the other user has done.
Discard your changes: This will discard the changes you’ve made.
After you choose how to proceed, click Confirm to save your changes.
Saving changes in a new view
To save your changes as a new view:
Click> Save as.
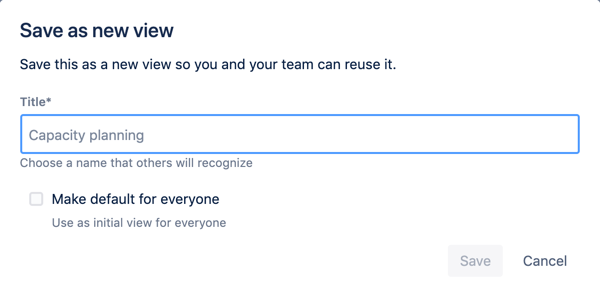
In the ‘Save as new view’ dialog, enter a name for the new view.
As an option, select the Make default for everyone checkbox. For any user accessing the plan for the first time, the issues will then be displayed according to the saved settings of the new view.
Click Save.
Discarding changes made in a view
While making changes to a view, you may realize that you no longer need these changes in the view. Note that by discarding your changes, they will be permanently deleted from the view, and the view will revert to the previous configuration of view settings.
Click > Discard changes.
In the confirmation dialog, click Discard changes.


