Creating your first plan and succeeding
Before you create a plan
To create a new hierarchy level such as initiatives, keep in mind that you need to create them in Jira first.
Create your first plan
Plans change. As you gain knowledge and refine estimates, requirements become clearer, and tasks may take longer or faster than expected. Portfolio for Jira helps you to keep your plans up to date thanks to its seamless integration with Jira Software.
- In your Jira application, go to Portfolio and click Create plan.
- Insert your plan name and choose one of the plan privacy options.
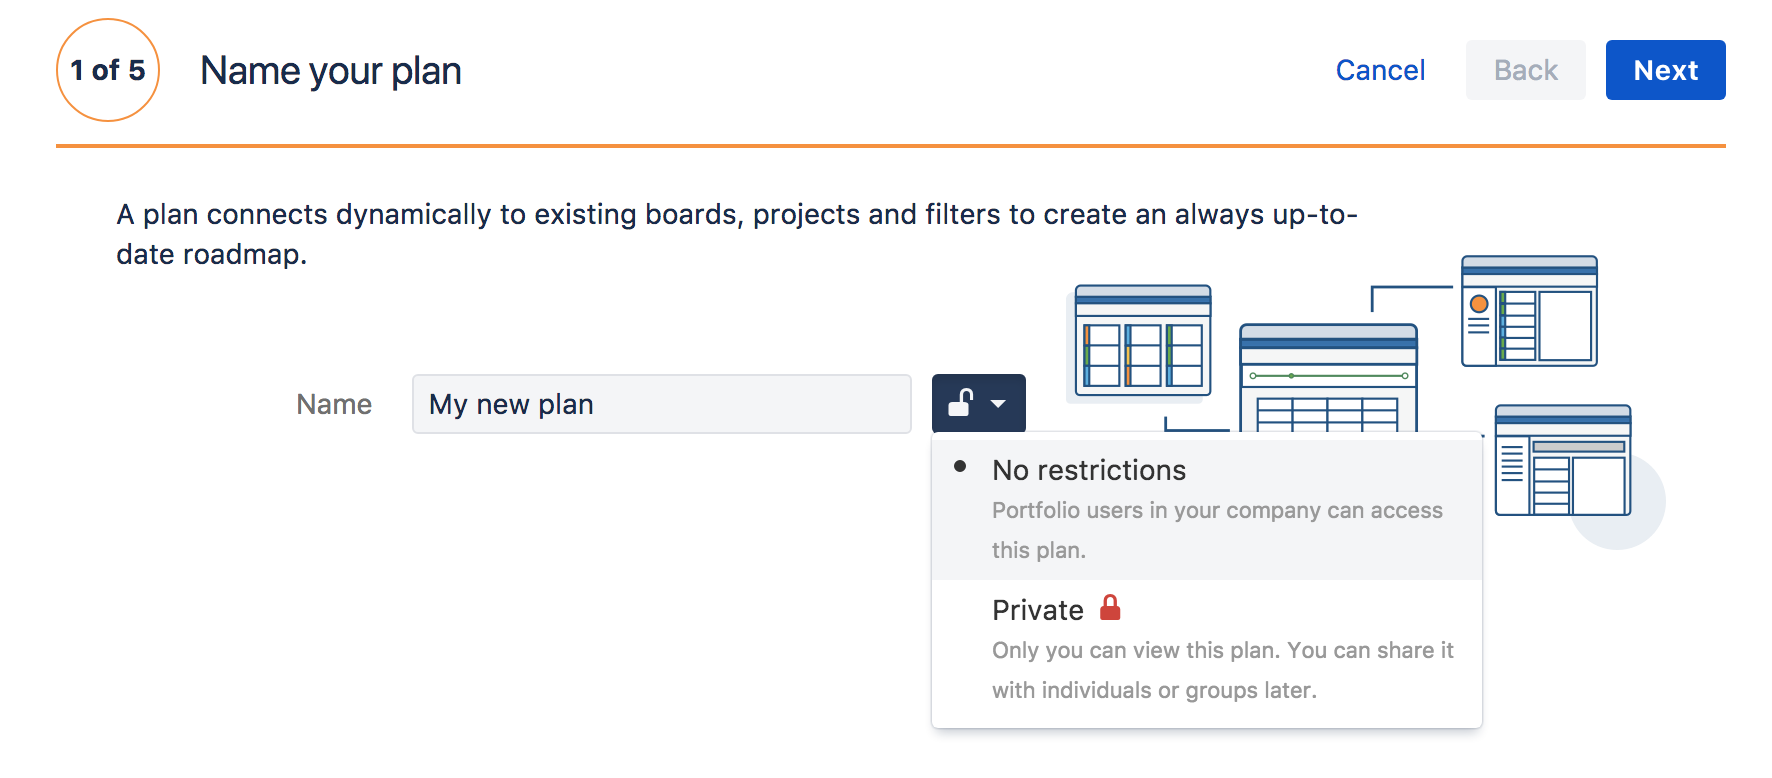
- No restrictions - Every Portfolio user will be able to access the plan.
- Private - Only the plan creator has view and edit permissions.
- Once you're ready, click Next.
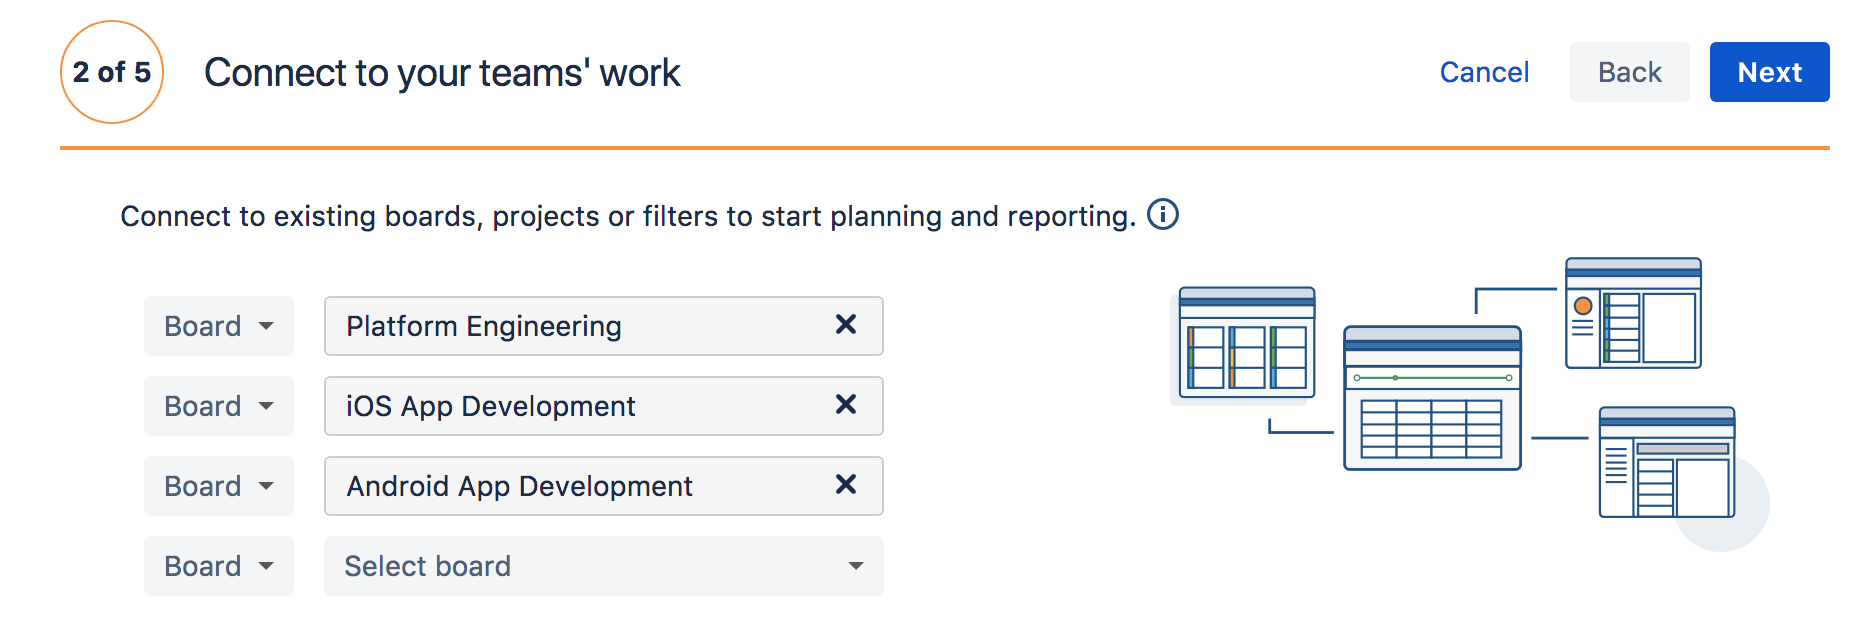
Connect to your teams' work
When you create a Portfolio for Jira plan, you need to select the issue sources you want to use to pull data into your plan. Issue sources are projects, boards, or filters that contain the issues you will use to forecast a roadmap for your plan.
If you connect with a scrum board, Porfolio pre-fills the team velocity box with the velocity of the past few sprints.
- Select the issue sources.
- Click Next.
| Sources | Description |
|---|---|
Board | A board displays issues from one or more projects, giving you a flexible way of viewing, managing and reporting on work in progress. There are two types of boards in Jira:
We encourage you to use boards, specially if you have scrum teams. Boards give you the ability to see your plan by sprint and a couple of additional features. We recommend that you have a custom board filter dedicated to Portfolio so you can exclude issues like bugs from your plan. |
| Project | A Jira project is a collection of issues that is defined according to your organization's requirements. For example, it could be a software development project, a marketing campaign or a website enhancement request system. When you choose a project, Portfolio pulls all the issues contained in the project you choose. Keep in mind this could imply pulling in hundreds or thousands of issues. |
| Filter | Your board's filter is a Jira issue filter that specifies which issues are included on your board. For example, your board may include issues from multiple projects, from only one project, or from a particular component of a project. Only the administrator of a board or a person with the 'Jira Administrators' global permission can configure a board's filter. |
| JQL filter | You can use Jira Query Language (JQL) to search for issues that use custom issue fields in Portfolio. More about JQL filters. |
Note
If all of your issue sources are boards using story points, the estimation method is automatically set to story points.
Select relevant releases
A Portfolio release is the same as a Version in Jira. Think of a release as a container where your work is grouped and has set dates.
- Select the releases that you want to work with and select Next.

Note
If you choose to not include a specific release, then any issues associated with that release will also be automatically excluded from your plan.
Learn more about the releases configuration here.
Define your teams
A Team in Portfolio is a group of real and virtual Jira users. Portfolio teams are defined by the amount of work they can get done during a given time period. By default, Portfolio assigns 30 velocity points for teams who use story points, and 200 hours is the default for time-based teams. You can change the default velocity by selecting the field and changing the number.
Keep things simple to start with. By default, Portfolio for Jira creates a team per issue source, but these can be amended at any time once the plan has been created.
Try with just a couple of teams and get comfortable with your plan. You can refine it anytime as you move through the different configuration options.

You can accept the suggested teams or you can customize them by following these steps:
- Choose the scheduling mode.
- Select the team's capacity.
- You can delete a team by clicking the three dots and selecting Delete.
- Click Next.
Learn more about the teams configuration here.
Confirm what's in scope
The scope contains the issues that are pulled from the project, board, or filter you have selected to connect to your plan.
In the last step you can refine the list of issues to be included in your plan. One of the greatest things about Portfolio is that your plan is "live," which means that when you create issues inside Jira and if they match the issue source you selected during the plan creation, they will be reflected in your plan.
- Uncheck any issues you don't want to include in your plan and click Next.

Keep in mind that you can add, edit, and delete issues once you've created the plan.
Learn more about the scope configuration here.
How does Portfolio create my schedule?
The automatic scheduling mechanism is one of the core capabilities of Portfolio for Jira.
The scheduling algorithm takes into consideration (without any additional plan configuration) the following aspects:
- Issue priority. Learn more about issue prioritization here.
- Release and sprint assignments
- Estimates
- Dependencies between backlog items
- Team capacity
You can also configure the schedule to take into consideration:
- Team and individual availability
- People's skills
- Availability and absences
- Work-stages
- Configurable constraints
The scheduling algorithm currently optimizes the scheduling of highest-priority items first.
Tip: You might want to prioritize items with the highest risk first to tackle uncertainty early in the process.
Learn more about the schedule behaviors here.
You are all set up!
You now have a plan! The schedule view (top half of the page) has been calculated on the scope, release, and team information supplied during the plan’s creation.
At this stage, you will have a basic plan where you can manipulate data and view a roadmap. But it does not stop here; there are more advanced features to accommodate many use cases.
