What is a plan
If you're using the improved planning interface, this page is for you. If you're using live plans, head to Live plans (legacy).
Before you begin
For Advanced Roadmaps to capture the latest data from Jira, you'll need to organize your work into what we call issue sources. The issue details that come from these issue sources will be used to create the ideal schedule for your teams. The issues can be scheduled across sprints, months, even years.
These are the issue sources into which you'll have to organize your work in Jira:
- Boards: A board displays issues from one or more projects, giving you a flexible way of viewing, managing, and reporting on work in progress. There are two types of boards in you can use as issue sources:
- Scrum board — for teams that plan their work in sprints
- Kanban board — for teams that focus on managing and constraining their work-in-progress
- Projects: A project is a collection of issues that is defined according to your organization's requirements. For example, it can be a software development project, a marketing campaign, or a website enhancement request system.
- Filters: Your board's filter is a Jira issue filter (a JQL query) that specifies which issues are included on your board. For example, your board may include issues from multiple projects, or from only one project, or from a particular component of a project.
Note that only the administrator of a board or a user with the Advanced Roadmaps administrator global permission can configure a board's filter.
What is a plan?
A plan is a roadmap of all the work that you manage in Jira. Work can be anything you're involved in — it can be the issues your teams are working on, the releases your teams have committed to delivering, and more.
Here's an example of a plan: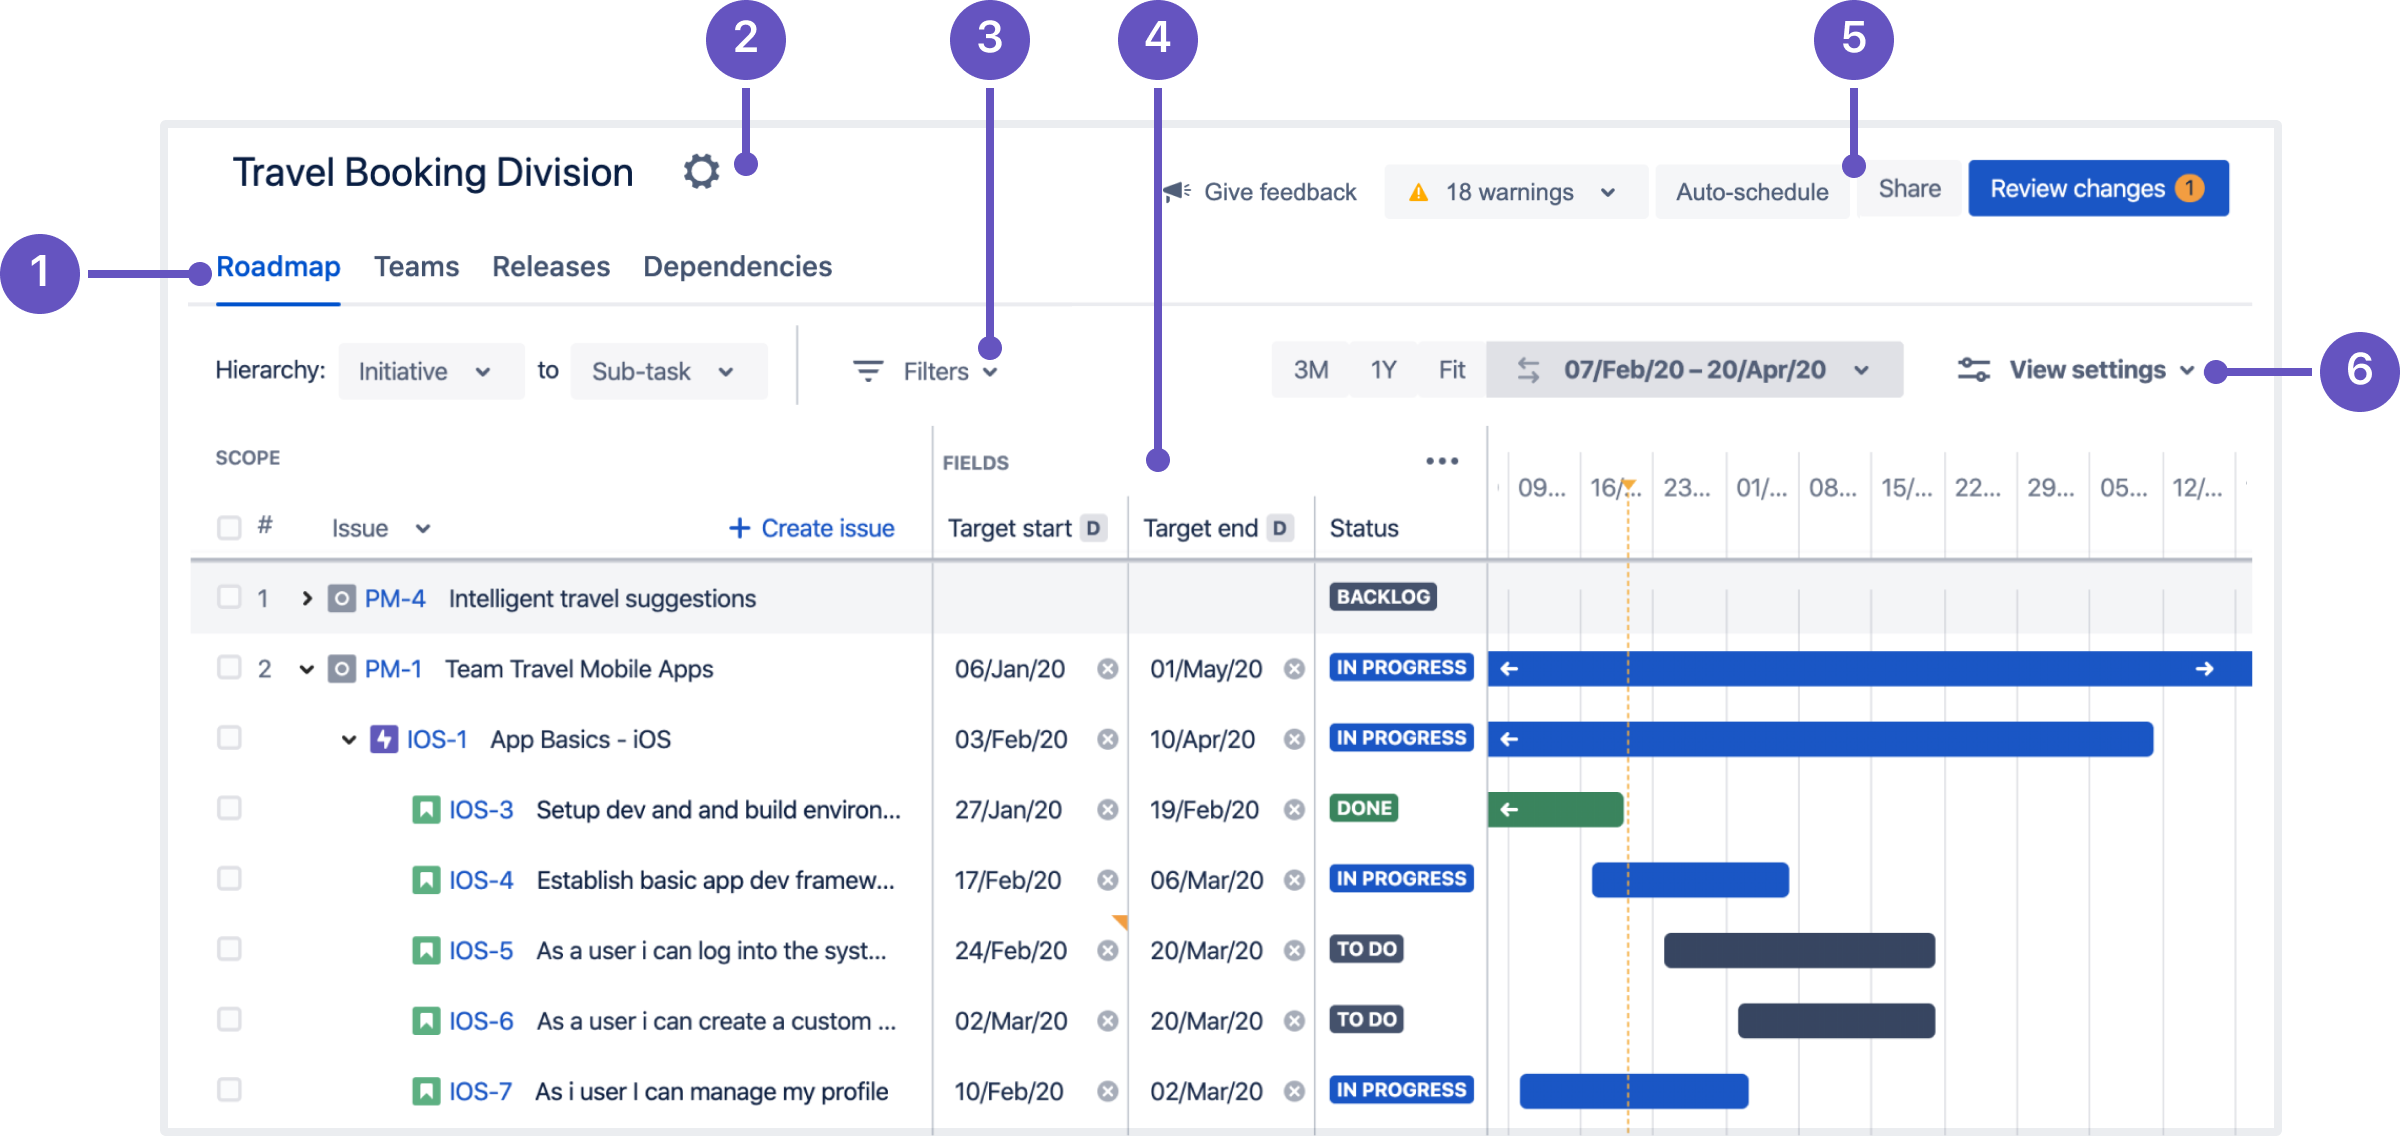
| 1 | Navigate to different views of your plan:
See Working with plans to know more about these views in your plan. |
| 2 | Configure plan settings, like the name of your plan, or the issue sources your plan is using. You can also delete a plan from the settings icon. |
| 3 | Filter work in your plan, so you're viewing only the work you need to see. You can filter your work by projects, releases, teams, and other filters. See Viewing work and Filtering issues for more details. |
| 4 | The different sections in the roadmap view of your plan, where you can view and work on issues accordingly:
|
| 5 | Perform actions for your plan:
As a best practice, make a habit of regularly reviewing and saving your changes in Jira. This way, you can inform stakeholders, keep the work items in Jira up to date, and ensure that your teams are ready to execute on your plan — all in real time. |
| 6 | Customize the view of the timeline, to make it easier for your audience to consume your plan. The following view settings are available:
See Customizing view settings for more information. |
Check out this video to see how to navigate a plan in action.