Set up an email channel with the Microsoft Graph API protocol
Your customers can send request to your queues from the comfort of their own mailbox. To receive their emails and have them turned into requests in Jira Service Management, you need to set up an email channel. One of the protocols that you can choose from is Microsoft Graph API. To use this protocol, there are a few steps that you need to take.
In Jira Service Management 5.8, Microsoft Graph API can only be used for incoming email.
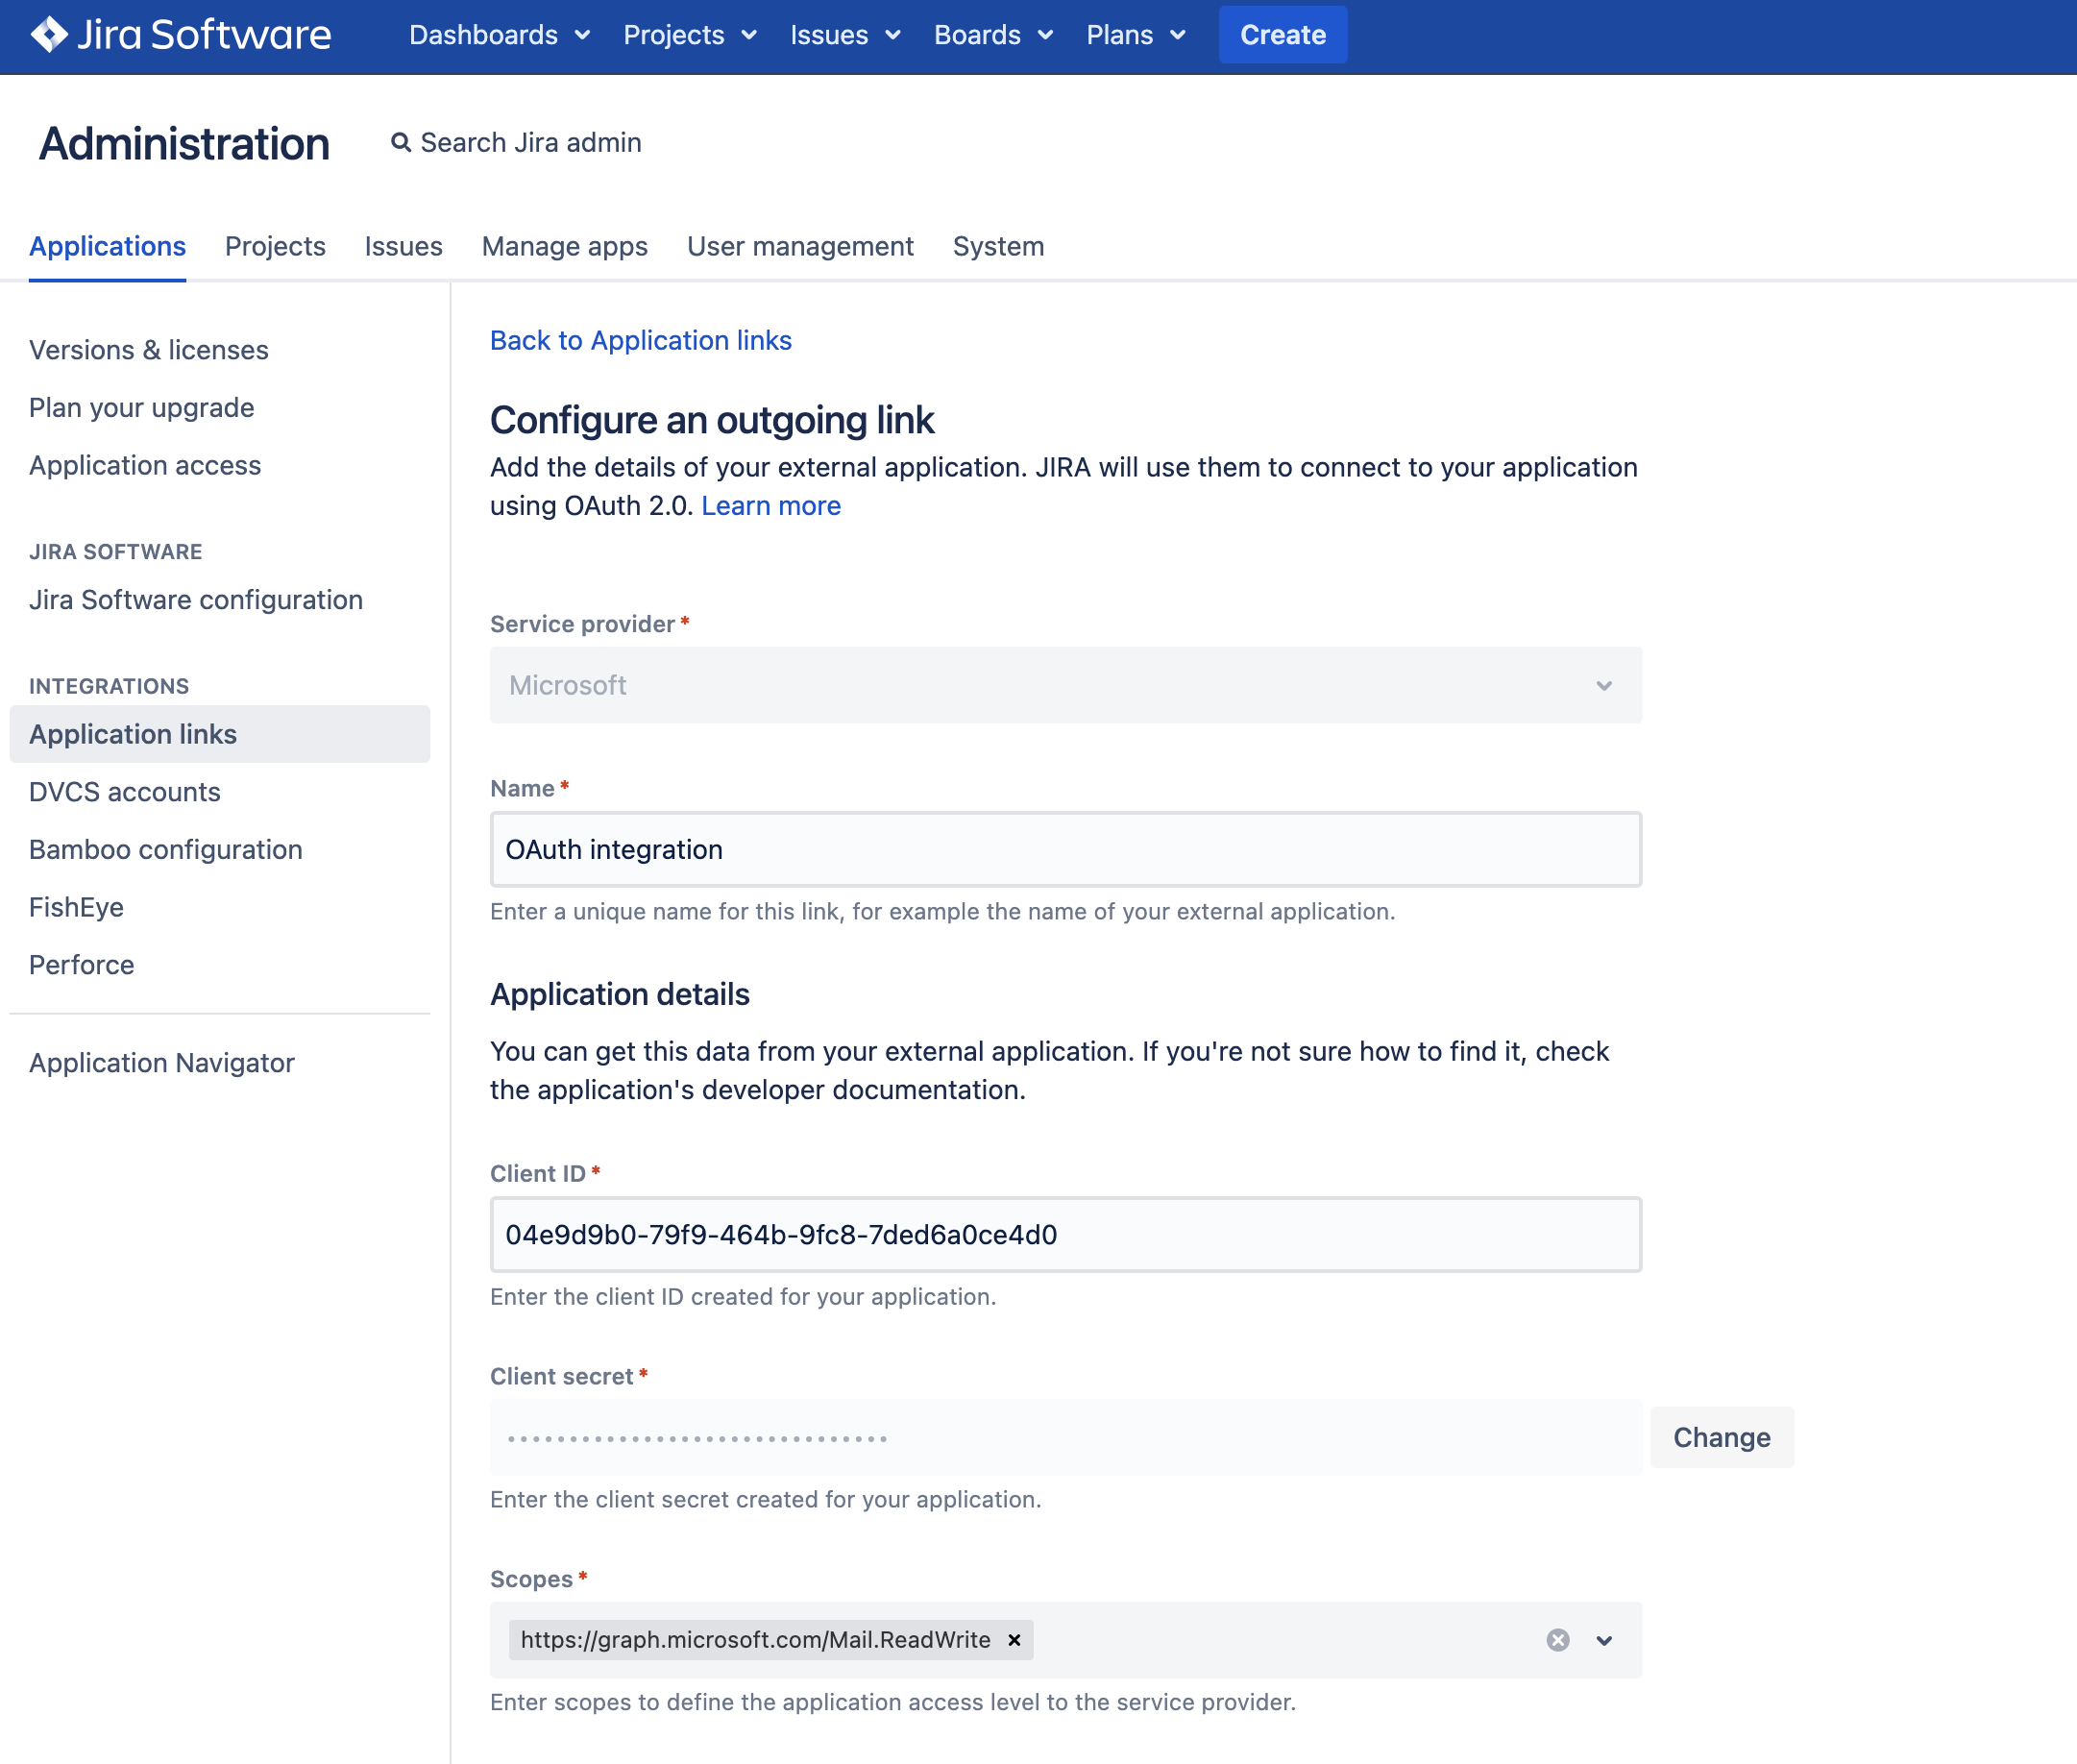
Since Microsoft Graph API is based on OAuth 2.0, before you start setting up the email channel, you need to configure your Azure Active Directory integration and add an application link in Jira Service Management. Learn how to configure OAuth 2.0 integration with Microsoft Azure.
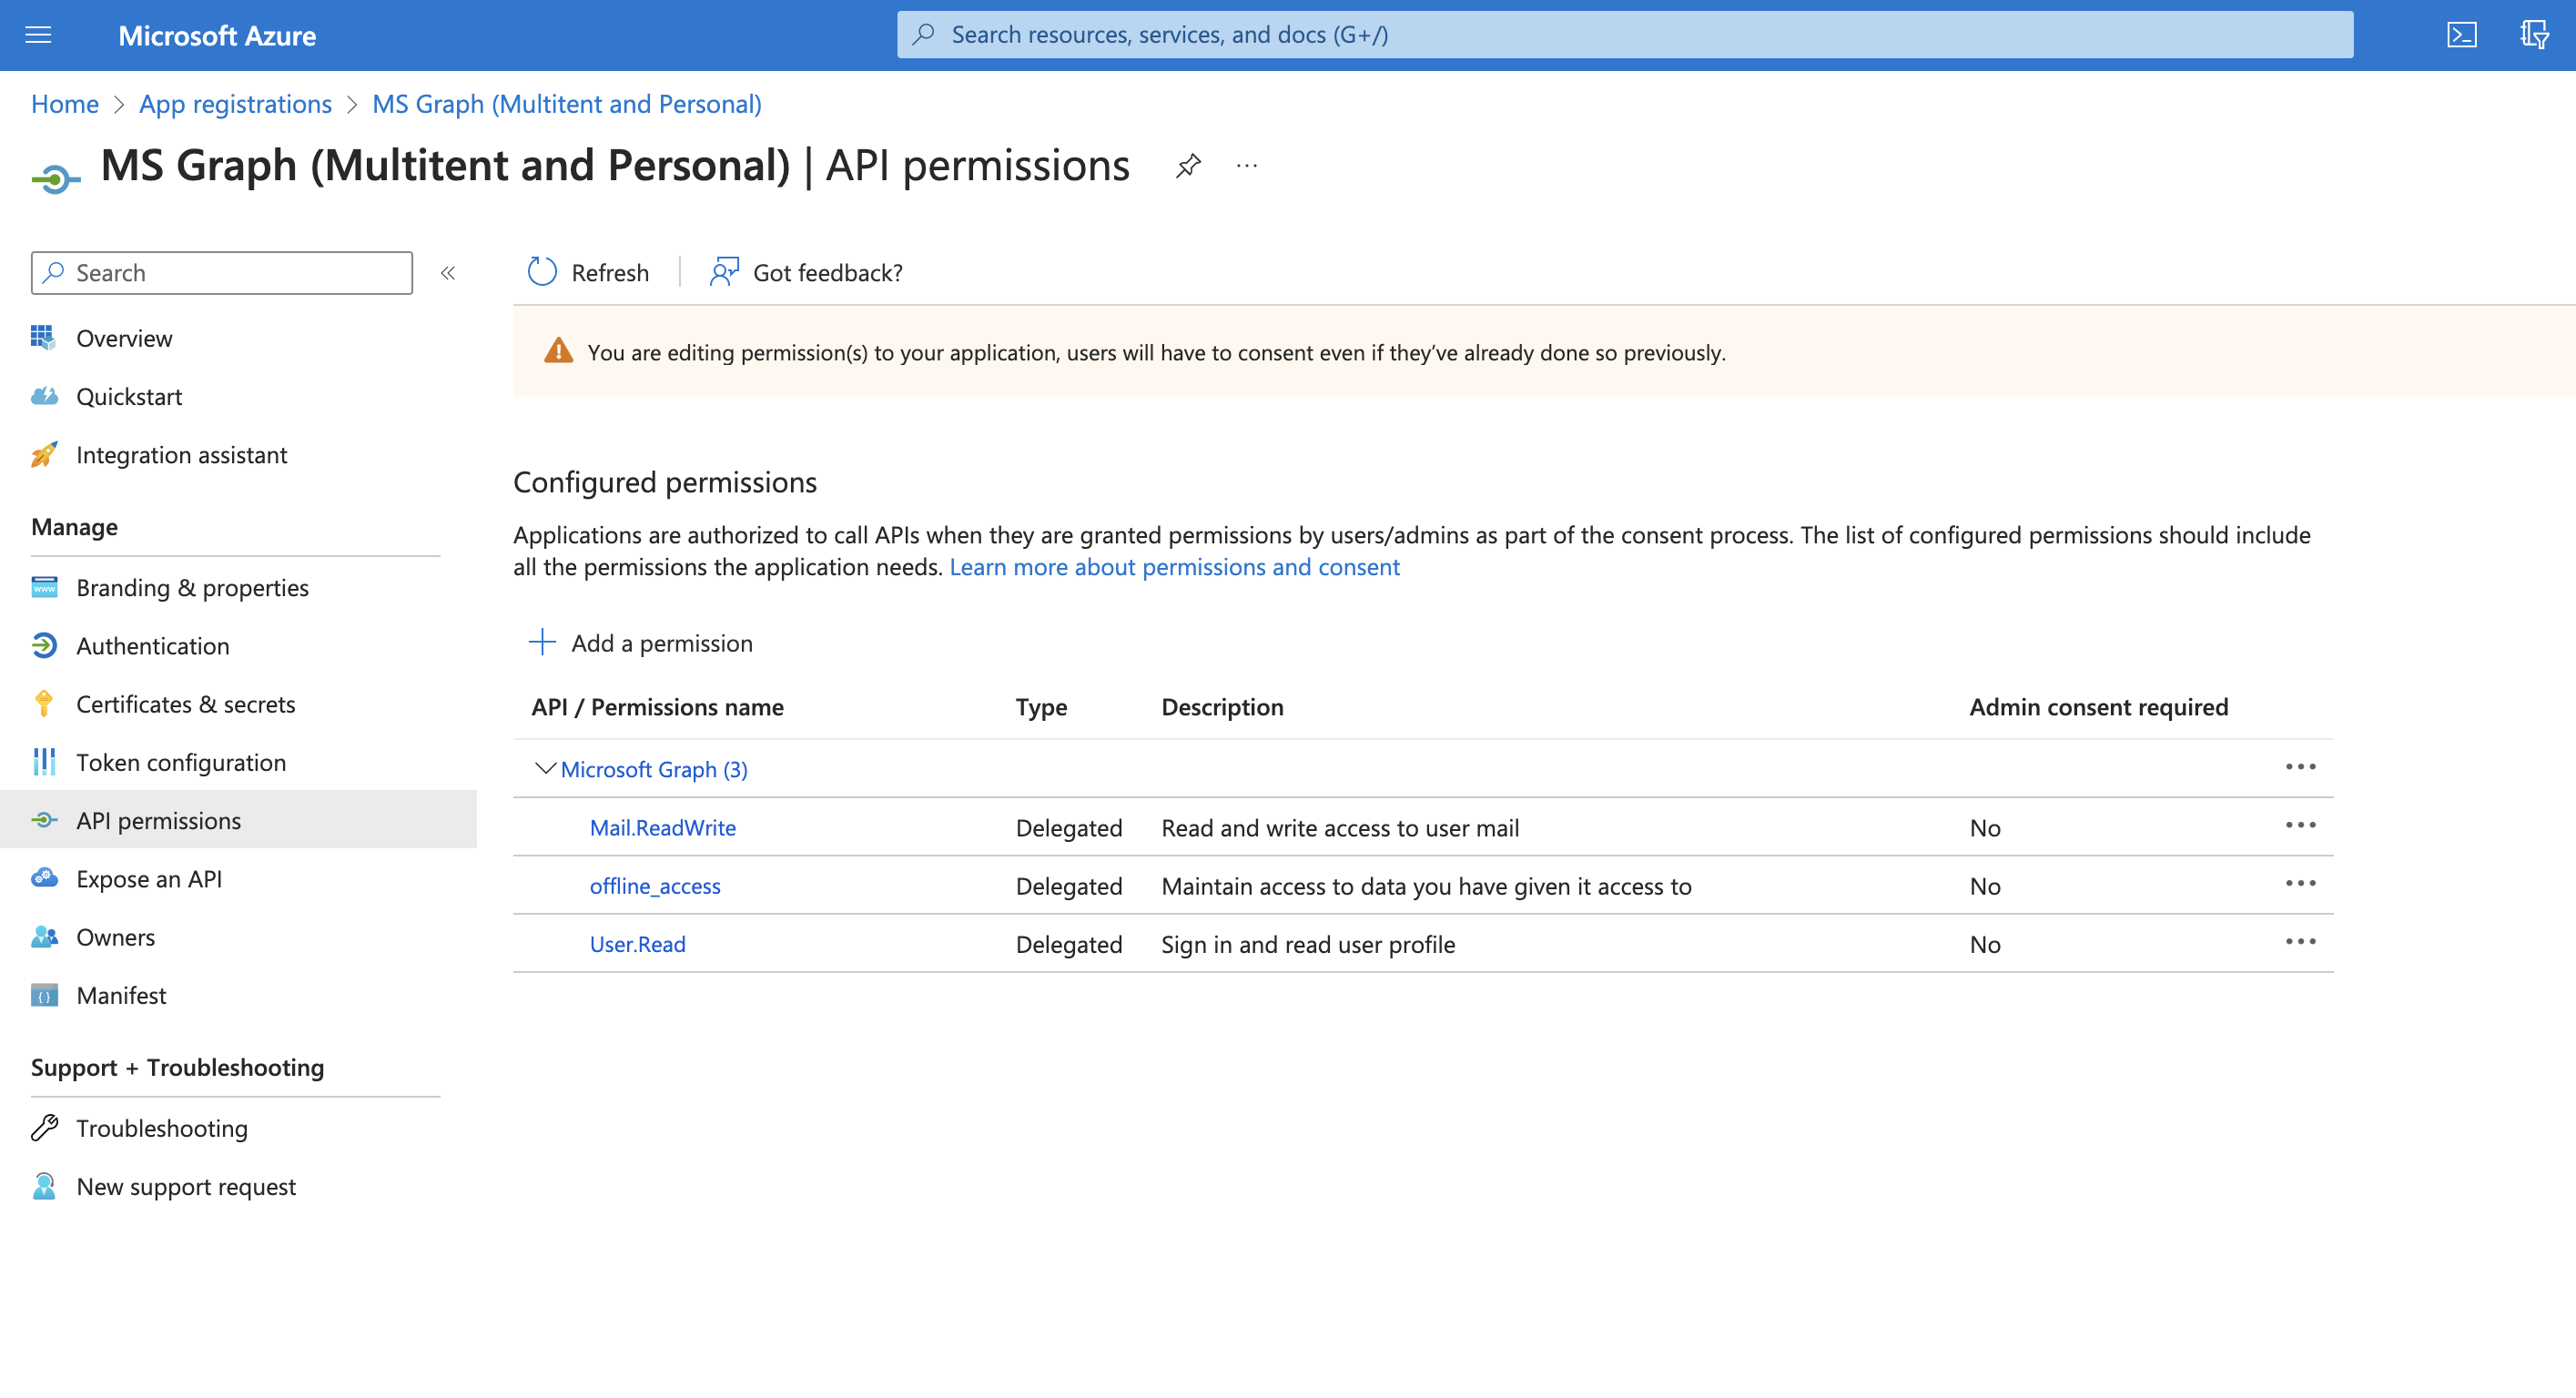
To use Microsoft Graph API for incoming email, you need to add the
Mail.ReadWrite
and offline_access permissions to your API permissions in your Azure Active Directory app registry. You also need to add the following URLs to the Scopes section in the application link configuration in Jira:
https://graph.microsoft.com/Mail.ReadWrite
https://graph.microsoft.com/offline_access
To configure application links, you must be logged in as a user with the Jira Administrators or Jira System Administrators global permission.
Once your Azure Active Directory integration and Jira Service Management application link are ready, you can proceed to adding the email channel.
Go to Project Settings > Email requests and create a new channel.
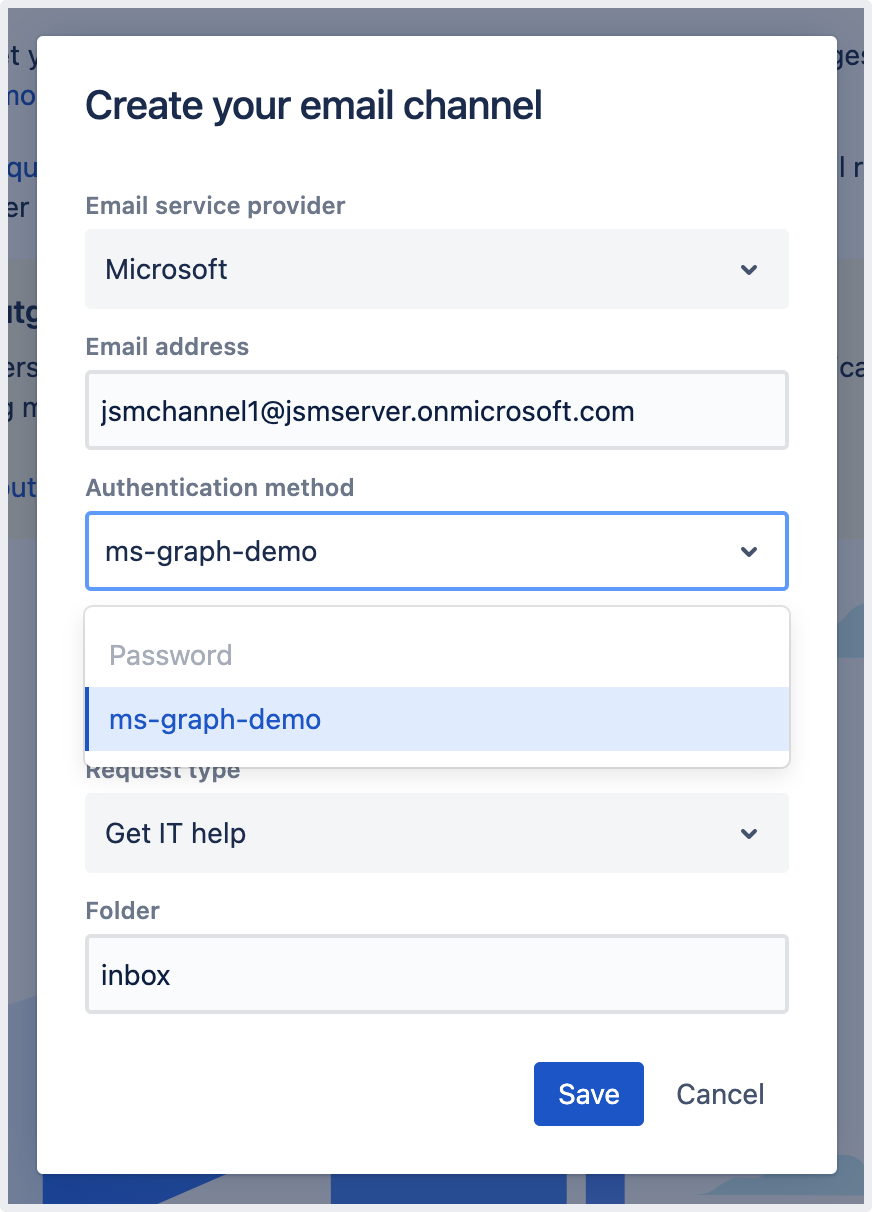
Select Microsoft as the Email service provider and Microsoft Graph API as the Email protocol.
Enter your email address and select the application link you configured as the authentication method.
4. After you select Save , you’ll be redirected to the Microsoft authorization page. Log in and give Jira the required permissions. Once that’s done, you’ll be taken back to the Email requests page in your project settings.
Jira Service Management will test the connection with the newly created Microsoft Graph API email channel and pull the first emails. To see the status of this process, select Actions > View log next to the new email channel on the Email requests page in your project settings.
Jira Service Management pulls unread emails from the mailbox once a minute. After a message is processed, it’s marked as read. This is done to distinguish between new and old messages. To see what has been processed in your email channel, select Actions > View log next to the channel on the Email requests page in your project settings.
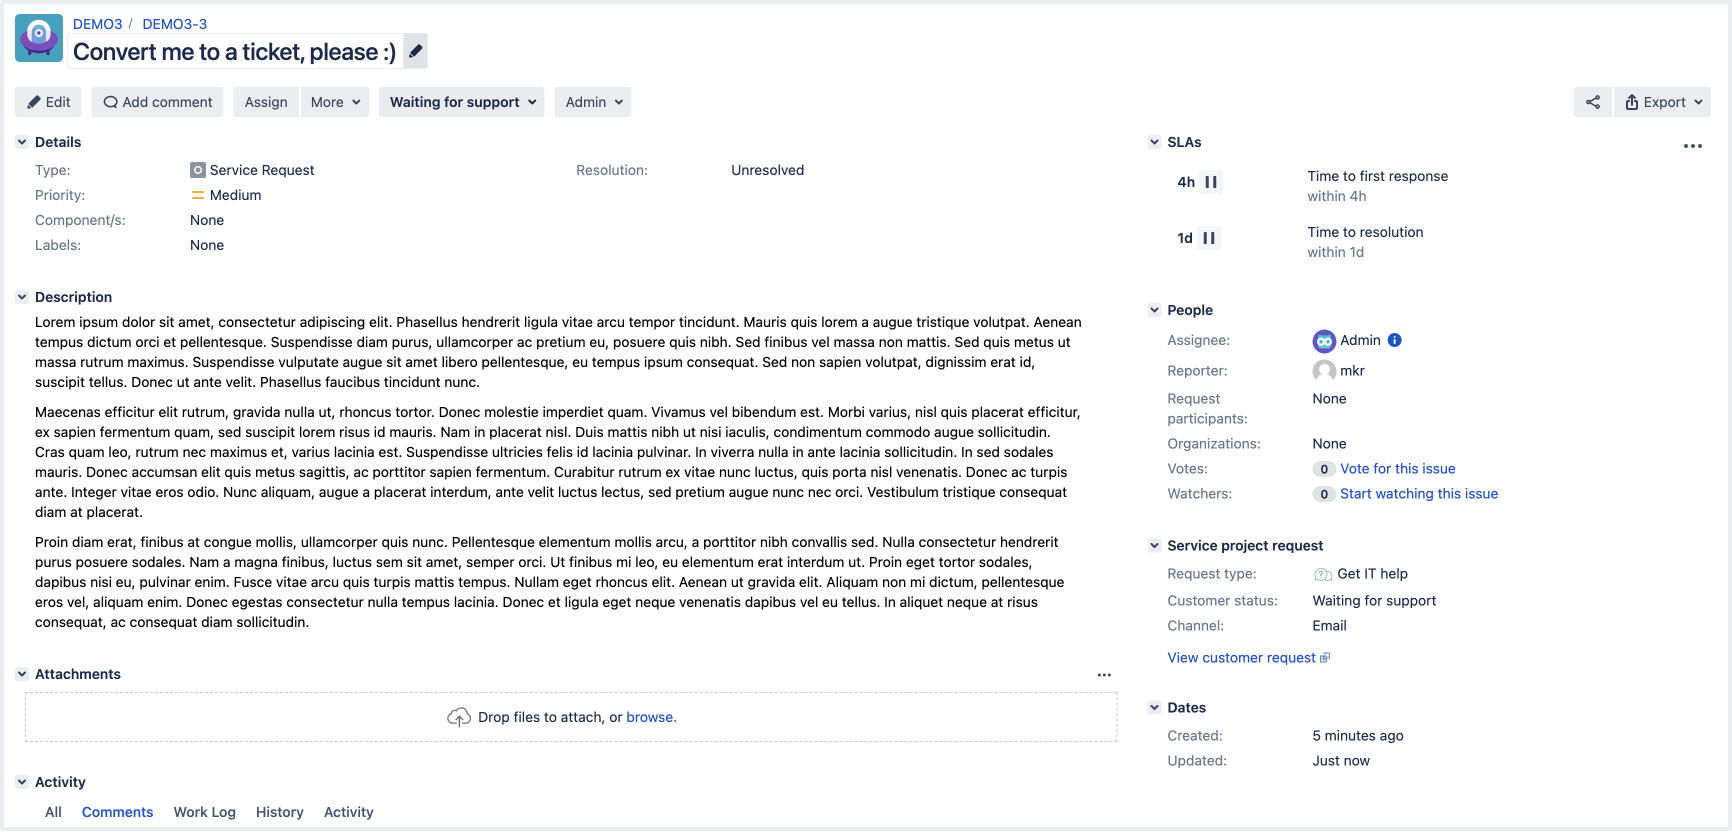
Here’s what a ticket that is created from an email looks like:


