How to use Slack Messages with Automation for Jira
Today’s guest blog is written by Tom Harris — head of the London Atlassian User Group, Atlassian Consultant at our partner Old Street Solutions and an all-round nice guy! Every day Tom goes to customers to help automate their Jira instance and integrating with Slack is one of the most common requests. I’ll hand over to Tom to walk you through best practice.
“Despite Atlassian’s well-publicized collaboration with Slack, it’s not yet as integrated, customizable, automated, nor as supported as most people would expect. That’s why Automation for Jira makes so much sense for anyone working with Slack.
With automation, you can create custom notification messages that alert you when particular transitions occur, dates have passed or priorities change - all without coding, scripting, or advanced Jira admin expertise.
In this step-by-step blog, I’m going to show how easily you can automate custom Slack notifications triggered by events in Jira - specifically how to update a Slack Channel every time a new Jira issue is created.
This is particularly useful for team leads who want real-time notifications of issues created without having to stare at a Jira dashboard or drown in the deluge of Jira email notifications. Let’s get started!
Slack Notification on Issue Creation
Step 1) Create a new rule and select the trigger “Issue created”.

Step 2) Add conditions so you only get notifications about the issues important to you.

Step 3) Select the action: “Send Slack message”.

Step 4) Click on the “configure an incoming webhook” link to generate a URL to authorise Automation for Jira to post messages to your Slack channel.
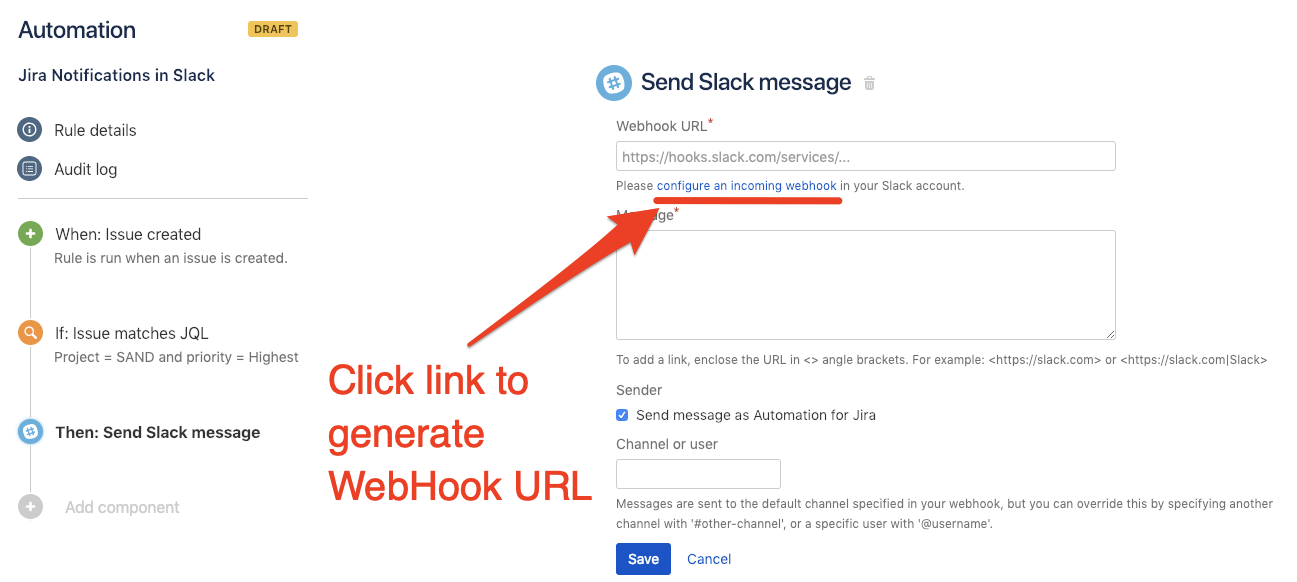
Step 5) This will open a new webpage, directing you to your Slack workspace integration settings.
From here, select the channel you want to post your messages to and click “Add incoming WebHooks integration” to generate a unique URL for your Automation rule.

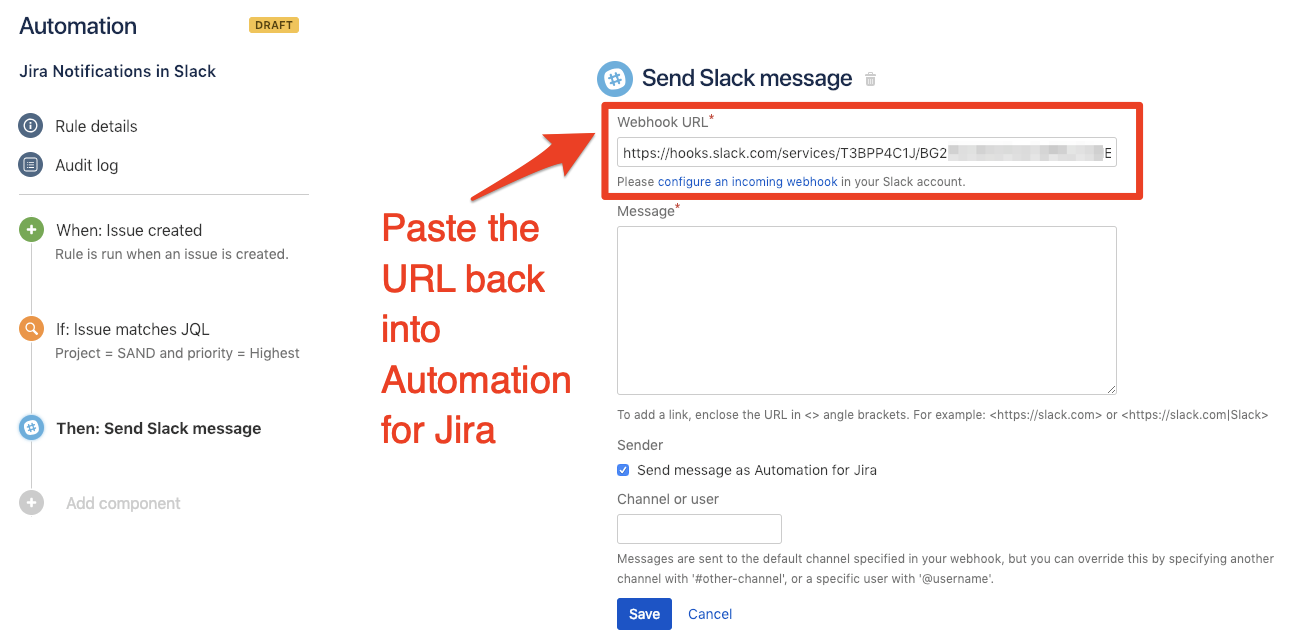
Step 6) Copy the Webhook URL that’s generated and paste it back into your Automation for Jira rule.

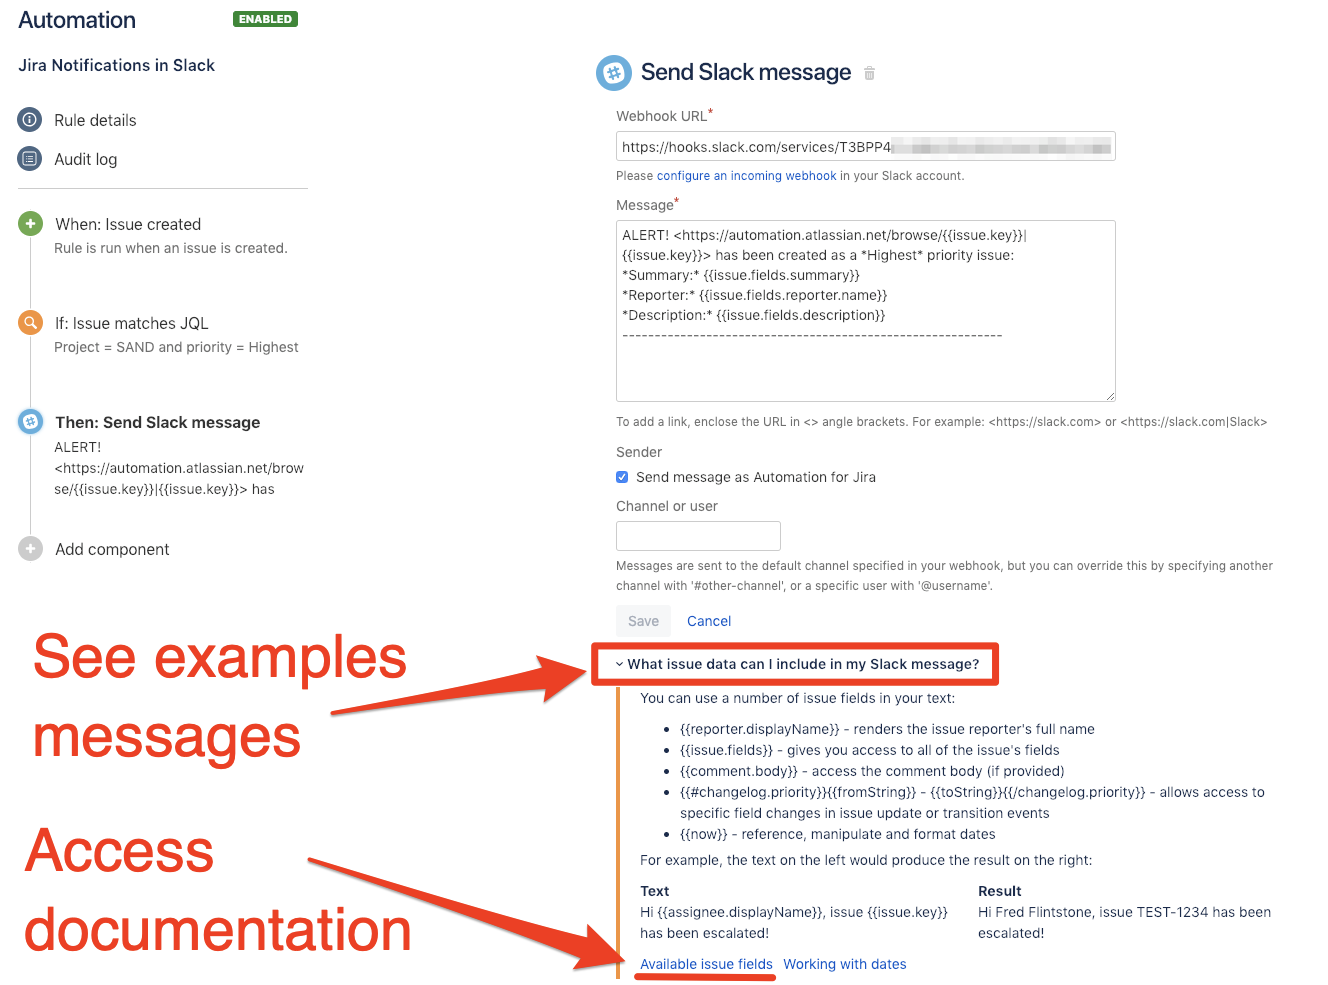
Step 7) Add content to your Slack message using fields from the newly created issue (see example below).

ALERT! <https://automation.atlassian.net/browse/{{issue.key}}|{{issue.key}}> has been created as a *Highest* priority issue:
*Summary:* {{issue.fields.summary}}
*Reporter:* {{issue.fields.reporter.displayName}}
*Description:* {{issue.fields.description}}
Step 8) Save and publish your new automation rule. Then create a new issue and view the output in your chosen Slack Channel.

Links to more examples and docs
If you’re interested in seeing more examples of what you can do to better automate your Jira and Slack integration, check out the automation docs here or via the app as per the screenshot below.”