Blog Posts Macro

This macro is available in Confluence Server and Data Center. Learn about the macros available in Confluence Cloud.

Add the Blog Posts macro to a page to display a curated list of blog posts. You can choose to show the just the title, an excerpt from the blog, or the entire contents of each blog post. 

This macro is great when you want to present a curated list of blogs for:

  • company announcements
  • new team member introductions
  • point-in-time project updates
  • change management communications.  

Because you can display blog posts from any space, with any label or author, you can display the same blogs on multiple pages. This reduces duplication and helps people in your team find information when they need it. 

On this page:

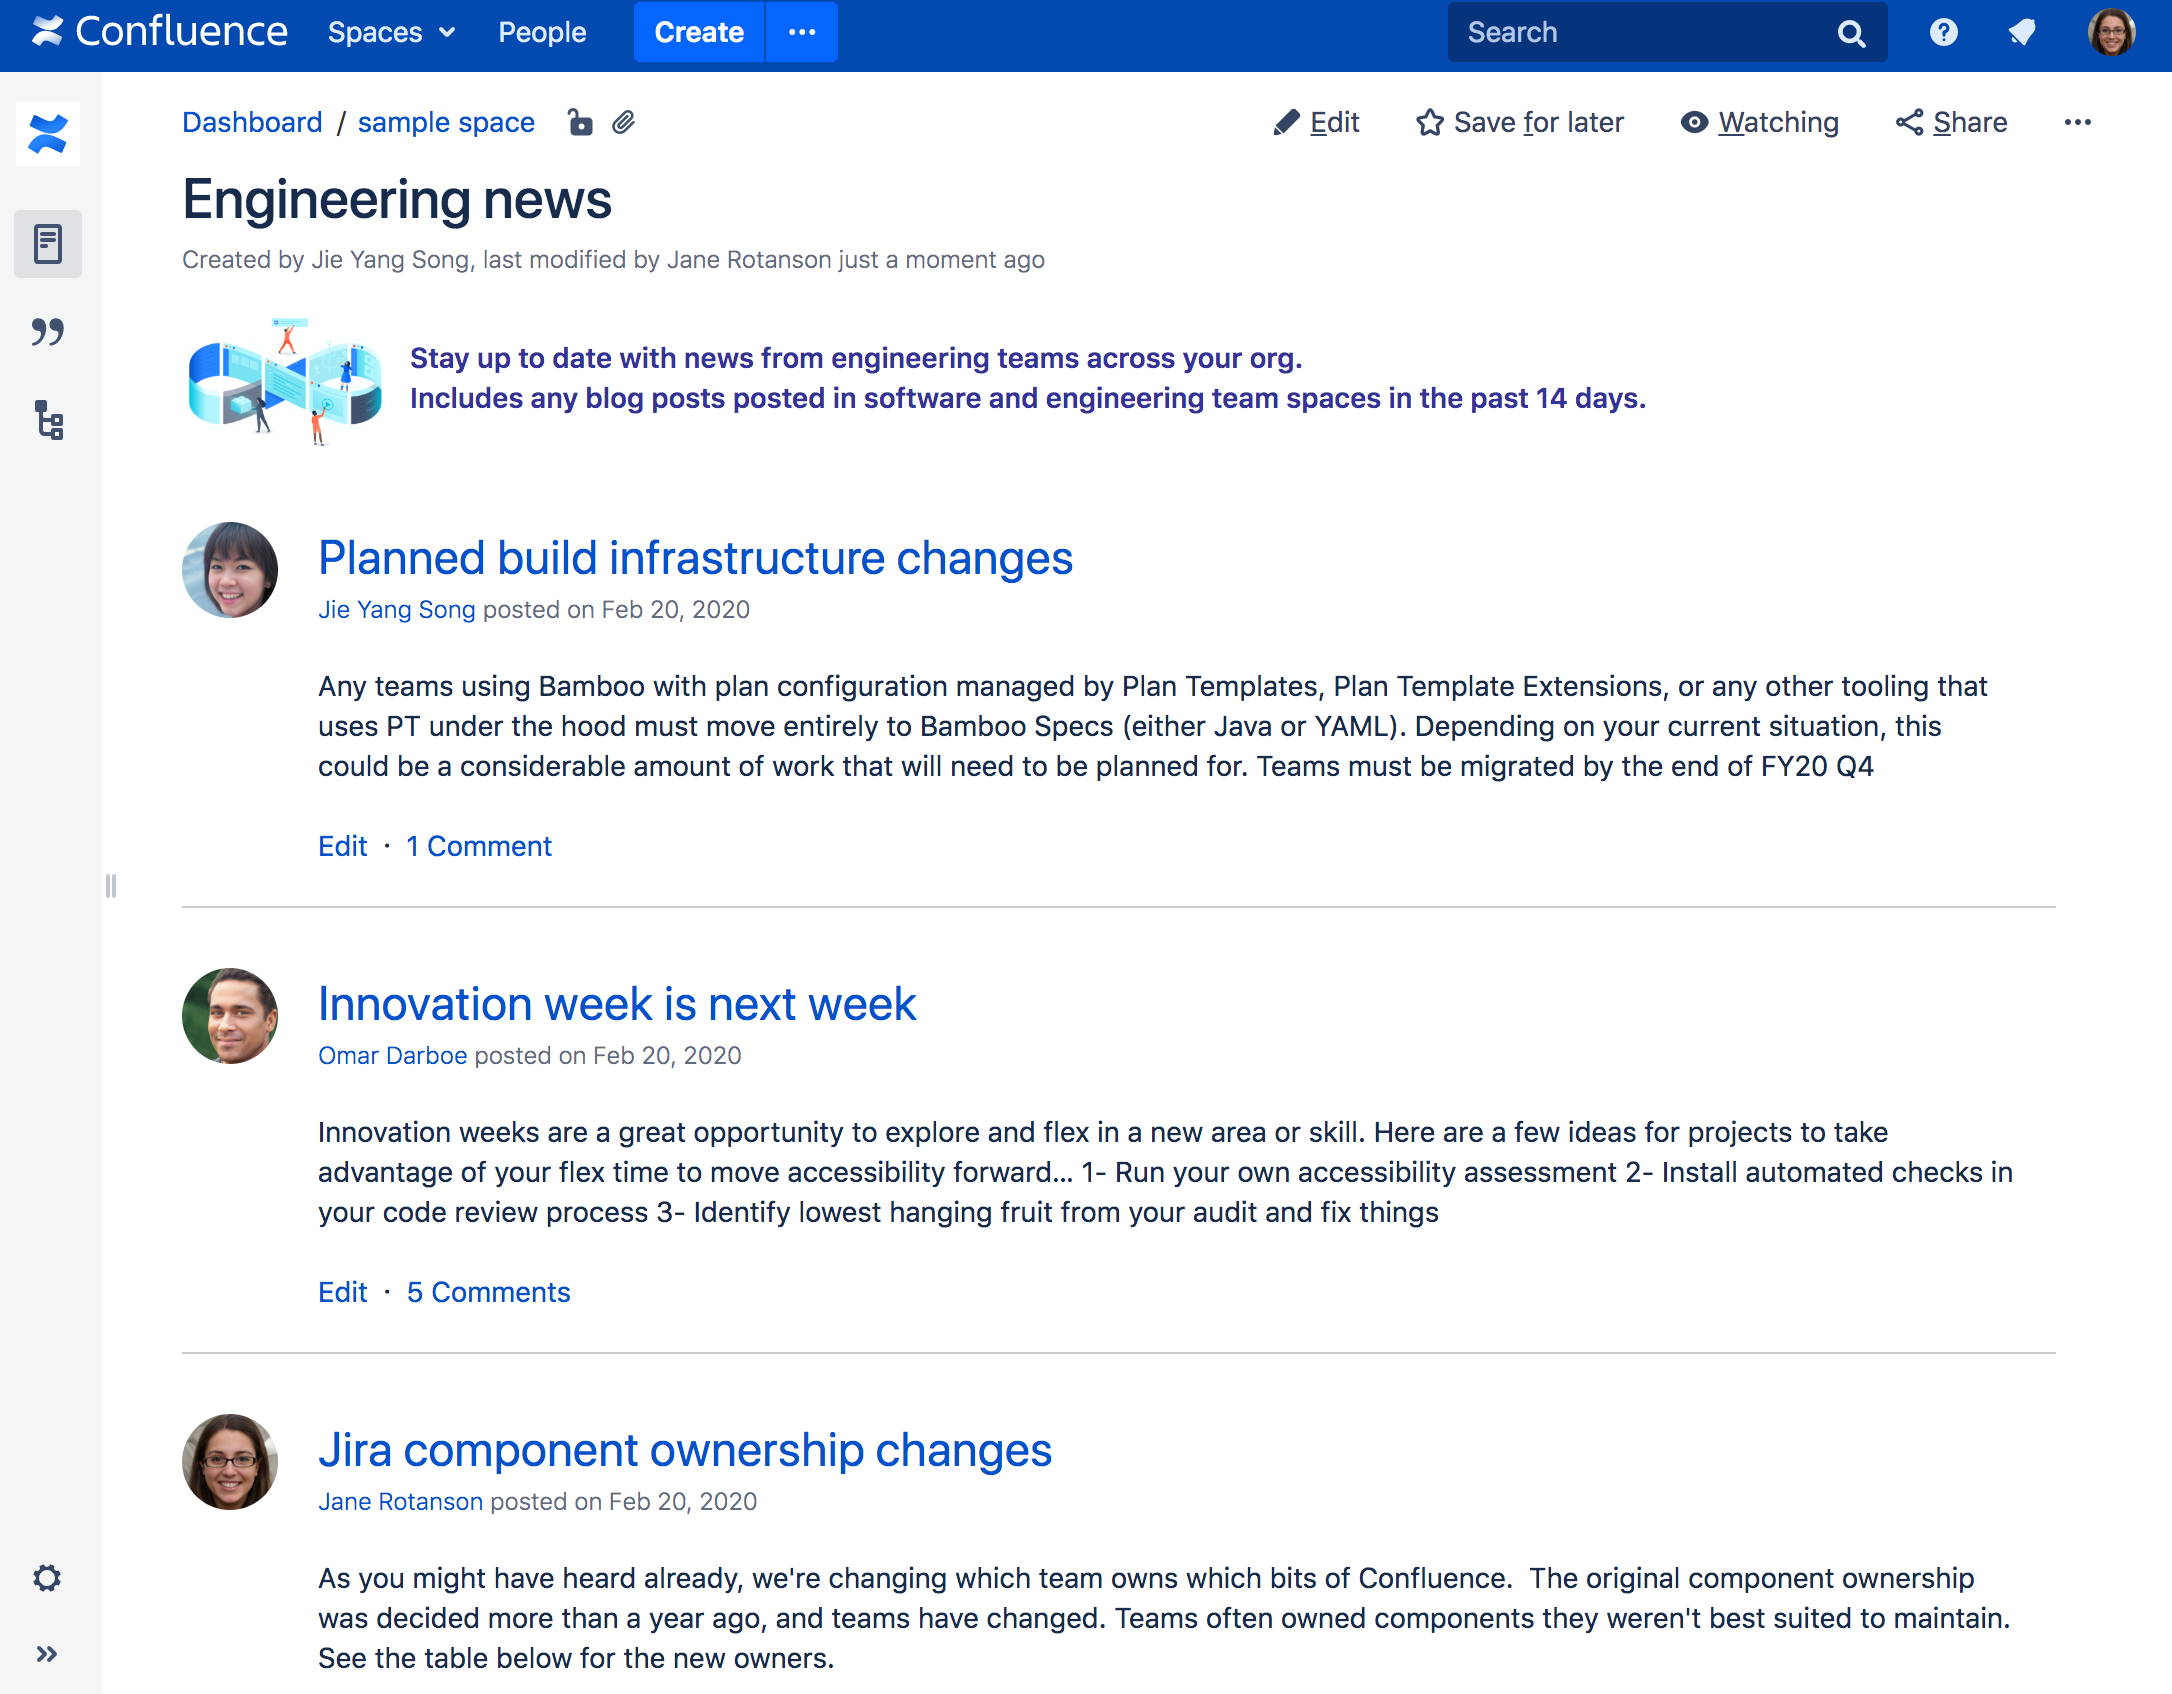
Screenshot: The Blog Posts macro, configured to show an excerpt of each blog post.

Screenshot of the Blog Posts macro on a page. Three blog posts are listed, with a short excerpt of the blog content under the clickable title.

For general information about blogging in Confluence, see Blog Posts.

Add the Blog Posts macro to your page

To add the Blog Posts macro to a page:

  1. From the editor toolbar, choose Insert > Other Macros.
  2. Choose Blog Posts from the Confluence content category.
  3. Use the parameters below to determine how you want the blog posts to display, and to narrow your query by time frame, space, author, or label. 
  4. Choose Insert

You can then publish your page to see the macro in action. 

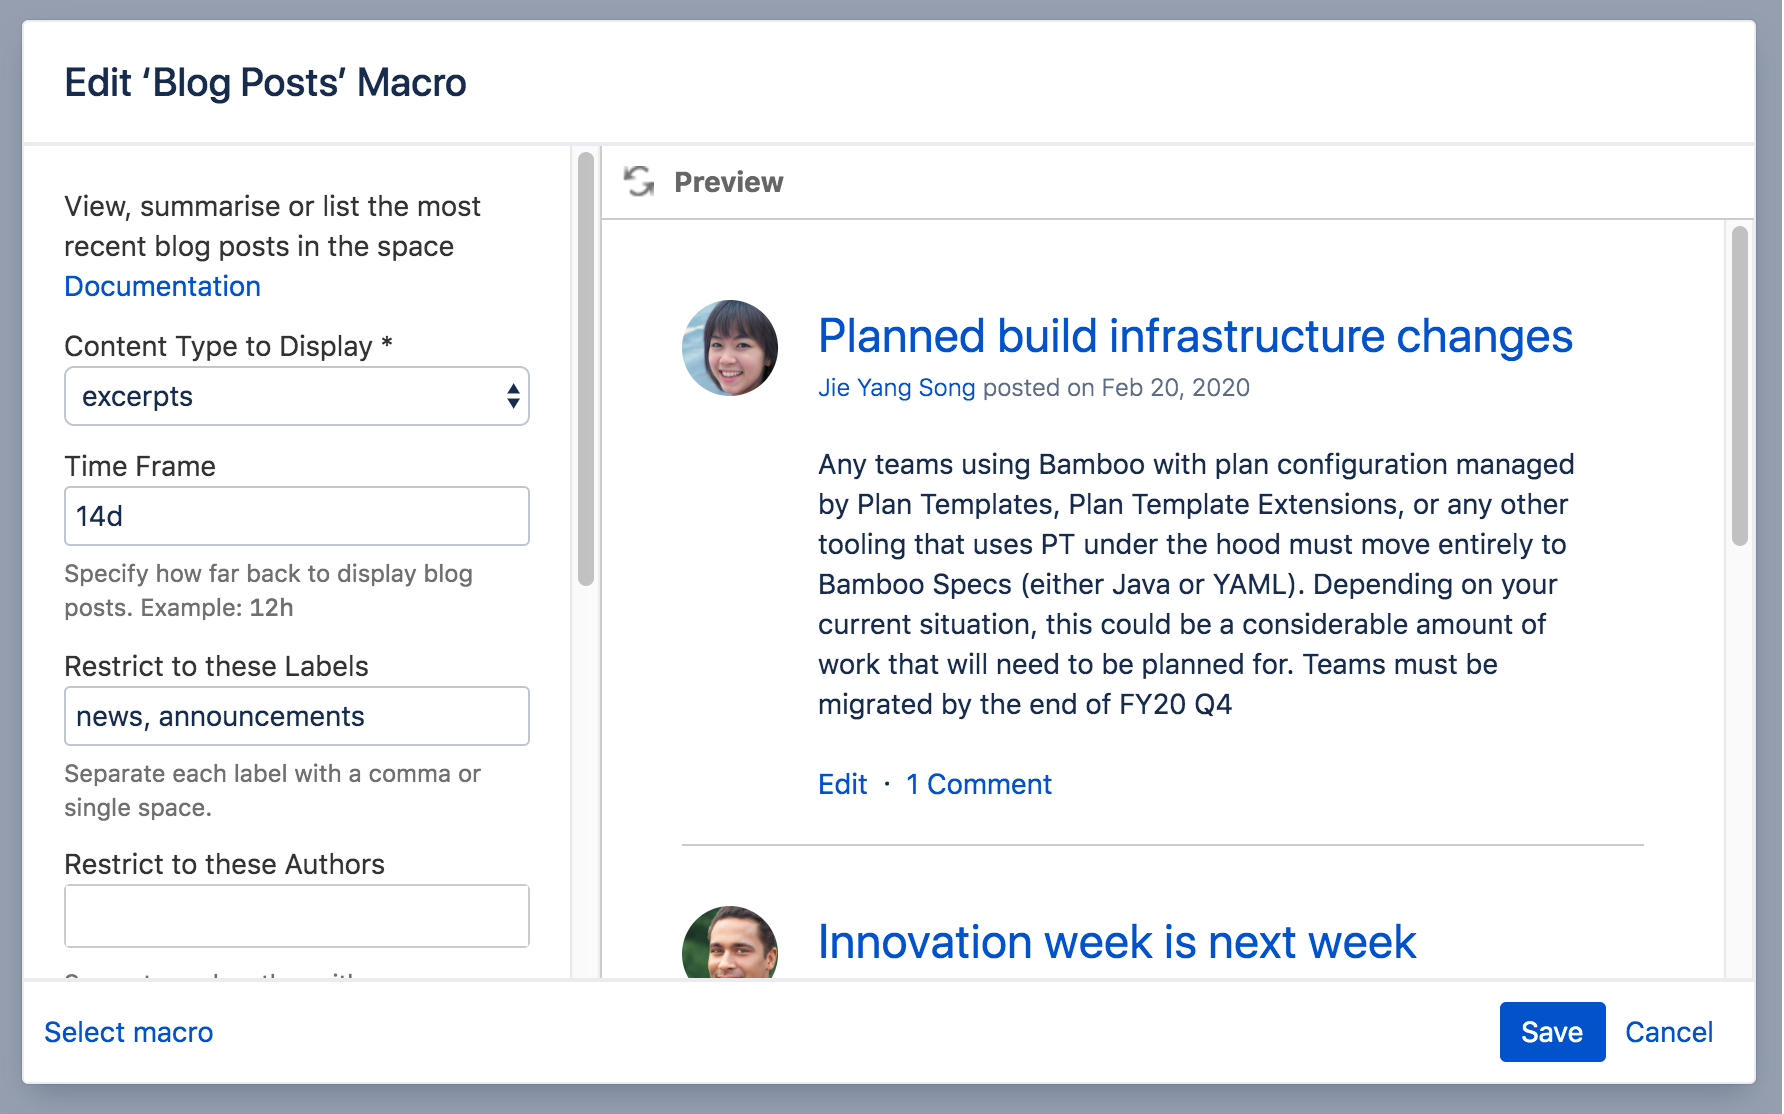
Screenshot: Entering display type, time frame, and label parameters in the Blog Posts macro.

Change the macro parameters

Macro parameters are used to change the behaviour of a macro.

To change the macro parameters:

  1. In the editor, click the macro placeholder and choose Edit.
  2. Update the parameters as required then choose Insert.

Here's a list of the parameters available in this macro. 

Parameter

Required

Default

Description

Content Type to Display

(content)

No

titles

Available values:

  • titles — Display the title, creator, space, and created date stamp for each blog post.
  • excerpts — Display a short excerpt from each blog post. If the post contains an Excerpt macro, the Blog Posts macro will display the content defined in the Excerpt macro. If the post does not contain an Excerpt macro, the Blog Posts macro will display the first few sentences of the post.
  • entire - Display the whole content of each blog post.

Time Frame
(time)

No

no limit

Specify how far back in time Confluence should look for the blog posts to be displayed.

Available values:

  • m — Minutes
  • h — Hours, so '12h' displays blog posts created in the last twelve hours.
  • d — Days, so '7d' displays blog posts created in the last seven days.
  • w — Weeks

Restrict to these Labels
(label)

No

None

Filter the results by label. The macro will display only the blog posts which are tagged with the label(s) you specify here.

You can specify one or more label values, separated by a comma or a space.

  • To exclude content which matches a given label, put a minus sign (-) immediately in front of that label value. For example: If you specify a label value of -badpage you will get only content which is not labeled with 'badpage'.
  • To indicate that the results must match a given label value, put a plus sign (+) immediately in front of that label value. For example: If you specify a label value of +superpage,+goodpage you will get only content which has at least two labels, being 'superpage' and 'goodpage'.

Restrict to these Authors
(author

No

None

Filter the results by author. The macro will display only the blog posts which are written by the author(s) you specify here.

Restrict to these Spaces
(spaces

No

@self, i.e. the space which contains the page on which the macro is coded

This parameter allows you to filter content by space. The macro will display only the pages which belong to the space(s) you specify here.

You can specify one or more space keys, separated by a comma or a space.

  • To exclude content in a specific space, put a minus sign (-) immediately in front of that space key. For example: If you specify a space key of -BADSPACE you will get only content which is not in the BADSPACE.
  • To indicate that the results must come from a specific space, put a plus sign (+) immediately in front of that space key. For example: If you specify a space key of +GOODSPACE you will get only content in GOODSPACE. (Note that this is not particularly useful, because each content item belongs to one space only. If you put a plus sign next to one space key and list other space keys too, the other space keys will be ignored.)
Special values:
  • @self — The current space.
  • @personal — All personal spaces.
  • @global — All site spaces.
  • @favorite — The spaces you have marked as favorite.
  • @favourite — The same as @favorite above.
  • @all — All spaces in your Confluence site.
  • * — The same as @all above.

When specifying a personal space, remember to use the tilde (~) sign in front of the username, such as ~jbloggs or ~jbloggs@example.com.

Maximum Number of Blog Posts
(max)

No

15

Specify the maximum number of results to be displayed. Note that the results are sorted first, and then the maximum parameter is applied.

Sort By
(sort)  

No

creation

Specify how the results should be sorted. If this parameter is not specified, the sort order defaults to descending order (newest first) based on the creation date.

Values:

  • title — Sort alphabetically by title.
  • creation — Sort by the date on which the content was added.
  • modified — Sort by the date on which the content was last updated.

Reverse Sort
(reverse) 

No

false

Select to change the sort from descending to ascending order (oldest first). Use this parameter in conjunction with the Sort By parameter. This parameter is ignored if the Sort By parameter is not specified.

In storage format and wikimarkup a value of true changes the sort order.

Where the parameter name used in Confluence storage format or wikimarkup is different to the label used in the macro browser, it will be listed below in brackets (example).

Other ways to add this macro

Add this macro as you type

Type followed by the start of the macro name, to see a list of macros. 

Add this macro using wiki markup

This is useful when you want to add a macro outside the editor, for example as custom content in the sidebar, header or footer of a space.

Macro name: blog-posts

Macro body: None.

{blog-posts:content=titles|spaces=@self,ds|author=jsmith|time=4w|reverse=true|sort=creation|max=10|label=chocolate,cookies}

Last modified on Jul 29, 2022

Was this helpful?

Yes
No
Provide feedback about this article
Powered by Confluence and Scroll Viewport.