Configuring custom field contexts
As your team and the number of projects grows, you most likely need to use more custom fields to capture all the needed information on issues. Instead of creating a new field for each particular use case, you can configure contexts for the existing field and then reuse it as you see fit.
A context of a custom field is a combination of projects and issue types where that field can be used. For each context, you can choose:
default values (what is pre-filled when a custom field is displayed)
options (what users can choose from), only if the custom field type uses options
Set global and project-specific contexts
When you create a context or modify an existing one, you can select between two options:
Set a global context — make the field available in every project that exists on your instance. This option won’t be available if the field already has a global context configured.
Set a project-specific context — limit the field’s usage only to those projects where you actually need it.
We recommend limiting the availability of a custom field to the projects that will actually use it. Large numbers of custom fields with global contexts have a significant impact on system performance. Learn how to optimize custom fields with global contexts
You can set only one global context for a field and, if needed, change it to a project-specific one. However, there might be a case when you won’t be able to set another project-specific context for the field. This will happen if you add all projects available on your instance to one or more project-specific contexts.
If you set a global context for the field, you can still create project-specific contexts for the same field and add existing projects to those. In this case, project-specific contexts will override the global one in selected projects.
View field's contexts
You can view existing contexts for your field and add some new ones on the contexts configuration page:
- In the upper-right corner of the screen, select Administration
 > Issues.
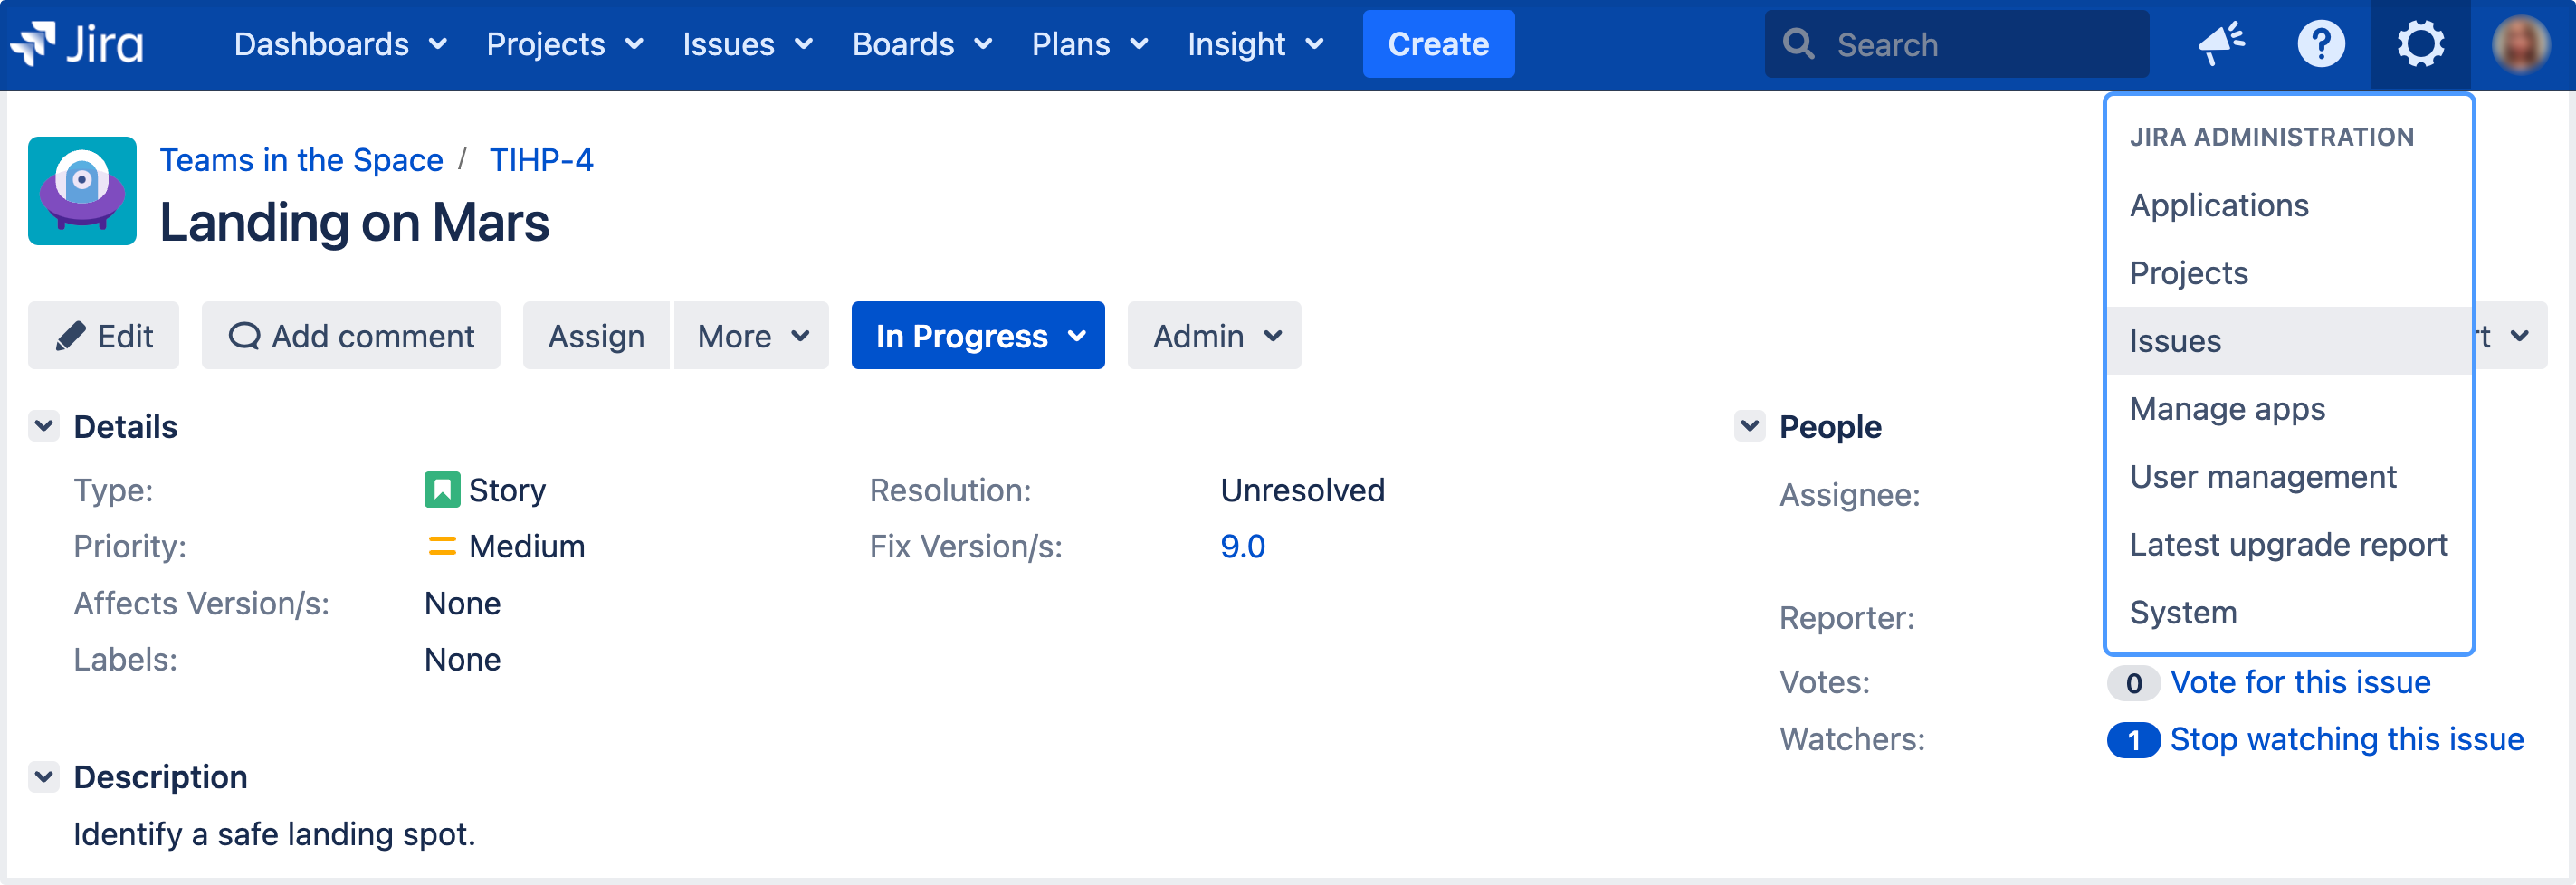
Under Fields (the left-side panel), select Custom fields.
Find your custom field, and select Actions
 > Configure contexts to open the context configuration page. Here you can find a table with all contexts configured for the field.
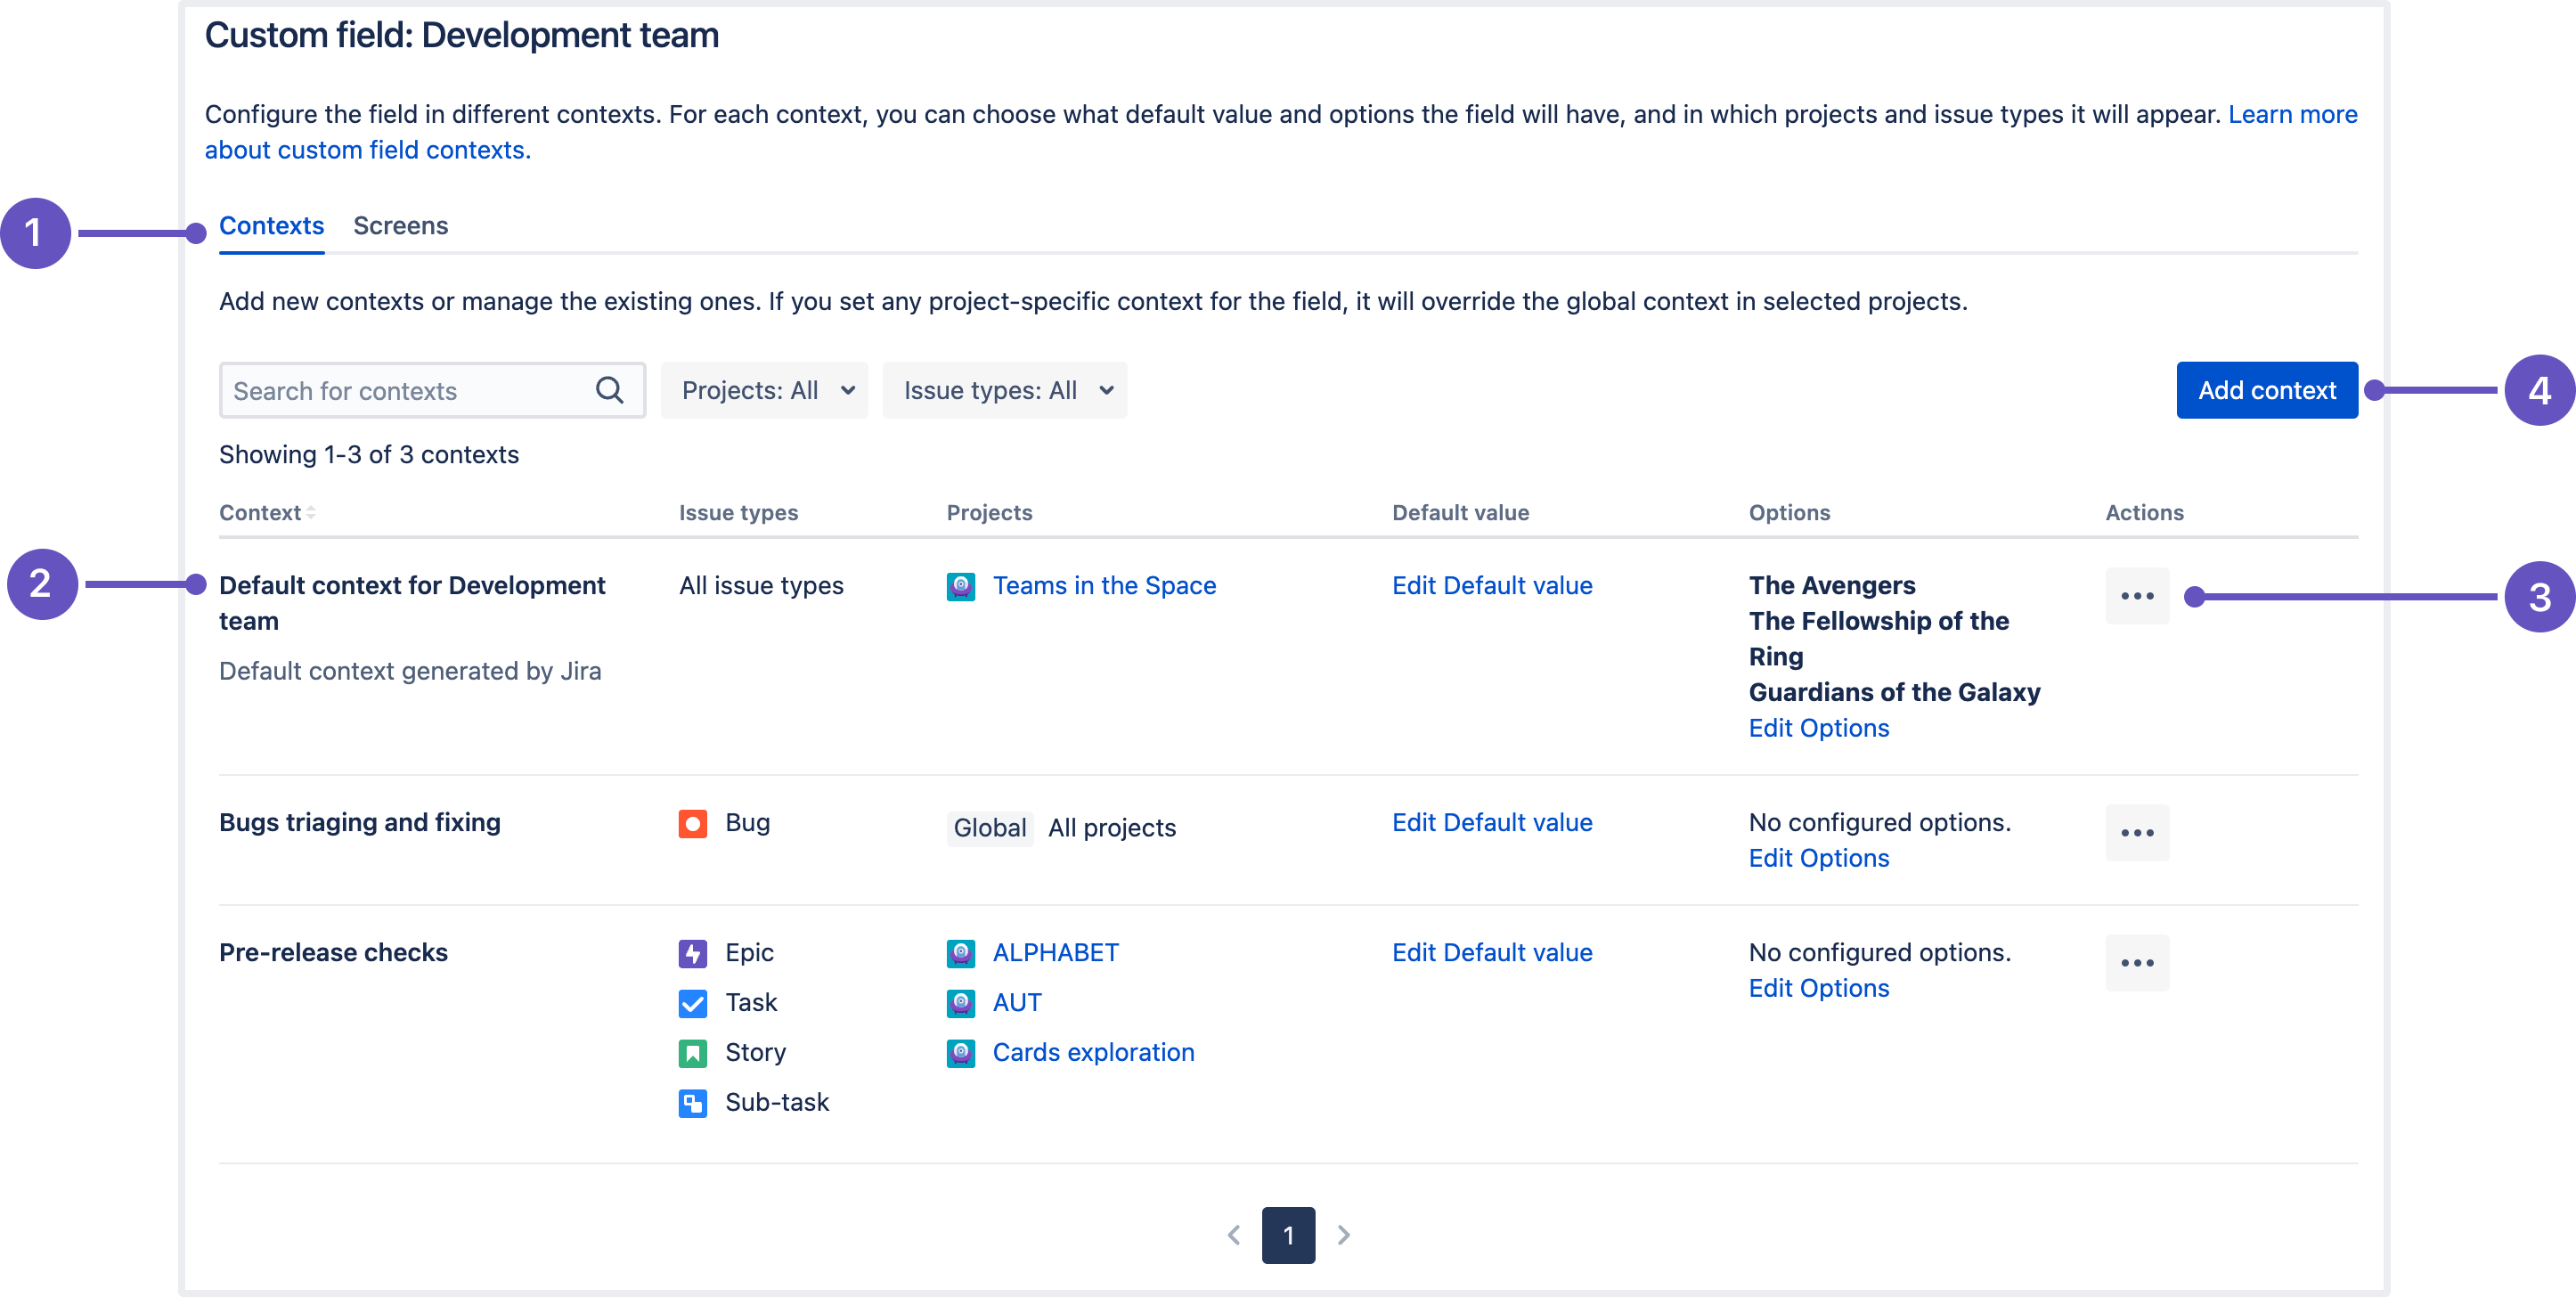
Contexts tab that lists all contexts configured for the “Development team” custom field.
Context column: view contexts configured for the field and create new ones. Here you can also check:
Issue types selected in a context.
Projects selected in a context.
The field’s default value that’s configured in a context.
The field’s options that are defined in a context. Some Marketplace apps might automatically add options to this table.
Actions menu: edit or delete a context.
Add context button: create a new context for the field.
Consider that the information presented in the table might vary depending on the field type. Such columns as Context, Issue types, Projects, and Actions are always displayed for any custom field.
However, some fields that come from Marketplace apps can add custom columns to the table, instead of Default value and Options. The number of those columns and their contents are controlled and customized by the apps that created a custom field.
If you configured a context, but your field isn’t visible in the selected issue types, check if it’s added to appropriate issue screens and is not hidden through Jira's user interface.
You can also use the “Where is my field?” option to understand why the field doesn’t show up in issues.
Change the default context
When creating a custom field, you need to set the initial context for this field by selecting in which projects the field will appear. This context will become a default one for that field, which means that the field will be available only in the selected projects unless you create a new context or edit the default one.
The default context is called “Default context for <custom field’s name>” and you can modify it as any other context, changing a default value, options (if applicable), as well as issue types and projects where the field will be available. Check how to edit a context
Add a new context
There’s no limit to how many projects or issue types you can add to a context, or how many contexts you can create for the same field.
However, you can’t apply more than one context to a single project. After a project is added to a context, you won’t be able to add this project to any other context for the same field.
Create a custom field context if you need to associate different default values and options with different projects or issue types.
To add a new context:
On the context configuration page, select Add new context.
Choose a name for this context. You can also add a description with any helpful information that'd give more details to other admins.
Add projects to this context. A field will be available in every project that you select in this context.
If you want to move multiple items between lists, hold the Shift key while you select the items and then drag and drop them to the desired list. Or simply select Add or Remove.
- Add issue types to this context. While you can search through all the issue types available on your instance, the field will be available only in issue types within the projects you’ve selected in the previous step.
- Select Save.
This is what the page where you can configure a context looks like:
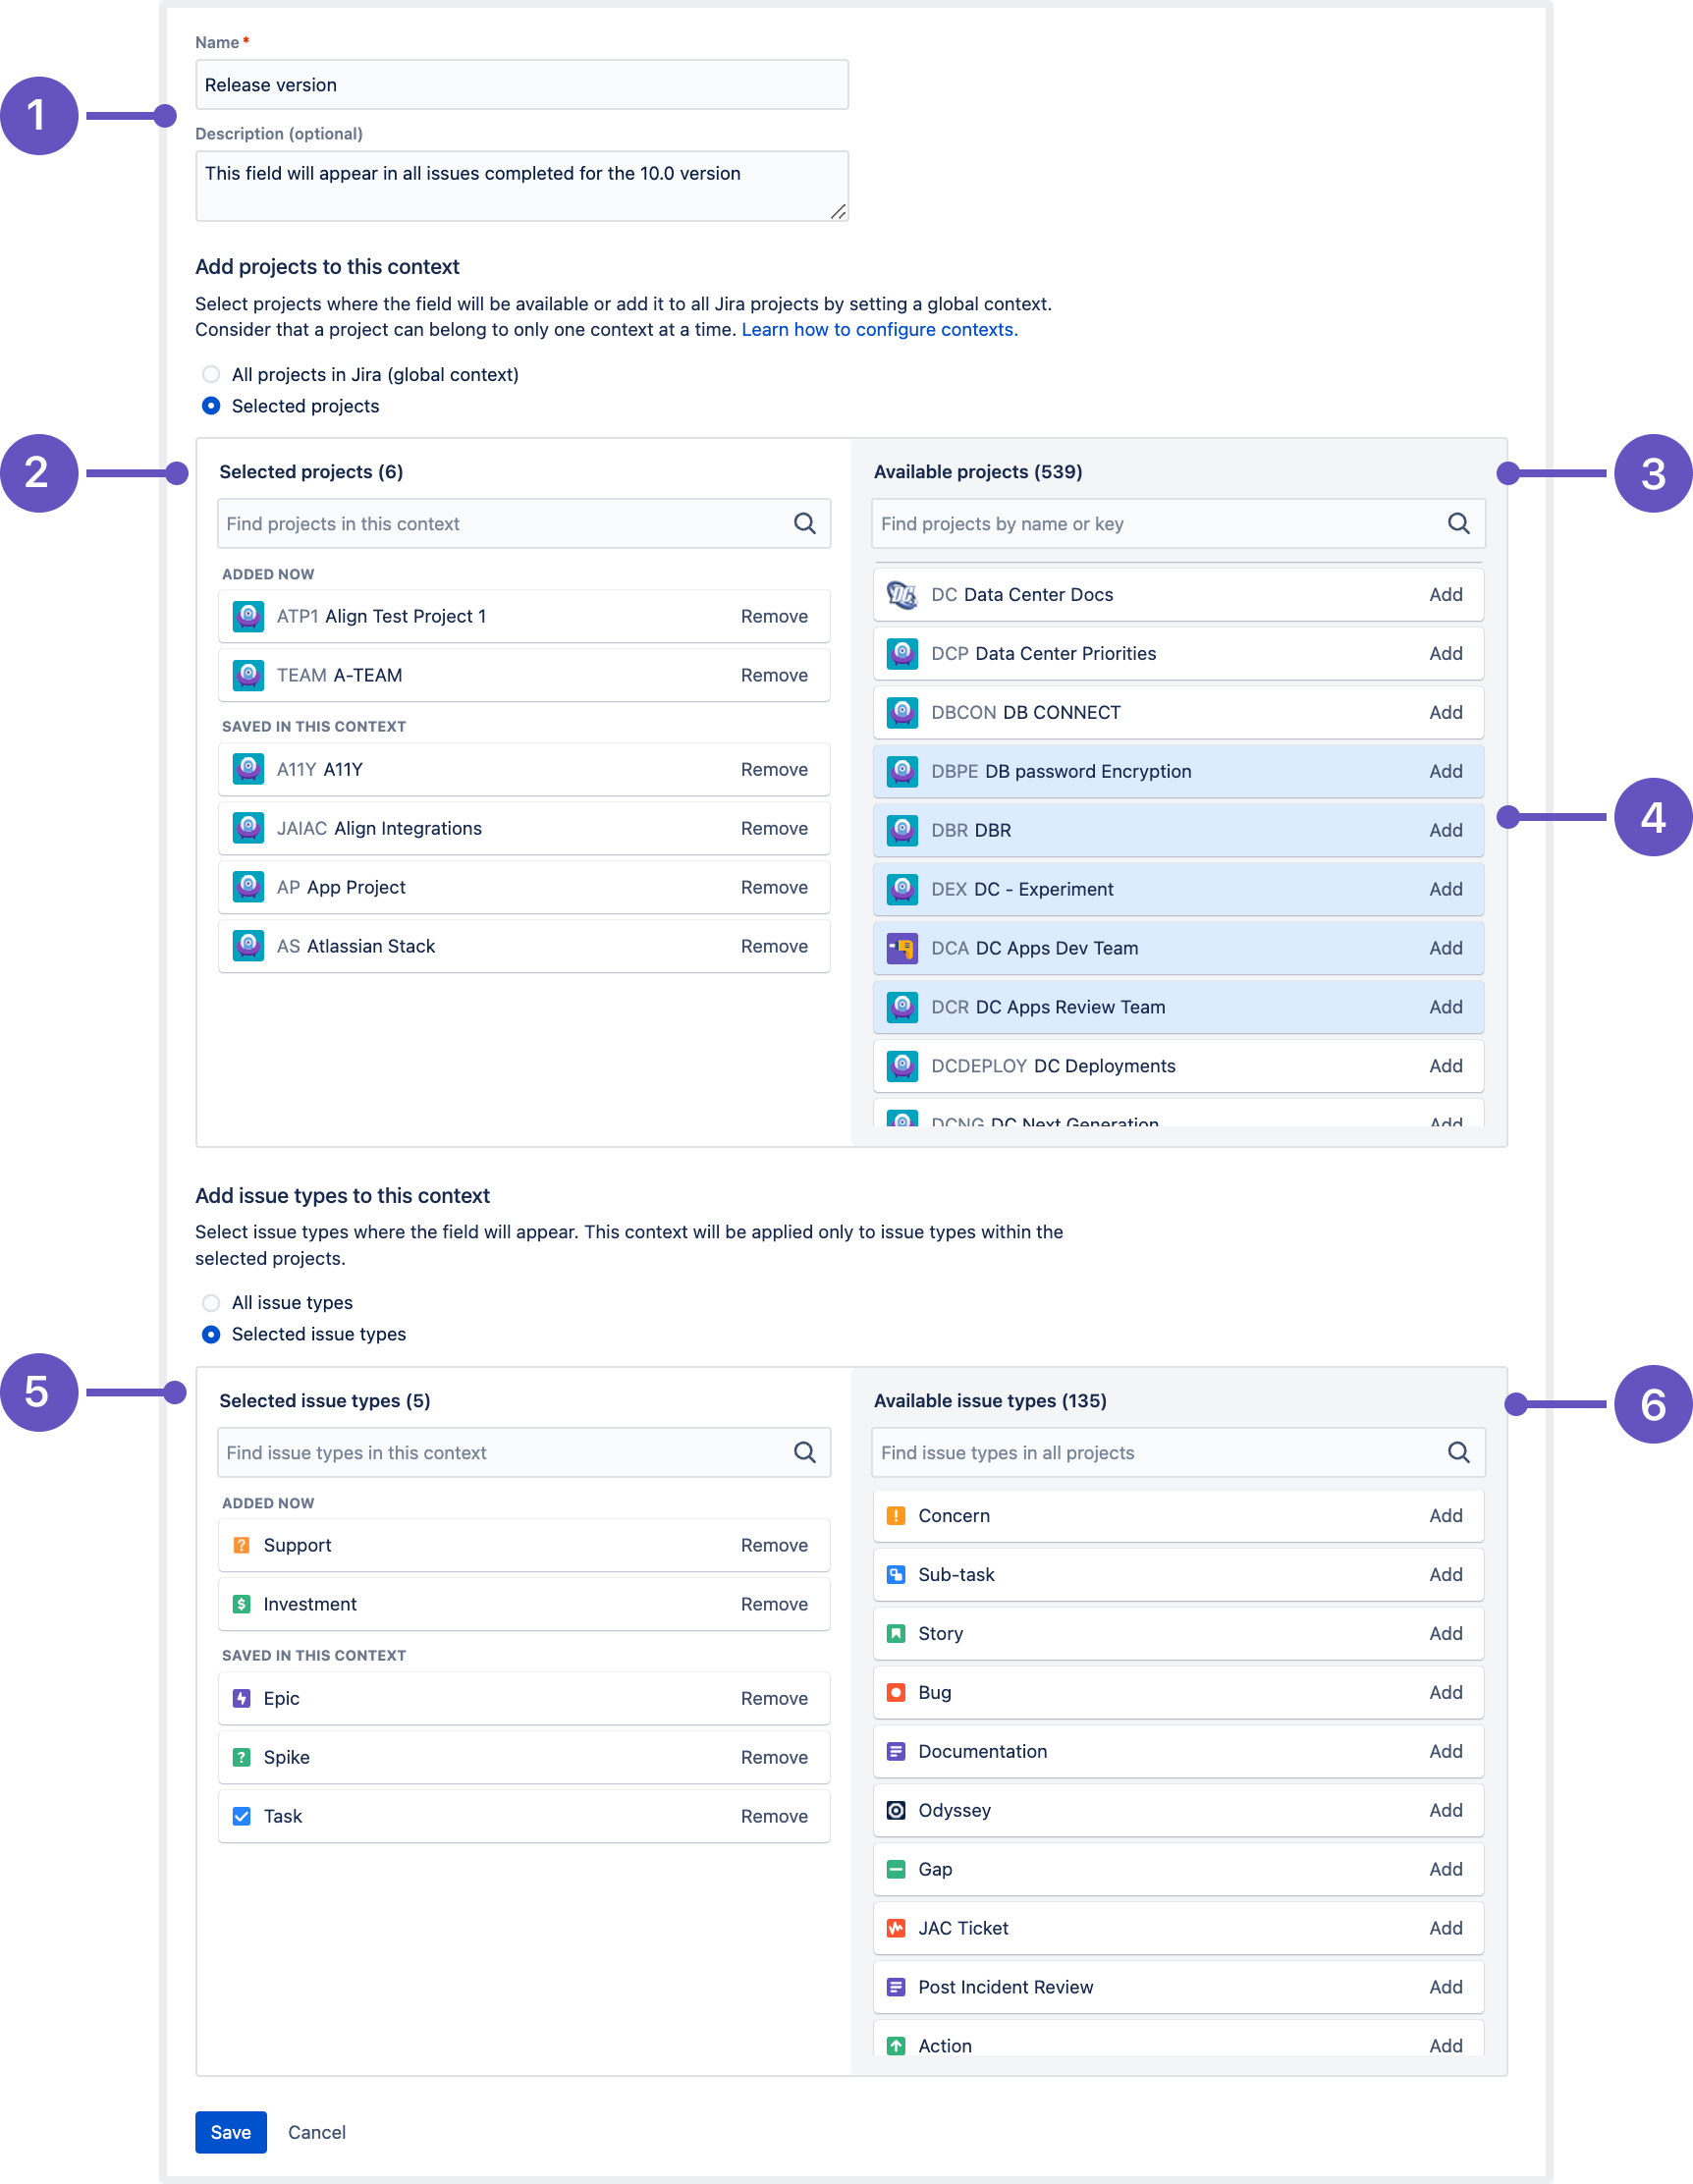
Name and description of the context you’re currently configuring.
Selected projects: All projects that belong to this context. When editing an existing context, you’ll see the Added now section with all projects you’ve just added but haven’t saved yet.
Available projects: Any projects that you can add to the context. This section might not contain all projects that exist on your instance - if some of them are selected in other project-specific contexts, they won’t appear in this list.
Multiple items selected in a list.
Selected issue types: All issue types that belong to this context. When editing an existing context, you’ll see the Added now section with all issue types you’ve just added but haven’t saved yet.
Available issue types: All issue types that exist on your instance.
Edit a context
Go to the context configuration page, and search for the context that you want to modify.
To change the details of this context, like name and description, and the issues and projects this context applies to, select Edit configuration.
Update the context as needed, and then save your changes.
Consider that projects that are used in other contexts (apart from the global one) won’t be available for selection.
If the custom field isn’t available for an issue type specified in the field’s context, make sure that this issue type exists in projects added to the same context.
Change field’s options and default value
To set up default values and options for the field in a context:
On the context configuration page, search for the context you want to configure.
To change the default value, select Edit default value.
To change the options, select Edit options. This will not be available for custom field types that don’t use options.
Delete a context
If you delete a context, the field will be removed from any issues configured in this context. If the field doesn’t appear in any other contexts, you’ll permanently lose all field values. The deleted data can't be restored.
To delete a context:
On the context configuration page, find the needed context.
Select the delete icon next to the context that you want to remove.
When deleting a global context, remember that the field will be removed from all projects that aren’t selected in any other context.
Associate field with screens
When configuring field contexts, you can also select the screens where your field will be displayed:
On the context configuration page, select the Screens tab.
Click the Select checkbox for each screen that you want to associate with the field.
- Save your changes.

Screens tab where you can find all screens available on your Jira instance.
Select checkbox that allows you to associate a screen with the custom field you're configuring contexts for.