Adding multiple email channels for creating requests
This article refers to an early version of the Jira Service Management feature which allows you to add multiple email channels to your projects. At the time, this functionality was released as a beta feature, and we asked participants of the Jira Early Access Program to test it out and provide their feedback.
Multiple email channels were fully implemented in Jira Service Management 4.22 and the feature was enabled by default for users with Data Center licenses. For more information on multiple email channels, refer to the Jira Service Management 4.22 release notes.
In Jira Service Management, every project can have an email channel where customers send emails and get them turned into requests or comments. We're now working on increasing the number of email channels you can configure. This will let you use a different email address for each request type, or just have more personalized addresses for your customers.
To use multiple email channels, you must have a Data Center license. This feature doesn’t work with Jira Service Management Server licenses, even if the dark feature is enabled.
Test and share your feedback
We’re sharing our work in progress on this feature so you can check how it works and give feedback on any improvements you’d like to see.
- You can test this feature in the EAPs of Jira Service Management 4.18 and 4.19 Data Center, or the Jira Service Management 4.18 and 4.19 releases.
- You can share your feedback by taking this survey.
Before you begin
To enable multiple email channels:
Go to
<Jira-base-URL>/secure/SiteDarkFeatures!default.jspa.Enable the following dark feature.
sd.multi.incoming.email.support.enabledIf you’re having issues, see Enabling dark features.
Add email channels
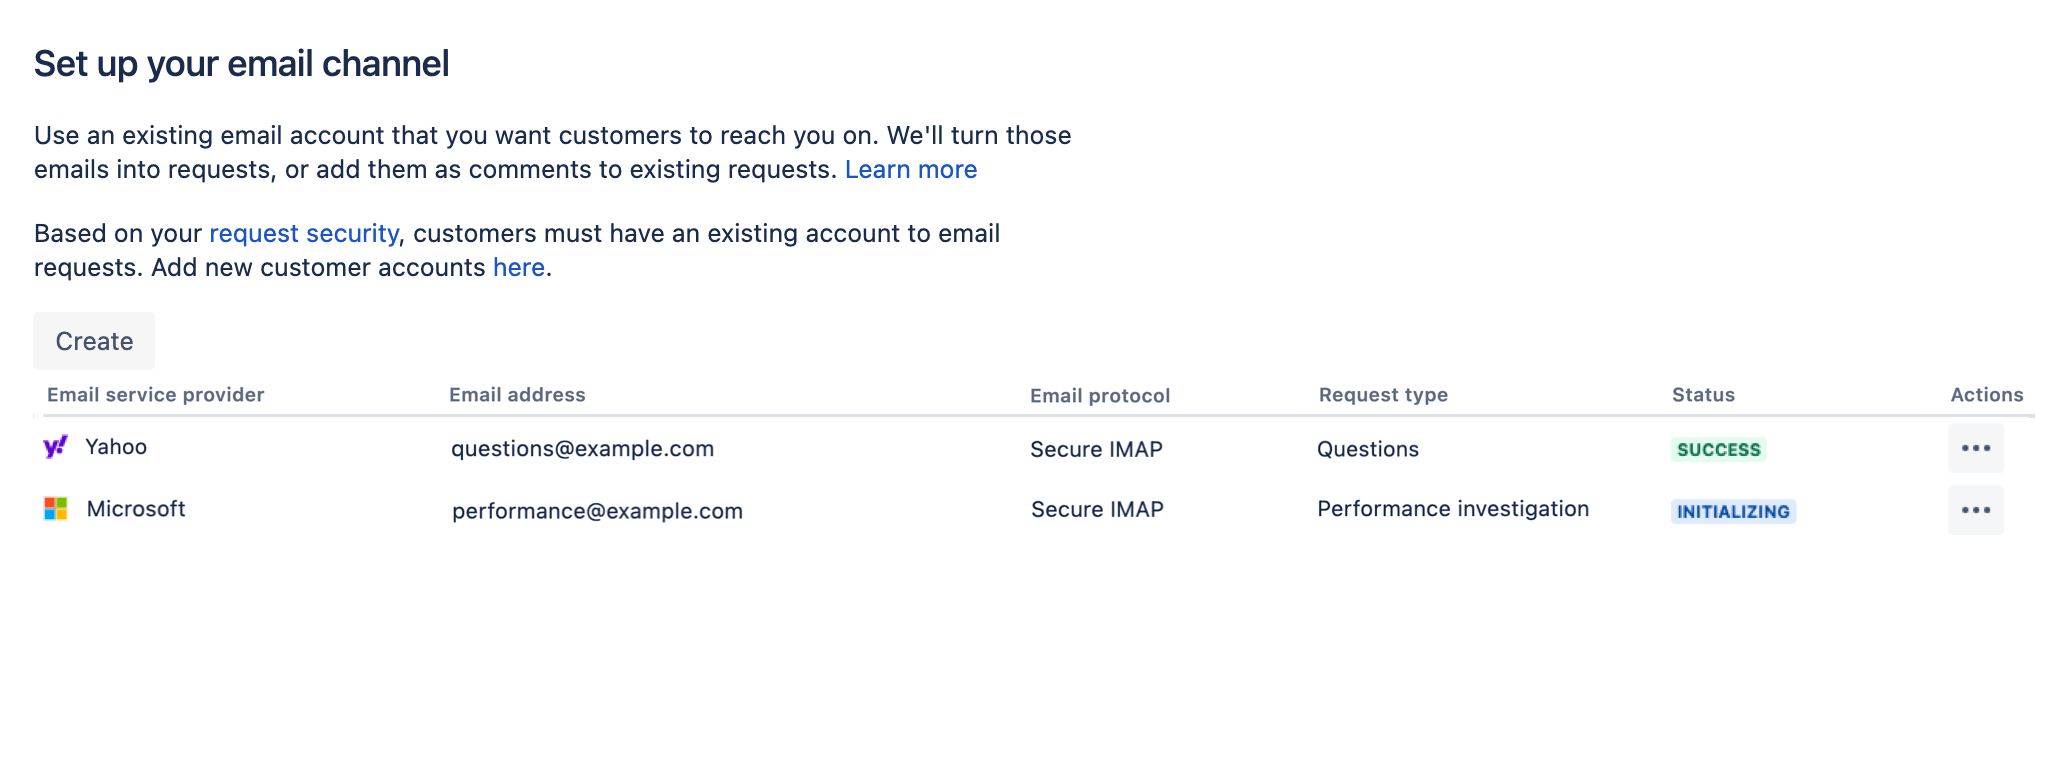
Here's what the Email requests page looks like right now, with a couple of email channels configured. Here you can add your email channels, or later edit or remove them.
To add an email channel:
Open your project.
Go to Project settings > Email requests. As opposed to previous versions, you should see a list view of email channels.
To add a channel, select Create.
Enter the configuration details. For more info, see Receiving requests by email.
Authentication methods
At this point, we’ve fully implemented only the basic authentication, so we recommend that you use it. You can still try OAuth 2.0, but you’ll most likely encounter some issues, as described in the known issues section below.
Known issues
Here are the known issues you might encounter when configuring multiple email channels:
Problems with OAuth 2.0
When you configure the OAuth 2.0 authentication, your password will be visible. Also, the configuration form won’t load when you edit an email channel. OAuth 2.0 is simply not fully implemented yet.
Only one channel displayed in the main nav
In the main navigation, you can click Customer channels to see information about the customer portal and email channel for your project. It will still display only one channel (the first one configured), just like in previous versions.
Testing the connection
Although the testing works, you won’t get any visual cue that it’s in progress. You will be notified when it completes.
Formatting on the page
Table formatting on the Email channels page isn’t working properly (columns aren’t rendered properly).
Missing texts and translations
Some smaller messages, like flags, might be missing text or translations in other languages.