Configuring a WebDAV client for Confluence
WebDAV allows users to access Confluence content via a WebDAV client, such as “My Network Places” in Microsoft Windows. Provided that the user has permission, they will be able to read and write to spaces, pages and attachments in Confluence. Users will be asked to log in and the standard Confluence content access permissions will apply to the equivalent content available through the WebDAV client.
Mapping a Confluence WebDAV network drive requires a set of specific criteria to be met. For specific information, please see Windows Network Drive Requirements.
Introduction to Confluence's WebDAV Client Integration
By default, all WebDAV clients have permission to write to Confluence. Write permissions include the ability for a WebDAV client to create, edit, move or delete content associated with spaces, pages and attachments in a Confluence installation.
On the WebDAV Configuration screen in the Confluence Administration Console, you can:
- Deny a WebDAV client write permissions to a Confluence installation using a regular expression (regex)
- Disable or enable strict path checking
- Enable or disable access to specific virtual files/folders
Note:
- The WebDav Configuration page is only available if the WebDAV plugin has been enabled. This plugin is bundled with Confluence, and can be enabled or disabled by the System Administrator.
- The settings on the WebDav Configuration page do not apply to external attachment storage configuration.
Using a WebDAV Client to Work with Pages
The following sections tell you how to set up a WebDAV client natively for a range of different operating systems. WebDAV clients typically appear as drives in your operating system's file browser application, such as Windows Explorer in Microsoft Windows, or Konqueror in Linux.
Accessing Confluence in Finder on Mac OSX
You can successfully connect but you can't see content when using HTTPS, so this technique won't work for Confluence Cloud. Use a third-party WebDAV client instead.
To use Finder to view and manage Confluence content:
- In Finder, select Go > Connect to Server.
Enter your Confluence URL in this format:
http://<confluence base URL>/plugins/servlet/confluence/defaultFor example, if your Confluence URL is http://ourconfluence.sample.com/wiki you would enter:
http://ourconfluence.sample.com/wiki/plugins/servlet/confluence/defaultEnter your Confluence username and password, and the select Connect.
Use your username (jsmith), not your email address, unless your email address is your username.
Confluence will appear as a shared drive in Finder. You can use the same URL to connect using a third party WebDav client, like CyberDuck.
Accessing Confluence in Explorer in Microsoft Windows
This section covers the two methods for configuring a WebDAV client natively in Microsoft Windows:
- as a network drive
- as a web folder
If possible, use the network drive method as this will enable more comprehensive WebDAV client interaction with Confluence than that provided by a web folder. However, your Confluence instance must meet several environmental constraints if you use this method. If you cannot configure your instance to meet these requirements, then use the web folder method or third-party WebDAV client software.
If you're using SSL you may need to add @SSL to the end of your server URL, for example:
http://<confluence server url>@SSL/confluence/plugins/servlet/confluence/defaultIf you run into any problems with the procedures in this section, please refer to the WebDAV Troubleshooting page.
Windows Network Drive
To map a Confluence WebDAV client network drive, your Confluence instance must be configured so that all of the following criteria is met:
- Has no context root
- There's an issue that can prevent Network Drives from being mapped. Please use the Network Folders steps below as a workaround.
The reason for these restrictions results from limitations in Microsoft's Mini-Redirector component. For more information, please refer to Microsoft's server discovery issue.
To map a Confluence WebDAV client network drive in Microsoft Windows:
- In Windows, go to Map Network Drive.
See Map a network drive in the Windows documentation to find out how to get to this in your version of Windows. - Specify the following input to map the WebDAV client as a network drive:
- Drive:
<Any drive letter>(for example,Z:) - Folder:
\\<hostname>\webdav(for example,\\localhost\webdav)
- Drive:
- Select Finish.
When prompted for login credentials, specify your Confluence username and password.
Windows Web Folder
To map a Confluence WebDAV client web folder:
- Go to My Network Places and select Add a network place and follow the prompts.
- In the Internet or network address field, enter the URL for the Confluence WebDAV location (for example,
http://<confluence server url>/confluence/plugins/servlet/confluence/defaultorhttp://<confluence server url>/plugins/servlet/confluence/default), and then select Next. - Enter your Confluence username and password.
- Provide a meaningful name for your web folder and proceed with the wizard.
- Select Finish.
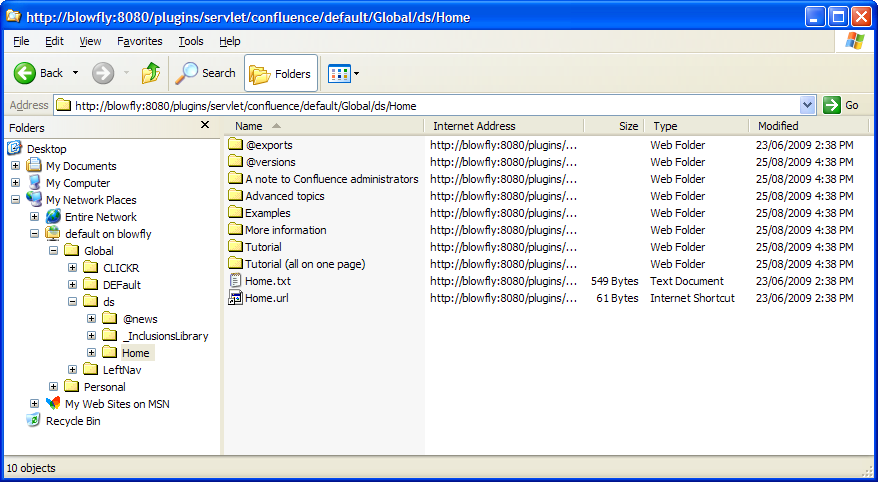
Screenshot: A Confluence WebDAV Client Web Folder in Windows XP
Setting up a WebDAV client in Linux
There are many tools and mechanisms available for configuring WebDAV clients in these operating systems. Therefore, we have chosen to demonstrate this using the file manager Konqueror, which is part of the Linux K Desktop Environment.
To set up a Confluence WebDAV client in Konqueror:
- Open Konqueror.
- In the Location field, enter the URL for the Confluence WebDAV location using the 'protocol'
webdavs(for example,webdavs://<confluence server url>/confluence/plugins/servlet/confluence/defaultorwebdavs://<confluence server url>/plugins/servlet/confluence/default) and pressEnter. - Enter your Confluence username and password if prompted.
You should be able to click to load many, but not all files. In practice, you would normally save a modified file locally, then drag it to the Konqueror window to upload it to Confluence.
Restricting WebDAV Client Write Access to Confluence
In earlier versions of the WebDAV plugin, separate options for restricting a WebDAV client's write permissions (that is, create/move, edit and delete actions), were available. However, in the current version of this plugin, they have been simplified and combined into a general write permission restriction that covers all of these actions.
WebDAV clients are now denied write permission to your Confluence installation by setting a regex that matches specific content within the WebDAV client's user agent header. Upon setting a regex, it will be added to a list of restricted WebDAV clients. Any WebDAV clients whose user agent header matches a regex in this list will be denied write permission to your Confluence installation.
Example: A PROPFIND method header generated by a Microsoft Web Folder WebDAV client, showing the user agent header field:
PROPFIND /plugins/servlet/confluence/default HTTP/1.1
Content-Language: en-us
Accept-Language: en-us
Content-Type: text/xml
Translate: f
Depth: 1
Content-Length: 489
User-Agent: Microsoft Data Access Internet Publishing Provider DAV
Host: 127.0.0.1:8082
Connection: Keep-Alive
Unlike earlier versions of the WebDAV plugin, which could only restrict write permissions for all WebDAV clients, the current version of this plugin allows you to restrict write permissions to specific WebDAV clients.
To restrict a WebDAV client's write access permissions to your Confluence installation:
- Select Administration menu , then select General Configuration
- Select WebDav Configuration in the left panel.
- Enter a regex that matches a specific component of the user agent header sent by the WebDAV client you want to restrict.
- Select Add new regex.
Repeat steps 3 and 4 to add a regex for each additional WebDAV client you want to restrict. - Select Save.
To restore one or more restricted WebDAV client's write access permissions to your Confluence installation:
- Select Administration menu , then select General Configuration
- Under Configuration in the left panel, select WebDav Configuration.
- Select the regex(es) from the list that match(es) the user agent header sent by the restricted WebDAV client(s) you want to restore
- Select Remove selected regexes.
- Select Save.
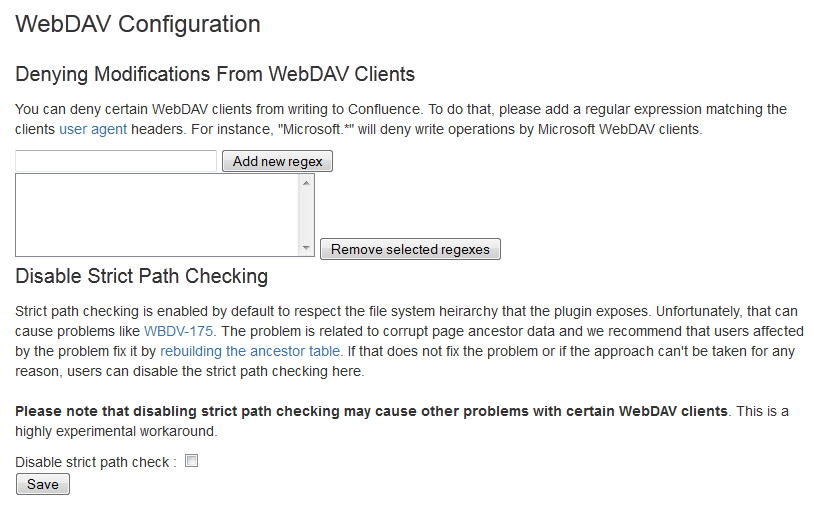
Screenshot: WebDAV configuration
Disabling Strict Path Checking
If you observe any idiosyncrasies with your WebDAV client, such as a folder that does exist on your Confluence site but is missing from the client, you can disable the WebDAV plugin's strict path checking option, which may minimize these problems.
To disable the WebDAV plugin's strict path checking option:
- Select Administration menu , then select General Configuration
- Under Configuration in the left panel, select WebDav Configuration.
- Clear the Disable strict path check checkbox.
- Select Save.
Virtual Files and Folders
In the unlikely event that you have problems with the WebDAV client's performance or stability, you can enable access to automatically generated (that is, virtual) files and folders.
Note:
By default, these options are hidden on the 'WebDAV Configuration' page. To make them visible, append the parameter ?hiddenOptionsEnabled=true to the end of your URL and reload the page. For example:
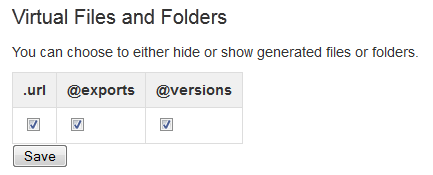
<Confluence base URL>/admin/plugins/webdav/config.action?hiddenOptionsEnabled=trueScreenshot: The Hidden Virtual Files and Folders Option
To enable or disable access to virtual files and folders:
- Select Administration menu , then select General Configuration
- Under Configuration in the left panel, select WebDav Configuration.
- Amend your URL as described in the note above and reload the WebDav Configuration page.
- Select or clear the checkbox options in the Virtual Files and Folders section as required.
- Select Save.


